VMware Workstation is distinguished as a robust virtualization tool because it allows users to run many operating systems on a single computer. The purpose of installing VMware Workstation on Linux Mint 22 is to create and run virtual machines for testing or development, or to run multiple operating systems at the same time.
You can run macOS, Windows, or other distributions of Linux without changing the Host system. VMware enables its users to run advanced operating systems in a stable and secure virtual environment with the aid of features such as snapshots, cloning, and resource allocation.
This guide will teach the process of installing VMware Workstation on Linux Mint 22, explaining every step thoroughly.
How to Install VMware Workstation on Linux Mint 22
The installation of VMware Workstation in the following guide is customized to fit the needs of developers, IT specialists, and enthusiasts who need flexibility and separation in their tasks. Let’s install via step-by-step instructions:
Prerequisites: System Requirements
Before you start the installation, check that your computer fulfills the minimum requirements stated below:
- Operating System: A Linux Mint 22 system (64-bit x86/AMD64 CPU)
- Memory: 4 GB RAM or greater (8 GB is suggested)
- Storage: A minimum of 2 GB of free disk space on your hard drive to store VMware Workstation
- User Privileges: A sudo user with administrative rights
- Network: Internet connection for downloads and updates
Step 1: Install System Updates
Concerning the installation of VMware, you should first ensure that your computer runs the most up-to-date version of Linux Mint 22. It all supported packages and security utilities added. Let’s update system packages:
sudo apt update && sudo apt upgrade |
|---|
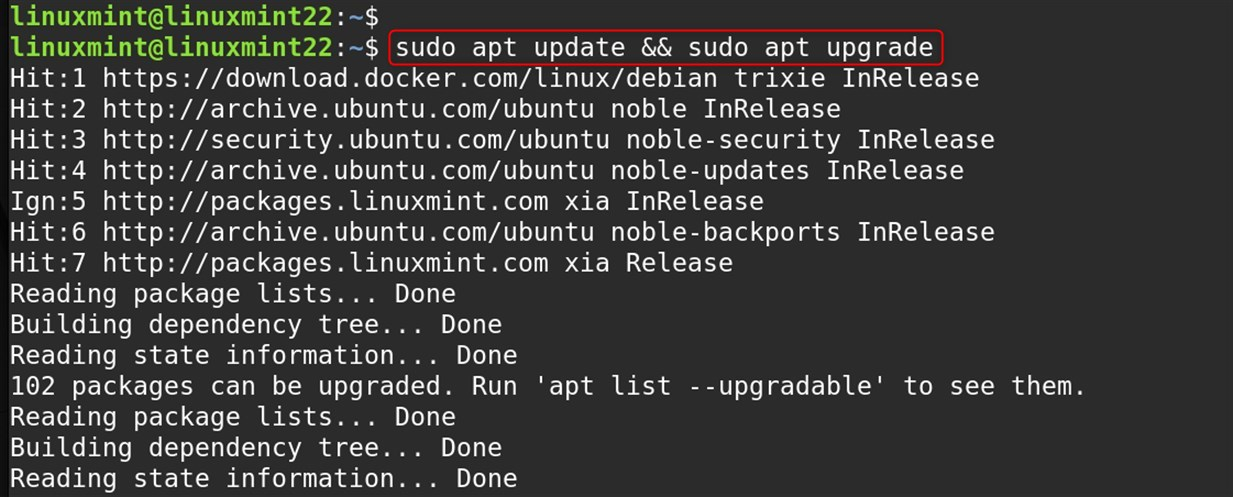
This ensures your system has the latest packages and security updates, preventing potential compatibility issues during installation.
Step 2: Install VMware Dependencies
To install VMware Workstation, you need to have specific tools installed that will allow for the compilation of the kernel modules during the installation process:
sudo apt install build-essential linux-headers-$(uname -r) -y |
|---|
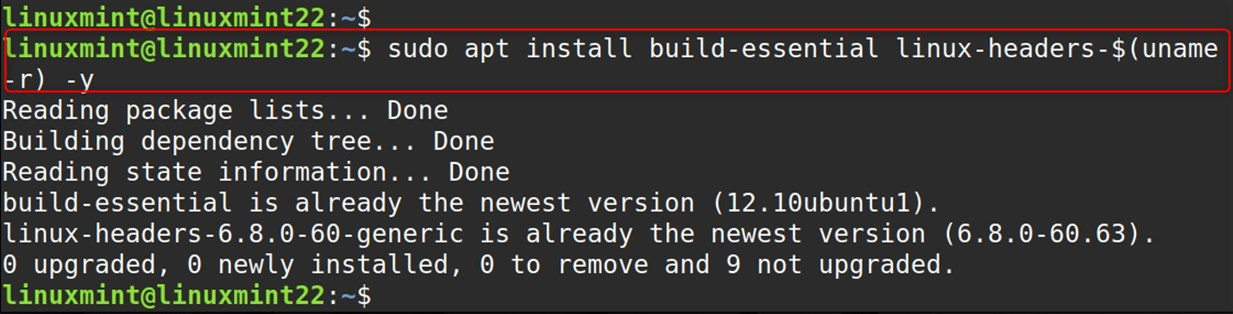
Here,
- build-essential: This includes essential development utilities required for compiling software from source code.
- linux-headers-$(uname -r): This installs kernel header files specific to your currently running kernel:
- $(uname -r) dynamically inserts your current kernel version
VMware uses these to build kernel modules that interface with your system’s virtualization features. The headers must match your exact kernel version for compatibility. This lists the contents of the kernel headers directory, confirming they’re installed for your current kernel version.
Step 3: Download VMware Workstation
You can download VMware Workstation using either the graphical method through a web browser or the command line method using wget. Let’s navigate to VMware’s Official Website. Click on “Download Now“. Pick “VMware Workstation Pro.” Finally, save the .bundle file:
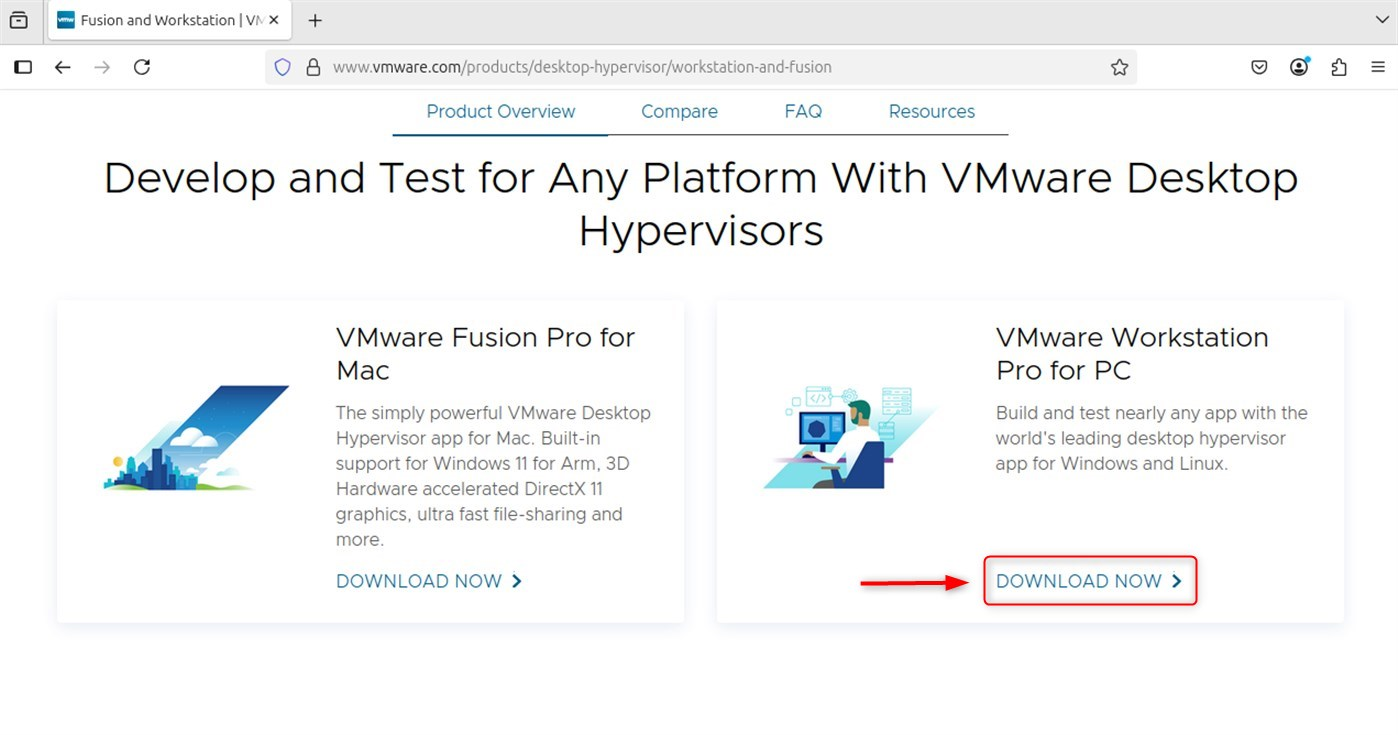
The web browser method is the easiest way to access the VMware bundle file web page since it guarantees you are downloading from the original site. VMware offers a bundle file that contains everything needed to execute an installation.
To maintain file order, navigate to the downloads folder:
cd ~/Downloads |
|---|

Step 4: Install VMware Workstation
We can now begin the installation process of VMware Workstation by executing the bundle file we downloaded earlier. Make the bundle executable:
chmod +x VMware-Workstation-Full-*.bundle |
|---|

Now, run the VMware installer. Due to security reasons, files downloaded from the internet do not have execute permissions enabled by default. In this case, the bundle file from VMware will require these permissions to function as an installer:
sudo ./VMware-Workstation-Full-*.bundle |
|---|
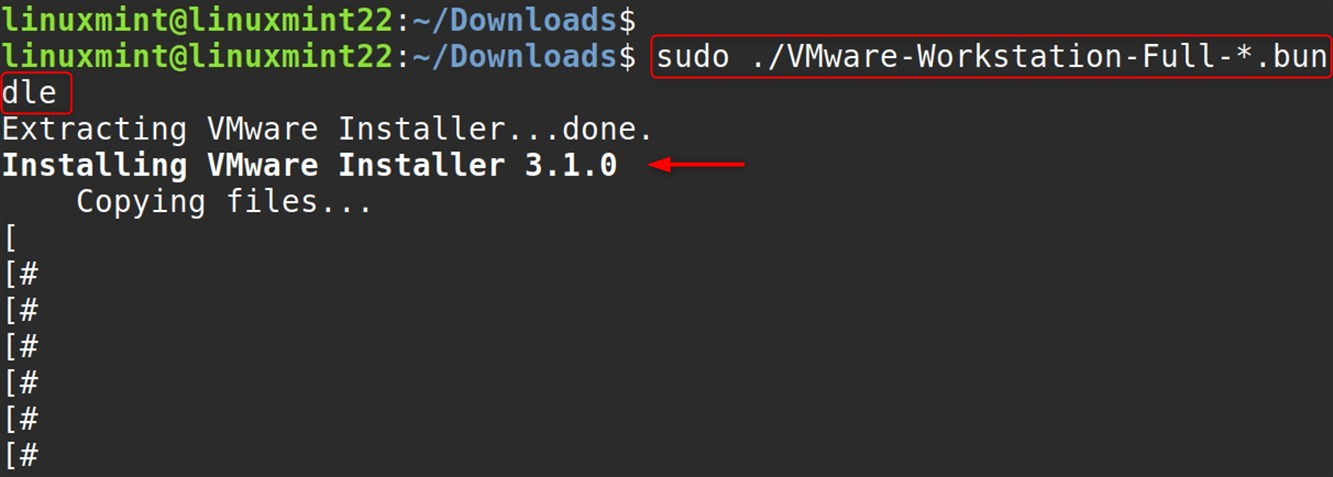
Granting administrative privileges using ‘sudo’ will allow the user to access system features such as folders when installing applications.
This screen introduces the installation wizard and lists out general information on the actual installation procedure:

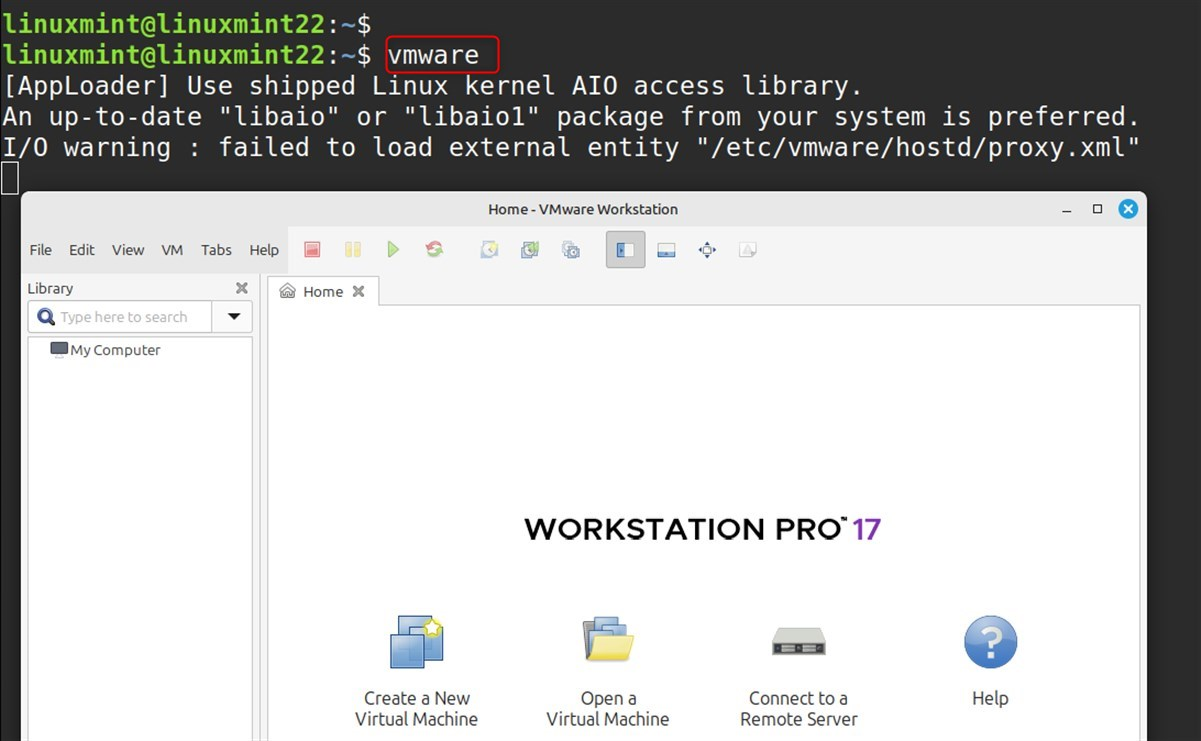
To launch VMware, execute the following command:
vmware |
|---|

Read and accept the End User License Agreement. Click “Next“. You must accept VMware’s terms of service to proceed with the installation.
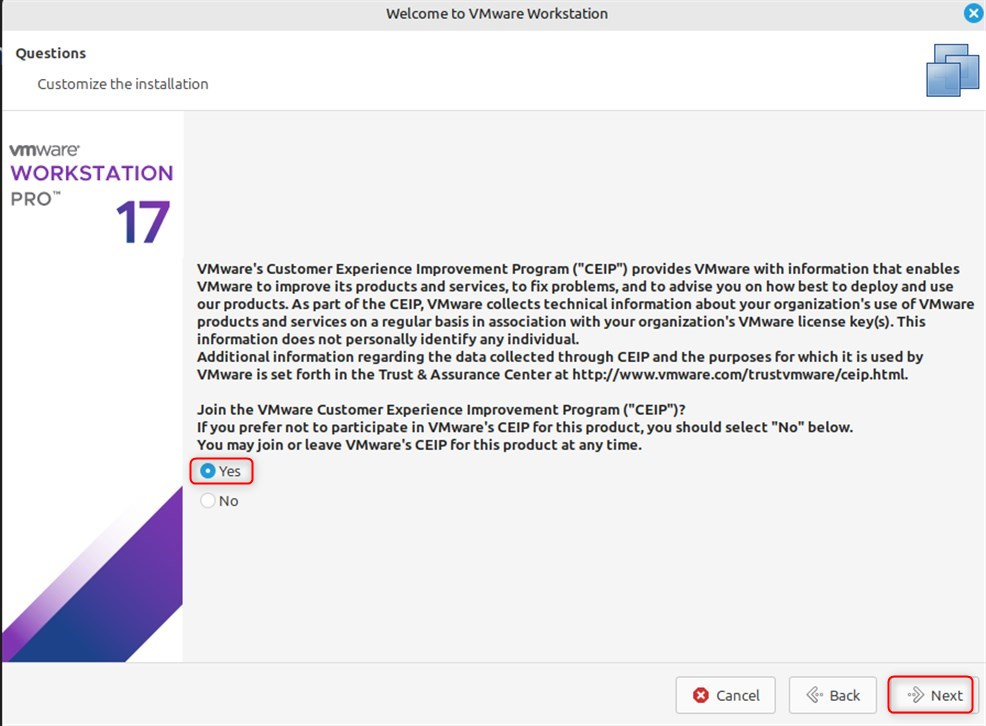
User Experience Improvement Program
Select your preferred participation level. Proceed by clicking “Next.”. This is an optional program that assists VMware in product improvement by collecting non-identifiable data regarding how their products are interacted with.
If users have a license key, enter it here. If not, choose “Use VMware Workstation Pro for 30 days” if a trial is selected. A VMware Workstation Pro license is needed to continue usage beyond the trial period after 30 days:
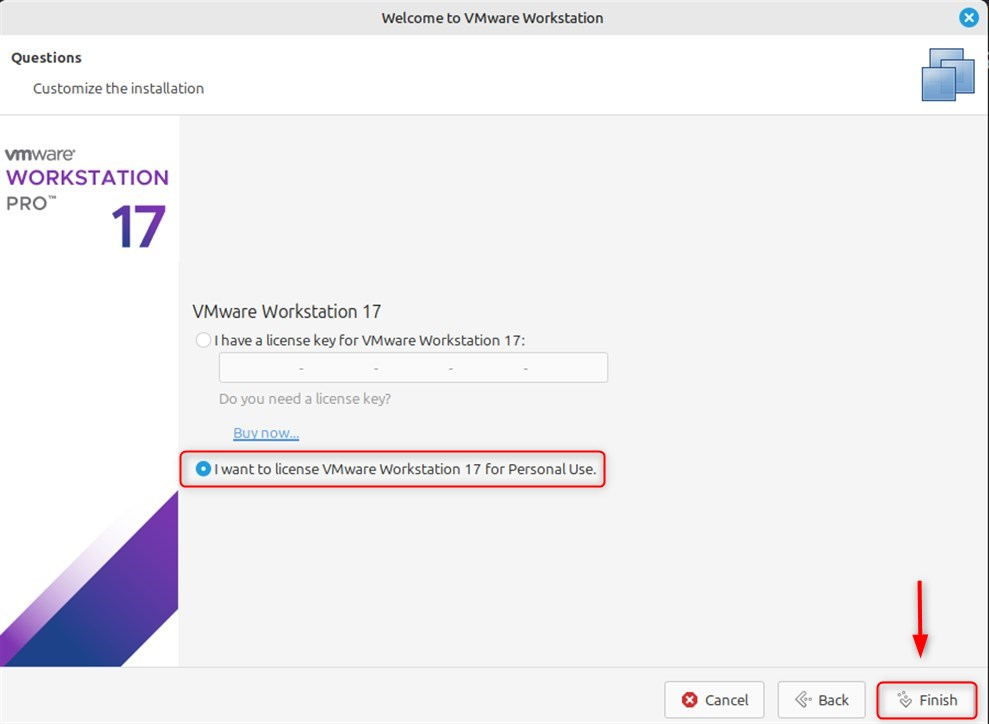
Review all selected options before clicking “Install” to verify if changes are needed. This last step will allow all selected options to be reviewed before execution of the installation:
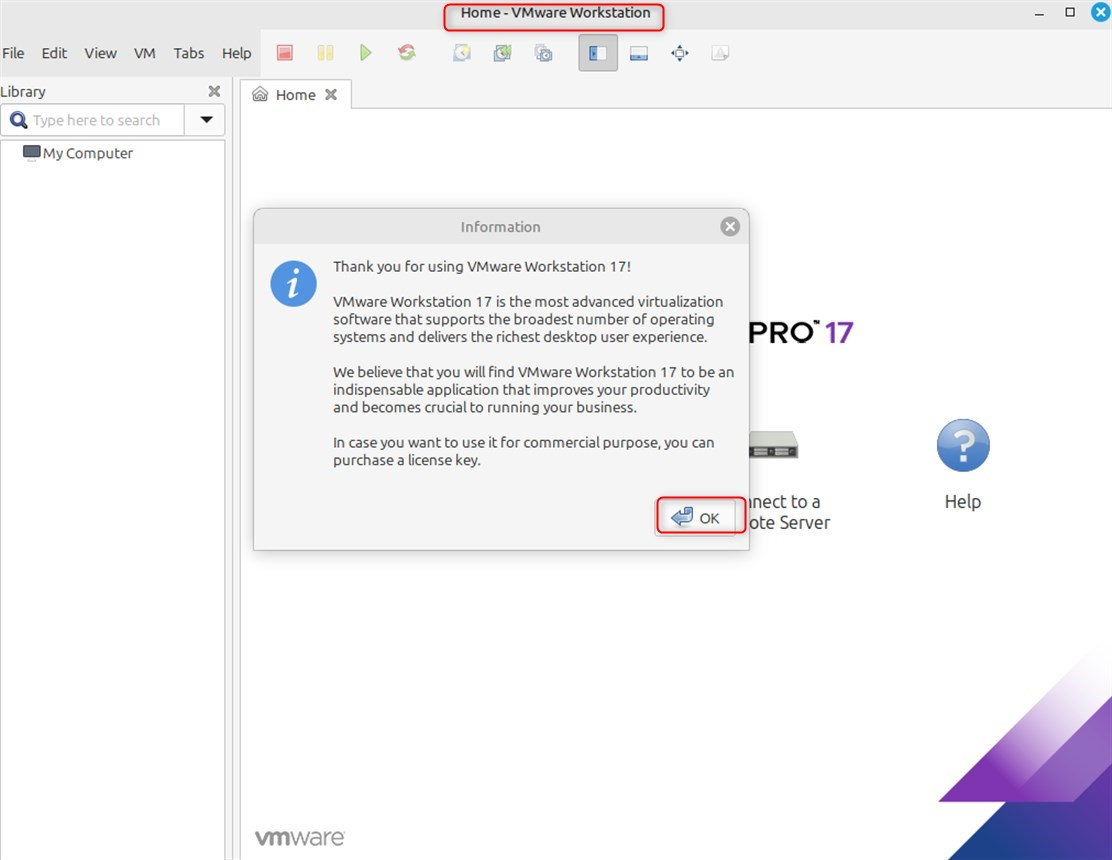
You are now done with the installation process and can proceed to using VMware Workstation:
Step 5: Post-Installation Configuration
After the installation of VMware Workstation, specific steps for additional configuration are crucial to achieve optimal performance with the program installed:
vmware --version |
|---|

This command verifies if VMware Workstation is installed correctly and in the version specified in the information.
Check VMware Services
To confirm the services, you need to execute the command below:
sudo systemctl status vmware |
|---|
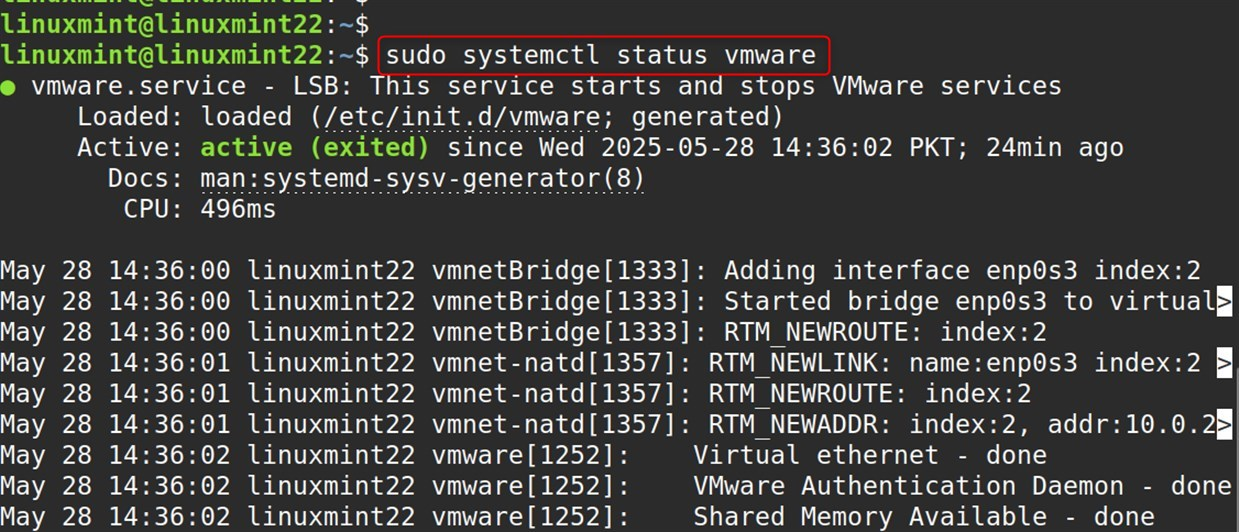
The command provided above checks the VMware system services, if the commands executed successfully, you should see services like vmware, vmware-USBArbitrator, and vmware-workstation-server running alongside other services.
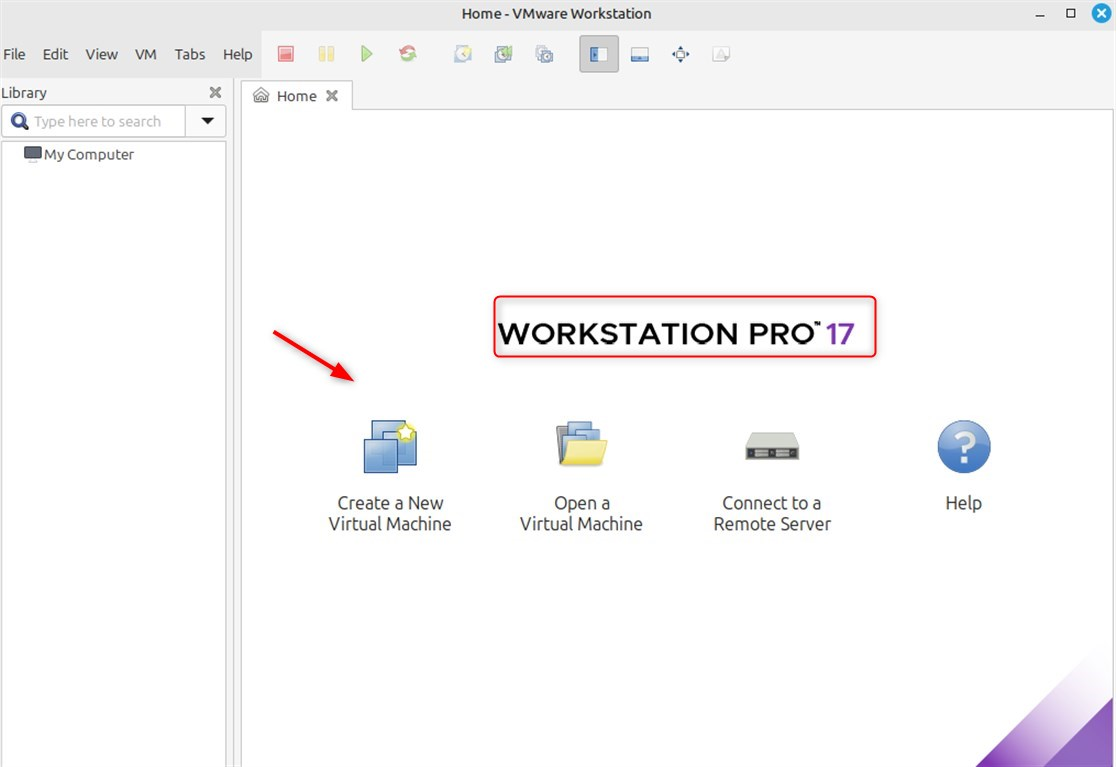
Let’s start VMware Workstation:
vmware |
|---|

The command provided above will allow you to launch VMware Workstation. Alternatively, users can locate it under the “System Tools” section of the application menu or use the search bar to find VMware in the application launcher.
Configure Kernel Modules (If Needed)
Sometimes VMware’s kernel modules require rebuilding, for example, after system kernel updates:
sudo vmware-modconfig --console --install-all |
|---|

The command provided above manually compiles and installs the necessary VMware kernel modules:
- vmware-modconfig = VMware’s module configuration utility
- –console = Tells the system to run in text mode instead of GUI
- –install-all = Builds and installs all the modules needed for the kernel
Important: You must log out and log back in for group membership changes to take effect.
Configure Virtual Networks
Go to the command prompt and type:
sudo vmware-netcfg |
|---|
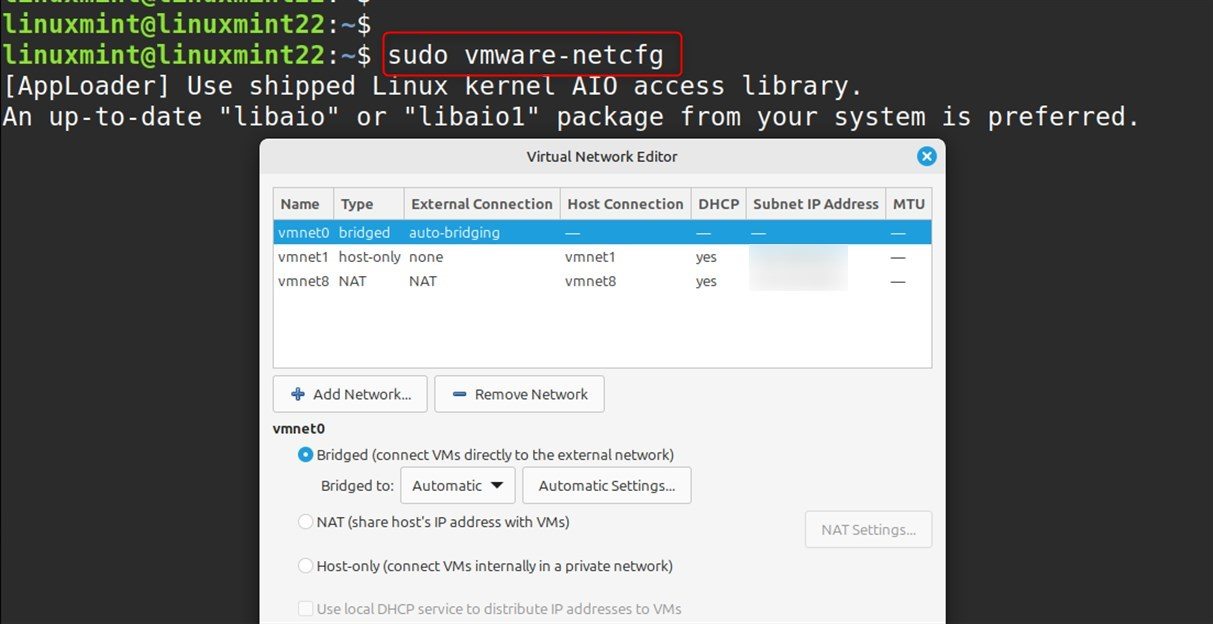
This opens the utility, which will allow you to:
- Set up virtual network adapters
- Configure NAT and bridged connections
- Control DHCP for the virtual networks
- Set up host-only networks
Step 6: First Launch and Initial Setup
Open VMware Workstation after it has been installed:
From Command Line:
vmware |
|---|
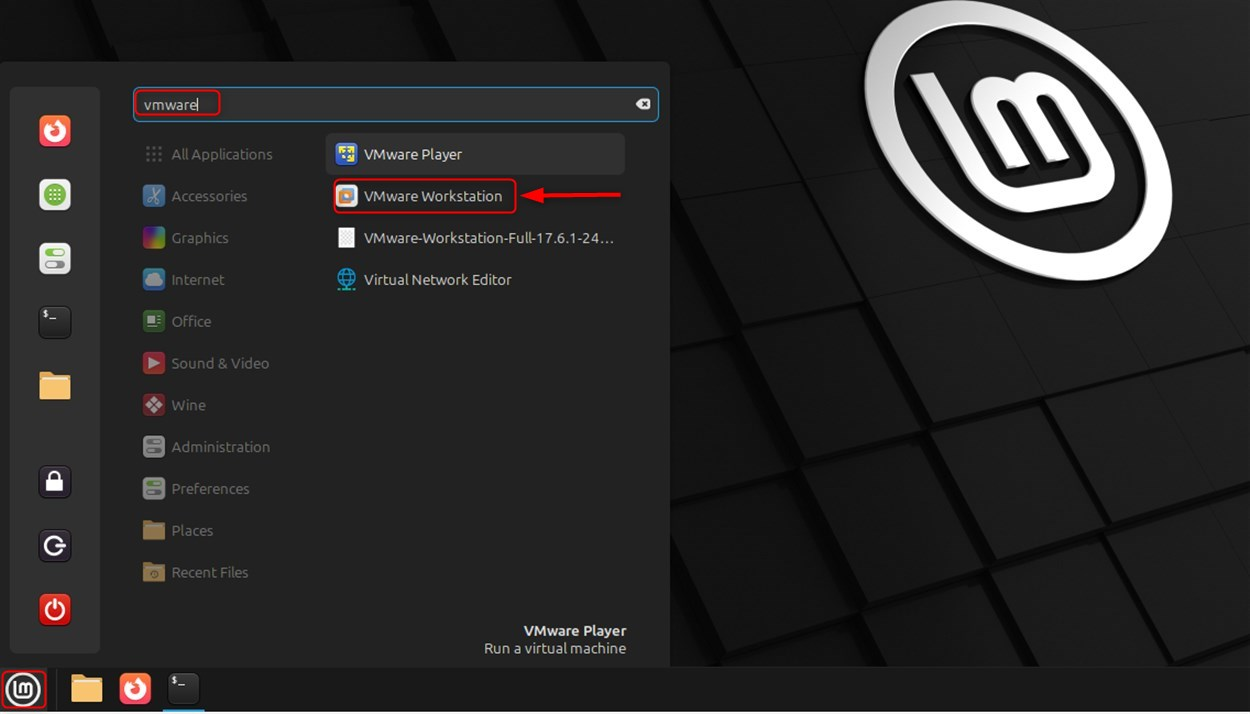
From Application Menu:
Open the Apps Menu and look for “System Tools” or “Virtualization” and click. Expand and look for “VMware Workstation” and click on it:
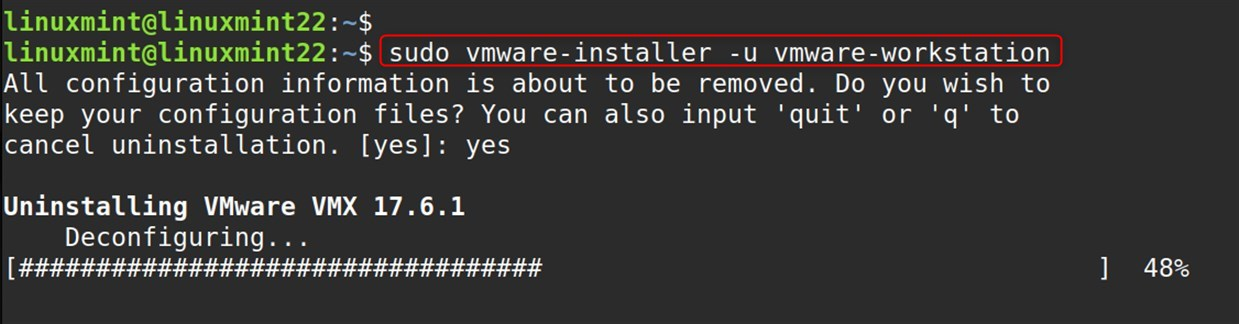
Step 7: Uninstall VMware Workstation (Optional)
If you need to remove VMware Workstation from your system, use the built-in uninstaller:
sudo vmware-installer -u vmware-workstation |
|---|
If you want to remove everything, do it in the following order. Remove system-wide configuration and delete user configuration (but be careful with this command)
sudo rm -rf /etc/vmware* rm -rf ~/.vmware |
|---|

Warning: Only run these cleanup commands if you’re certain you want to completely remove all VMware-related files and configurations.
This comprehensive guide provides everything you need to successfully install and configure VMware Workstation on Linux Mint 22.
Conclusion
To install VMware Workstation on Linux Mint 22, navigate to the official VMware website and download the latest edition of VMware Workstation Pro or Player. After that, change the permissions of the downloaded bundle by running chmod +x VMware-Workstation-Full-*.bundle in the terminal.
Proceed to execute the installer with root privileges through the terminal using the command sudo ./VMware-Workstation-Full-*.bundle and simply follow the installation guide that pops up. Do not forget to install all other requisite dependencies of your system using the command: sudo apt install build-essential linux-headers-$(uname -r). Once you are done with the installation, feel free to fire up VMware from the application dump and start spinning up new virtual machines on your Linux Mint system.

Karim Buzdar holds a degree in telecommunication engineering and holds several sysadmin certifications including CCNA RS, SCP, and ACE. As an IT engineer and technical author, he writes for various websites.