If you are using Linux Mint 20, you will often need to work on a terminal for settings, configuration, and installations. But working on the default Linux terminal is not a fun ride. The text font is standard and small. The default design of white text on black does not help either.
This article brings you different ways, you can liven up your terminal according to your taste.
Change Default Window Size
Open your Terminal from the utilities or by pressing Ctrl+Alt+T. The First thing that you will notice is the rather small window size.
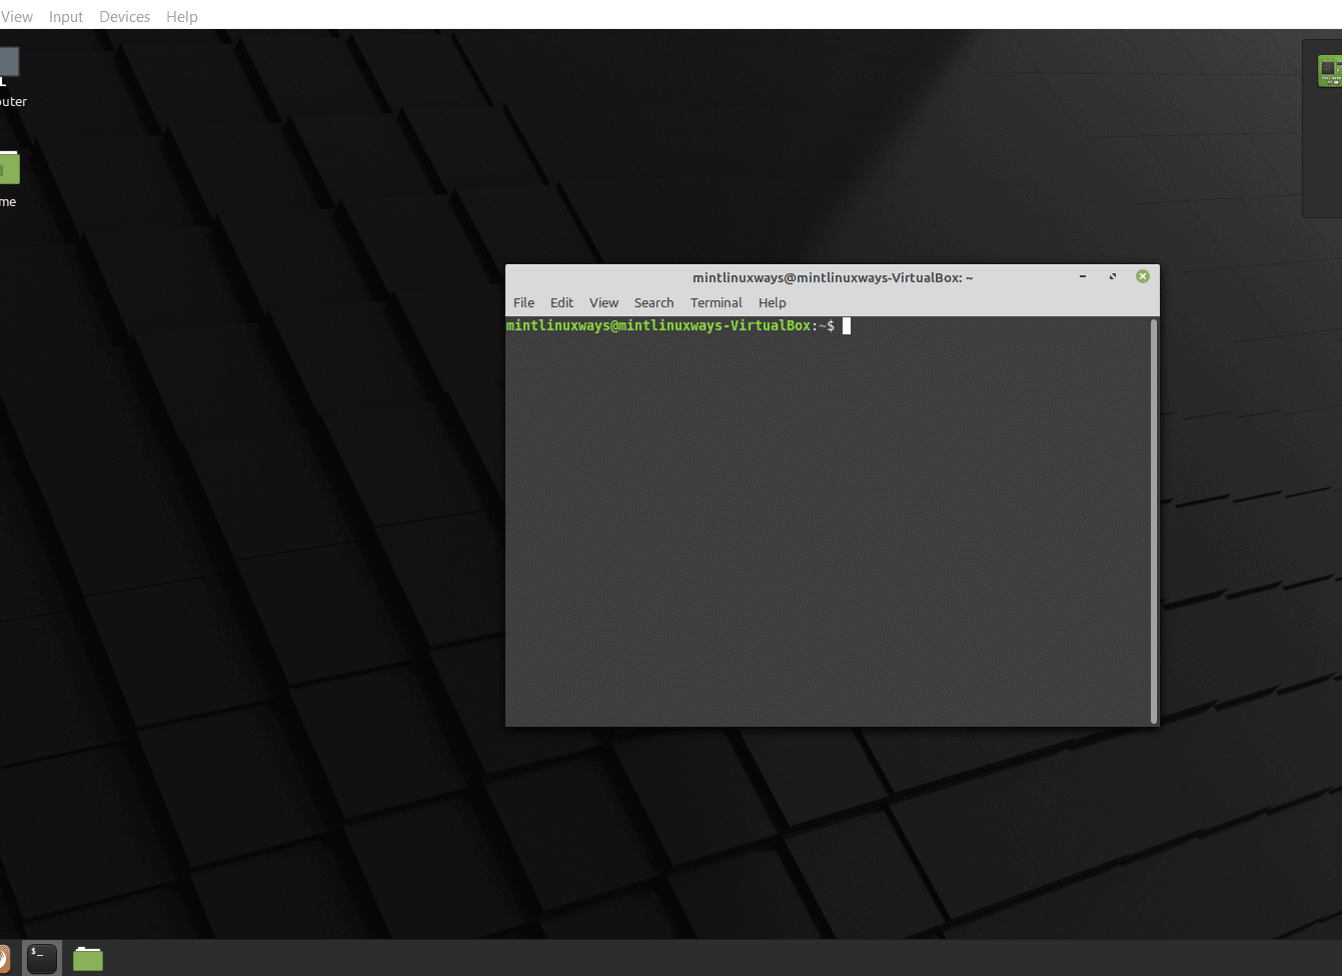
You can avoid adjusting it every time by changing the window default size. To change the window default size in the terminal, simply right-click on your terminal screen and select Preferences from the drop-down.
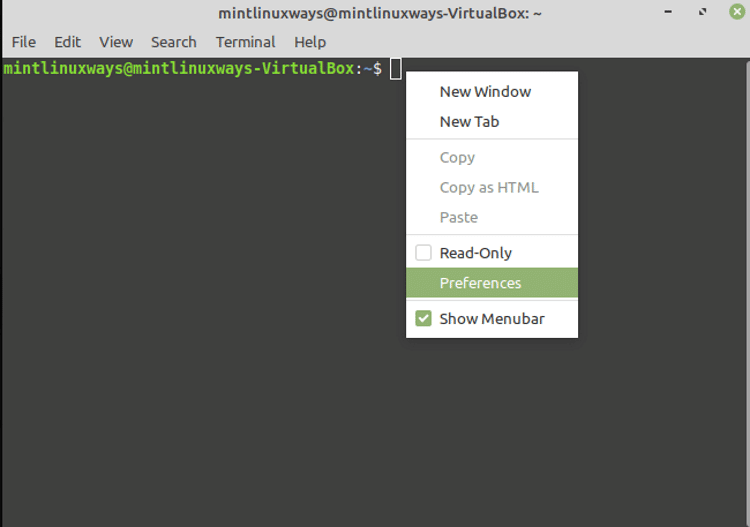
You will see the Preferences-Profile window open up.
In the text tab, look for the Initial terminal size and adjust the column and rows according to your need.
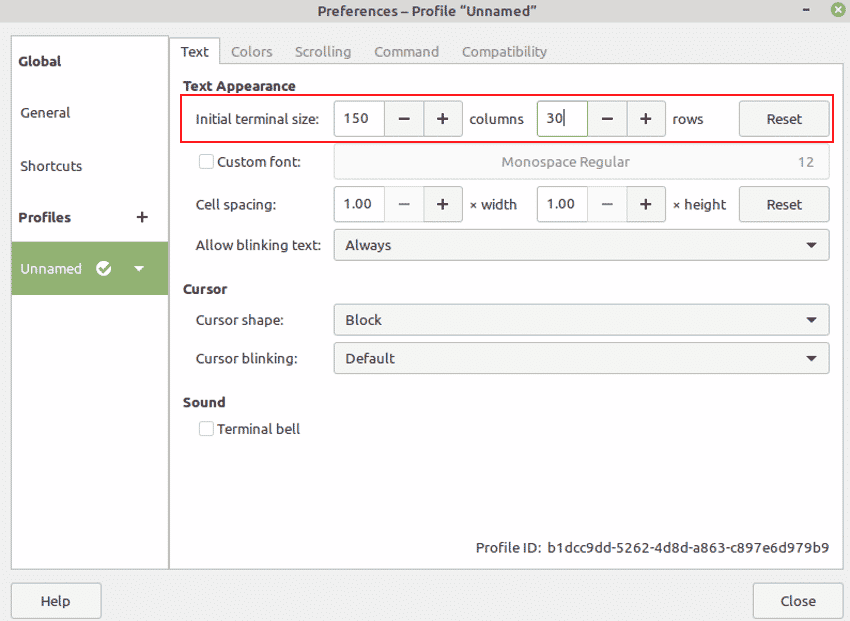
Note: You need to restart the terminal to see changes in effect
Change Font Type and Size
To change the font type, Go to the text tab in the Preferences-Profile window, You will see a ‘Custom font’ option is disabled and greyed out.
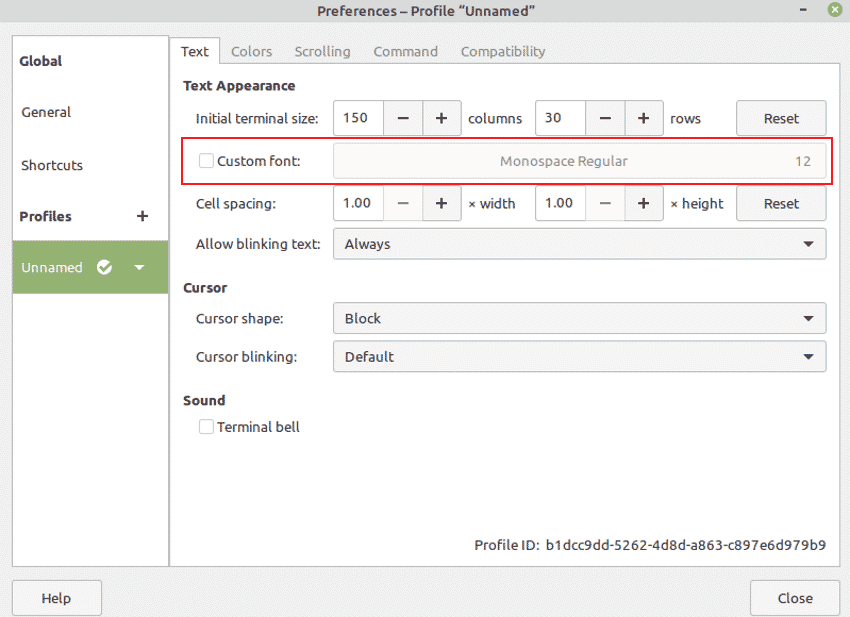
Check the box next to Custom font to enable the option and select your desired font from the drop-down.
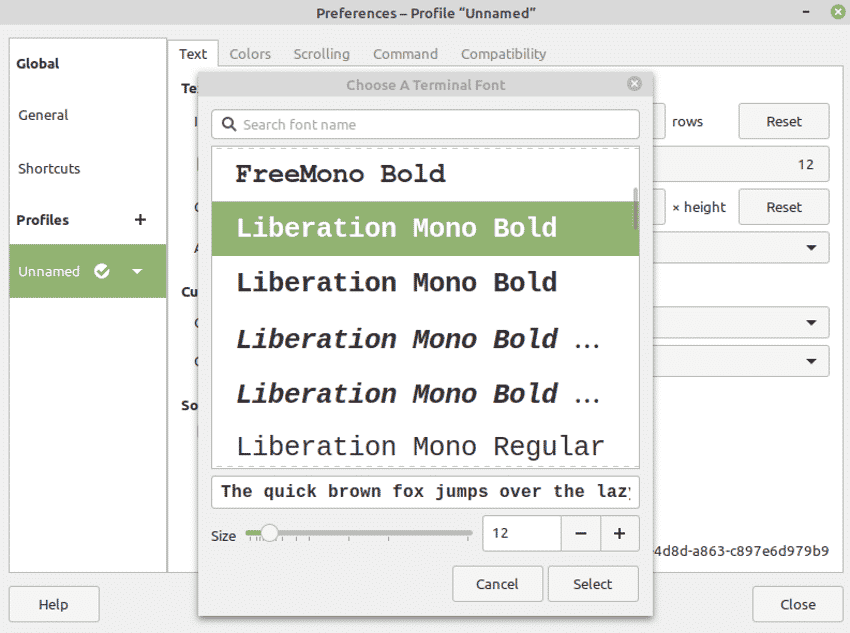
Once you have selected the font, Adjust/Increase its font size from the Size slider or button given below in the window.
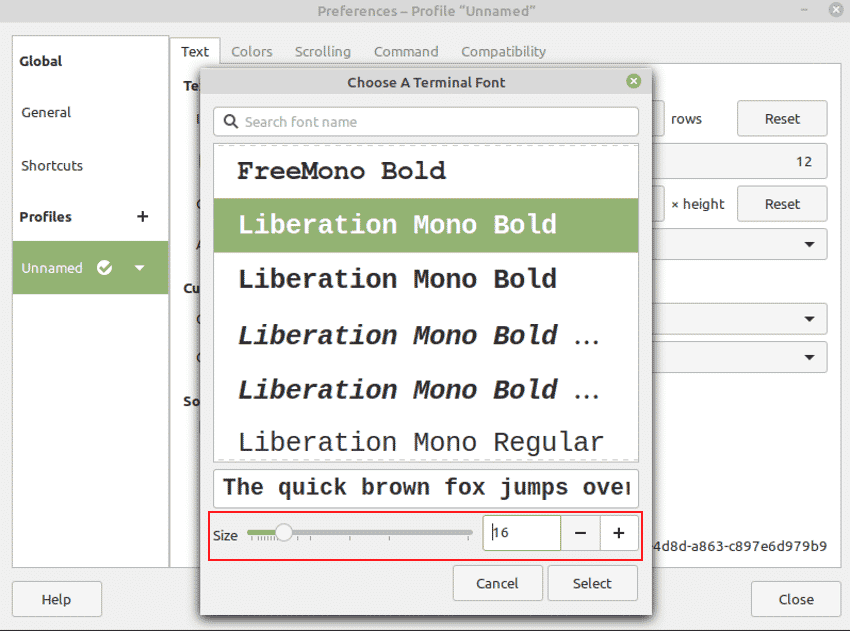
Note: you can preview the changes as you make changes in the text above the ‘Size’ option.
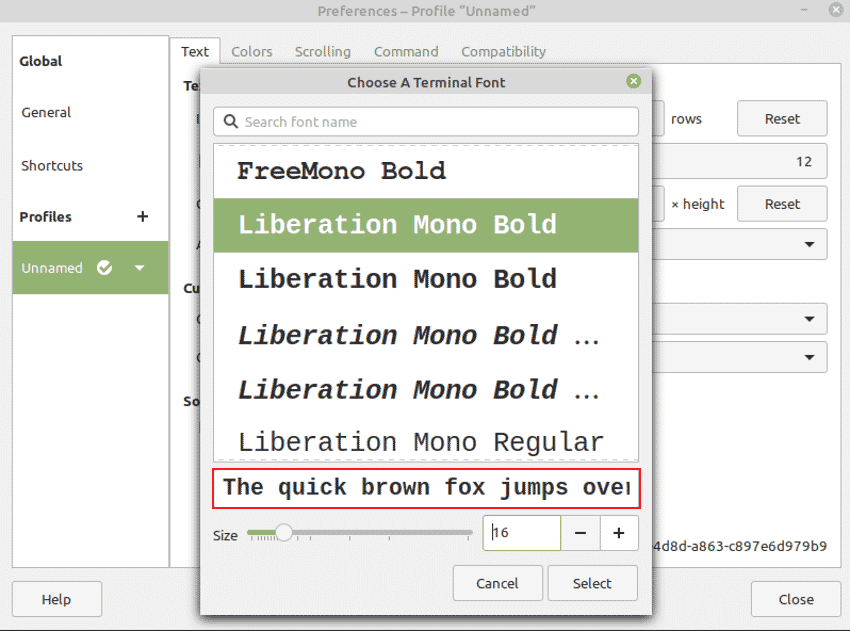
Once you are done with change, press Select. You can immediately see the font changes in effect within the terminal.

Change Font and Background Color
To change the font type, Go to the Color tab in the Preferences-Profile window, You will see the ‘Default color’ option under the ‘Text and Background Color’ settings. As the terminal uses a ‘white on black’ built-in scheme by default, other settings are disabled.
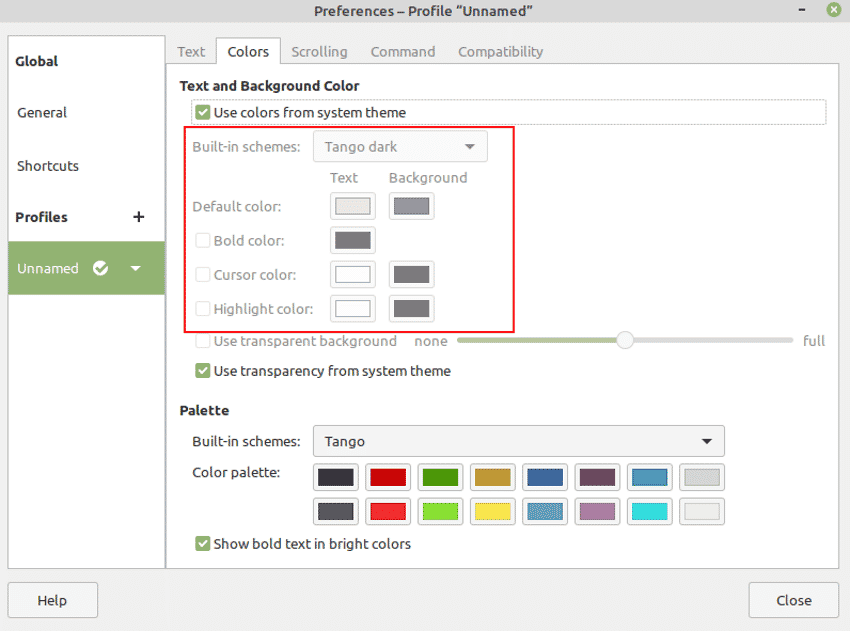
To enable these settings, uncheck the box next to the use colors from system theme. You can see now that the Color settings are enabled.
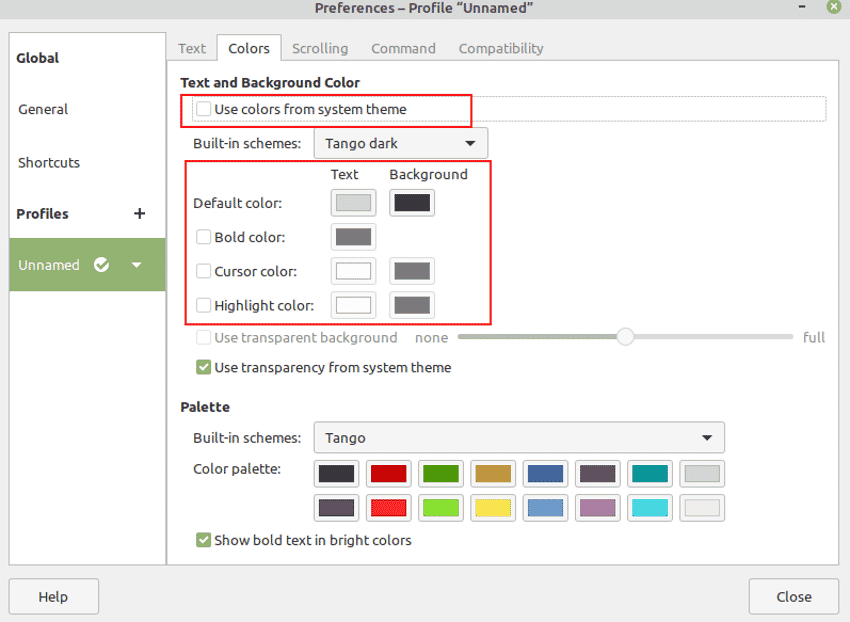
To change font and background color, you can either choose from the other built-in scheme from the drop-down.
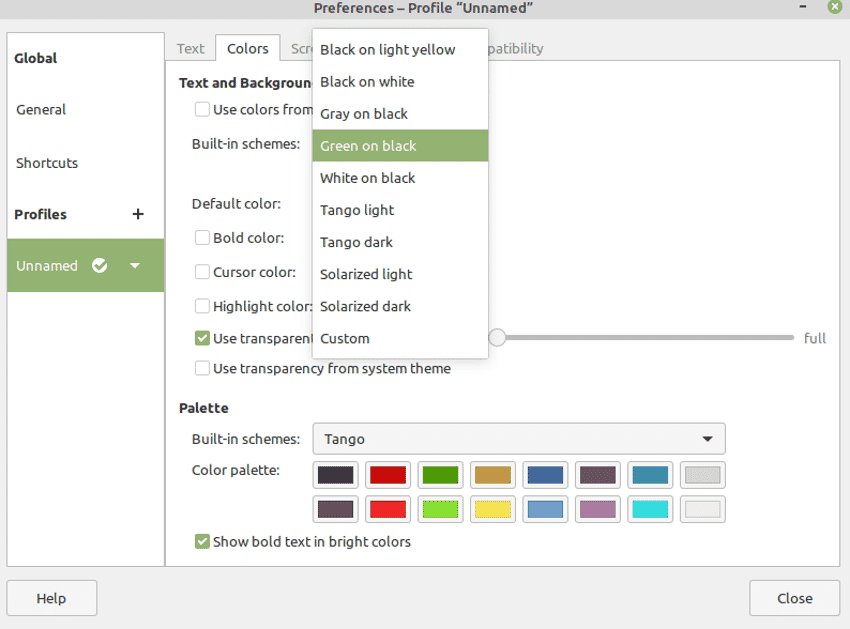
Or you can build your custom theme by selecting the custom from the built-in scheme drop-down. Now go to the Default color and click on the box underneath Text.
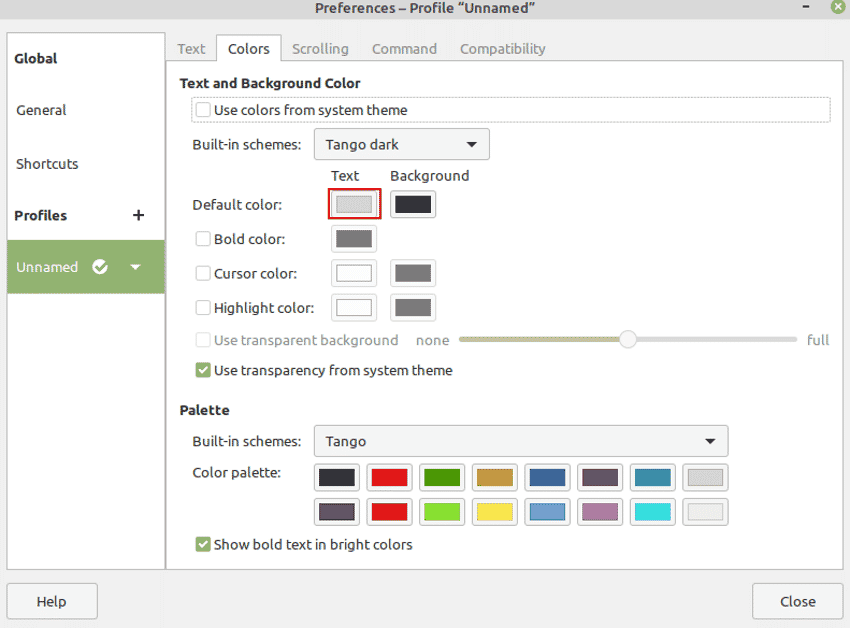
Choose Terminal Text Color window will open up, choose your desired font color and press Select.
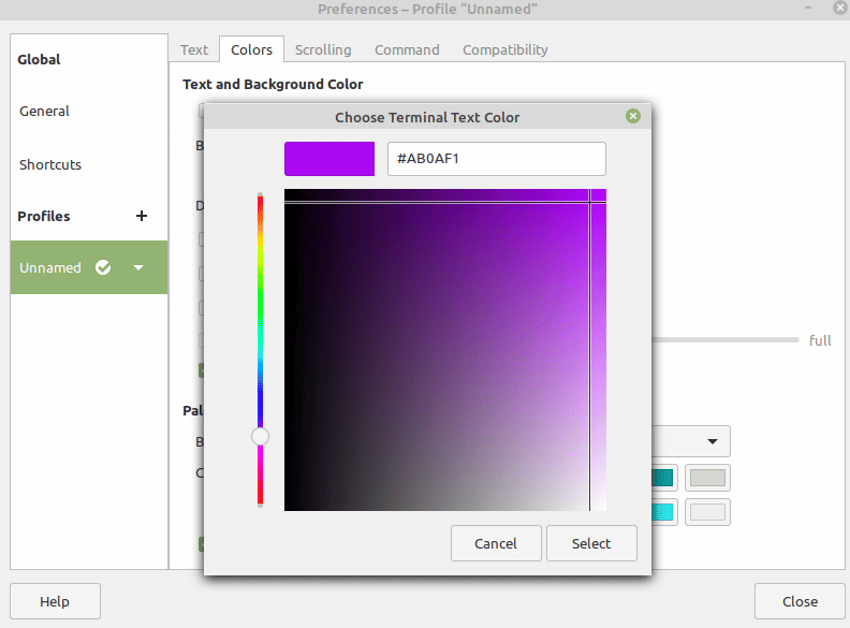
Similarly, select the box underneath Background and choose the background color for your terminal.
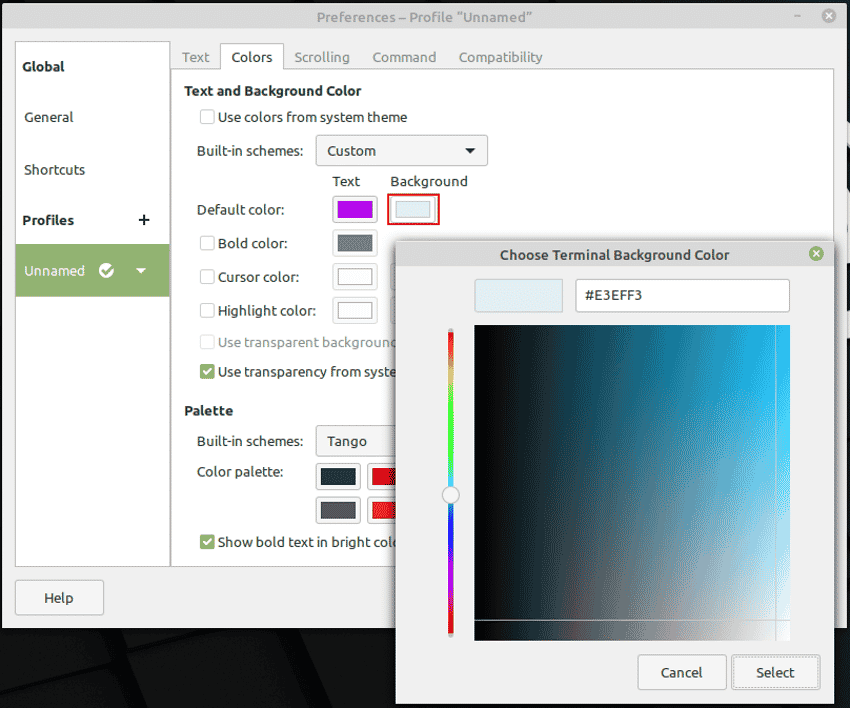
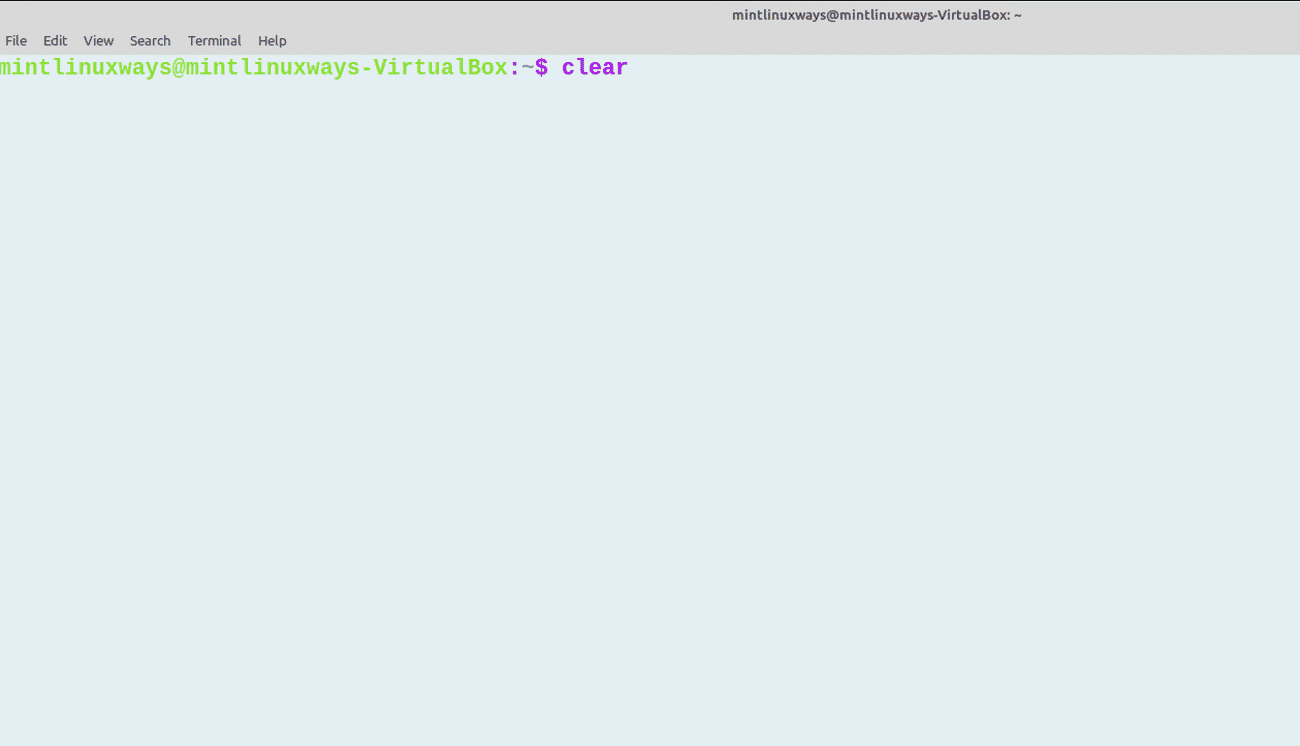
You can see the changes in color in the terminal so you can tweak colors to see what works.
Conclusion
This article shows you how you can build a comfortable workspace by customizing the look and feel of the Linux Mint terminal.
