The good old df command sure does a decent job in keeping tabs on the disk space usage. That’s not in doubt. However, a new tool in the open-source community has come to revolutionize the way we view disk space usage statistics on the terminal. DUF, an acronym for Disk Usage Free utility, is a free and awesome command-line tool that prints disk usage statistics in an intuitive and fancy format on the terminal. DUF is developed in the Go programming language and is a cross-platform tool that can be installed in Windows, Linux, BSD ad macOS.
In this tutorial, we showcase how to install DUF and use it to print various disk usage metrics.
Prerequisites
Before you get started, ensure you have a Linux distribution with a sudo user configured. We have used Ubuntu 20.04 LTS. Additionally, confirm that you have a fast and reliable internet connection that will be required for the installation of packages.
How to install DUF on Linux
There are 3 approaches to installing the DUF utility tool and we shall begin with the easiest.
Install DUF using snap packages
The easiest and most straightforward way of installing DUF is using snap packages. But before you go a step further, ensure that snap is enabled. Here’s a comprehensive guide on how to enable snap for various Linux flavors. Once snap is enabled, invoke the following command as the sudo user.
$ sudo snap install duf-utility

Once installed, you will be notified that DUF has successfully been installed. To confirm the version of DUF installed, run:
$ duf --version

Install DUF from .deb or .rpm packages
DUF Linux packages are also available in both .deb and .rpm packages. To get more insights on the available duf packages and the supported architectures, visit the GitHub releases page.
On Debian / Ubuntu distributions, download the .deb file as follows. I’m using Ubuntu 20.04 which is a 64-bit system, and so I’ll grab the 64-bit Debian package as follows:
$ wget https://github.com/muesli/duf/releases/download/v0.6.2/duf_0.6.2_linux_amd64.deb

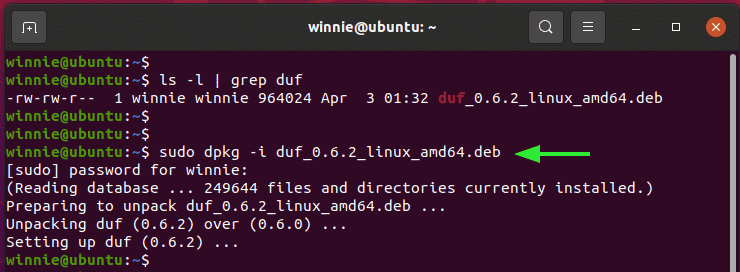
Once the DUF package is downloaded, run it as shown:
$ sudo dpkg -i duf_0.6.2_linux_amd64.deb
Install DUF from source
Lastly, you can compile DUF from source. But as we pointed out earlier, DUF is written in GO language. So before compiling from source, ensure that you install GO programming language as a prerequisite.
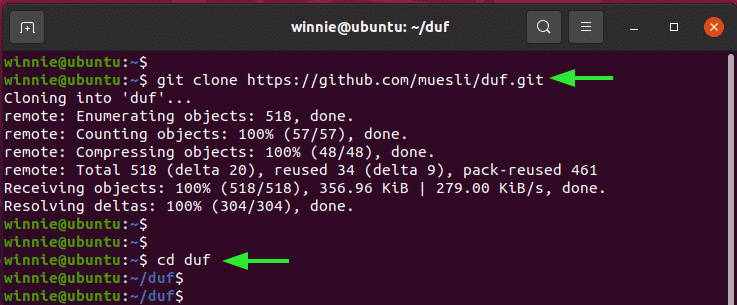
Once installed, proceed and clone the git repo.
$ git clone https://github.com/muesli/duf.git
Navigate into the clone directory.
$ cd duf
And finally, compile the source code as indicated.
$ go build
Using DUF to check disk usage
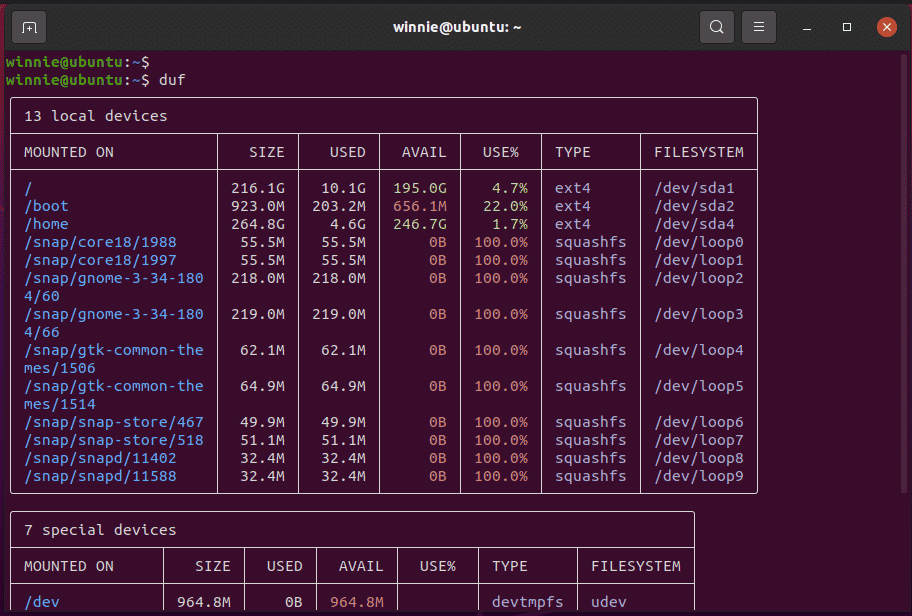
To begin monitoring disk space usage, simply invoke the duf command as follows:
$ duf
This prints out the disk usage statistics in a color-coded format in a tabular format.
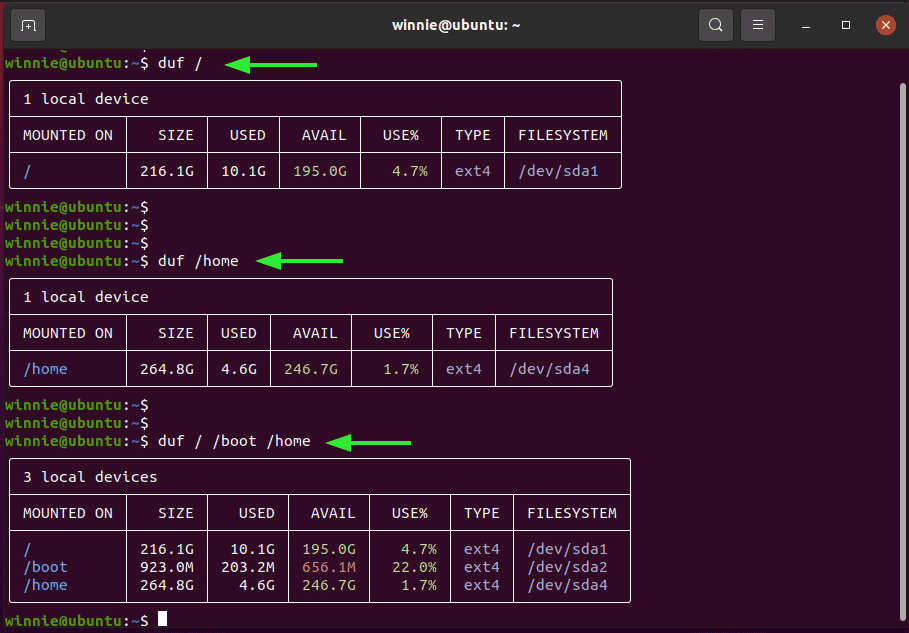
Instead of displaying all the mount points, you can set duf t. For example, to display disk usage on the root partition only ( / ) run the command:
$ duf /
To display disk usage on the home partition invoke:
$ duf /home
Additionally, you can list the partitions on a single command as follows. This prints out the disk usage statistics on the three partitions indicated.
$ duf / / boot /home
Also, you can filter the columns that you want to display. For instance, if you want to display the ‘Mounted ON’ , SIZE, USED, AVAILABLE SPACE, and FILESYSTEM TYPE, run the command:
$ duf --output mountpoint,size,used,avail,type /home

Moreover, you can choose to view the inodes as follows:
$ duf --inodes
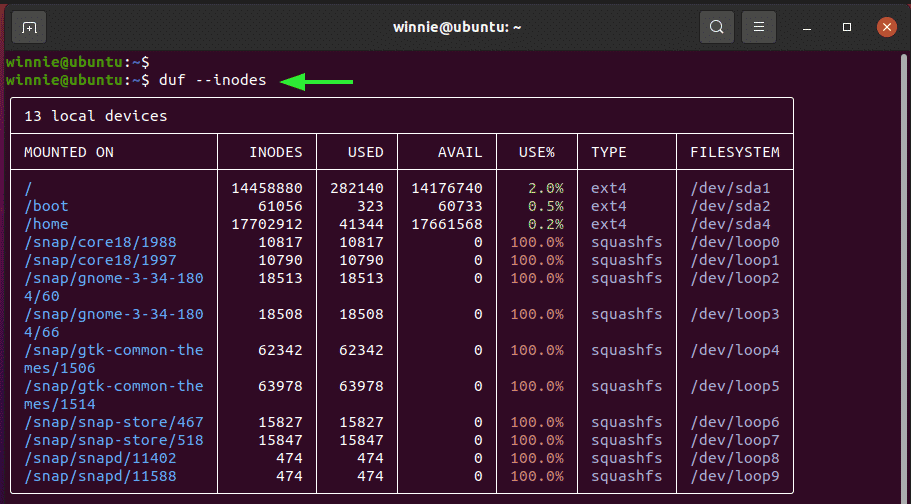
To print the output in JSON, run:
$ duf --json
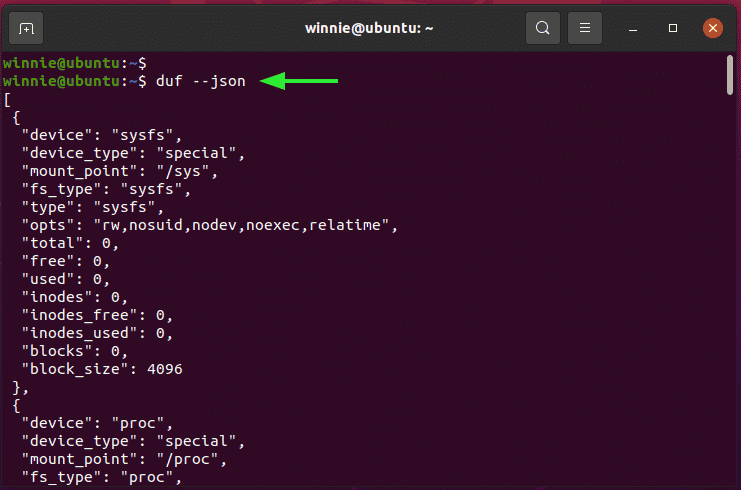
For more options on the command options, use the duf help command as shown.
$ duf --help
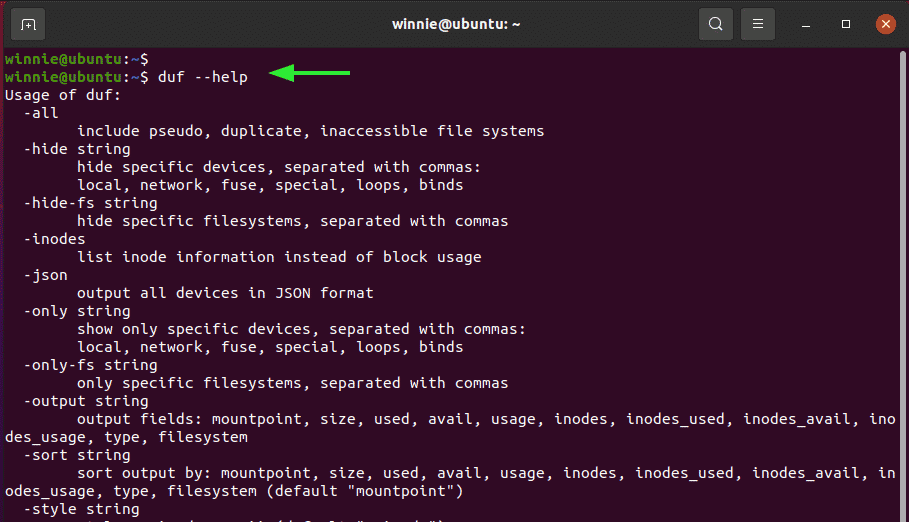
Additionally, feel free to visit the DUF GitHub page for more information.


