PostgreSQL, which is popular with a name as Postgres, is an open-source and freely available relational database management system. This type of database server more emphasis on SQL compliance and extensibility. In this article, we will elaborate on the installation of PostgreSQL on CentOS 8 Linux distribution.
Prerequisites
You should be login as the root user or you must have privileges to run the ‘sudo’ command on your system.
Installation of PostgreSQL databases on CentOS 8
First, you will open the command line application ‘Terminal’ by clicking on the terminal icon from the left sidebar of your desktop. Type the below-mentioned command to log in on your terminal as the root user:
$ su
Enter the root account password.

Now, you can run all the administrative commands for PostgreSQL installation.
To complete the installation of PostgreSQL on CentOS 8, you will implement the following steps:
Step 1: Update system cache
It is a recommended and quite an easy step that you should update the repository cache of your system repository or packages by using the following command:
# dnf makecache

Step 2: Install PostgreSQL
All package has been updated. Now, execute the below-given command to install the PostgreSQL server on your system:
# dnf install postgresql postgresql-server
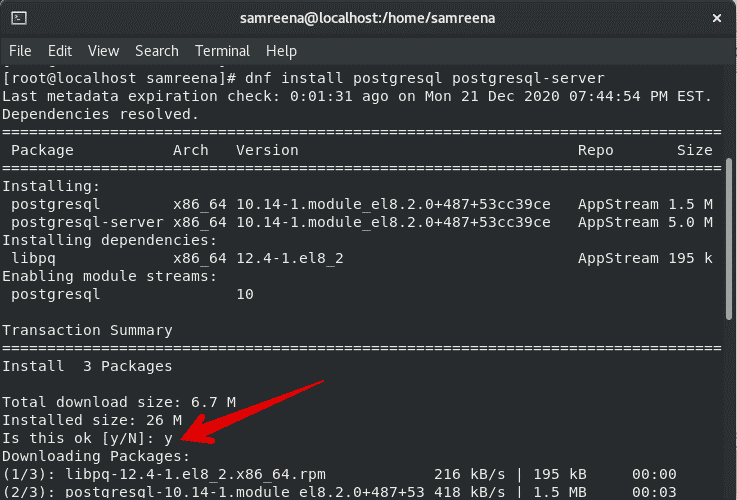
During the installation, you need to press ‘y’ and then hit the ‘Enter’ key to confirm the installation of PostgreSQL.
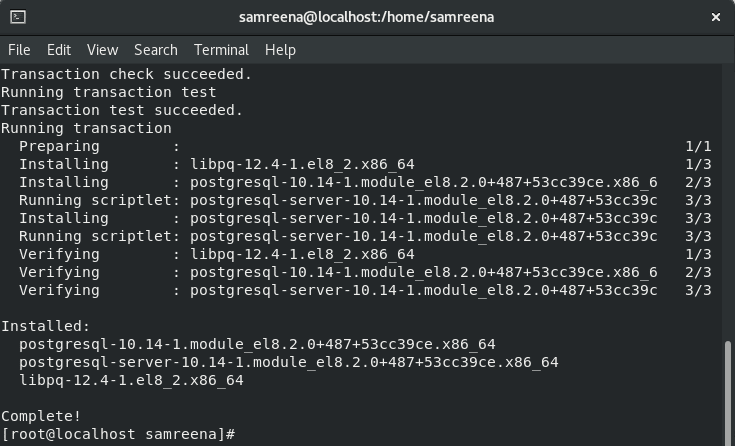
The complete status will display on the terminal that represents the installation of PostgreSQL has been completed.
Step 3: Check installed version of PostgreSQL
Once the installation of PostgreSQL is complete, to verify the working of PostgreSQL databases run the below-mentioned command:
# postgres --version

As you can see in the above screenshot the Postgres 10.14 is installed on this system.
Step 4: Initialize the PostgreSQL database
To initialize the PostgreSQL database server directory, type the following command on the terminal:
# postgresql-setup --initdb

Step 5: Enable and Start PostgreSQL services
You can enable the services of PostgreSQL by running the following set of commands:
# systemctl enable postgresql

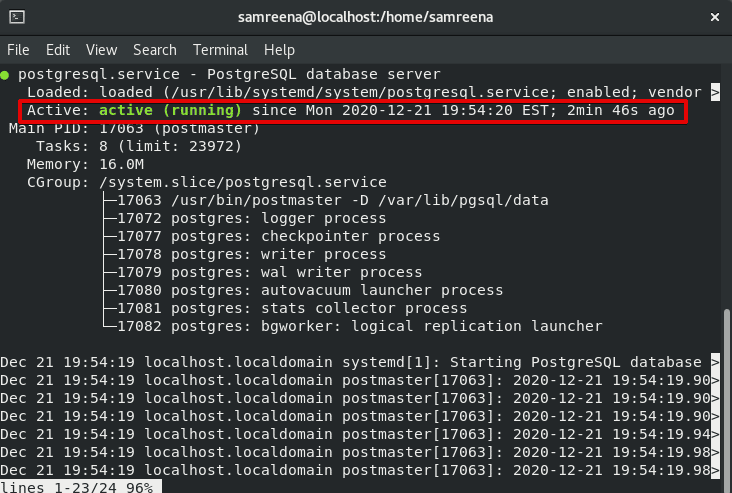
To know the services running status, use the below-mentioned commands:
# systemctl start postgresql
# systemctl status postgresql
![]()
Remove PostgreSQL server
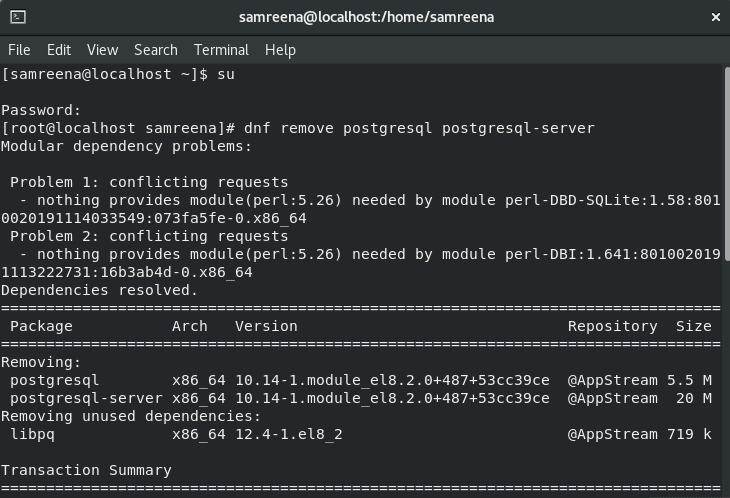
If you don’t want to use the PostgreSQL database server on your system then, by using the following command you can remove it:
# dnf remove postgresql postgresql-server
Creating a new PostgreSQL database
Login as root on your PostgreSQL database server as follows:

Now, we have created a new PostgreSQL database with the name ‘samreenadb’ by using the following command:
$ createdb samreenadb
Now, access the created database ‘samreenadb’ by using the following command:
$ psql samreenadb

To test the working of the above-mentioned database execute the following SQL query:
SELECT CURRENT_DATE;
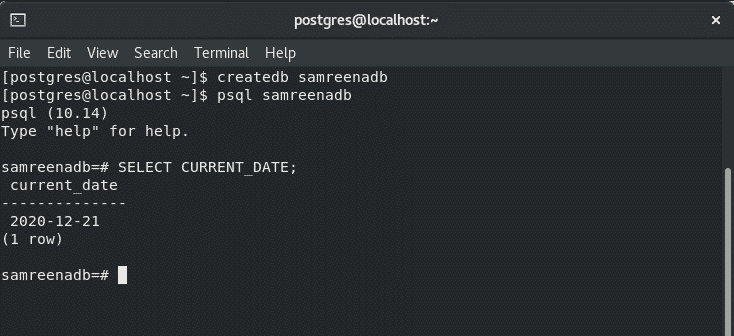
As you can see in the above-displayed image, the query is working on this database.
Create Tables in PostgreSQL Database
Here, we can create tables and assigned privileges on this database by pasting the following code in your current database shell which you can also see in the below-displayed screenshot:
CREATE TABLE users (

id INT NOT NULL,

name VARCHAR(16) NOT NULL,

pin VARCHAR(4) NOT NULL

);
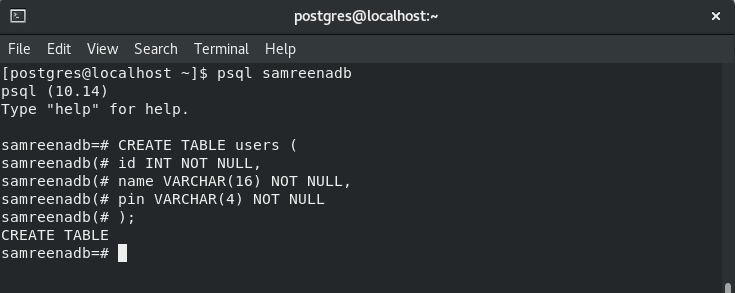
As you can see the table is created in the above screenshot with the name ‘users’.
To list all tables or relations of your database run the below-given command:
# \d

To exit from the database type the following command:
# \q

Conclusion
So, we have demonstrated in this article how you install and remove the PostgreSQL server and create a database in PostgreSQL on CentOS 8. We have also shown how you can add tables in the database by using the SQL query. I hope this article would be helpful and knowledgeable for you.


