
On a DHCP network, your Linux system will usually receive an IP address automatically from the DHCP server which, in most cases, is the router. The IP configuration will usually comprise the IPv4 address, the netmask, gateway, and the DNS settings. This is usually convenient for desktop or client PCs which only need to access the internet or network resources.
However, the case is different when you want to set up a server. In this case, you would need to configure a static IP to make the server always available via the same IP address. With DHCP, the IP address is bound to change once the lease time is over leading to the unavailability of the server.
In this guide, we will take you through a walk-through of how to set a static IP on Debian 11. We will demonstrate how you can configure a static IP on both the desktop GUI and server instances.
Prerequisites
As you set sail, ensure that you have an instance of Debian 11 server installed and set up. In addition, ensure that you have configured a sudo user.
There are two ways of configuring a static IP on Debian. You can achieve this using GUI or on command-line.
Configure Static IP Address using the Graphical User Interface ( GUI )
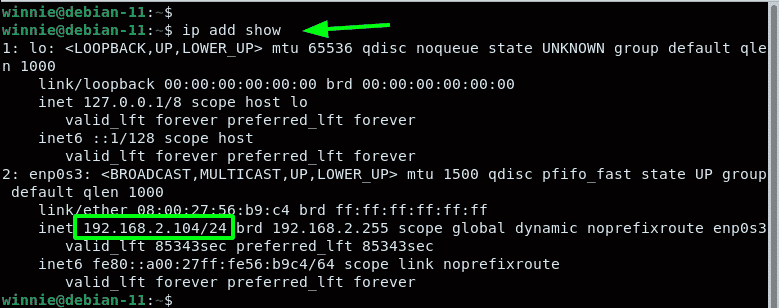
If you are running a Debian 11 desktop instance, log in using your username and password. Before we configure the static IP, first confirm the IP address assigned to your system. In our case, we have a Debian PC with an IP address of 192.168.2.104 in a DHCP network.
You can verify this using the command shown.
$ ip addr show
In our system, enp0s3 interface is the active link that is assigned the IP address. This may be something else in your case.
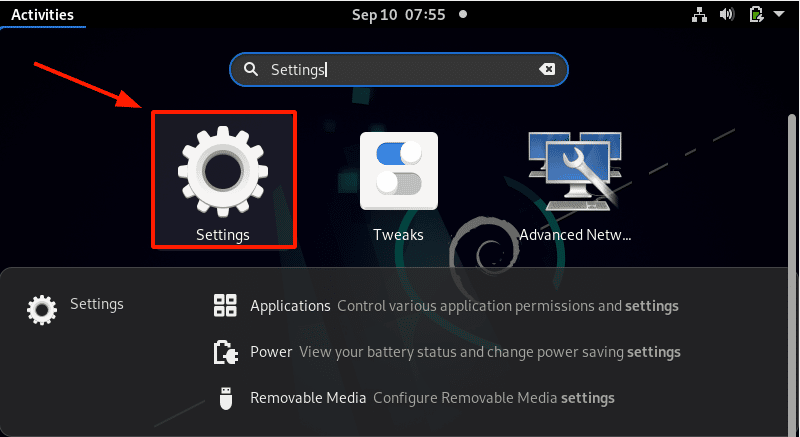
To get started with setting the static IP, click on ‘Activities’ on the left far corner. Search for and click on the ‘Settings’ icon.
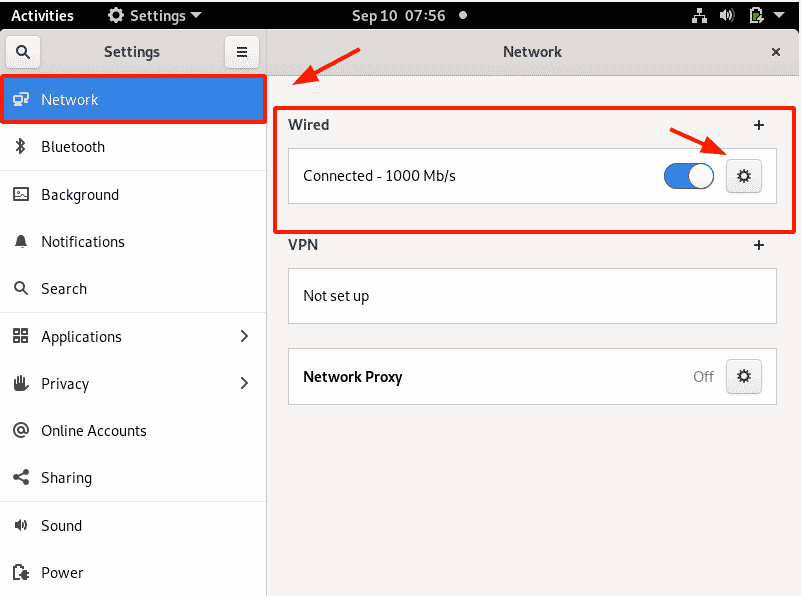
On the ‘Settings’ page, select the ‘Network’ tab. Next, head over to the ‘Wired’ section and click on the small gear wheel as indicated.
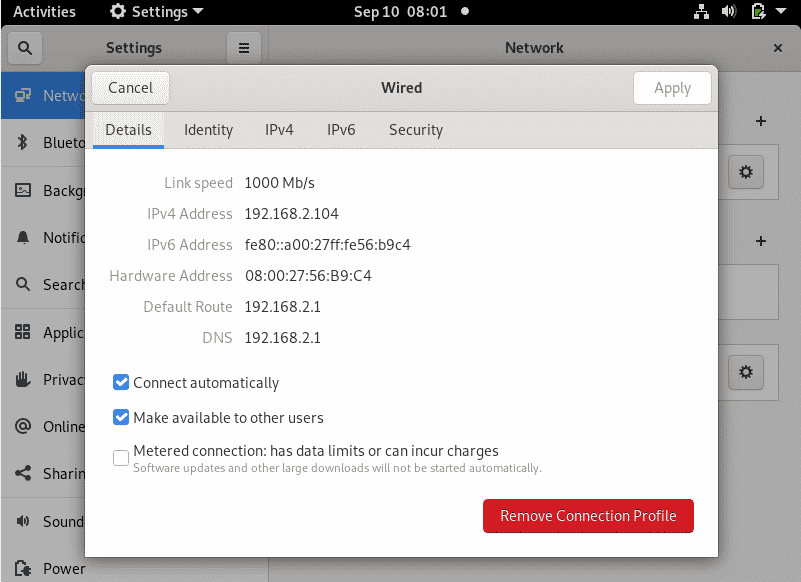
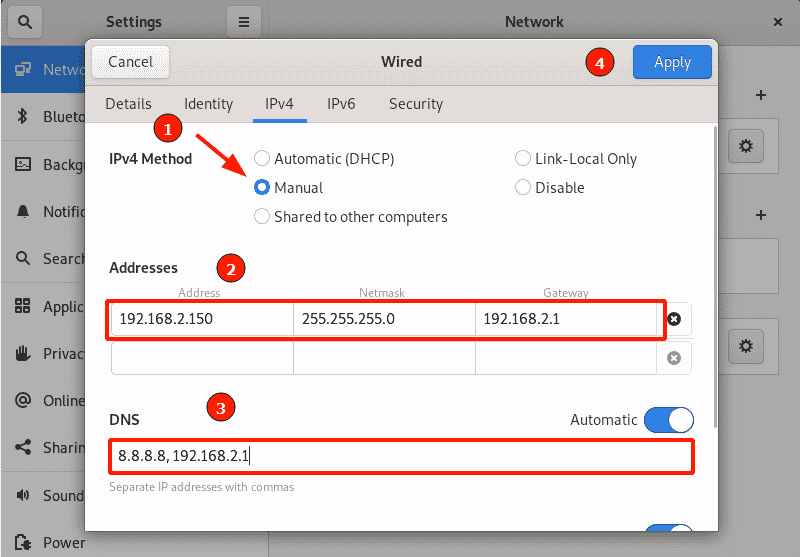
This displays the current IP address configuration as shown. As we confirmed earlier, our current IP address is 192.168.2.104. This has been dynamically allocated to the active interface using the DHCP service.
We are going to override the DHCP settings and manually set a static IP which will persist even upon a reboot.
Click the IPv4 tab. Switch from ‘Automatic’ to ‘Manual’ in the IPv4 method section. Thereafter, specify your desired IP address, netmask, and default gateway. Be sure to also provide the preferred DNS settings.
To apply the changes made, click the ‘Apply’ button.
You need to restart the networking daemon or service for the Debian system to implement the new static IP settings. So, turn the toggle button off and then on.
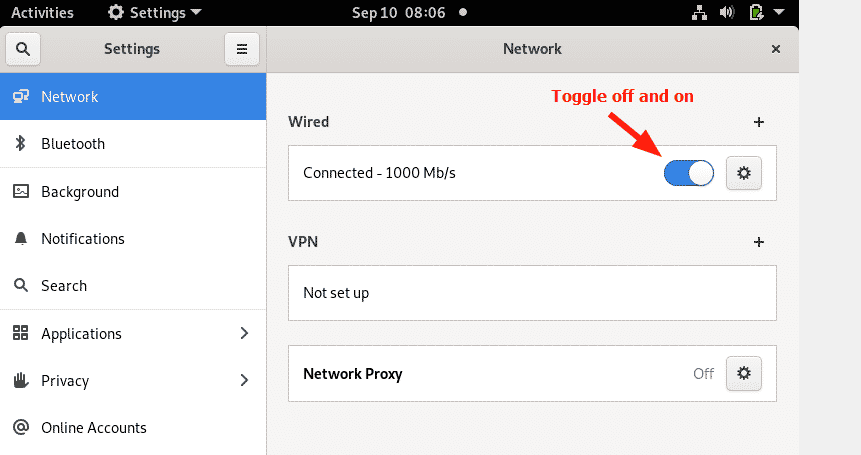
Click on the gear icon once more to verify that the static IP settings have been applied.

On the terminal, verify that the network interface has acquired the newly configured IP address:
$ ip addr show
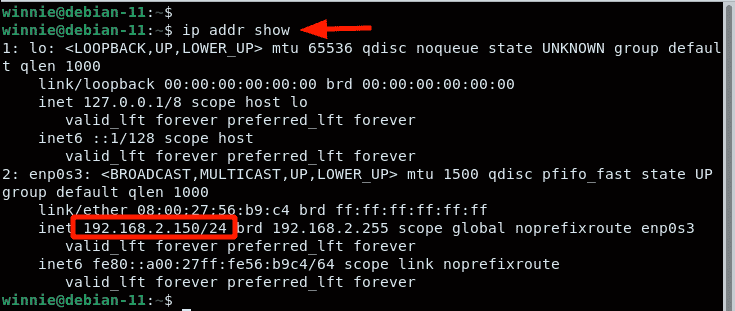
The output is a confirmation that the system was successfully configured using a static IP. Let’s now shift gears and explore setting a static IP on the command line.
Configure Static IP Address using the terminal
If you are running a headless server, or are connecting to a remote server via SSH, the only option available is to configure the static IP on the command line.
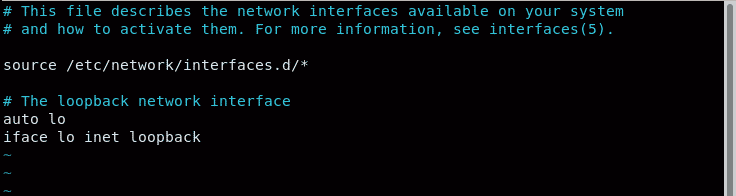
The network configuration settings are stored in the /etc/network/interfaces file. Have a peek at the file as follows. Feel free to use Nano editor if you don’t have vim installed.
$ sudo vim /etc/network/interfaces
By default, only the loopback settings are specified.
We are going to specify the IP settings for our active network interface. But before making any changes, make a backup of the configuration file.
$ sudo cp /etc/network/interfaces /etc/network/interface.bak

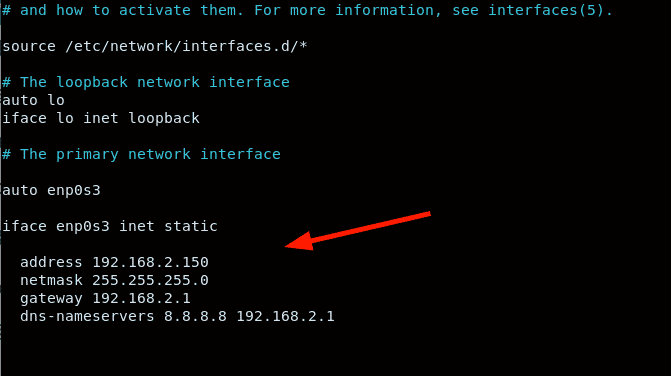
Specify the IP settings as provided. Ensure to make your settings in accordance with your network subnet.
auto enp0s3

iface enp0s3 inet static

 address 192.168.2.150

 netmask 255.255.255.0

 gateway 192.168.2.1

 dns-nameservers 8.8.8.8 192.168.2.1
To apply the changes, restart the networking service.
$ sudo systemctl restart networking
NOTE:
This will disconnect you from the server if you are connected via SSH. Reconnect using the newly set static IP address.

Conclusion
We have outlined two methods of assigning a static IP on your Debian 11 PC – using GUI and the terminal. The former is the easier option when working on a Debian desktop and the latter comes in handy when configuring a remote server via an SSH client.

Karim Buzdar holds a degree in telecommunication engineering and holds several sysadmin certifications including CCNA RS, SCP, and ACE. As an IT engineer and technical author, he writes for various websites.


