The CHOWN command in Linux is used for changing the ownership of a file. This ownership can be at the user level as well as at the group level since a file in Linux always belongs to a certain user and a certain group. This article has been designed to share with you the usage of the CHOWN command in Linux.”
How to Use the CHOWN Command in Linux?
First of all, before starting to use the CHOWN command in Linux, it is good to have a look at its help manual, which can be done by executing this command:
$ chown --help
![]()
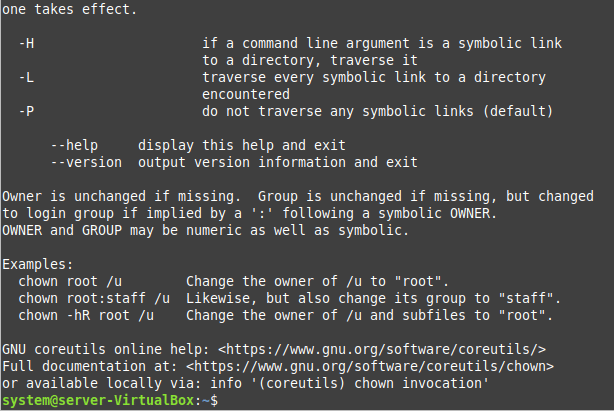
The help manual of this command is as follows:

Now, you can learn the basic usage of this command by going through the examples that we have crafted for you.
Example # 1: Change the Ownership of a Single File
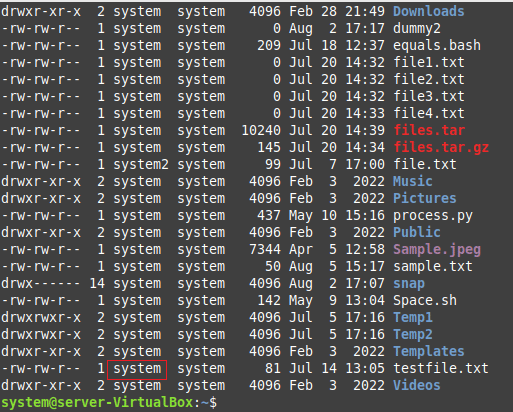
In this example, we will attempt to change the ownership of a single file in Linux. For that, we will first list down all the files of our Home directory with the help of the command given below:
$ ls –l
![]()
The following image shows all the files of our system’s Home directory. We will be changing the ownership of the file named “testfile.txt” from “system” to “system2”.

For changing the ownership, we will run the command shown below:
$ sudo chown system2 testfile.txt
![]()
Here, “system2” represents the name of the new owner.
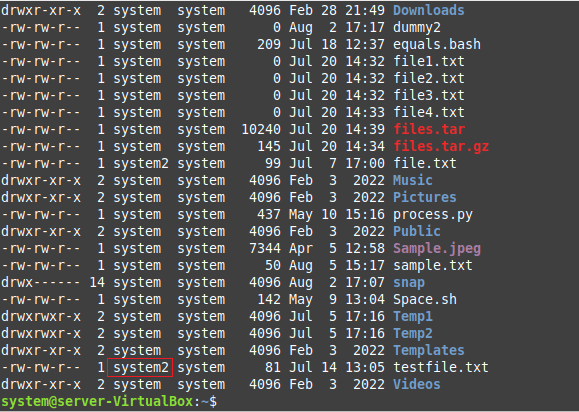
After running this command, you will not get any output. Therefore to confirm if the ownership of the said file has been changed successfully or not, you will have to run the “ls -l” command again. You can verify from the following image that the ownership of the said file has successfully been changed to “system2”.

Example # 2: Display the Change of Ownership on the Terminal
In this example, we want the change of ownership to be displayed in the output of the CHOWN command. Therefore, we will run it this time as shown below:
$ sudo chown –c system2 testfile.txt
![]()
The following output explicitly displays the change of ownership:

Example # 3: Change the Group of a Single File
Now, we will be using the CHOWN command for changing the group to which a file belongs in Linux. We will execute the command shown below for this purpose:
$ sudo chown –c :system2 testfile.txt
![]()
This command will change the group ownership of the file named “testfile.txt” to “system2,” as shown in the following image:

Example # 4: Change Both the Ownership as well as the Group of the File at Once
Finally, we will attempt to change both the ownership as well as the group to which the file belongs at once. For that, we will make use of the command shown below:
$ sudo chown –c system2:system2 testfile.txt
![]()
This command will change the ownership as well as the group to which the file “testfile.txt” belongs to “system2,” as shown in the following image:

Conclusion
This article discussed the basic usage of the CHOWN command in Linux. This command serves the purpose of changing the ownership of a file in Linux at the user level as well as at the group level. Once you go through all the examples that have been shared in this article, you will conveniently be able to use this command in Linux.


