A dual-boot system allows you to run two OS on a single machine. Dual-booting Windows 11 and Linux Mint 22 is a perfect way to appreciate what both operating systems have to offer. Windows 11 provides full support for gaming and productivity-related software, whereas Linux Mint 22 is known for being safe, customizable, and developer-friendly.
This article will go over how to set up a dual-boot system safely and efficiently.
How to Dual Boot Linux Mint 22 and Windows 11
You can select the operating system you wish to use each time you boot your computer with dual booting. You will need to partition your hard drive first to allocate space for the installation of Linux Mint 22. After that, get a USB drive and install the Linux Mint 22 installer on it to create a bootable USB. The system will then display a boot menu when powered on, allowing you to choose which operating system to run.
Prerequisite: Verify the Dual Boot Requirements
To configure a machine for dual booting, the following must be checked:
- Must Have Disk Partitioned Windows 11
- An empty disk partition (minimum of 20 GB of space is ideal for the Linux Mint 22 install)
- A Linux Mint 22 Distribution ISO File
- USB Flash drives (minimum 5 GB)
Follow the steps below to setup dual booting on Windows 11 alongside Linux Mint 22:
Step 1: Back-Up Your Important Files
It is always smart to keep a copy of all important documents, images, and files using any external storage device such as an external hard disk, USB flash drive, or cloud-based services such as Google Drive, One Drive, Dropbox, etc. before making alterations to the operating system’s partitioning and booting settings. Doing so will allow users to restore important files in case something goes wrong during the process.
Step 2: Make a USB Drive Bootable
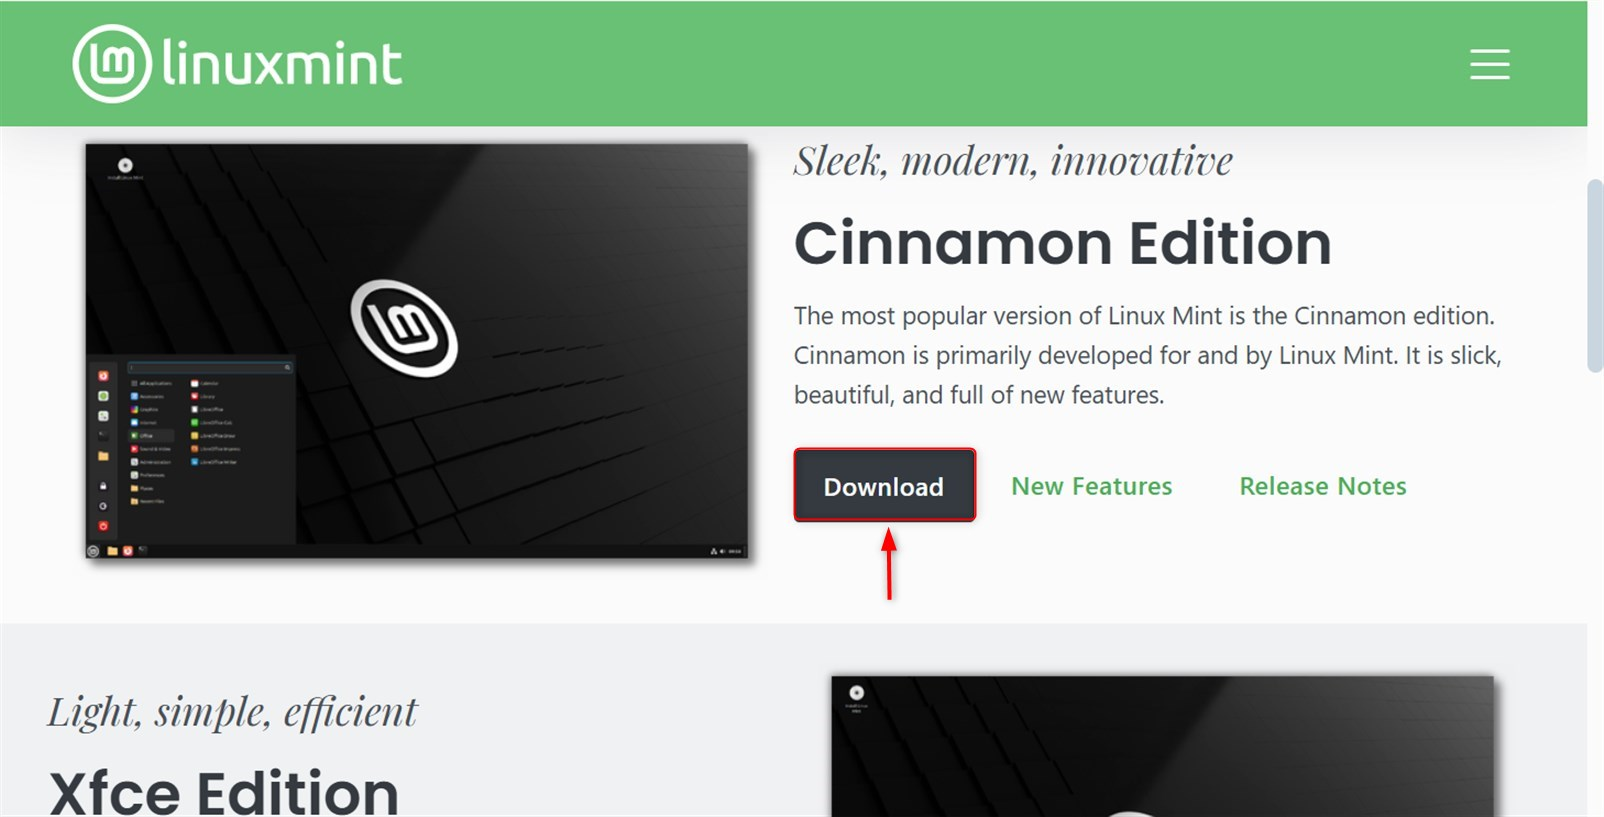
Some of the most useful Linux distributions are Linux Mint 22 (easy to use), Fedora (innovative), and Debian (stable, customizable). In this instance, we select Linux Mint 22 and grab the ISO file from the official website.
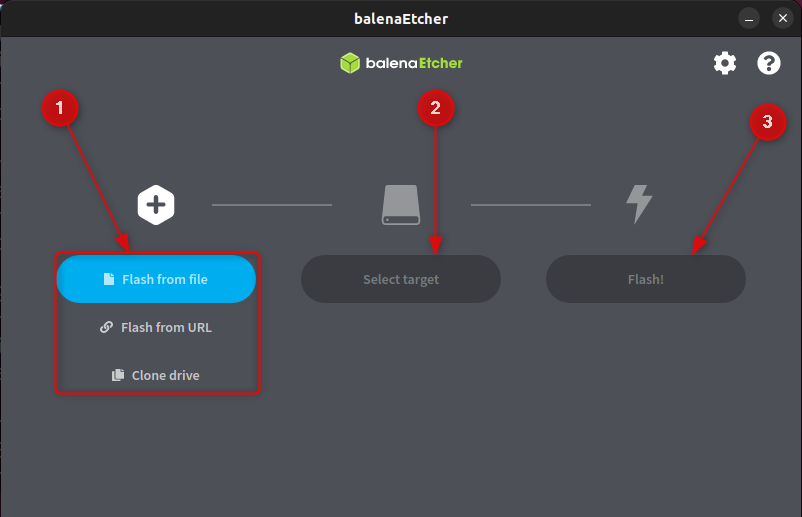
To accomplish this task, one will need a means of creating a bootable USB drive, such as Rufus (Windows), Balena Etcher (cross-platform), or UNetbootin. As mentioned above, we chose Balena Etcher, which can be obtained from the official website.
Let’s plug in your USB drive. Now, Etcher can be opened. After launching the application, pick the Linux Mint 22 ISO file you have previously downloaded. Then, choose your USB drive as the desired location. Finally, hit the “Flash” button:
Now you can eject ESP safely, having completed all the aforementioned steps, you will possess a USB drive that is readily accessible for installation.
Step 3: Partition Your Hard Drive
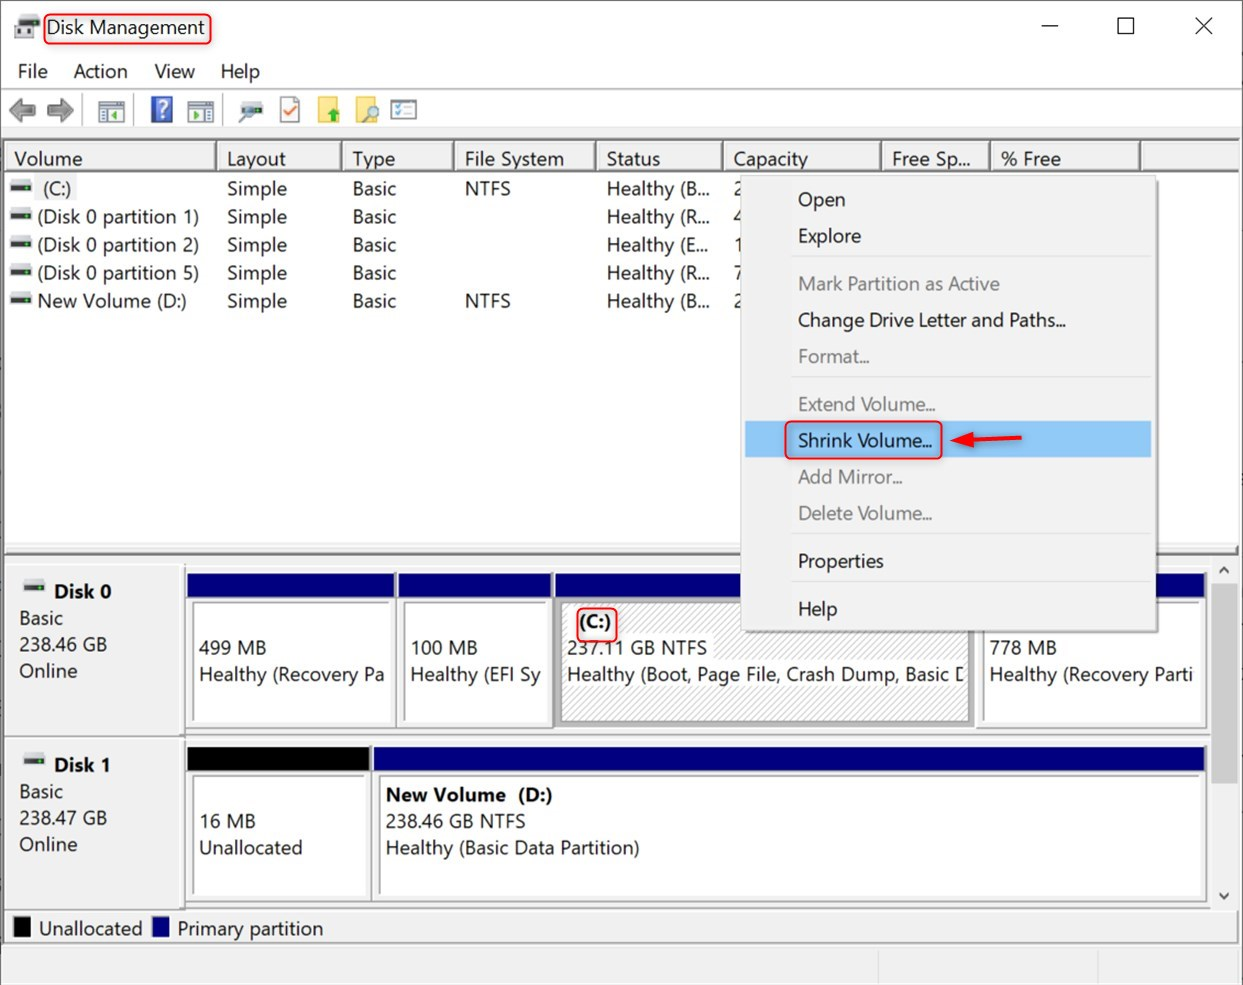
You have to set aside free space on your hard disk by reducing the size of the Windows partition to accommodate Linux Mint 22 because it requires its partition. You must use Disk Management to modify the configuration of partitions on your hard disk. You can access it by simultaneously pressing the Windows Key and the X key to bring up a menu.
Look for the main drive, which is usually marked as C:. Finally, right-click on it and pick the Shrink Volume option:
Then, indicate how much space you want to reduce. To choose a minimum of 20GB for Linux Mint 22, but if you install many applications, then more space is needed and click Shrink:

Note: Do not create a partition at this step because Mint 22 will handle all the installations during the installation process. It will automatically utilize the space marked as unallocated for Mint 22.
Step 4: Disable Secure Boot (for UEFI Systems)
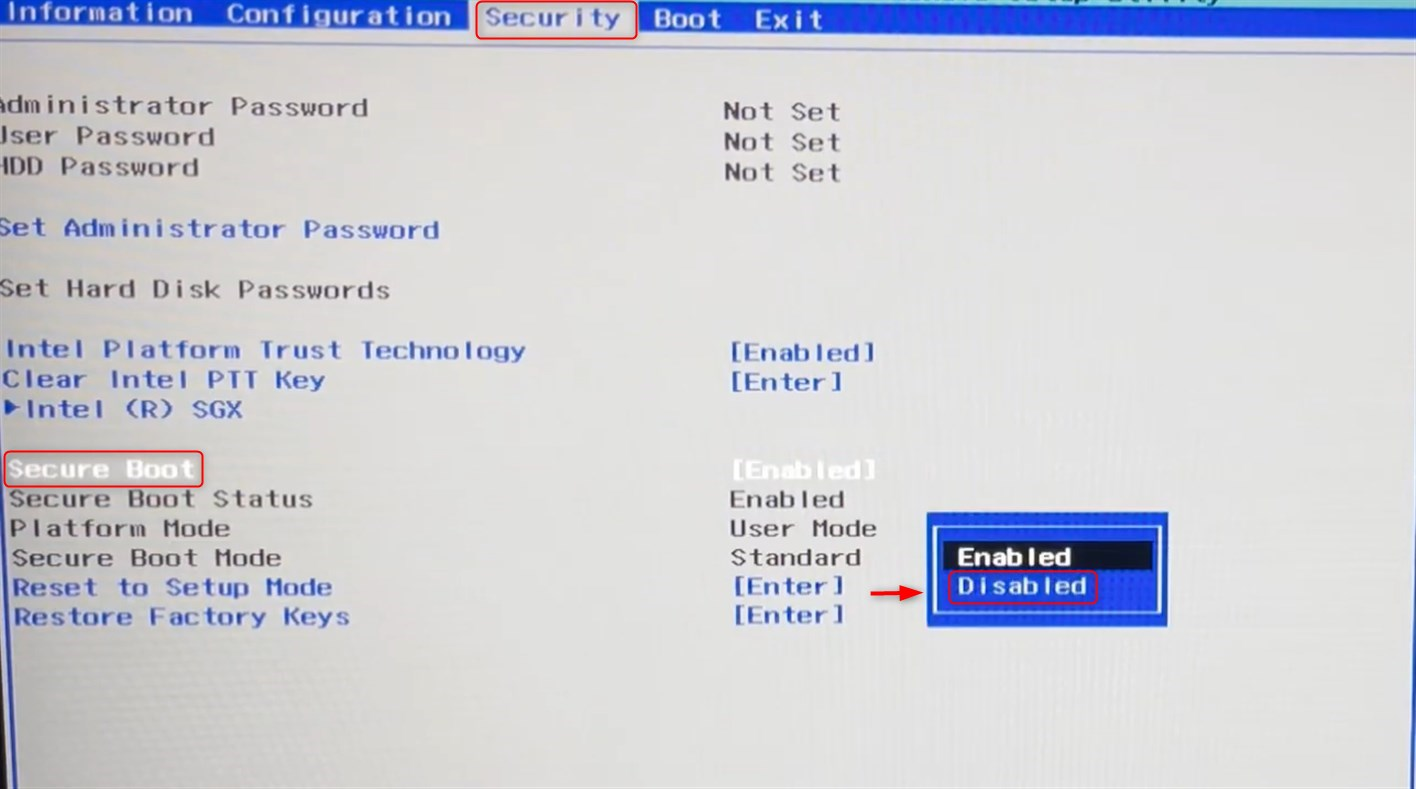
In some of the new computers, Secure Boot comes enabled and this will restrict running Linux Mint 22 on your system.
Secure Boot can be disabled by restarting your computer and entering the BIOS/UEFI settings by pressing one of the following keys: F2, F12, DEL, or ESC (this differs according to the manufacturer). Finally, look for the Secure Boot option under the Security settings and set it to Disabled. Now, exit the interface after saving the modifications:
Step 5: Boot into the Linux Mint 22 Installer
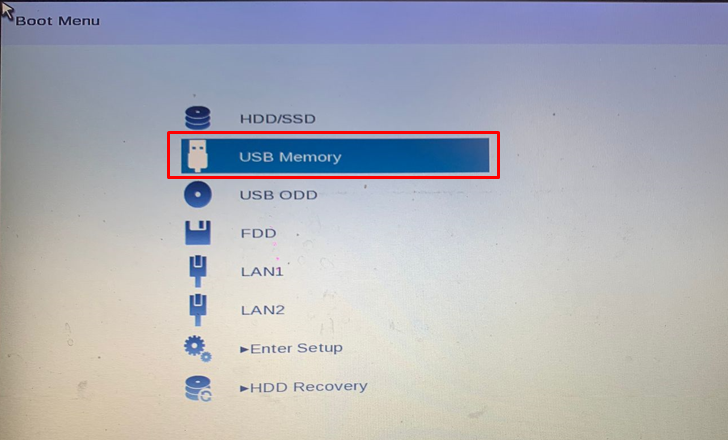
In order to begin the installation process, first restart the system. During the system startup, you will have to pay attention to the screen and interrupt the normal booting process by pressing a certain key, usually F12, ESC, or a different key, depending on your computer model. It will display the Boot Menu. (This may also vary from one system to another).
From the displayed boot options, choose your USB Memory and confirm your selection by pressing Enter so as to set the boot order to start with the USB:
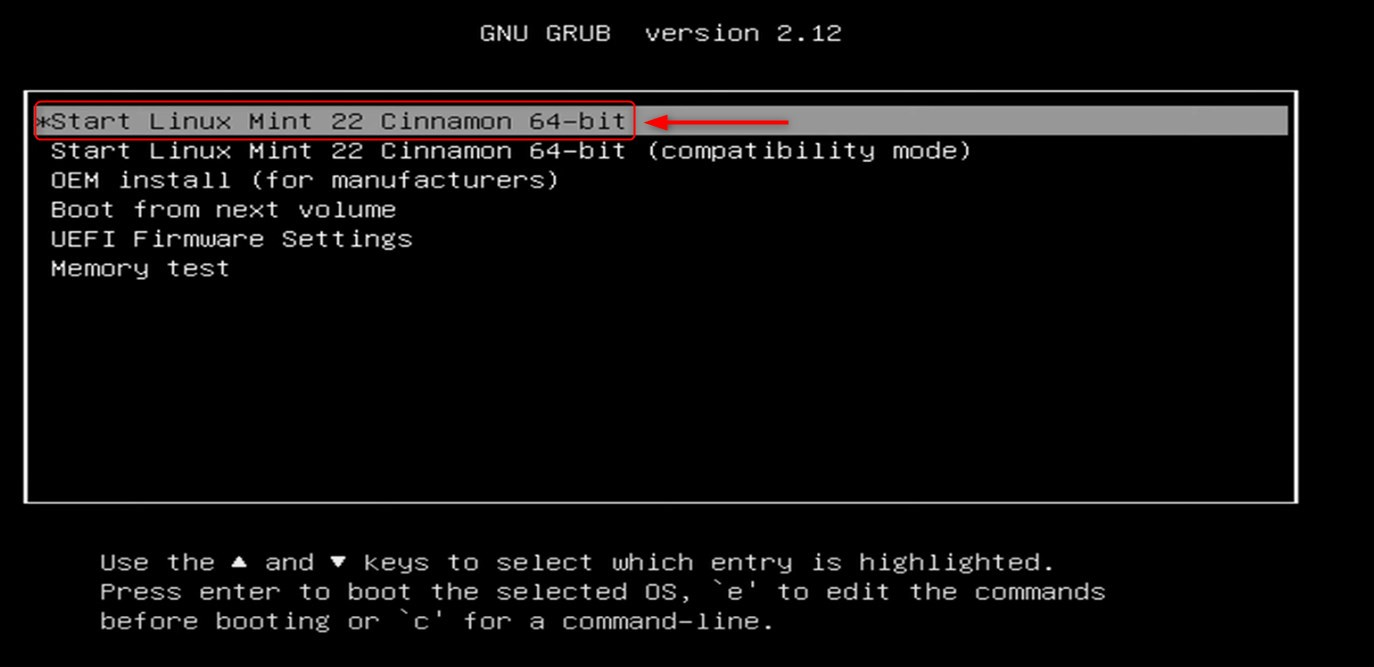
Most Linux OS have the choice of ‘Start Linux Mint 22’. In our scenario, we will select ‘Start Linux Mint 22 Cinnamon 64-bit’:
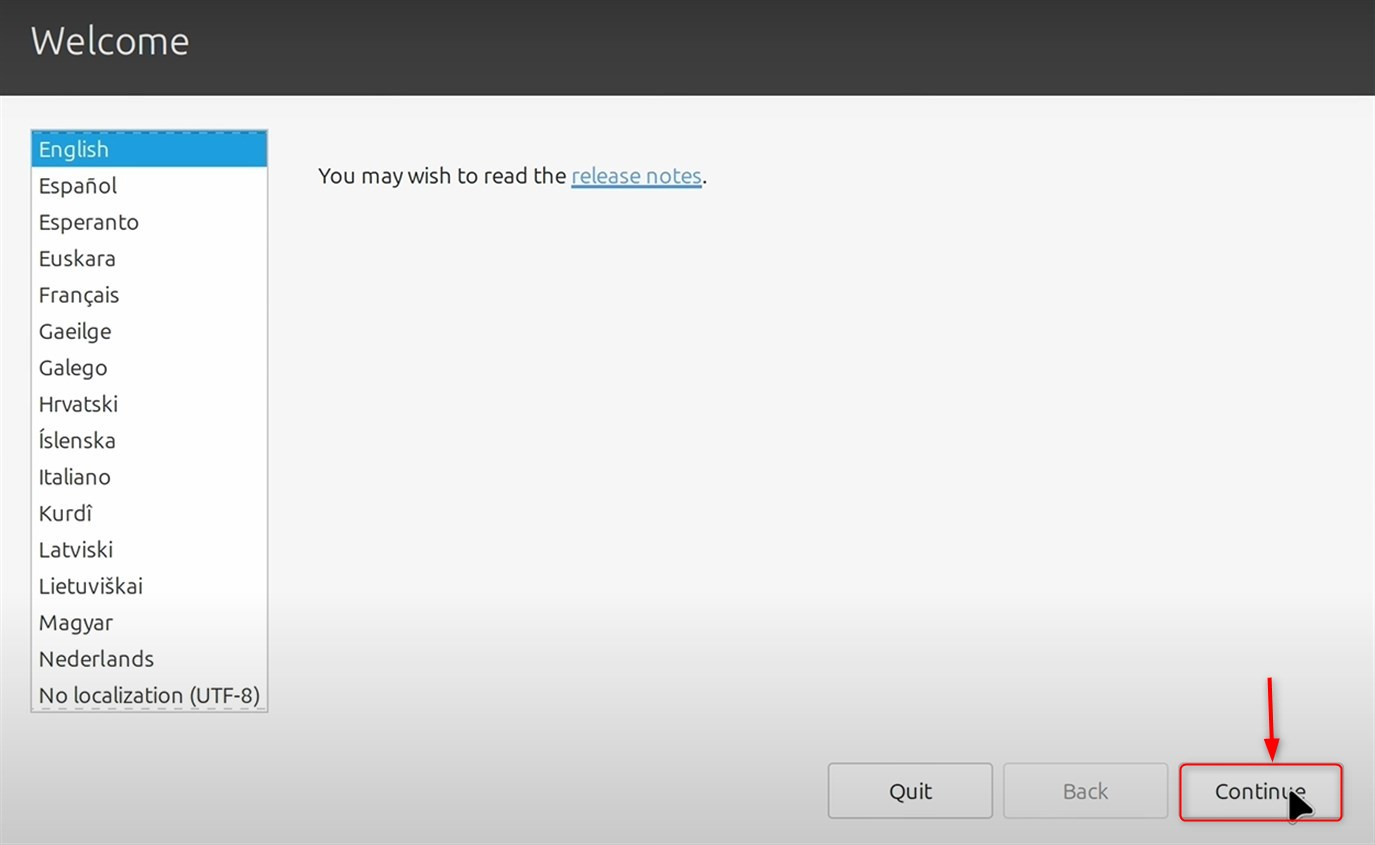
Proceed with the on-screen prompts and progress by selecting the language, region, date and time, etc.:
Step 6: Install Linux Mint Alongside Windows
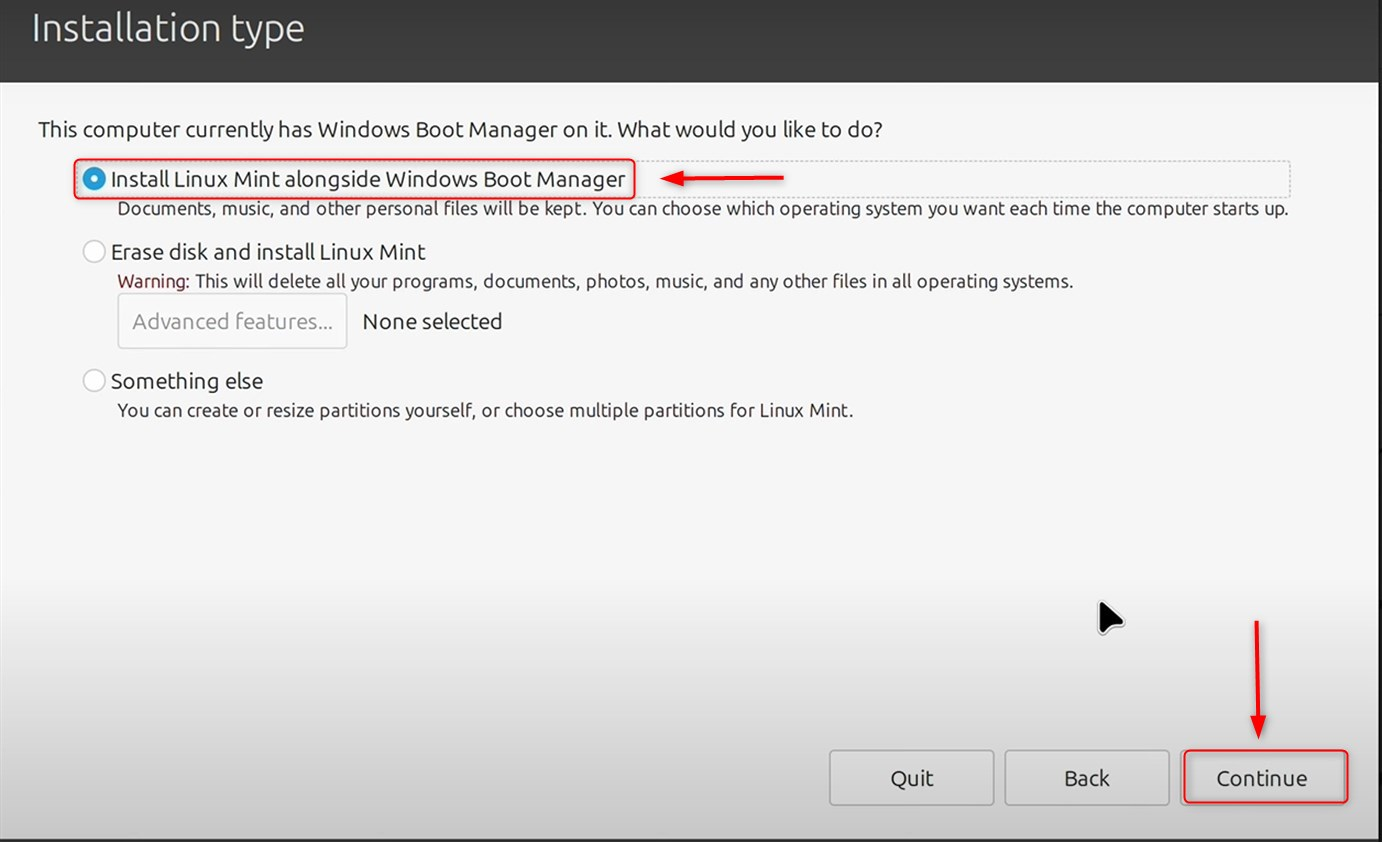
When prompted, select ‘Install Linux Mint alongside Windows Boot Manager’ and hit ‘Continue‘:
For advanced customized disk setups, select Manual installation. Find the Unallocated Space you created earlier, and format it to ext4, the Linux file system, mapped with Linux OS. Optionally, if RAM is confined, a swap partition for system memory can be created (equal to or double your RAM size). Furthermore, select the bootloader’s installation position (which should be on the same drive) /dev/sda if it is hosted with Windows.
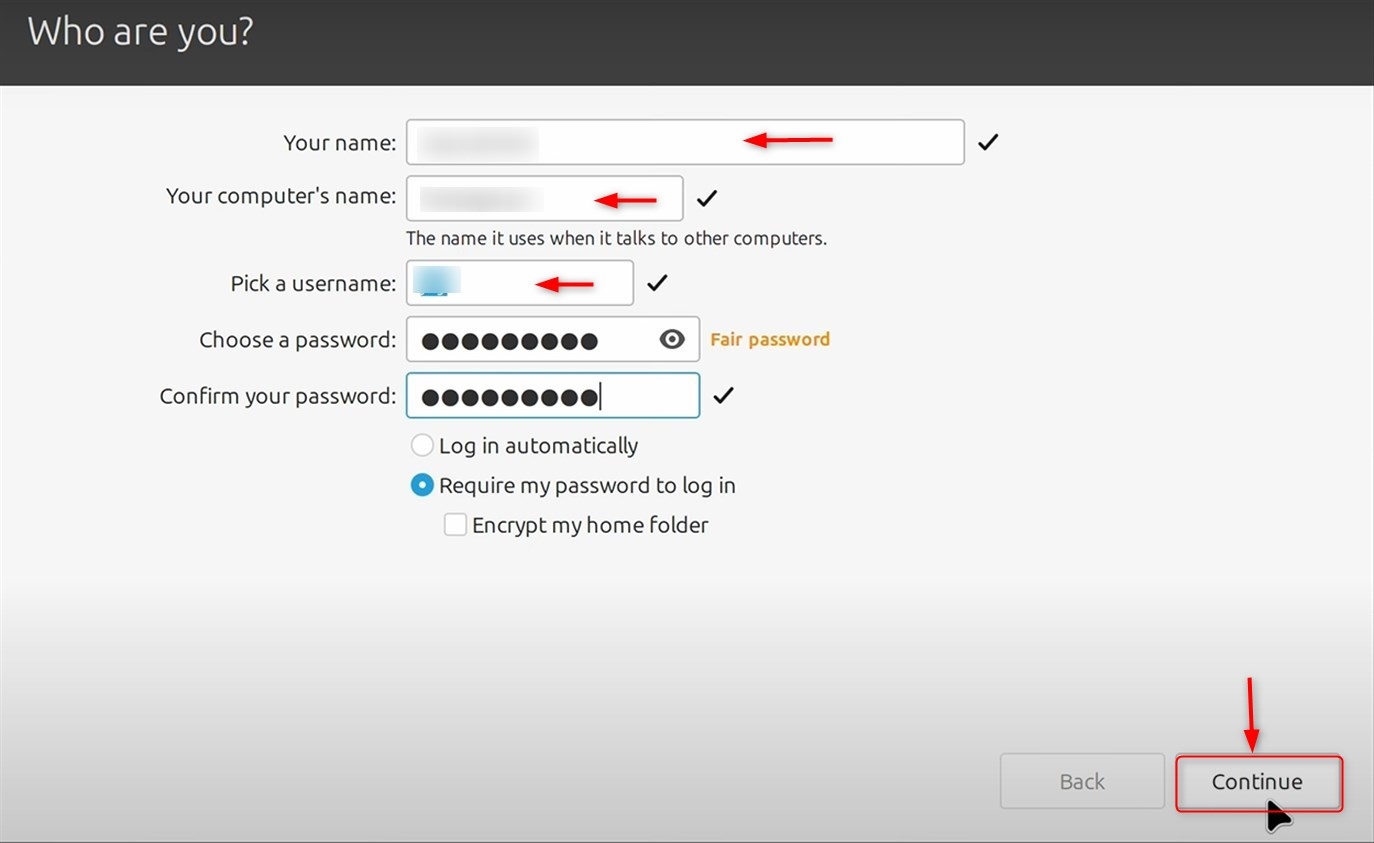
Set your name, computer name, username, and password for the Linux distribution to create an account. Afterwards, click the Continue button. Completing this step takes some time:
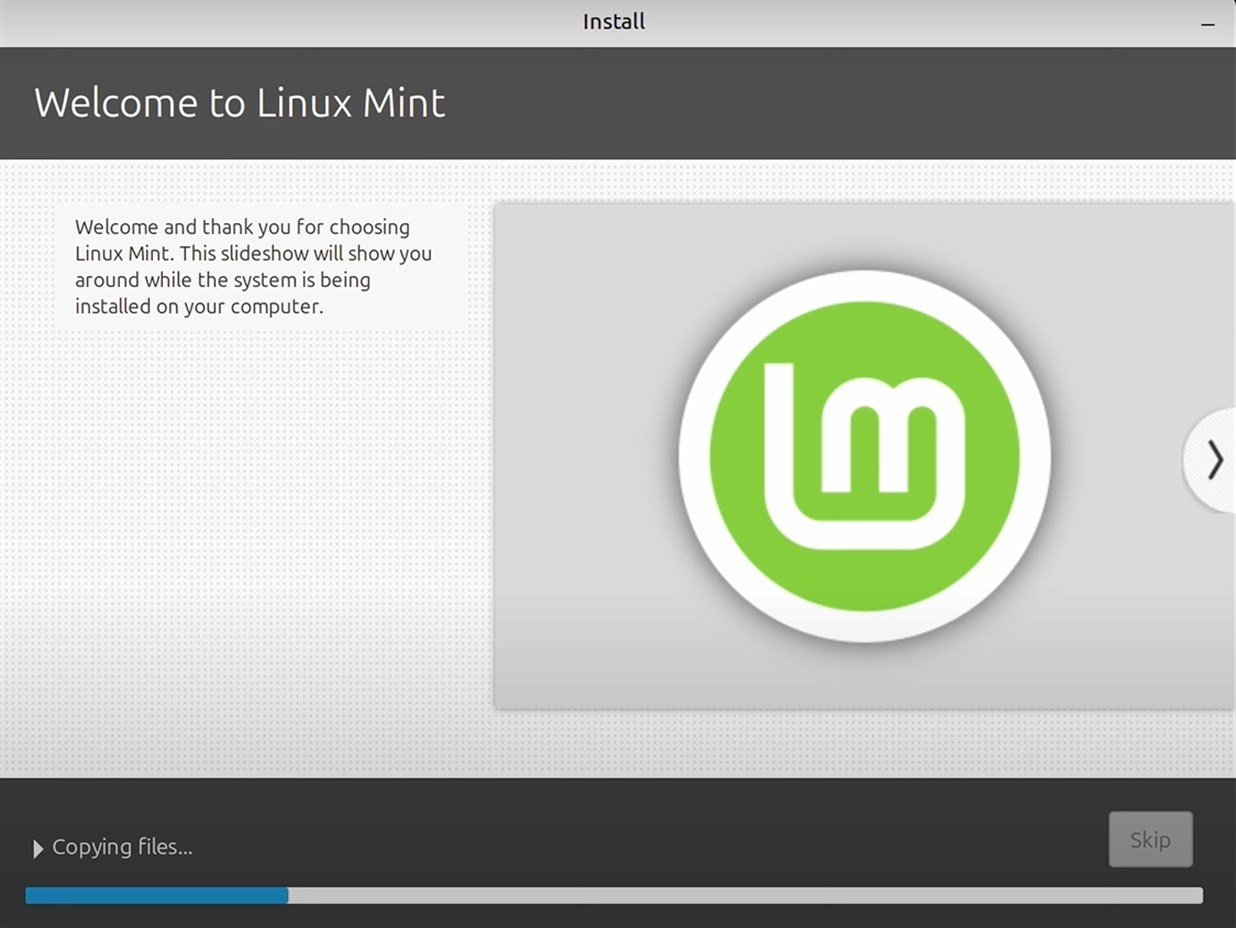
Follow the procedure that you see on the interface to end the installation:
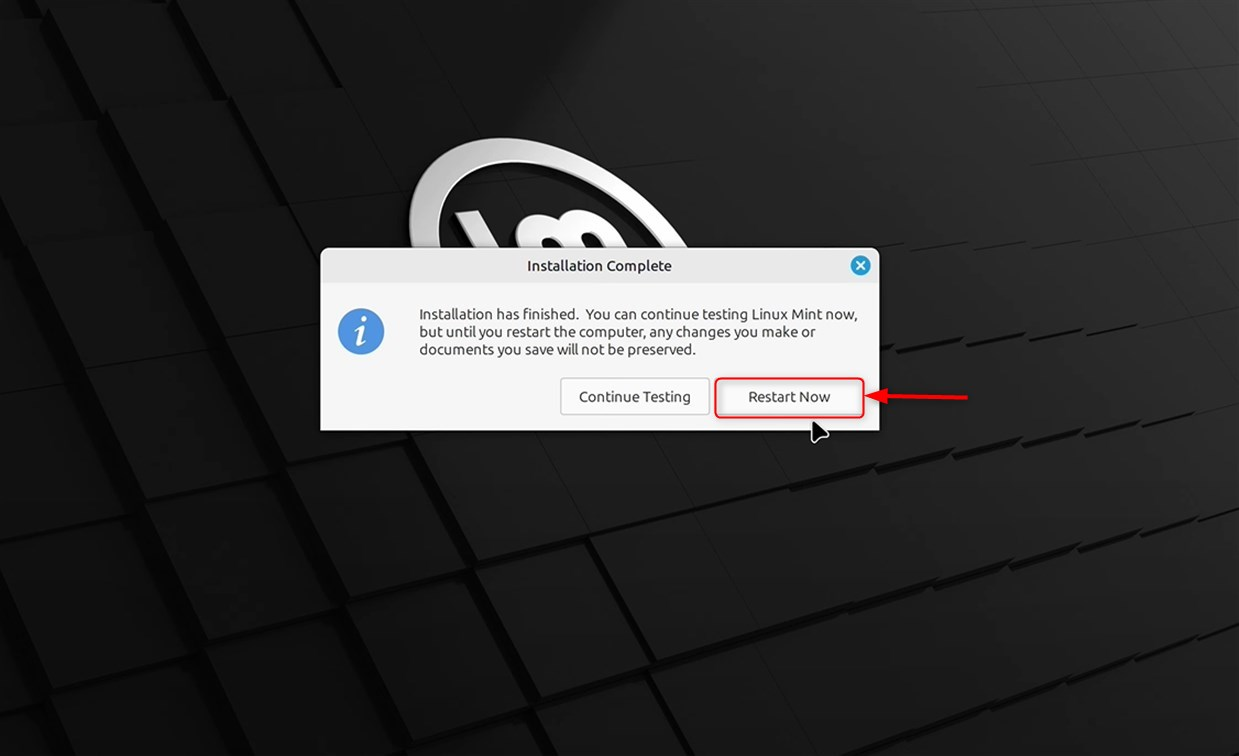
Click on the Restart Now button after Mint 22 is installed:
Step 7: Test and Reboot
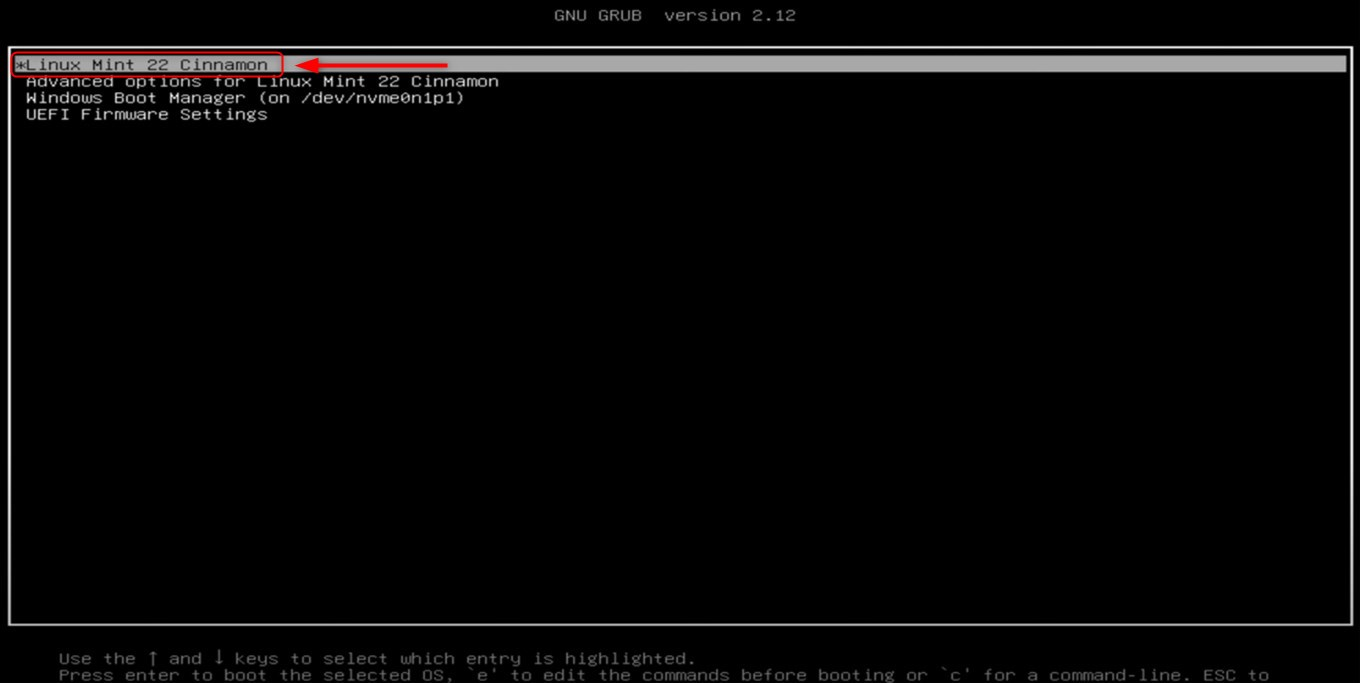
While rebooting, your system checks if the dual-boot option is functioning properly. The GRUB menu appears, which allows you to select either Linux Mint 22 or Windows. For example, if you choose to boot into Linux Mint 22 OS, confirm that both systems start without any complications:
Important: In case Windows is missing from the GRUB menu, boot into Linux Mint 22 and execute the command sudo update-grub in a terminal. This will enable Windows boot detection so that it appears in the menu. If you are having problems with booting into Linux, check that the Secure Boot setting is off.
You can now run the Linux distribution Linux Mint 22 and explore its features:
This concludes the guide for dual-booting Linux Mint 22 with Windows 11.
Conclusion
With the dual booting of Windows 11 and Linux Mint 22, users are able to accommodate both operating systems in a single computer. Be it a developer, a student or an average user, the setup allows people to use Windows for general-purpose work and Linux Mint 22 for deep customizations and security. Following the stated steps will ensure a safe installation of Linux Mint 22 alongside Windows without any data loss.

Karim Buzdar holds a degree in telecommunication engineering and holds several sysadmin certifications including CCNA RS, SCP, and ACE. As an IT engineer and technical author, he writes for various websites.