Introduction:
XAMPP is a very well-known web server that is used to host applications that are based on PHP, Perl, MySQL, and Apache. The best thing about hosting applications on this web server is that you do not need to perform any extra configurations rather you can simply go with the default configurations and start using this webserver straightaway after installing it. If you have yet not installed this web server, then you can follow our tutorial on installing the XAMPP server on Linux Mint 20. After installing this web server, you will be all set to follow today’s tutorial that will teach you the method of working with the XAMPP server on Linux Mint 20.
Method of Working with XAMPP Server in Linux Mint 20:
For working with the XAMPP server in Linux Mint 20, we would like to demonstrate to you the method of creating a simple PHP application and then hosting it on the XAMPP server. To achieve this goal, you will have to go through the following four simple steps:
Step # 1: Verifying the Installation of XAMPP on Linux Mint 20:
First, you need to verify if the XAMPP server is installed on your Linux Mint 20 system or not. For that you need to launch your terminal start running the XAMPP server using the command stated below:
sudo /opt/lampp/lampp start
![]()
If this command is executed successfully and the output shown in the following image is displayed on your terminal, then it means that your XAMPP server has started running in the background.

Now you need to launch any browser of your choice preferably Mozilla Firefox in case of Linux Mint 20, and then type the following URL in the address bar of your browser:
www.localhost/

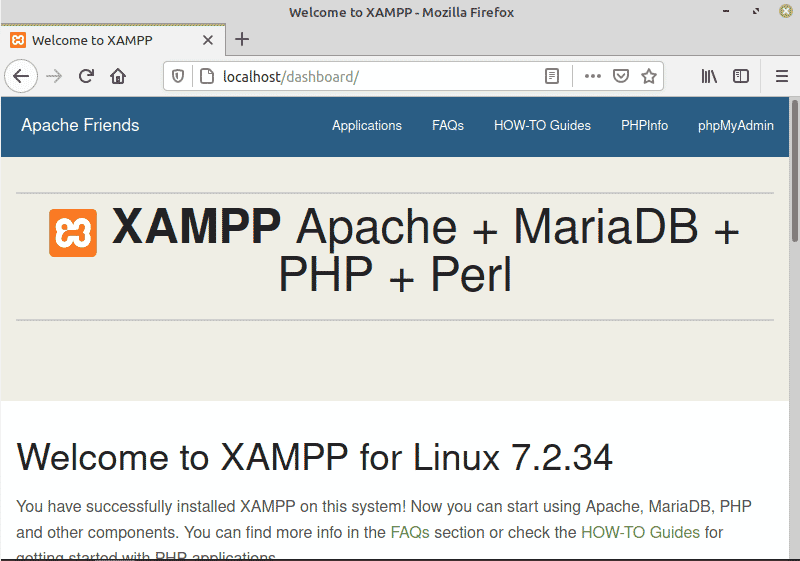
Entering this URL into your browser’s search bar will take you to the XAMPP server’s dashboard if it has been successfully installed on your Linux Mint 20 system as shown in the image below:

Step # 2: Navigating to the Document Root Folder:
Now when it is verified that your XAMPP server is installed on your Linux Mint 20 system, it is the right time to navigate to your document root folder where you can create your PHP application that you want to run on your XAMPP server. At this point, you can simply stop running your XAMPP server with the “sudo /opt/lampp/lampp stop” command so that you can rerun this server once you have created your application. For navigating to the document root folder in Linux Mint 20, you need to execute the following command in your terminal:
cd /opt/lampp/htdocs
![]()
Executing this command will change the path of your terminal from your Home directory to the /opt/lampp/htdocs directory. We have navigated to this directory because the XAMPP server can only read and run those applications that have been stored in this directory.
Step # 3: Creating a Simple PHP Application:
Now when we have navigated to the document root folder, we can create a simple PHP application by running the command stated below in our terminal:
sudo nano NameOfApplication.php
Here, you need to replace NameOfApplication with whatever name you want for your PHP application. We wanted to name our application MyFirstPHPApplication. Also, you can even choose any text editor of your choice for creating this application other than the nano editor.
![]()
Once you will run the above-mentioned command, a PHP file will open with the nano editor in which you need to type the script shown in the following image. In this script, “<?php” refers to the starting tag of a PHP script whereas “?>” refers to the ending tag of a PHP script. Between these two tags, you can write the code of whatever functionality you want for your PHP application. In our case, we only want our application to display a message to the user. Therefore, we have typed that message after the “echo” command. Then you need to save your PHP file and then close it.

Step # 4: Running the Created PHP Application on XAMPP:
By now, our PHP application is ready and we are all set to run it. But before running it, we need to navigate back to our Home directory by executing the “cd” command in our terminal. Now we need to start our XAMPP server again by executing the command shown in the image below:
![]()
If the XAMPP server is started successfully, then you will see the following message on your terminal:

Now you need to access your browser and in the address bar, you need to type the address of your newly created application after “localhost” i.e. your complete address will be as follows:
www.localhost/MyFirstPHPApplication.php

When you will enter this URL in the address bar of your browser, you will immediately be taken to your newly created PHP application’s page as shown in the image below:

Conclusion:
By following this helpful tutorial on working with XAMPP in Linux Mint 20, you can easily host your applications on this server. In this method, we only created a simple PHP application, however, you can even choose to create applications with complex functionality that are not essentially written in PHP but can also be written in Perl or MySQL.


