
Wine is a tool that enables users to execute Windows software, such as apps, programs, and games, on a Linux machine. Windows and Linux are two completely different environments, and therefore, they do not support programs or applications meant for the other system. If you are using Linux Mint 22 and wish to run some Windows applications, you can install Wine. With Wine, you will be able to run Windows programs on Linux Mint as it provides a compatibility layer for the operating system.
This post will teach you how to install and set up Wine on Linux Mint 22.
Quick Outline
- How to Install Wine on Linux Mint 22?
- Method 1: Using the Default Linux Mint Repository
- Method 2: Using the Official WineHQ Repository
- How to Setup Wine on Linux Mint 22?
- How to Run Windows Applications Using Wine on Linux Mint?
- How to Remove Windows Applications Installed With Wine on Linux Mint?
- How to Remove Wine from Linux Mint 22?
- Conclusion
How to Install Wine on Linux Mint 22?
You may install Wine on Linux Mint 22 from the default Linux repository or the official Docker repository and configure it with the “winecfg” command. Here are various methods for installing Wine on the Linux Mint system:
Method 1: Using the Default Linux Mint Repository
The primary Wine packages compatible with Linux Mint can be installed using the “apt” package manager. It automatically downloads the packages from the default Linux Mint repository. It hosts several Wine packages.
To install the Wine package on Linux Mint 22, use the default Linux repository.
Step 1: Update System Repository
You need to confirm that the package is updated by the kernel repository first:
sudo apt update && sudo apt upgrade |
|---|

Step 2: Enable 32-bit Architecture
If you have a 64-bit architecture system but wish to run 32-bit Windows programs in Wine on your Linux system. You must enable the 32-bit architecture on Windows:
sudo dpkg --add-architecture i386 |
|---|

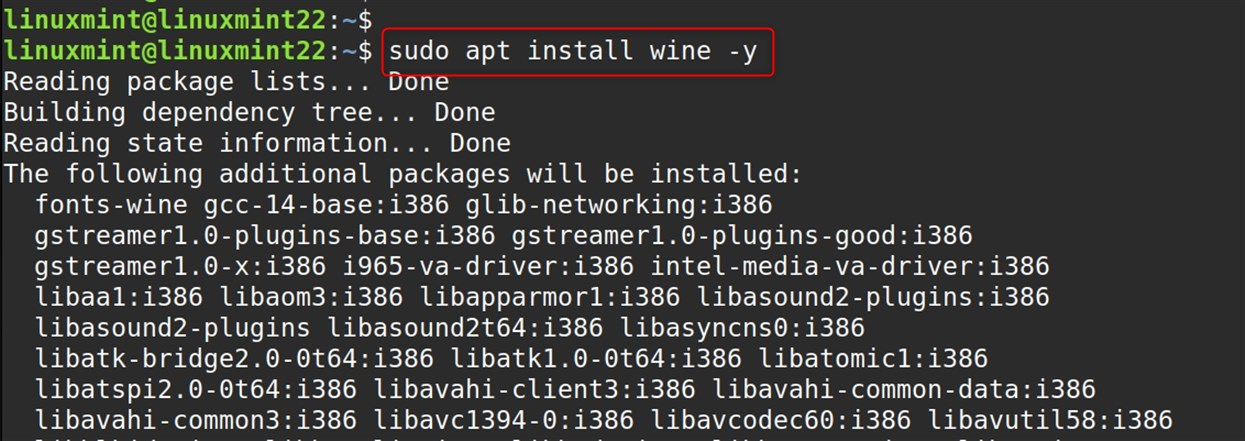
Step 3: Install Wine on Linux Mint
Now, install Wine with the command below:
sudo apt install wine -y |
|---|
Step 4: Verification
You may use the following command to see if Wine is currently running:
wine --version |
|---|

As noted, the current one is 9.0 of Wine has been installed.
Method 2: Using the Official WineHQ Repository
To install the latest version, install it from the official WineHQ repository. Hence, it is mandatory to add/import WineHQ’s official repository into the system. By doing this, it will also update automatically through the package manager on your system whenever a new version is released.
To install Wine on your device using the official WineHQ wine repository, follow the subsequent instructions:
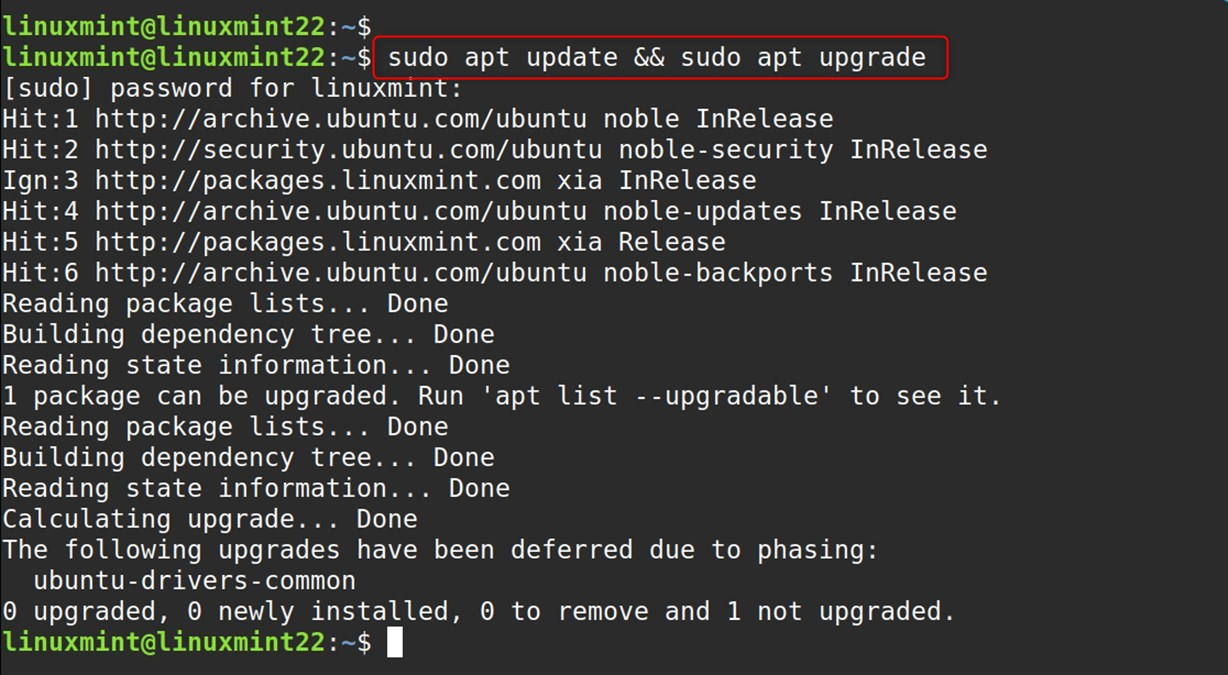
Step 1: Update and Upgrade System Repository
Start by updating and upgrading the system’s package repository by executing this command:
sudo apt update && sudo apt upgrade |
|---|
Step 2: Enable 32-bit Architecture
If you are running a 64-bit architecture system, go ahead and enable 32-bit architecture through the command.
sudo dpkg --add-architecture i386 |
|---|

Step 3: Make a Folder
Make the folder that will have the character associated with the GPG key:
sudo mkdir -pm755 /etc/apt/keyrings |
|---|
Here:
- The p refers that if the parent folders do not already exist, they will be created.
The m flag will define the directory’s permissions, so here -m755 means the directory’s owner is almighty, but others have restricted permissions.
- The default dir ‘keyrings’ will be created under the string ‘/etc/apt/keyrings’, which will hold the new directory.

Step 4: Download the Wine GPG Key
Now, execute the next command as follows concerning Wine’s repository:
sudo wget -O /etc/apt/keyrings/winehq-archive.key https://dl.winehq.org/wine-builds/winehq.key |
|---|
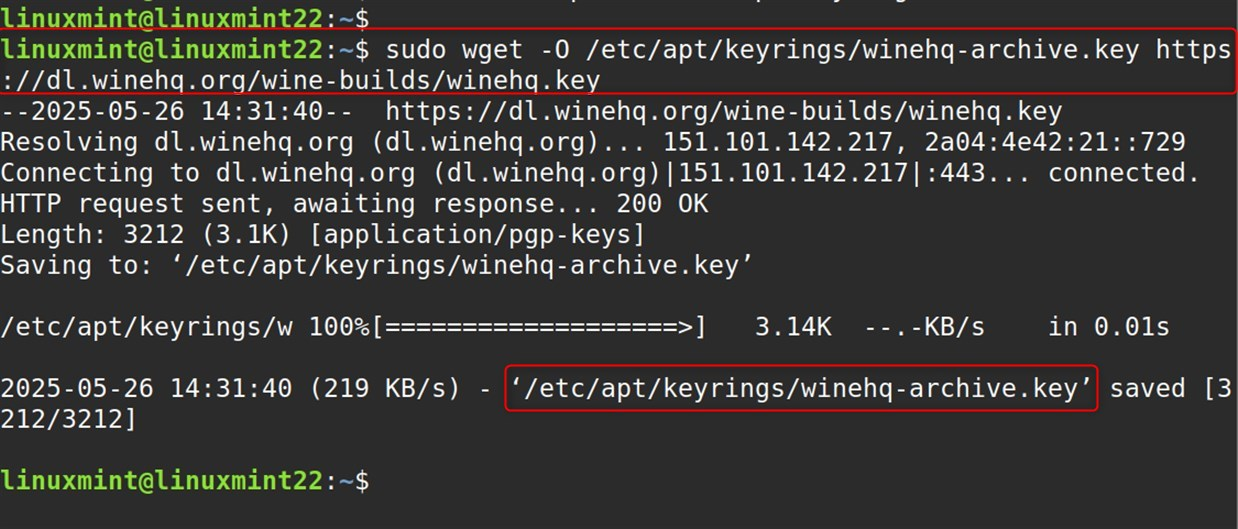
WineHQ GPG indeed has a GPG key, and you can download it by running the command. The path is named as: ‘/etc/apt/keyrings/winehq-archive.key’.
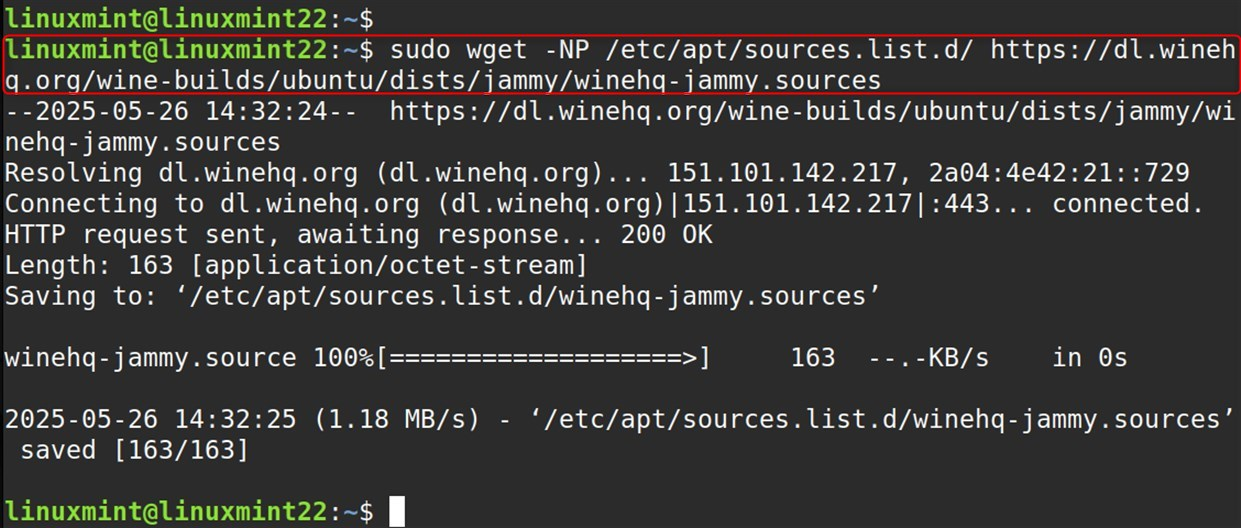
Step 5: Add WineHQ Repository
Install the WineHQ repository by executing the command given below straight to your Linux Mint:
sudo wget -NP /etc/apt/sources.list.d/ https://dl.winehq.org/wine-builds/ubuntu/dists/jammy/winehq-jammy.sources |
|---|
If you are using Linux Mint version 21, then the second command is the right choice for you:
sudo wget -NP /etc/apt/sources.list.d/ https://dl.winehq.org/wine-builds/ubuntu/dists/focal/winehq-focal.sources |
|---|
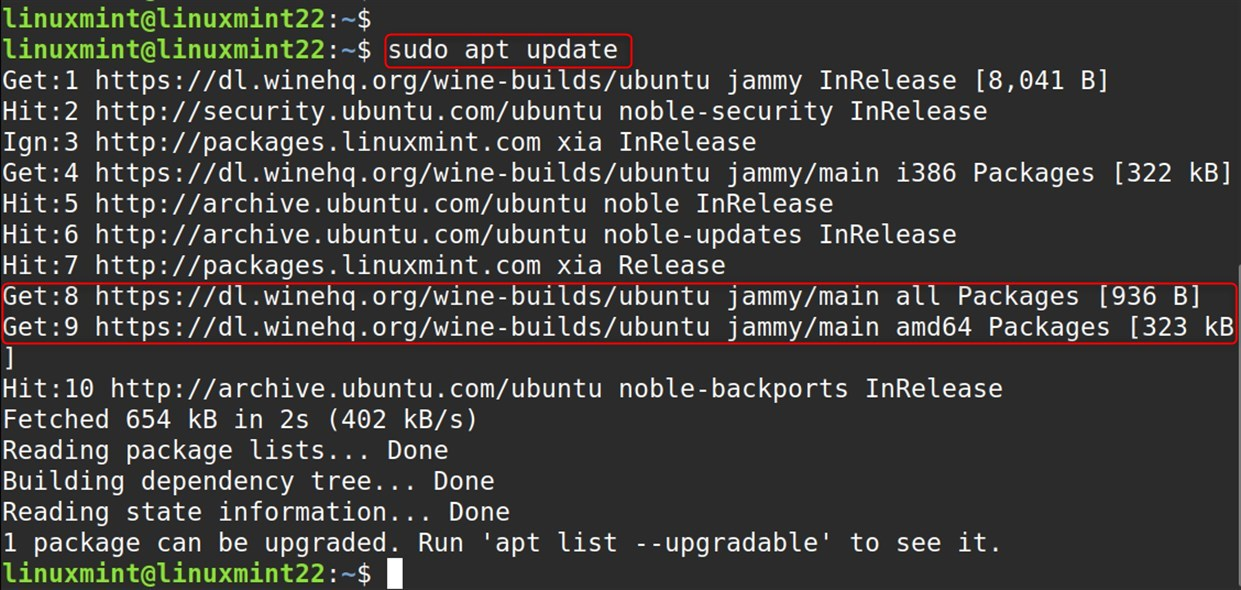
Step 6: Update System
After that, run the following command to refresh:
sudo apt update |
|---|
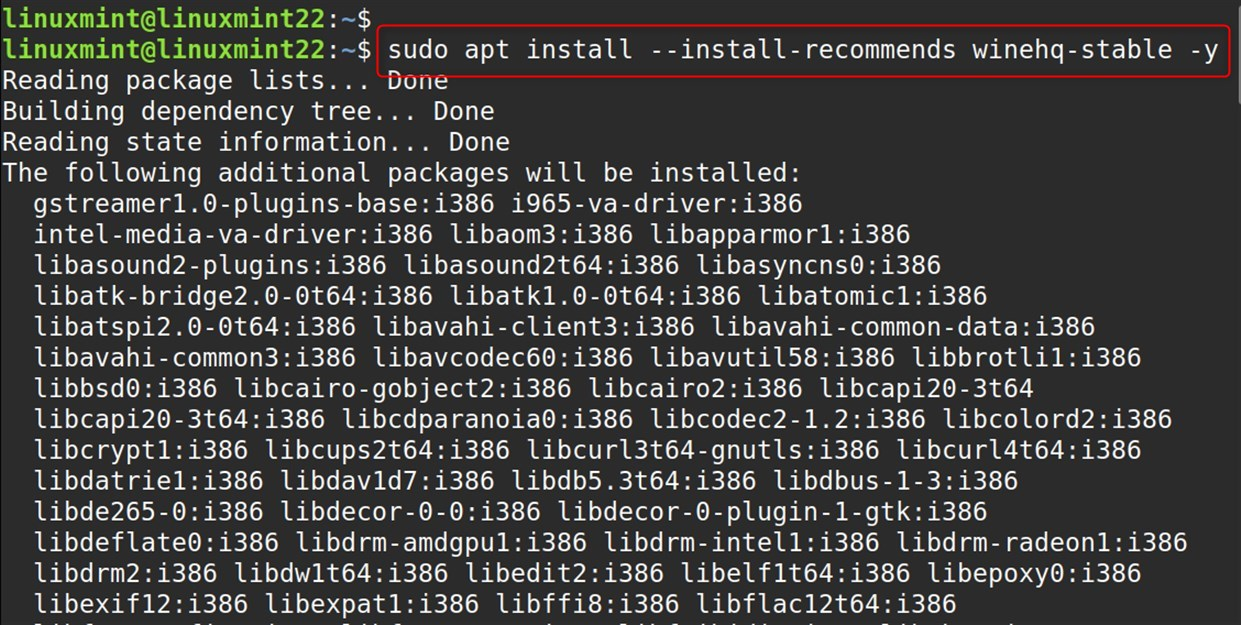
Step 7: Install Wine on Linux Mint
Install the most recent version of Wine that is trustworthy, easy to use, and stable on your device through the command given below:
sudo apt install --install-recommends winehq-stable -y |
|---|
Important: You know there are Wine’s staging and dev versions also. The staging one has experimental add-ons and enhancements under testing, while the development one is mainly intended for those who want to check the newest features and support in its evolution.
Should you prefer to acquire the development or staging release, use the command above to substitute ‘winehq-stable’ with ‘winehq-devel’ or ‘winehq-staging.’
Step 8: Verification
In the last step, you need to verify that Wine has been configured and installed correctly on your computer by running the command:
wine --version |
|---|

As you can see, Wine has been successfully installed on the machine, and the newest version is shown in its shell.
How to Setup Wine on Linux Mint 22?
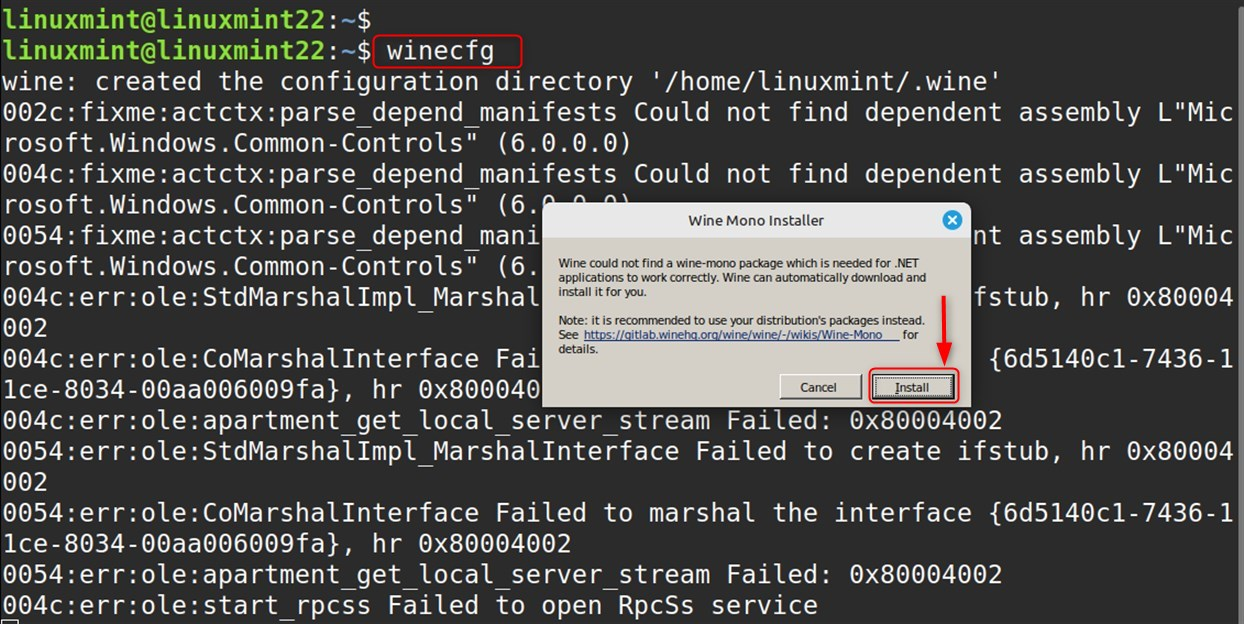
Now that Wine is properly installed on Linux Mint, you may need to do some additional configurations. To modify Wine’s Environment, use the command below:
winecfg |
|---|
Then, you will be greeted by the configuration dialogue box, which will prompt you to install Wine Mono by telling you,” You need to install Wine Mono!” Click on Install.
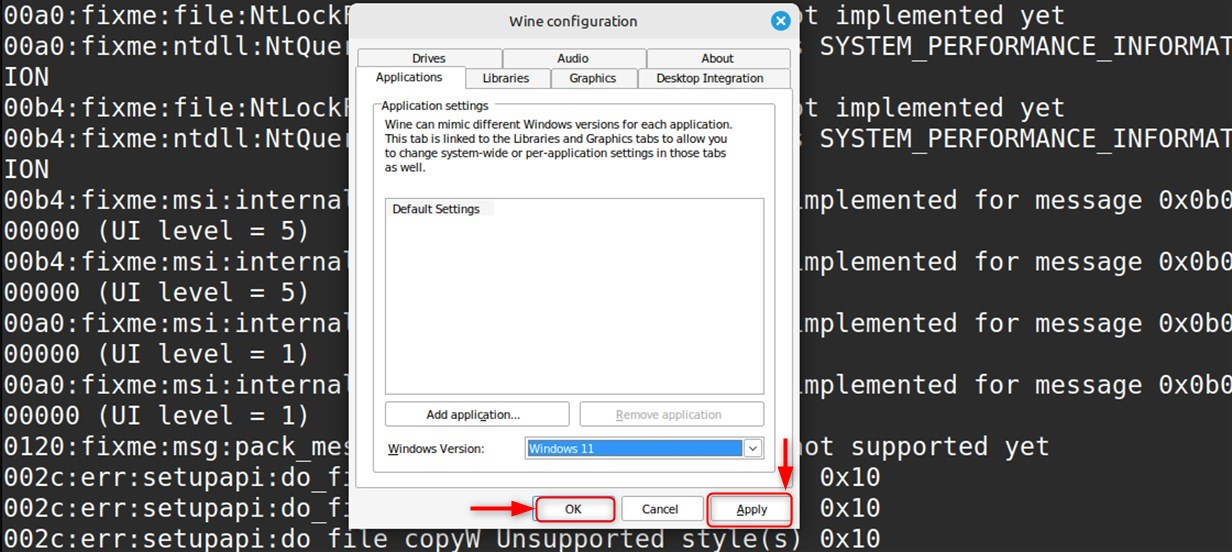
Then, you will see a new configuration window in Wine with many options available for you to configure, like Drivers, Audio, Applications, and so on. In this case, we will change the version of Windows to be emulated to be “Windows 11”:
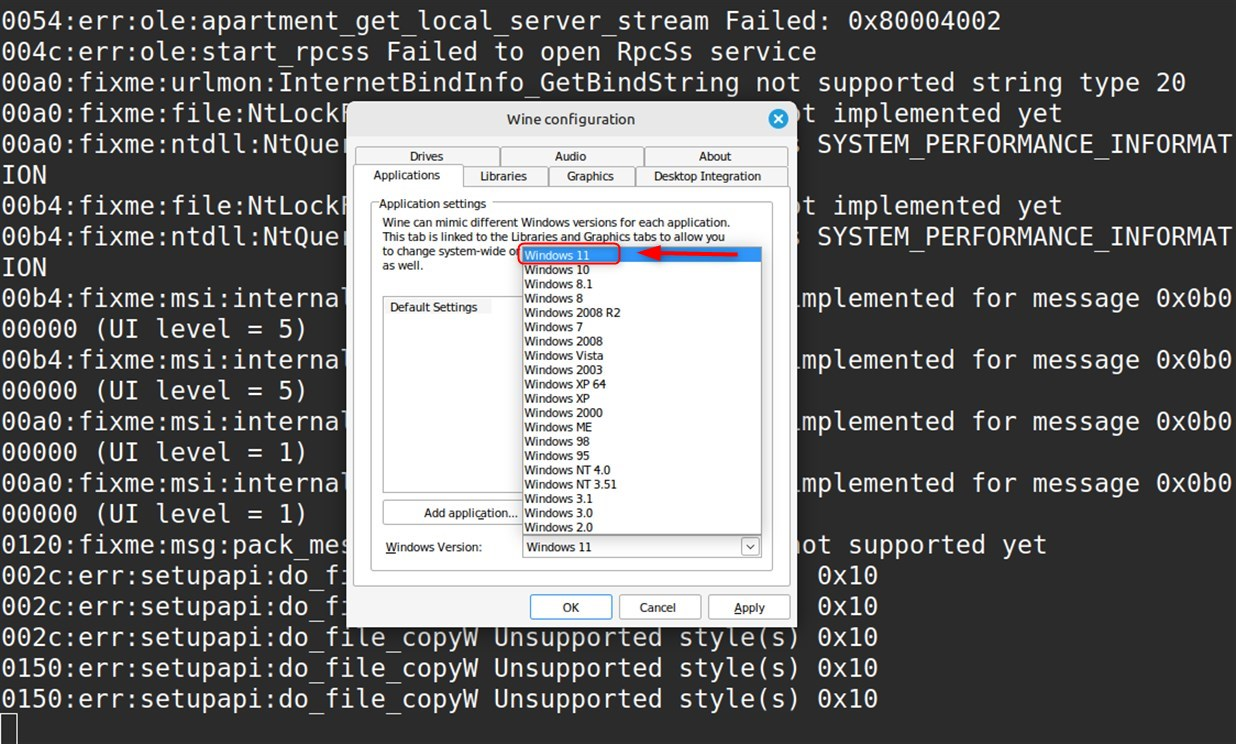
Make sure to hit “Apply” and “OK” after you are through the setup so that changes made will be captured, because if those buttons are not pressed, changes will not be saved:
How to Run Windows Applications Using Wine on Linux Mint 22?
Now that you have installed and configured Wine, you can use it to run Windows applications. The only prerequisite is to have the setup EXE file of the application saved on your computer and then run it through Wine to install. If, for example, you plan to install the “Notepad++” Windows application using Wine, follow the procedure below:
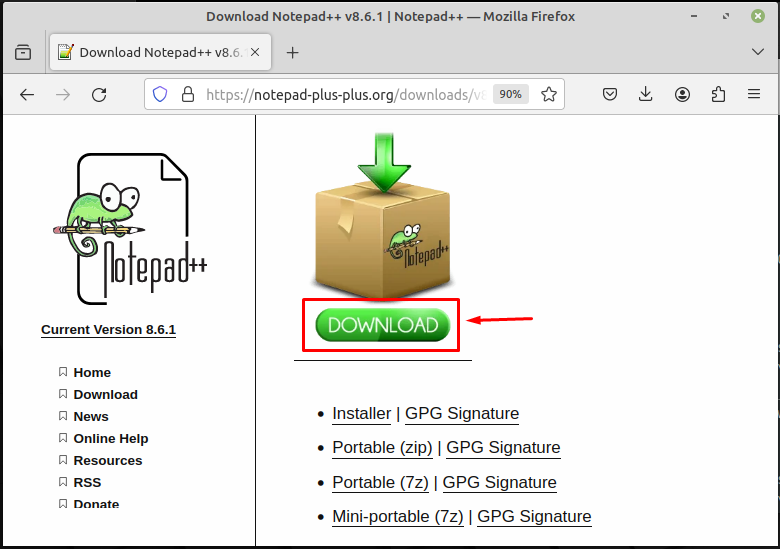
Step 1: Download Notepad++ Installer
First, go to the official Notepad++ website and download its EXE file on your computer:
Step 2: Navigate to the Downloads Directory
Then, go to the terminal and navigate to the “Downloads” folder containing the file:
cd Downloads ls |
|---|
And indeed, the “Downloads” directory consists of the installer “Notepad++” file:

Step 3: Install Notepad++ on Linux Mint Using Wine
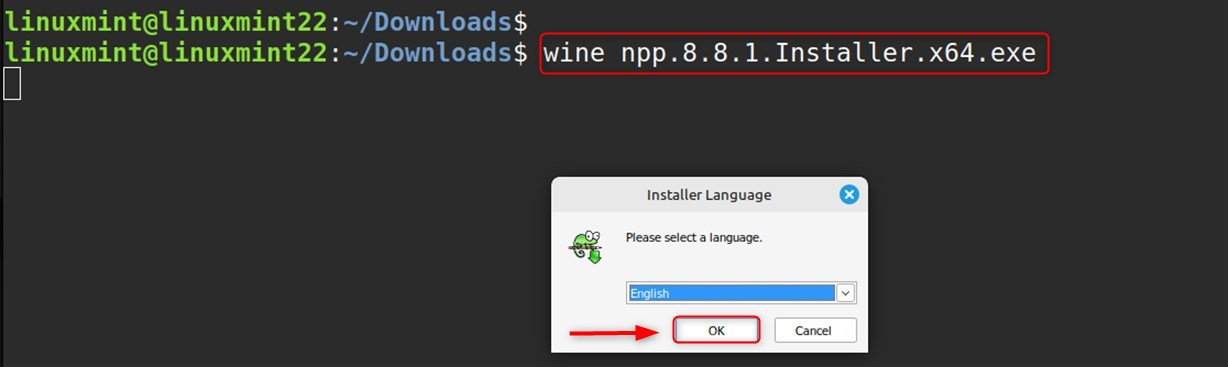
To install the Notepad++ Windows application on Linux Mint, issue the command wine and include the installer file name:
wine npp.8.8.1.Installer.x64.exe |
|---|
From the output below, we have noted that the installation of Notepad++ is currently ongoing:
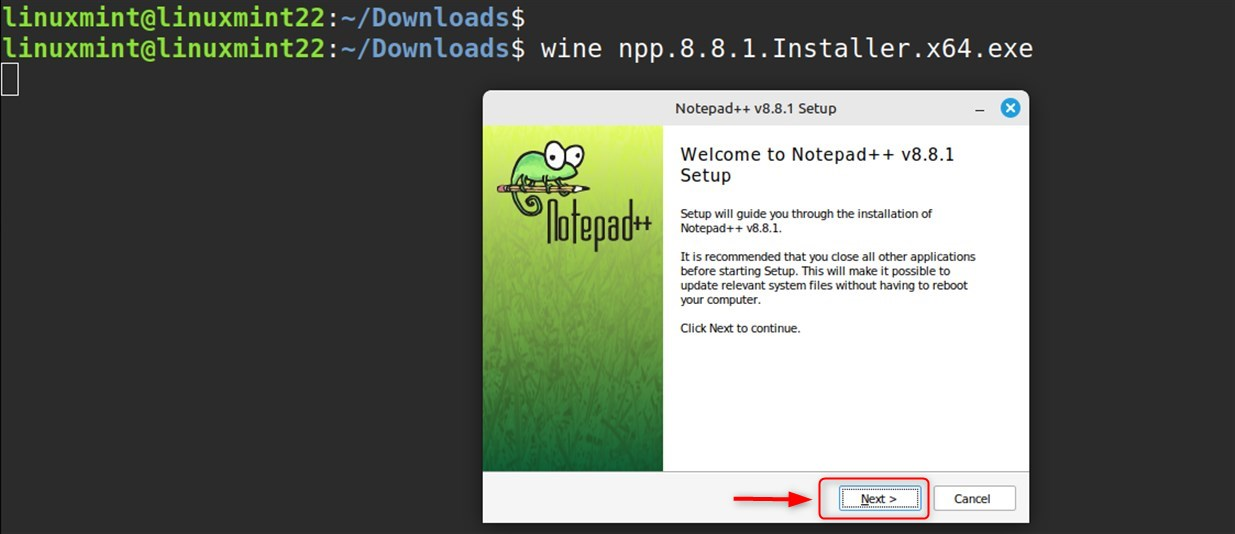
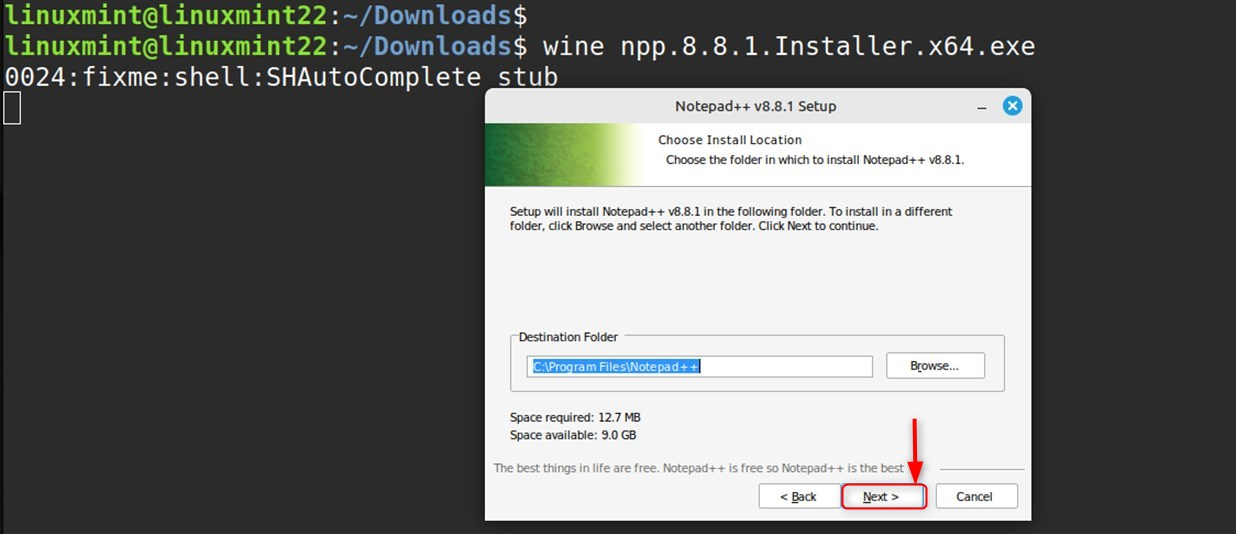
Step 4: Install/Set up Notepad++ on Linux Mint
These are the steps to install Notepad++ on the system. Choose the installation location and click on “Next”:
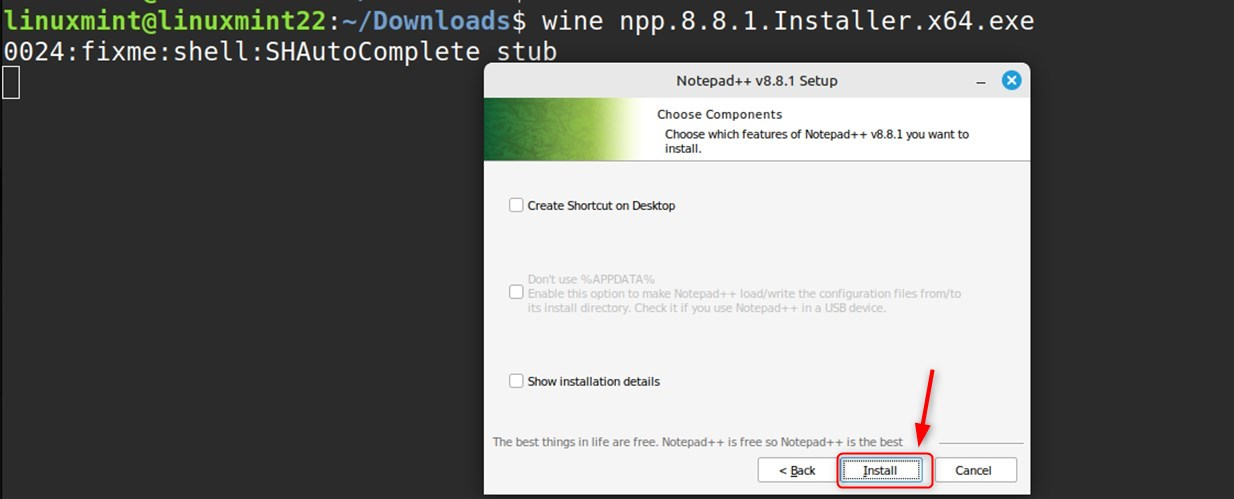
Click on “Next,” and the application will be installed on the system.
Click on the “Install” button to install Notepad++ on the system:
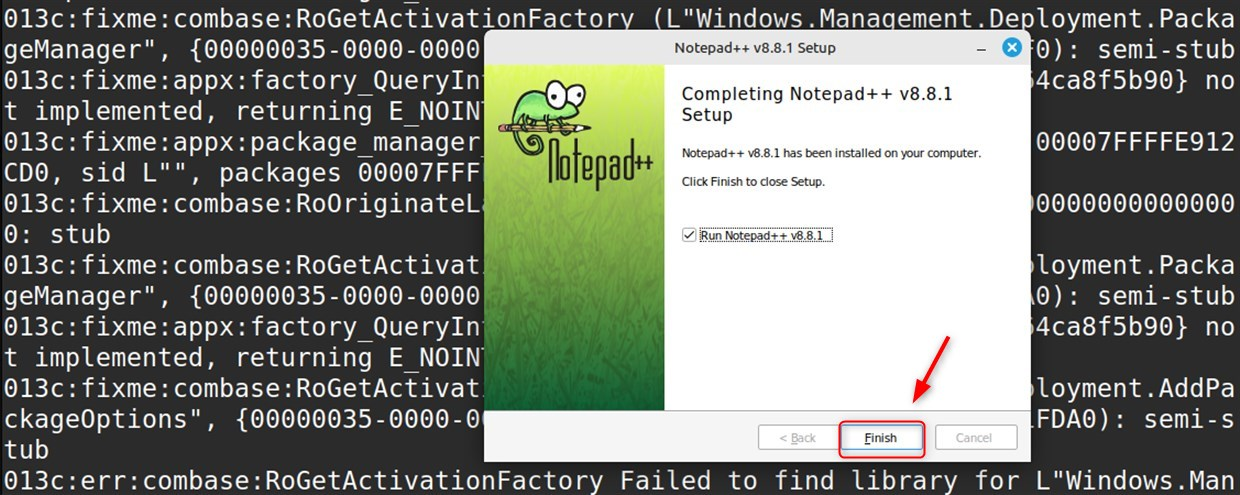
Tap on the “Finish” button after the installation has completed:
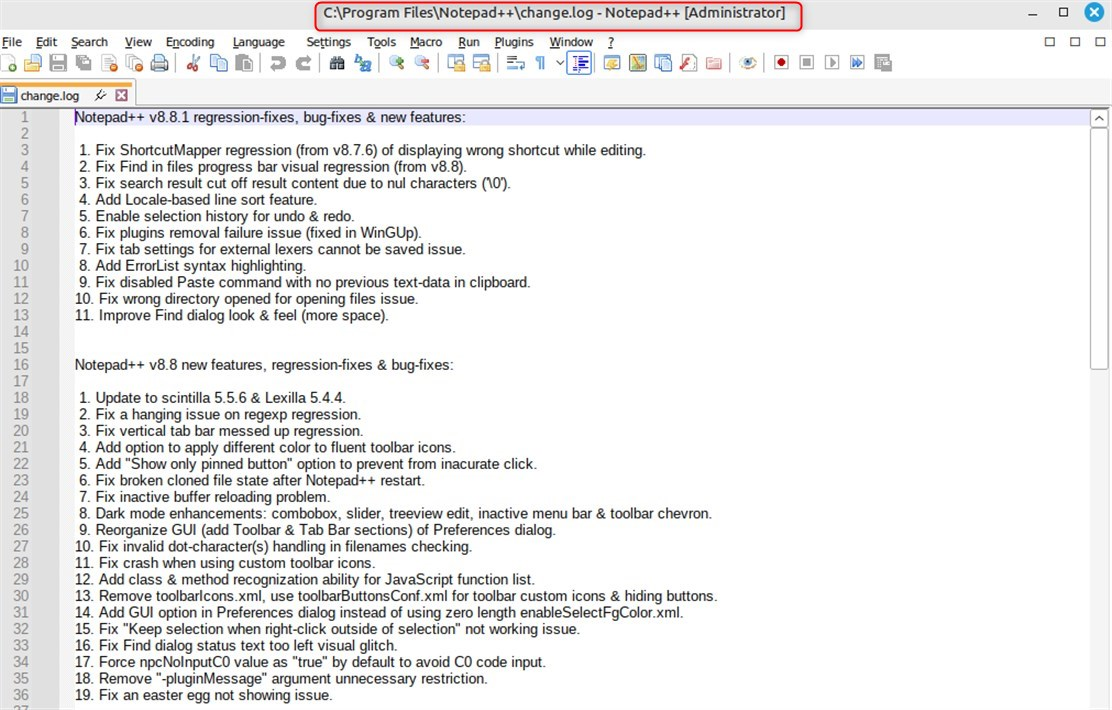
The following image shows Notepad++, which has been installed. This confirms that the Installation of Notepad++ using Wine was successful:
How to Remove Windows Applications Installed With Wine on Linux Mint?
For those who are looking to remove a specific Windows application installed using Wine, follow the provided steps:
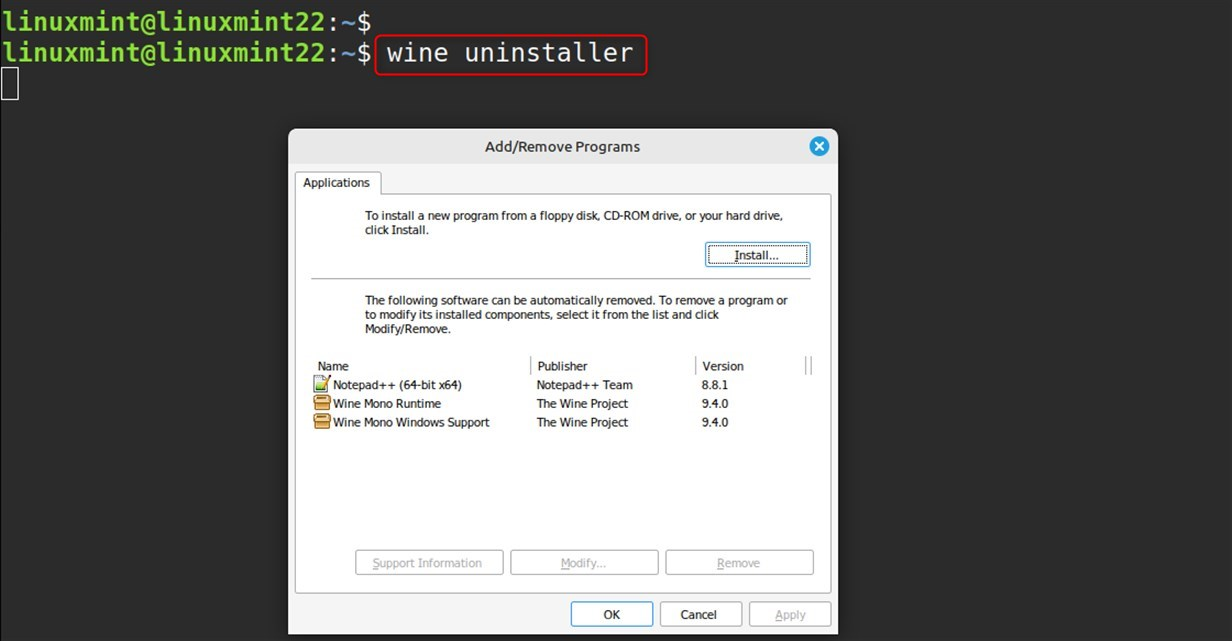
Step 1: Launch the Add/Remove Programs window
The first step is to run the command “wine uninstaller,” which will open the “Add/Remove Programs” window:
wine uninstaller |
|---|
Now, the Add/Remove Programs window is visible as seen below. The program can be used to uninstall applications installed through Wine:
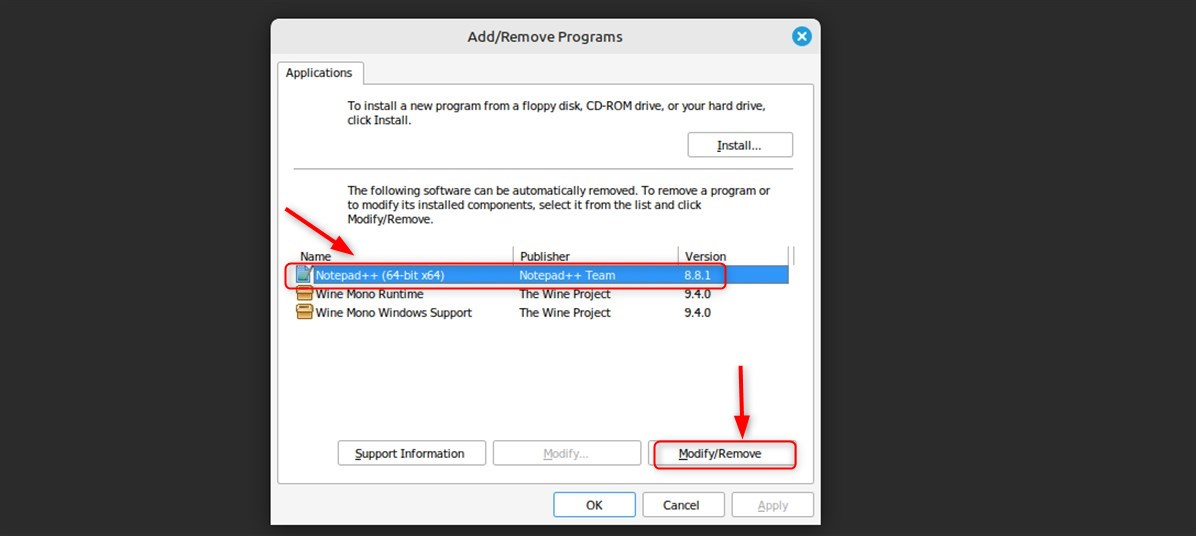
Step 2: Choose Windows Application for Removal
Choose the Windows application you want from the system and click on “Modify/Remove”. As an example, remove the Notepad++ application. You may select any application available to remove:
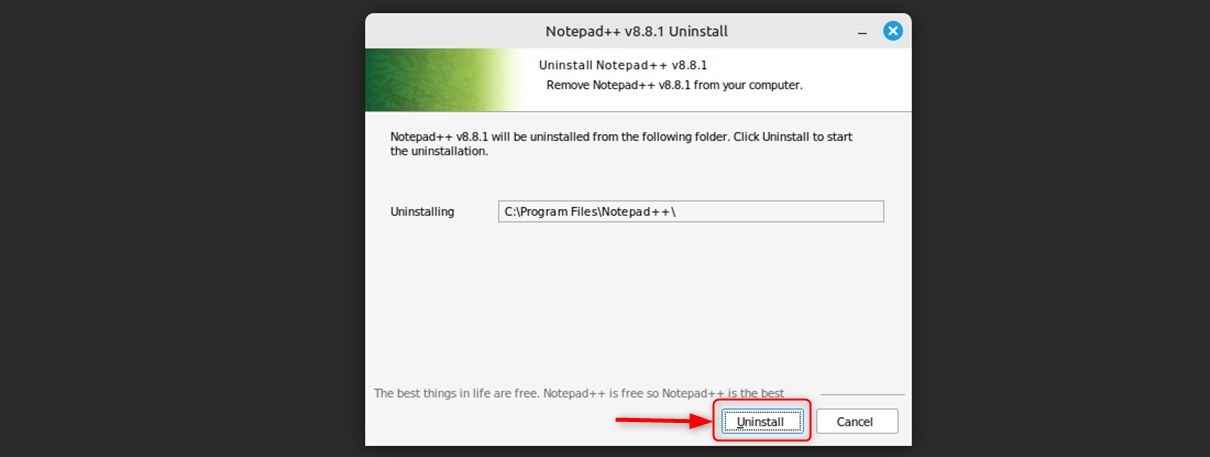
Step 3: Uninstall the Windows Application
Now, click on the “Uninstall” button to remove or uninstall it:
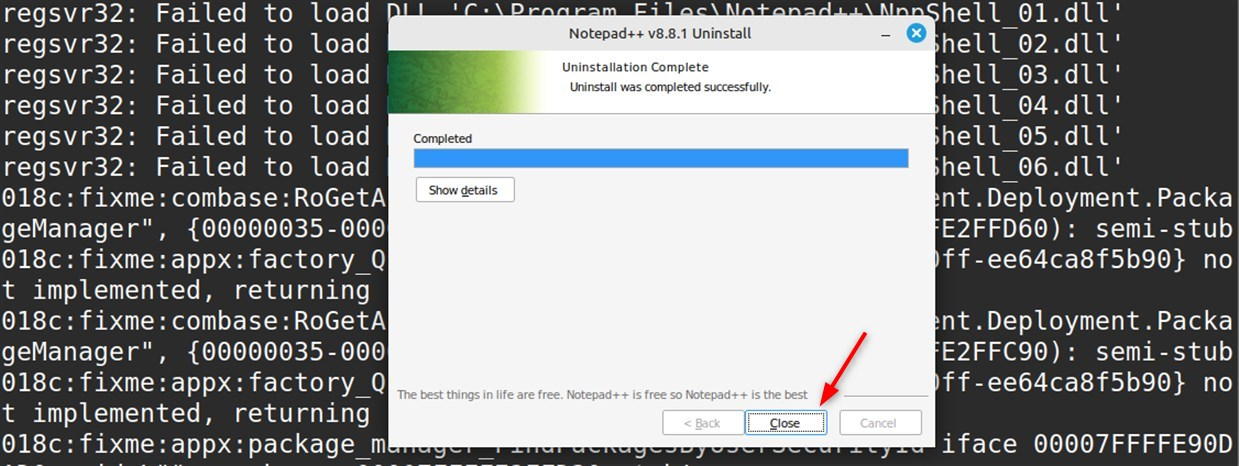
After that, the uninstallation of “Notepad++” has been completed and is displayed below. To finish, click the “Close” button to exit the window.
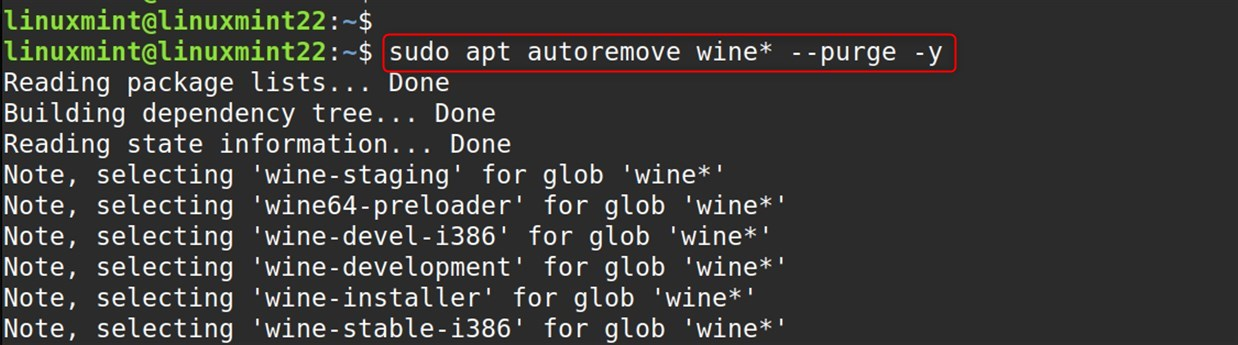
How to Remove Wine from Linux Mint 22?
In case you do not use Wine anymore, simply removing it from your Linux Mint will be straightforward by executing this command:
sudo apt autoremove wine* --purge -y |
|---|
You may also want to delete the Wine repository from your computer by running this command:
sudo rm /etc/apt/sources.list.d/winehq-jammy.sources |
|---|

That will conclude the instructions for installing, configuring, and uninstalling Wine on Linux Mint.
Conclusion
Wine allows users to run multiple applications designed for Windows on their Linux Mint system. Wine can be installed in the system’s default Linux repository or the official WineHQ repository for Linux Mint. If you prefer to have the latest version of Wine, install using the official repository. This will allow the installation, execution, and management of any desired Windows application on the system. This article demonstrates how to install, configure, and uninstall Wine on the Linux Mint system.

Karim Buzdar holds a degree in telecommunication engineering and holds several sysadmin certifications including CCNA RS, SCP, and ACE. As an IT engineer and technical author, he writes for various websites.