
“SSH is a client-server service or program that provides secure, encrypted communication over a network connection. It is widely used for command-line tools like remote login applications and terminals. SSH is the primary method for remote access and administration on Linux systems, including Ubuntu 22.04 Jammy Jellyfish. For users who want to access remote servers and other computers using SSH, the client and the remote connection must be installed and activated with SSH. The SSH configurations may be one of the first settings that you want to configure after installing Ubuntu 22.04.”
This article will demonstrate how to install and enable SSH server access on Ubuntu 22.04 Jammy Jellyfish distribution.
Prerequisites
You should have sudo or root privileges to enable the SSH server on Ubuntu 22.04 system.
How to Enable SSH on Ubuntu 22.04 LTS?
Perform the following step-by-step guidelines to install SSH on your Ubuntu 22.04 LTS system:
Step 1: Update Ubuntu Repositories
First, update all system repositories to ensure that all packages are up to date. In this way, no conflicts will occur during the OpenSSH server package installation.
$ sudo apt update

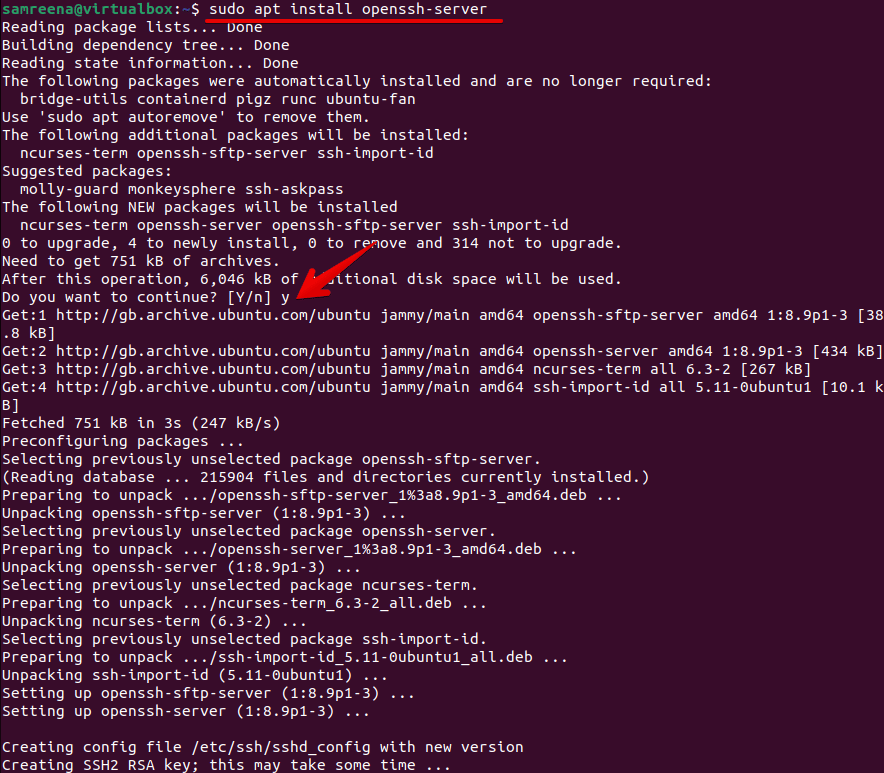
Step 2: Install OpenSSH Server
SSH server is not installed and enabled by default in Ubuntu 22.04 LTS. So, we will install the OpenSSH server from the default Ubuntu packages repository and then enable the SSH connections. Type the following command to install the OpenSSH server package on Ubuntu 22.04 system:
$ sudo apt install openssh-server
Step 3: Check the Status SSH Service
The “system” unit controls the SSH service on all the latest Ubuntu distributions. Therefore, you can use the “systemctl” commands to control the SSH service.
To start or stop the SSH service, use the following command:
$ sudo systemctl start ssh

$ sudo systemctl stop ssh
Similarly, if you want to verify whether the ssh service is running on your system or not. You can also check SSH service status using the following command:
$ sudo systemctl status ssh

If the service is not running properly on your system, you can enable the SSH service on your Ubuntu system using this command:
$ sudo systemctl enable ssh

Or you can restart it using this command:
$ sudo systemctl restart ssh
Step 4: Configure SSH Port in Firewall UFW
The firewall UFW should be enabled and activated on your Ubuntu system. Enable the firewall UFW settings if it is not enabled on your Ubuntu system using this command:
$ sudo ufw enable

After enabling the UFW setting, allow ssh port 22 in the UFW firewall using this command:
$ sudo ufw allow 22/tcp

Step 5: Connect to SSH Server on Ubuntu 22.04 LTS
After enabling the SSH server, you can use it to initiate remote connections and can also accept incoming connection requests. Use the following ssh command to connect SSH server remotely:
$ ssh username@remotehost or IP-address
For example, here, we will connect to the Ubuntu 22.04 SSH server with an IP address 10.0.2.15 as the user “samreena”:
$ ssh samreena@10.0.2.15

How to Disable the SSH on Ubuntu 22.04 LTS?
If you don’t want to use an SSH server on your system, you can disable it due to some security issues. To disable SSH server access, block SSH port 22 through the UFW firewall.
$ sudo ufw deny 22/tcp

To completely disable the SSH service access on Ubuntu 22.04 system, execute the following “systemctl” command:
$ sudo systemctl stop ssh --now

$ sudo systemctl disable ssh --now

The above commands will help you to disable the SSH service access immediately and stop the auto-start service on each reboot operation.
Conclusion
We learned from this tutorial how to enable ssh on Ubuntu 22.04 LTS Jammy jellyfish distribution. Moreover, we also see how to enable, start, stop, restart and disable SSH service on Ubuntu 22.04 system. Thanks!

Samreena Aslam holds a master’s degree in Software Engineering. She’s a technical writer and has written various articles on different Linux flavours including Ubuntu, Debian, CentOS and Mint as well as programming guides in various programming languages


