Snappass is generally the web app that is used to share the password in a secure way. Using the Fernet symmetric encryption, snappass encrypts all the passwords shared through their platform. For each password, a random key is generated that is not stored and shared as a password link. So it will be safe and secure, enhancing the security features.
In this article, we are going to discuss the installation process and use case of snappass on Ubuntu 20.04 LTS server.
Installation of Snapass on Ubuntu 20.04 LTS server
To install the snappass, first you must have to install the redis server and python with version above 3.5. Redis server is easy to install by downloading its package from the official documentation https://redis.io/ or directly from the Ubuntu repository. Install the redis server following the commands mentioned below.
$ sudo apt update
Then install the redis server with the command as:
$ sudo apt install redis-server -y
Verify the redis server is running by checking its status.
$ sudo systemctl status redis-server.service
Also, check if python is installed or not with the command as shown below.
$ python3 --version
Next, you are ready to install the snappass on your Ubuntu 20.04 server. Simply execute the command as shown below for this purpose.
$ pip install snappass
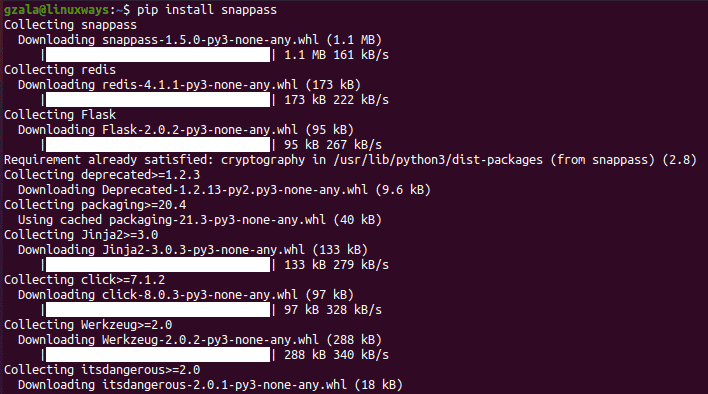
Now, run the snappass to serve the web app by executing the command to see the output similar as:
$ snapass
Output:

Using Snappass web app
After successfully installing the snappass and its requirements like redis server and python, you are ready to browse the web app of the snappass that is generally a Flask app. To browse the site, copy the address link from the output of snapass command which is http://192.168.122.230:5000 .
After browsing this link, you will see the output similar to the screenshot as shown below.
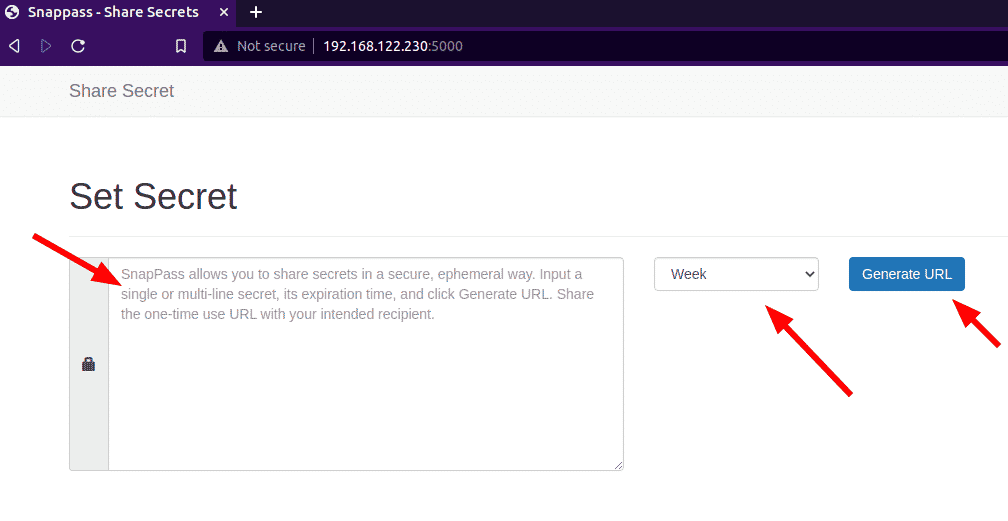
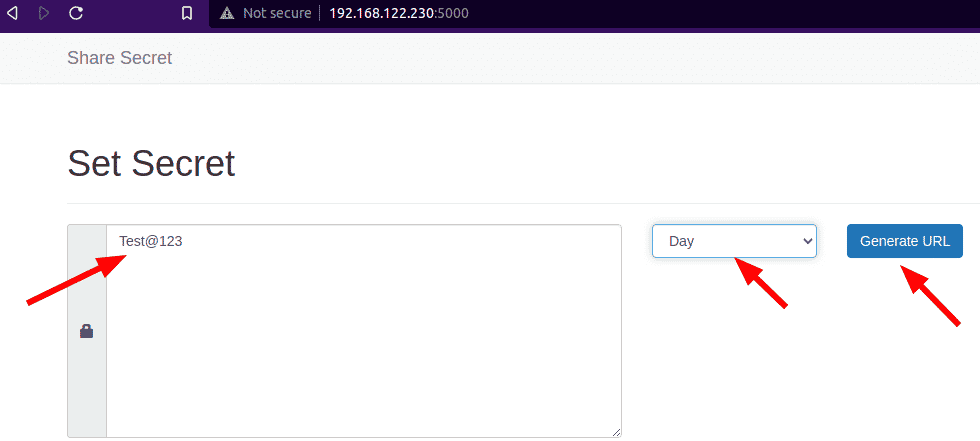
Here, you are able to share the password or secret with the easy steps. First put your password on the set secret field then set the validity of the password. Lastly click on the Generate URL that is shown on the above screenshot. For example, we will put the password and generate a url which you can see on the screenshot below.
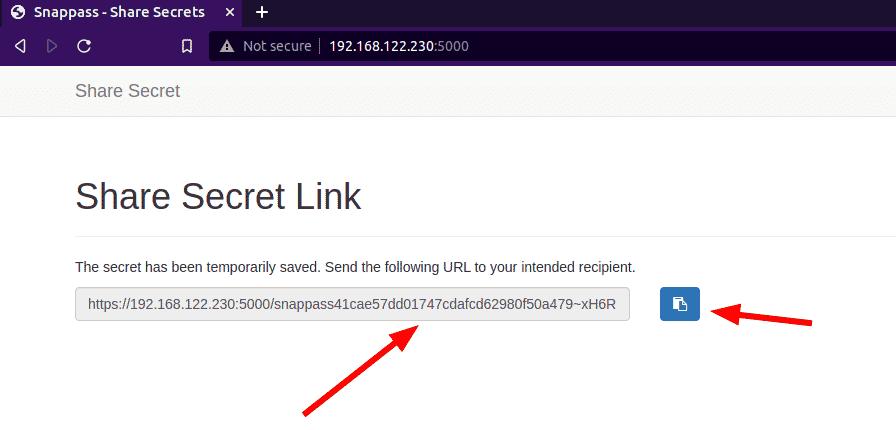
After clicking on the Generate URL, you will get the secret link which you can share to the concerned person through any media. Simply copy the link address and share it. For the reference, You can see the output as shown in the below screenshot.
Now the concerned person can browse the secret link provided by you. As soon as they browse the link, they will get a “Reveal secret” section similar to the output as :
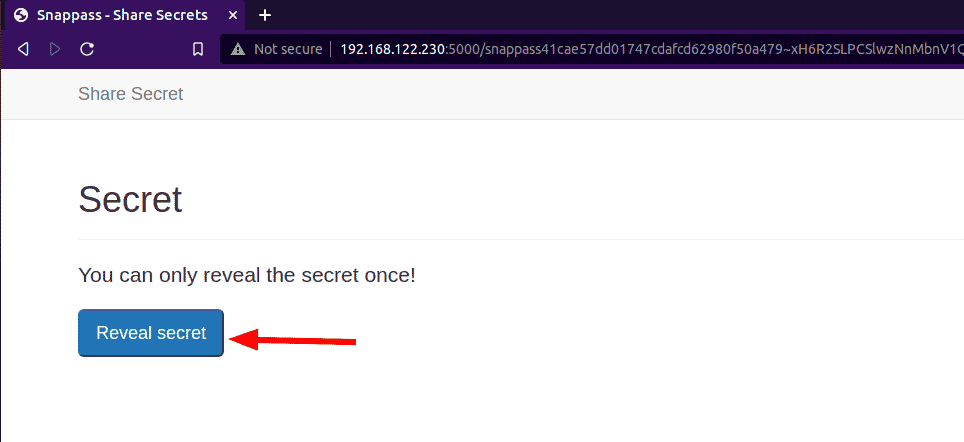
After the provided link is browsed, the person will click on the Reveal secret section to see the password which is set by the sender. You should get similar output as below.
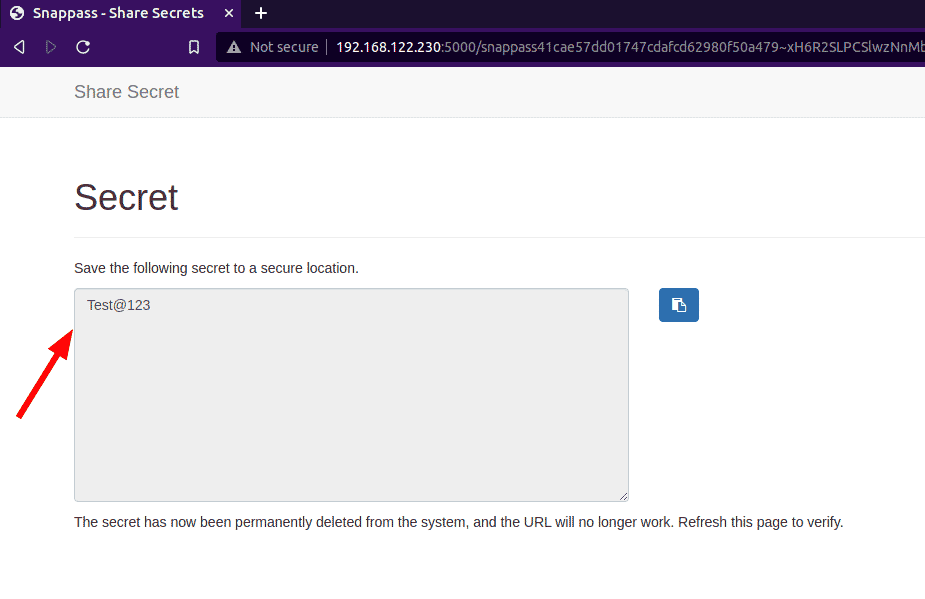
Here, you can see the same password is provided as output that is set by the sender. This is an easy and secure way to set and reveal the password.
Installation of Snapass through docker
Snappass is also installed and set up with the use of docker and docker compose. First be sure you have already installed the docker and docker compose on your Ubuntu 20.04 LTS server. Then download the project of the snappass from the github repository by executing the command as shown below.
$ git clone https://github.com/pinterest/snappass.git
Now you will notice the snappass folder will be downloaded with the required contents like Dockerfile, docker-compose,yml and mainly snappass project file. You will see the similar output as :
![]()
To install and setup snappass with its requirement like redis server, simply execute the docker-compose command as:
$ docker-compose up -d
After executing this command, the redis server and snappass web app will be set up and ready to be browsed.
Conclusion
In this article, you have learnt how to install and use the snappass web app. It is an easy and very secure way to generate a random link for the password that can be opened only one time. Thank you!


