Data of any organization is very important because, without data, there would be no world. Backing up data is even more important to save that in case of any disaster. In this article, we are going to discuss an Open Source backup solution that is UrBackup.
UrBackup is an easy to setup Open Source client/server backup system that, through a combination of image and file backups, accomplishes both data safety and a fast restoration time. File and image backups are made while the system is running without interrupting current processes. UrBackup also continuously watches folders you want to be backed up in order to quickly find differences to previous backups. Because of that, incremental file backups are really fast.
Prerequisites:
We are going to set up the installation of the UrBAckup server on the latest Ubuntu 20.04 LTS. Let’s launch your instance if you are using any cloud service provider and login to the server with any user with sudo rights or root user. I will be using the root user so, if you use general user then make sure to use ‘sudo’ as well to perform the following steps.
Step 1: System Update
Once you are login to your Ubuntu server run the command below to update your system with the latest updates and security patches.
# apt-get update -y
Step 2: Installing UrBackup Server
After updating the system, now we will install the UrBackup server using its Official PPA repository by issuing the following commands in the terminal.
# add-apt-repository ppa:uroni/urbackup
# apt update
# apt install urbackup-server

Once prompted, type ‘y’ and hit enter to start the installation of the UrBackup server along with its dependent packages.
Step 3: Configuring UrBackup Server
During the installation, you will be asked to configure the UrBackup server, where you need to give a path of backup storage as shown below.

All the backups will be stored in the given path, tab to ‘ok’ and hit Enter key to continue.
Once the installation is complete, run the following command to check the status of UrBackup Server.
# systemctl status urbackupsrv

You can also use the commands below to set the service run automatically after reboot.
# systemctl enable urbackupsrv
Step 4: Access UrBackup Web Interface
Once the installation is complete, the web interface of UrBackup server can be accessed using its default port ‘55414’ provided that it is allowed in your firewall.
Let’s open the URL in your favorite browser as below.
https://your_ip:55414

Step 5: Adding Admin User to UI
Now you have access to the Web UI of UrBackup Server without giving any user and password to log in, to do so we need to create an Administrator user from the web interface as below.

Similarly, you can go through other settings to make changes as per your own requirements for the backups.
Step 6: Adding New Backup Client
To add a new client for backup to UrBackup server, click on the add new client as an Internet client/client behind NAT. Make sure to Enable Internet mode from settings. Give it the name of your client host FQDN or IP and click to Add client as shown below.
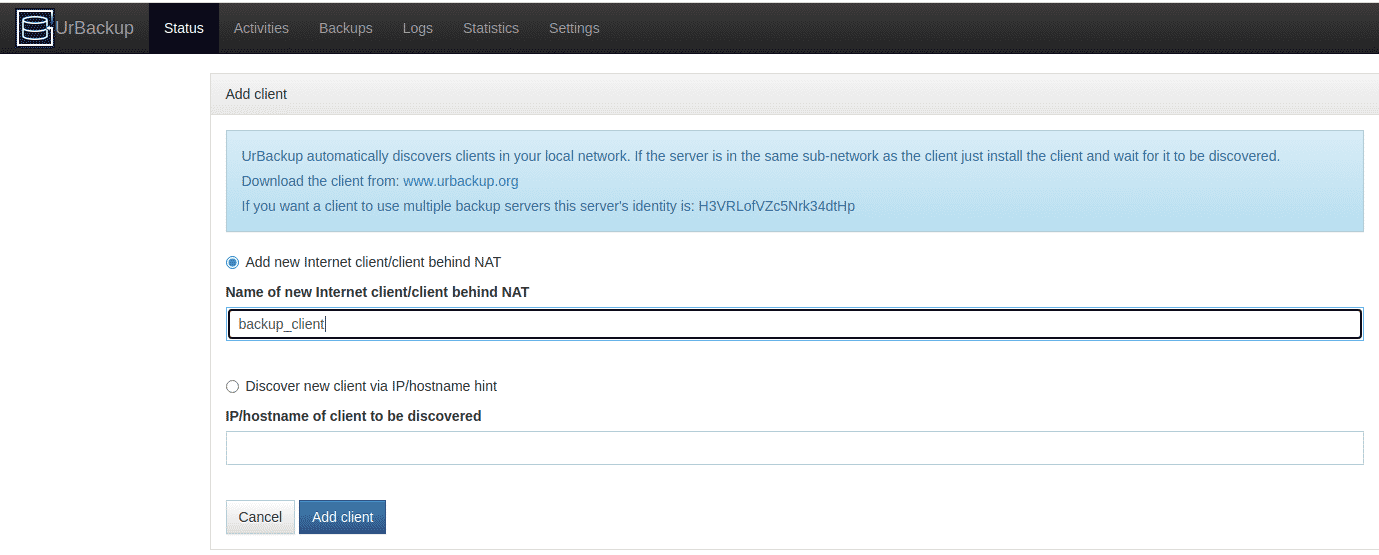
After you add the client, you will get its installation packages that you need to install for backups on the client host as shown below.
# TF=`mktemp` && wget "http://your_server_ip:55414/x?a=download_client&lang=en&clientid=1&authkey=nGEDmaj5Qb&os=linux" -O $TF && sudo sh $TF; rm -f $TF
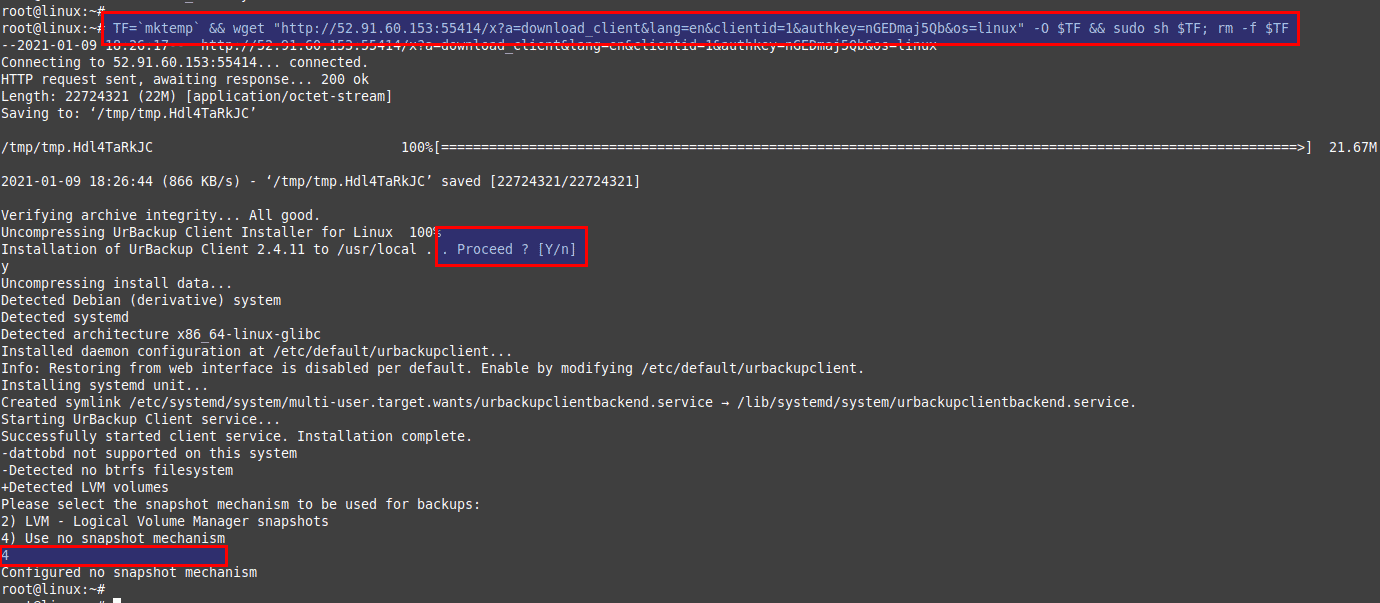
Run the command below to check client service status.
# systemctl status urbackupclientbackend
UrBackup client is up and running on port ‘35621’
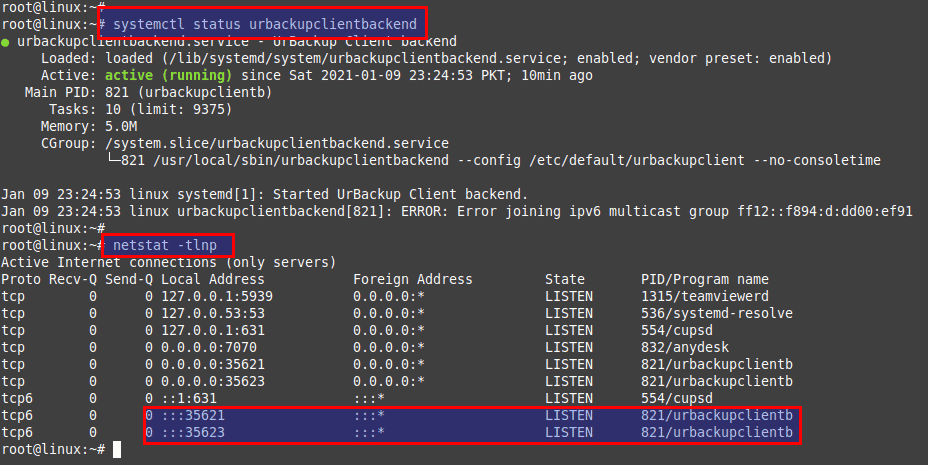
In case of any issues, take a look at its logs under ‘/var/log/urbackupclient.log’ file.
Step 7: Taking Client Backups
You can add as many clients as you want. Then run the command below to add any folder that you want to take the backup of.
# /usr/local/bin/urbackupclientctl add-backupdir -x -f -d /backup
Now check that the status of the client is ONLINE at UrBackup server. Once it is online you can manually run the backup as shown below otherwise it will run as per its default schedule that you can change under client settings.
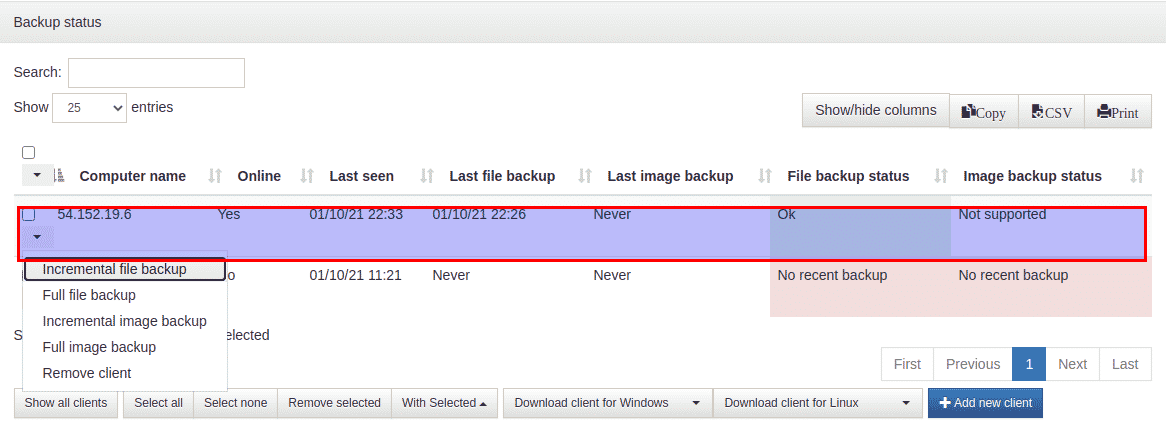
If you click on the backups tab, you will see the log of its last successful backup entry as shown below.
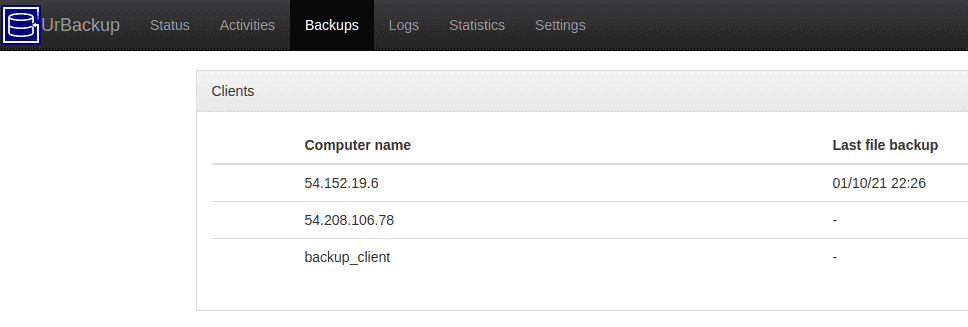
You can also verify from your server-side if the backup files are there on the storage path of your backup server which is shown below in our scenario.
root@ip-172-31-90-76:~# ls -lhtr /media/BACKUP/urbackup/54.152.19.6/210110-1726/backup/
total 0
-rwxr-x--- 1 urbackup urbackup 0 Jan 10 17:15 test.txt
Conclusion:
At the end of this article now you will be able to install and setup the UrBackup server on Ubuntu 20.04. We have also checked how we can add a Linux host to be backed up. The main reason for data backup is to save important files if a system crash or hard drive failure occurs, you will lose your data. So, a backup solution is much important for any data critical organization.


