Mozilla Firefox is the free open source and default web browser of most of the Linux distributions including Ubuntu. But, if you have accidentally removed this browser from your system then, you can easily install it on your Ubuntu. In this article, we will show you two ways to the installation of Mozilla Firefox on the Ubuntu 20.04 system.
You can install Firefox browser on the Ubuntu system using the following methods:
- Install Mozilla Firefox browser through Ubuntu software
- Install Firefox browser through Command line
Prerequisites
Users should login from the root account or run commands with ‘sudo’ rights.
Method 1: Install Mozilla Firefox browser through Ubuntu software
Click on the Ubuntu software icon that is located at the sidebar of the Ubuntu ‘Activities’ toolbar.
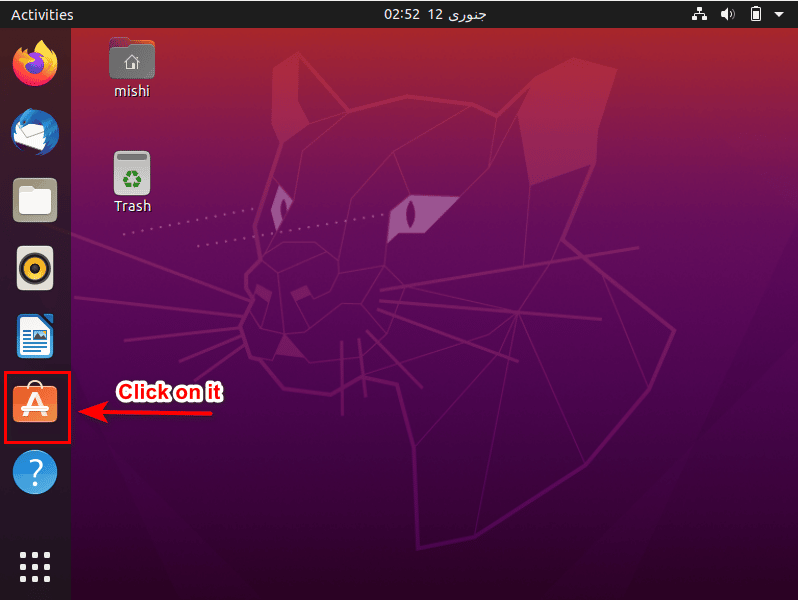
Click on the search icon which is also shown in the below screenshot.

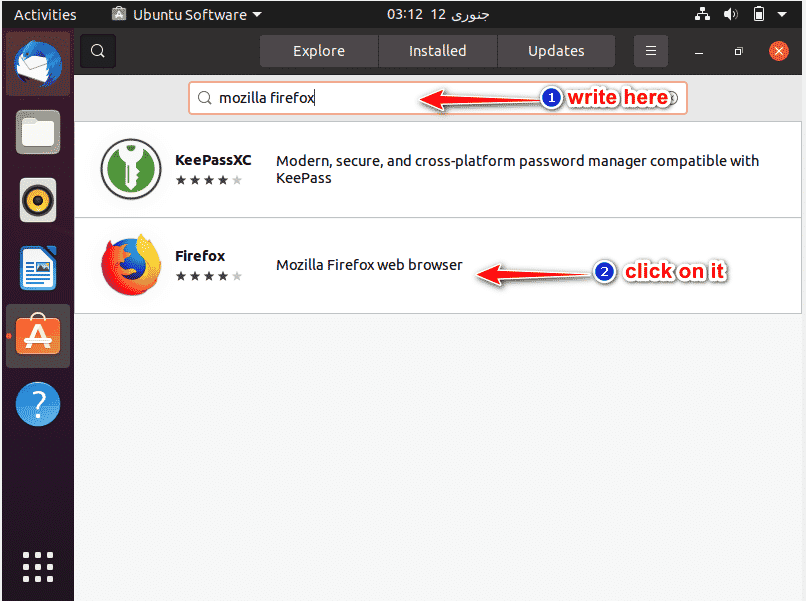
When the search bar show on your screen you, enter “Mozilla Firefox” in it. The search results will show on the following displayed window.
The second step is just to click on the Mozilla Firefox as shown in the below image.
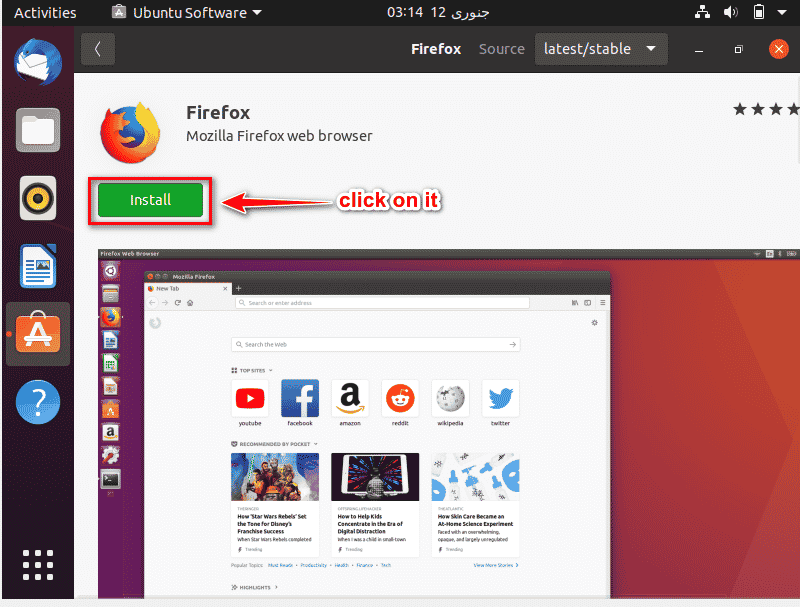
Click on the “install” button from your mouse to install the Mozilla Firefox.
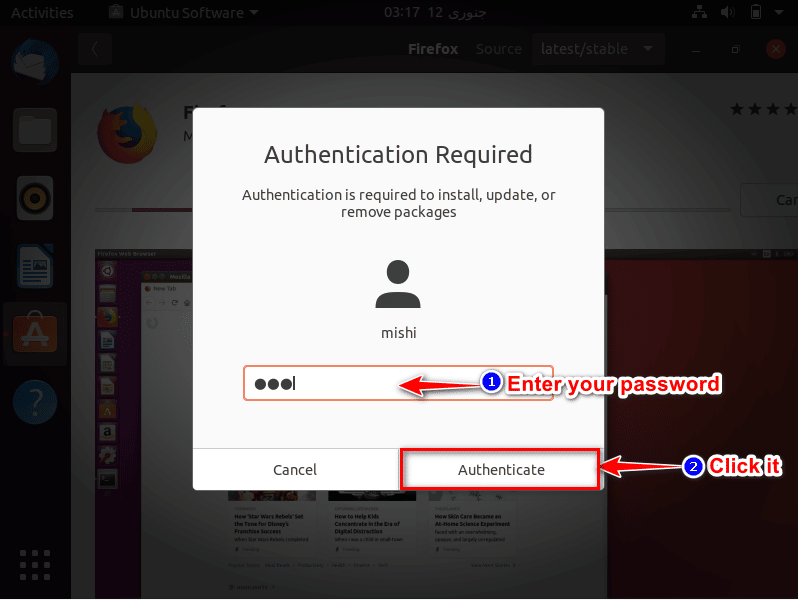
After clicking on the “install” button, a pop up window for confirmation will show on your screen. Enter your password and then click on “Authenticate “ button as follows:
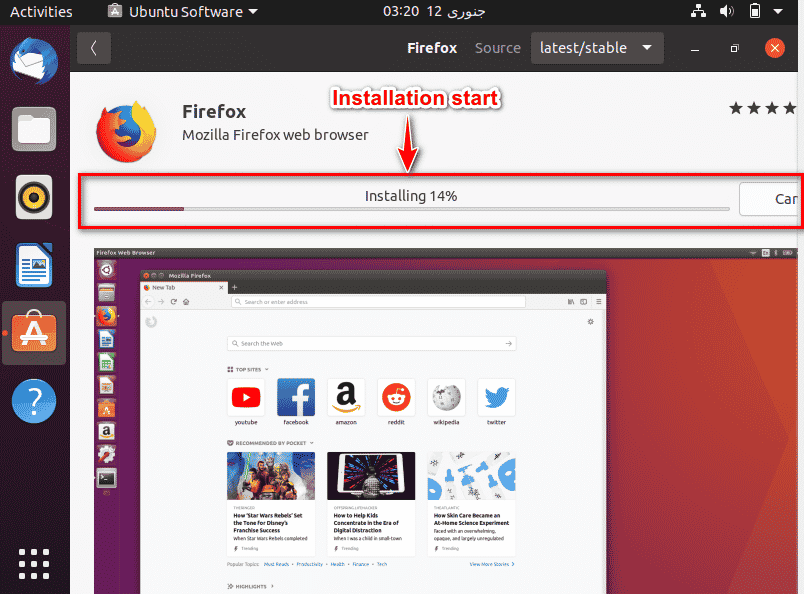
After authentication, the installation of Firefox will start as you can see below image.
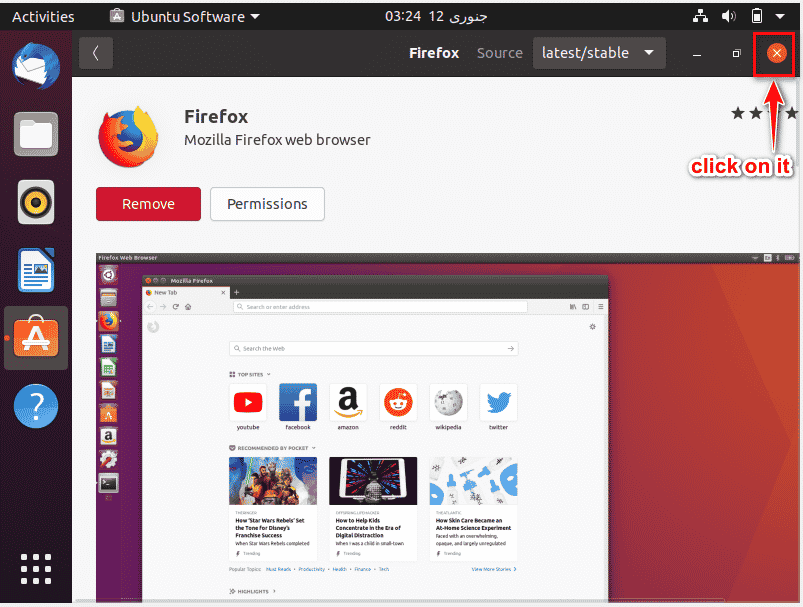
When installation will complete you can close the window by clicking on the cross icon as shown in the image below:
Launch Mozilla Firefox
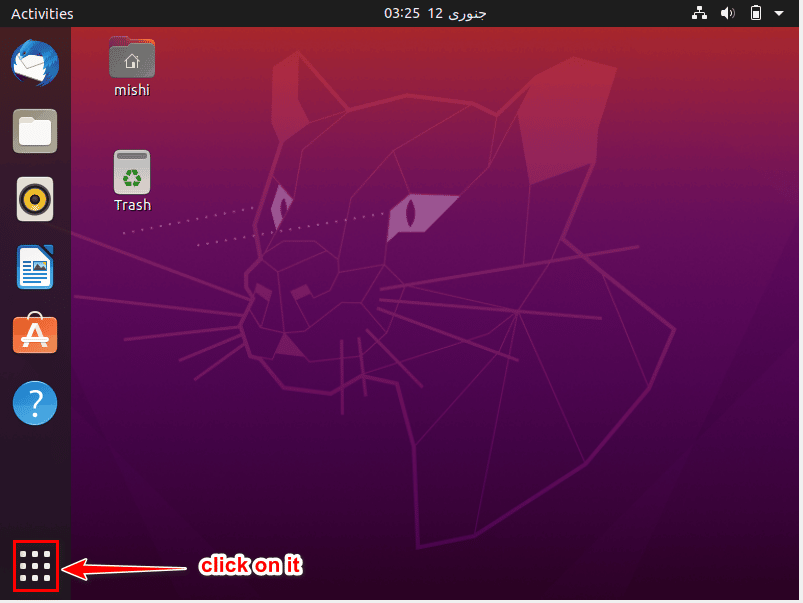
To open the Mozilla Firefox, you will click on the App menu button icon as shown in the image below.
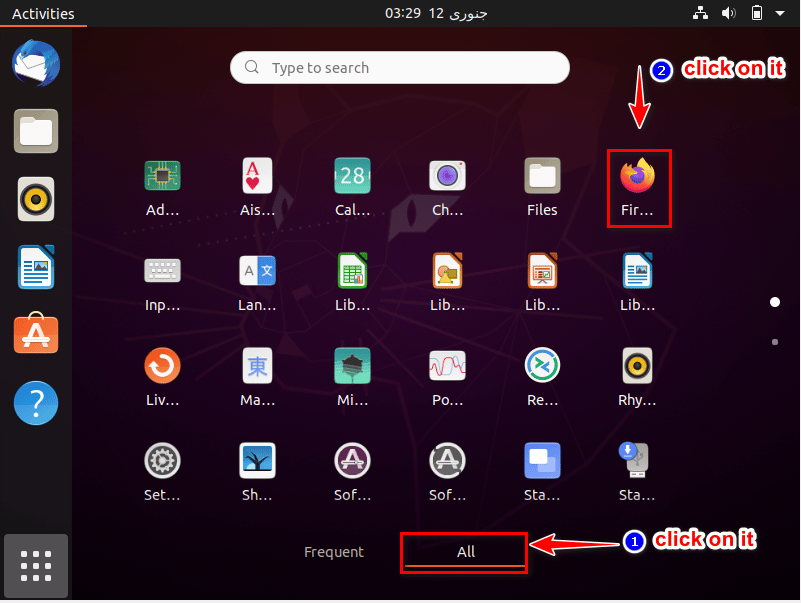
Click on the “All” tab then click on the Mozilla Firefox as you can see below the image.
The “Mozilla Firefox web browser” will show on your screen as you can see the below image.

Remove or uninstall Firefox
For removing this Mozilla Firefox, click on the Ubuntu software icon of located on the activities toolbar as follows:
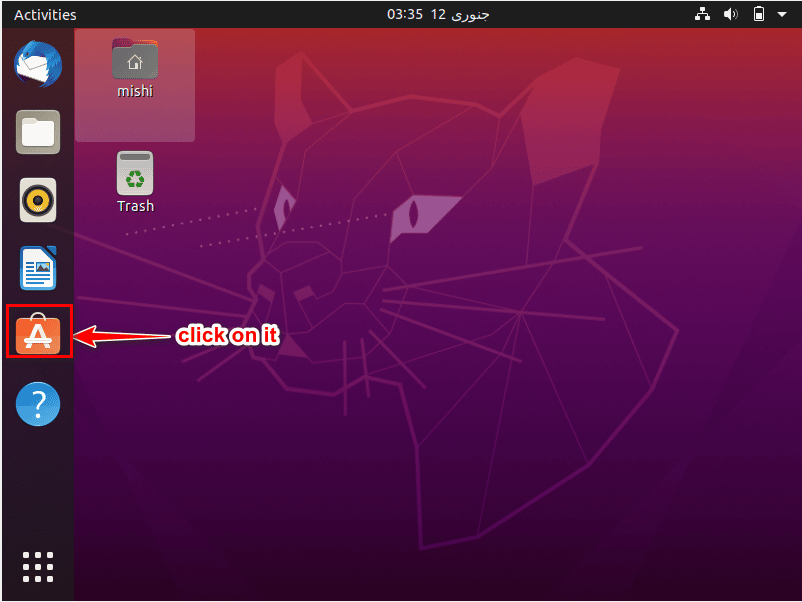
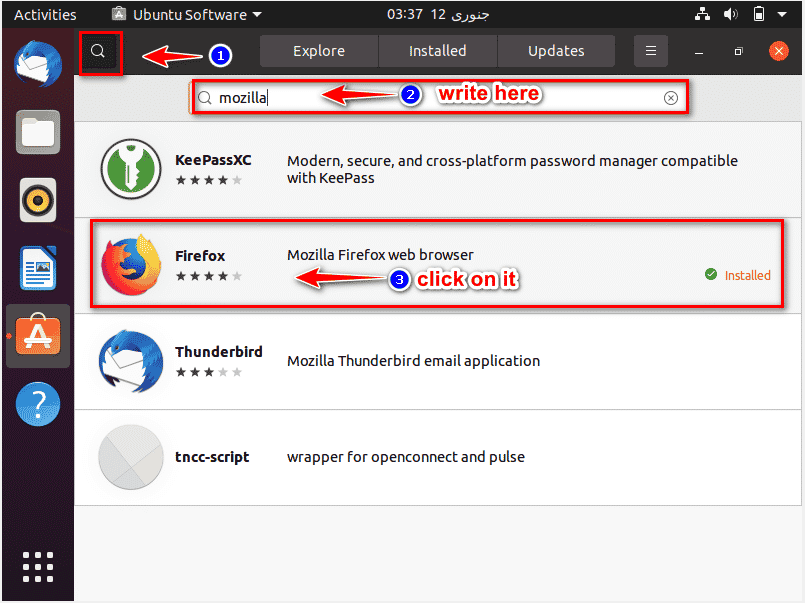
Click on the search icon and enter the “Mozilla Firefox” in the search bar from your keyboard. Click on the listed browser “Mozilla Firefox” as shown in the following image:
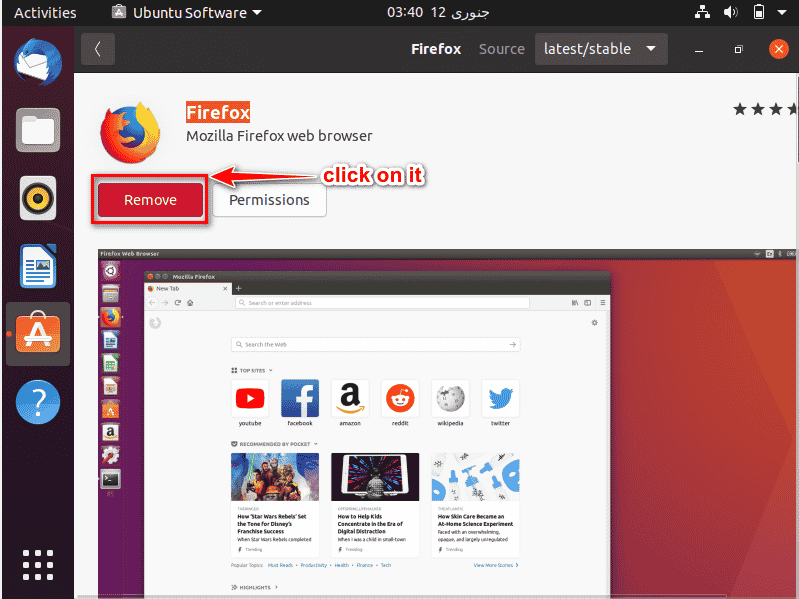
Click on the “Remove” button for removing or uninstalling Mozilla Firefox.
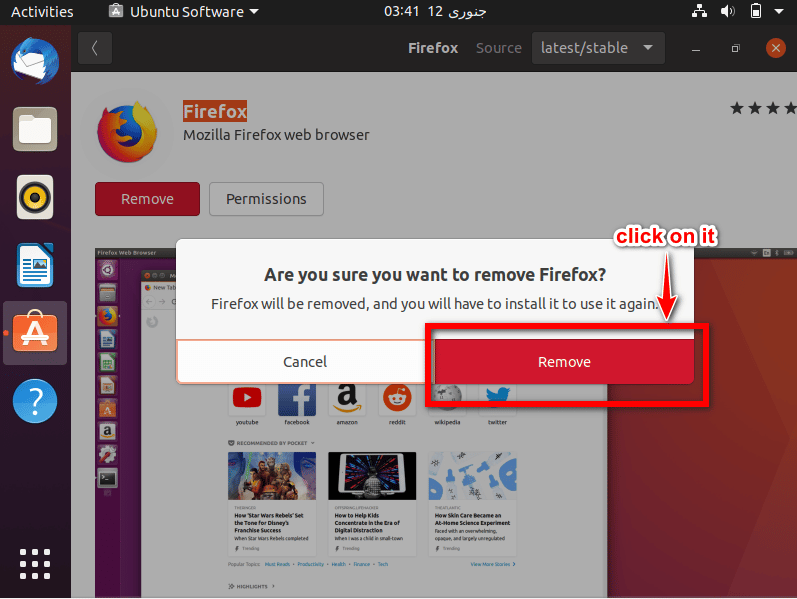
A pop-up window will show, it will be the confirmation that you really want to remove the Firefox browser. If yes, then click on the “Remove” button.
Again, a pop-up window will show on your screen for Authentication. You must enter your password and then click on the authenticate button as you can see below the image.

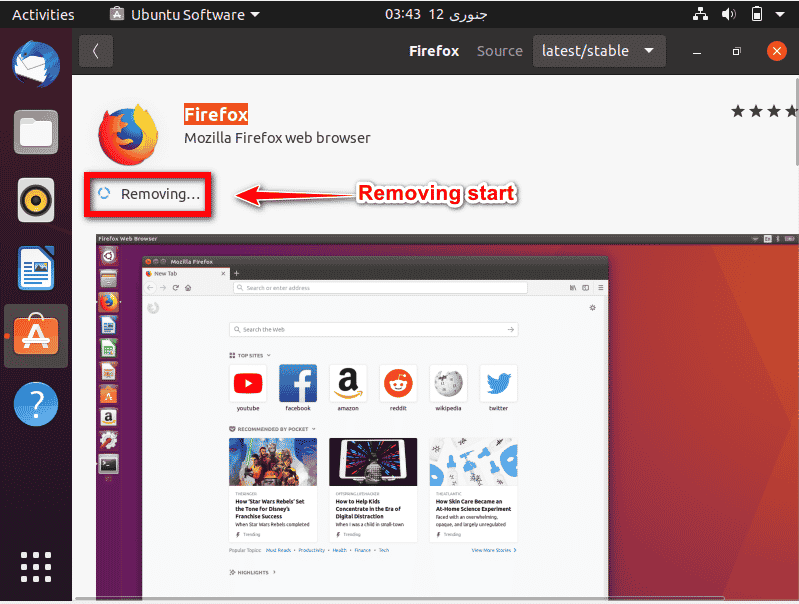
The removal process of Mozilla Firefox will start on the screen it will take some seconds, as you can see in the below image.
Method 2: Install Firefox browser through Command line
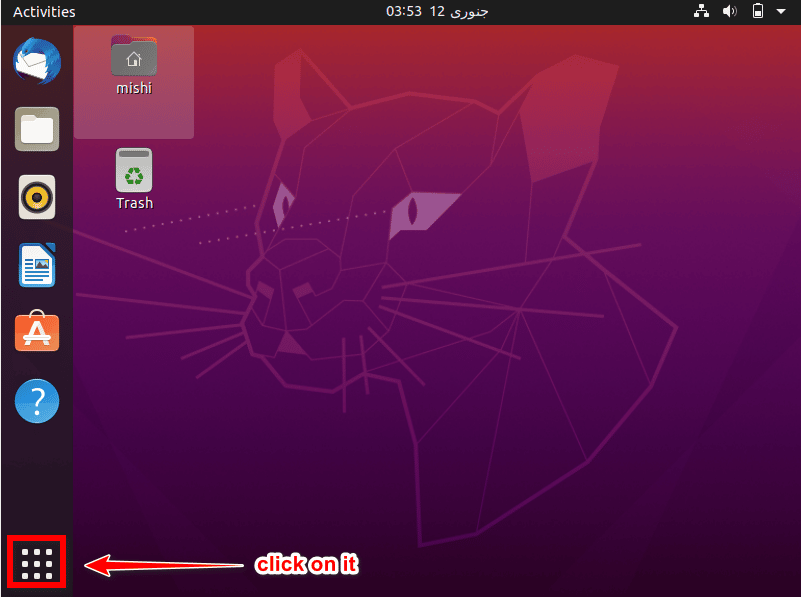
The other way to install Mozilla Firefox is through the command line method. Click on the following menu icon:
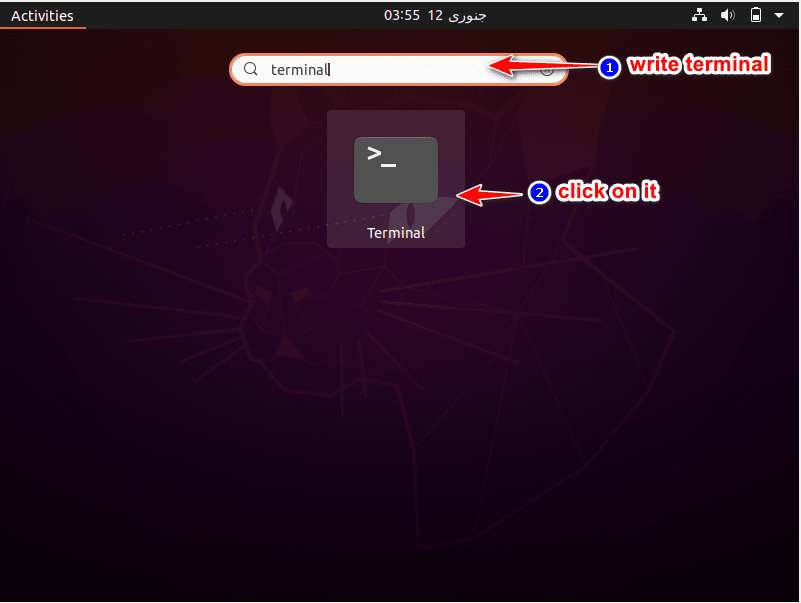
You will enter “Terminal” in the search bar and click on this terminal application as shown in the below image:
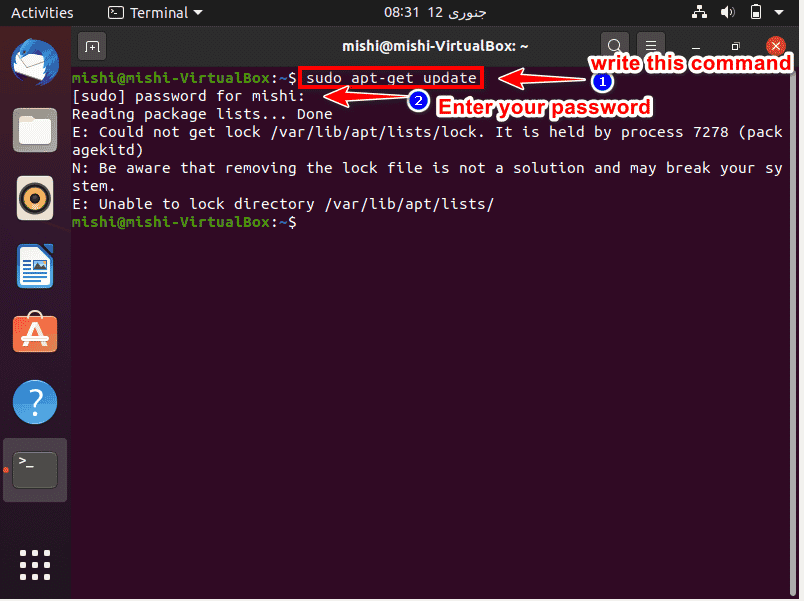
When the terminal open, enter the following command:
$ sudo apt-get update
Then, enter your password.
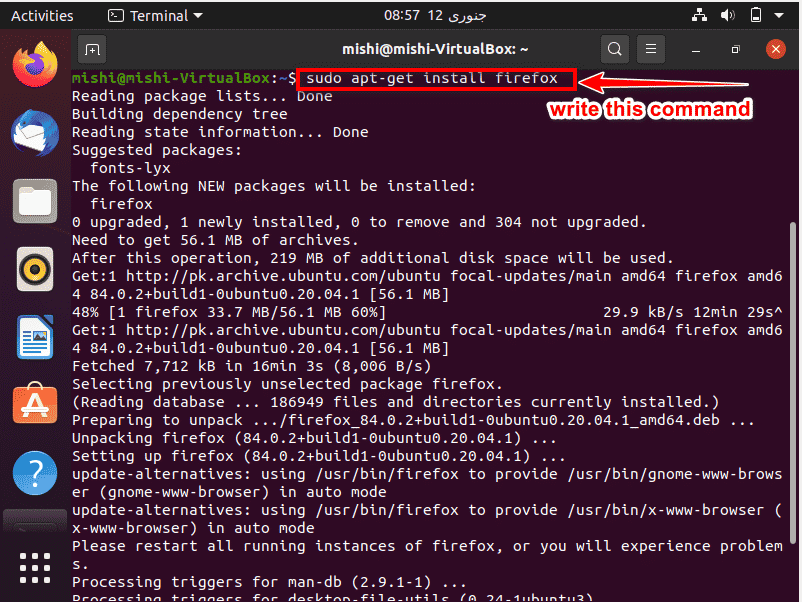
After that, write the below-mentioned command in the terminal :
$ sudo apt-get install firefox
It will take some time to complete the installation of the Firefox browser.
Launch Firefox
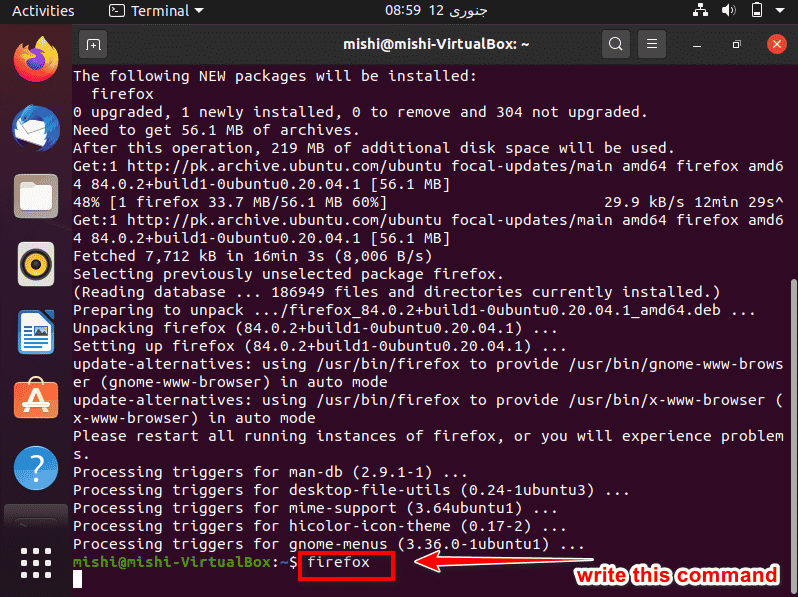
To launch the Firefox browser, you will enter the below-given command:
$ Firefox
Browser will open on your screen as shown in the image below:

Remove or uninstall Firefox
For removing browser through command, execute the following.
$ sudo apt-get purge firefox
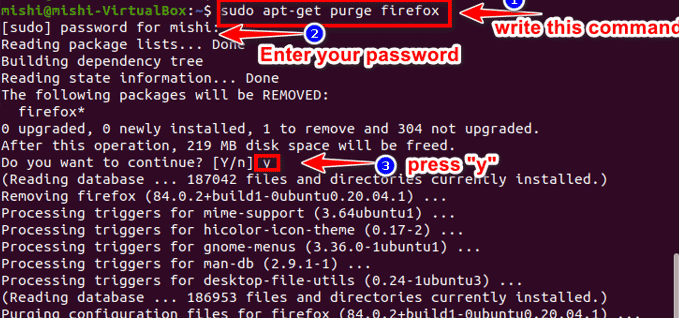
Press “y” and the uninstallation will start. You won’t have a Firefox browser on your system.
Conclusion
We explained two methods to install the Mozilla Firefox browser on the Ubuntu system. This article will give you the detail About the installation of the Mozilla Firefox browser on Ubuntu 20.04. Hope you really like this article and now you can easily install Mozilla Firefox without any error.
Mahwish Aslam is an IT Engineer interested in research and development. With experience of over 5 years, she writes on Linux to help the sysadmin community.


