Introduction
OpenVPN is open-source free software that implements a virtual private network(VPN) and helps you connect securely to an untrusted public network.
It is very useful and provided under the GNU(GPL). VPN is really necessary for government offices and large businesses because it has very high security and privacy. Here we will show you how to deploy a virtual network using OpenVPN on Ubuntu 20.04.
Step 1 – Update system
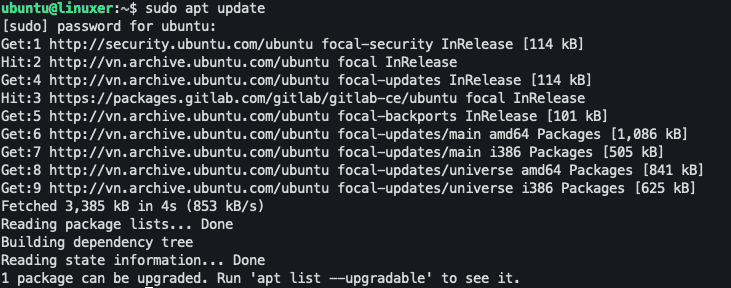
Run apt command:
$ sudo apt update
Output:

Then run:
$ sudo apt upgrade
Output:

Step 2 – Find your IP address
Run ip command:
$ ip -4 a
Output:

The red part is your IP address then let’s note it down.
Step 3 – Install openvpn-install
Let run the following command:
$ wget https://git.io/vpn -O openvpn-ubuntu-install.sh
Now let’s use chmod command to set access to script file:
$ chmod -v +x openvpn-ubuntu-install.sh
Output:

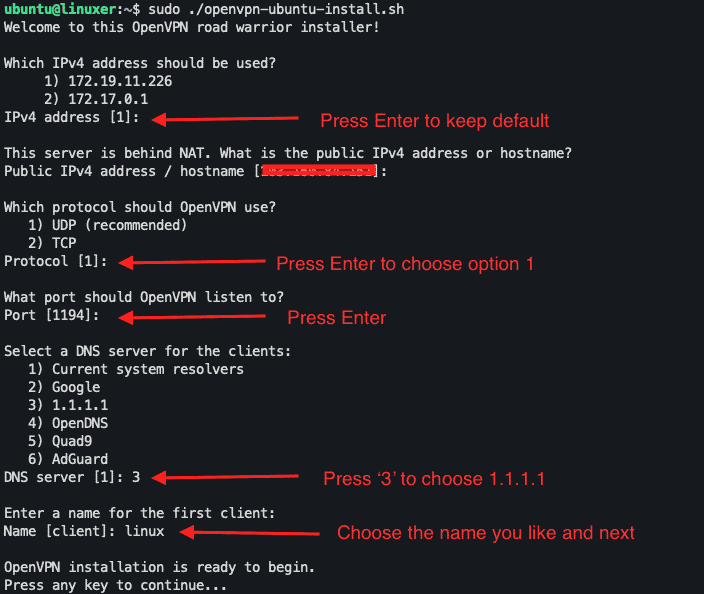
Then, let’s install OpenVPN by running openvpn-ubuntu-install.sh script file:
$ sudo ./openvpn-ubuntu-install.sh
Output:

Step 4 – Checking connection
Using ping command to ping to the OpenVPN server:
$ ping -c 4 10.8.0.1
Output:

If it appears like the picture, you have successfully connected.
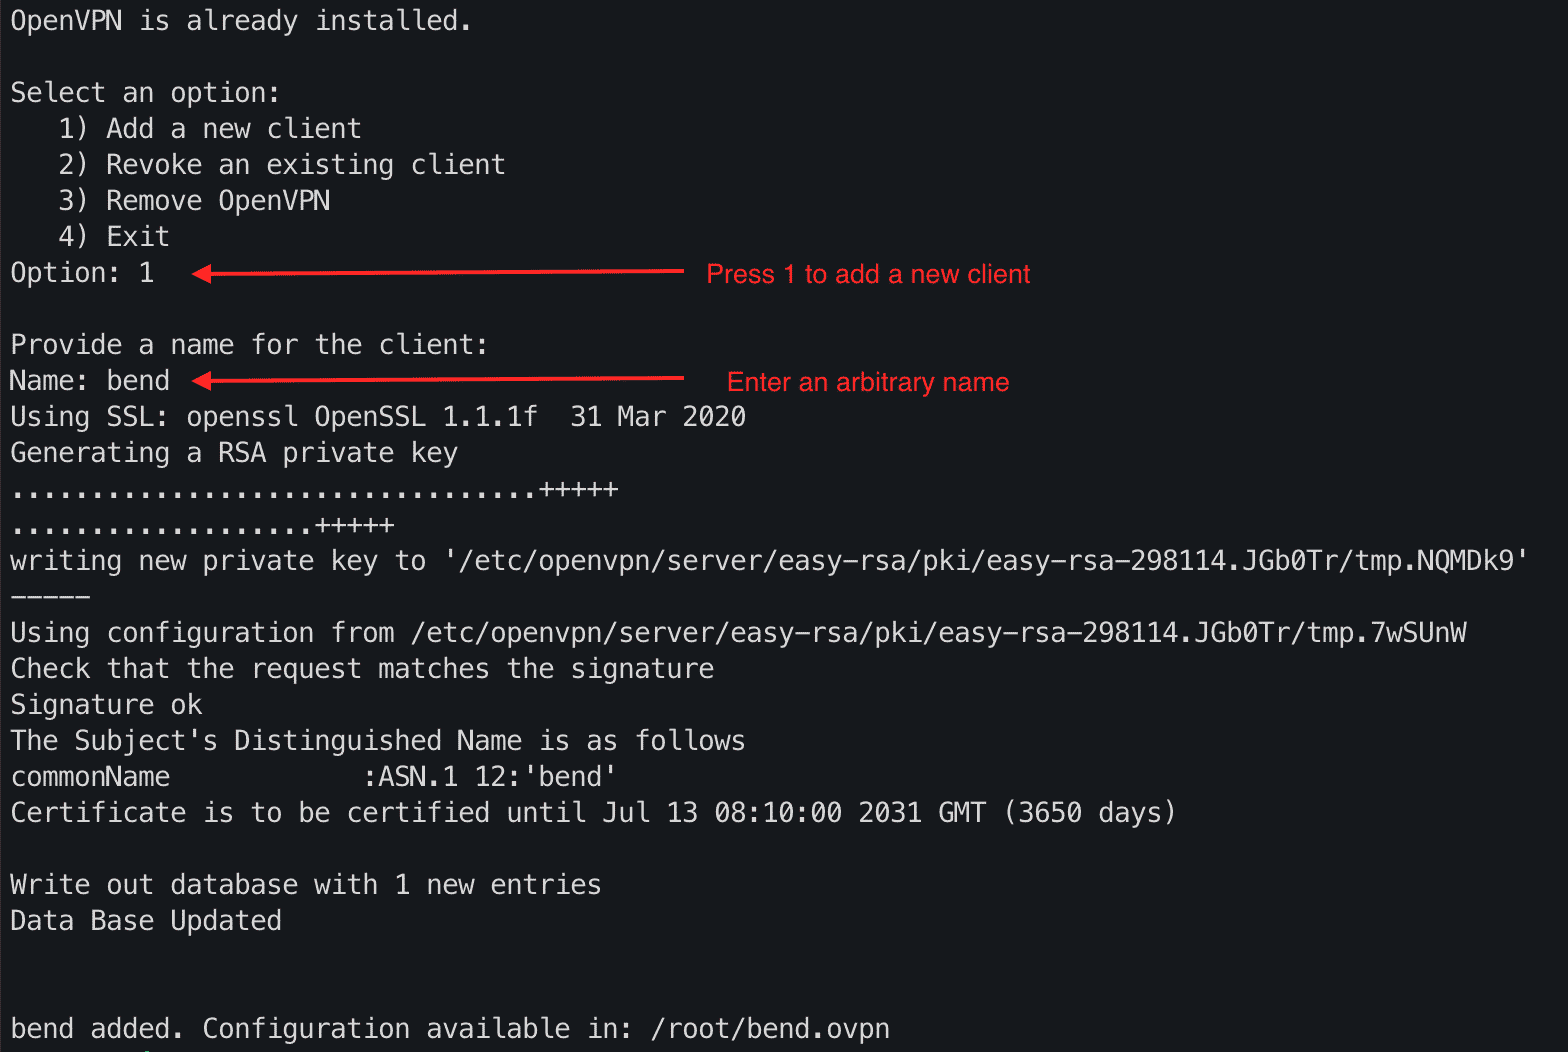
Step 5 – Add or remove a new client
You must run openvpn-ubuntu-install.sh script file again:
$ sudo ./openvpn-ubuntu-install.sh
Output 
How to start / stop / restart the OpenVPN server?
To start, run:
$ sudo systemctl start [email protected]
To restart, run:
$ sudo systemctl restart [email protected]
To stop, run:
$ sudo systemctl stop [email protected]
To display status, run:
$ sudo systemctl status [email protected]
Output:

Conclusion
You’ve already gone through the details of how to set up OpenVPN on Ubuntu 20.04.
Thanks for reading.


