Introduction:
VLC is one of the most commonly used media players across all the famous operating systems such as android, iOS, Windows, Mac, and Linux. Apart from its efficient and powerful video playing features, it also presents some basic video editing features such as trimming. Therefore, today we have decided to share with you the method of trimming a video in VLC.
Note: The steps of trimming a video in VLC have been performed on Ubuntu 20.04. However, these steps will work perfectly fine with any other Linux distribution too such as Linux Mint 20, Debian 10, CentOS 8, etc. We also assume you have already installed VLC on your system. If not, click here.
Method of Trimming a Video in VLC in Ubuntu 20.04:
For trimming a video in VLC in Ubuntu 20.04, you will need to perform some easiest steps stated below:
Step # 1: Check if VLC is installed on your Ubuntu 20.04 System or not:
First things first. Before starting to trim a video with VLC, you need to ensure that VLC is installed on your Ubuntu 20.04 system. You can check this out by running the following command:
vlc --version
![]()
If VLC will be installed on your Ubuntu 20.04 system, then running this command will display its version along with some other details as highlighted in the image shown below:

Step # 2: Download or Locate a Sample Video that you want to trim:
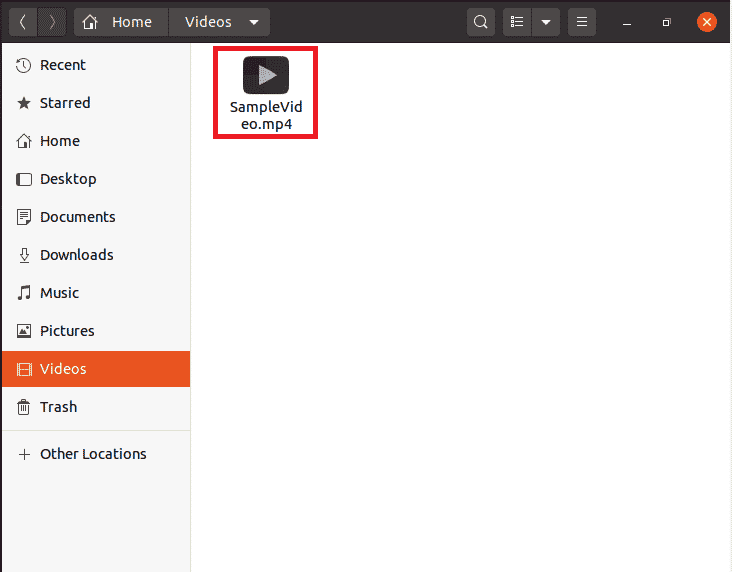
We had a sample video of 30 seconds that we wanted to trim further. This video was located in our /home/videos directory. We have also highlighted the icon of that video in the following image. You can take any desired video for trimming with VLC.
Step # 3: Launch VLC via Ubuntu 20.04 Terminal:
Now we need to launch VLC and we will do this via the terminal by running the command stated below:
vlc
![]()
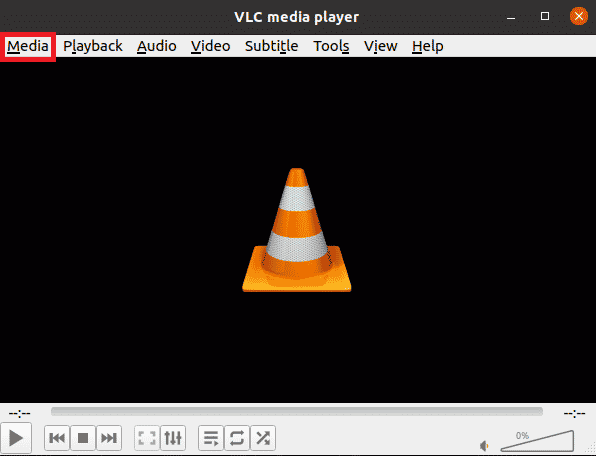
After running this command, the VLC media player will immediately be launched on Ubuntu 20.04 as shown in the following image:
Step # 4: Open the Video File that you want to trim with VLC:
Now we would like to open our sample video with VLC to trim it. For that, we will click on the Media tab on the VLC window as highlighted in the image shown above in step # 3.
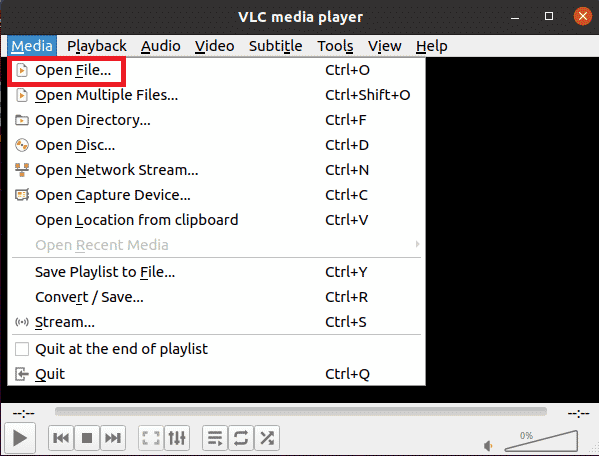
Clicking on the Media tab will launch a menu from which we are supposed to select the Open File option as highlighted in the image shown below:
Doing this will let you browse through your computer system to locate your desired video. Once you have selected it, you can click on the Open button.
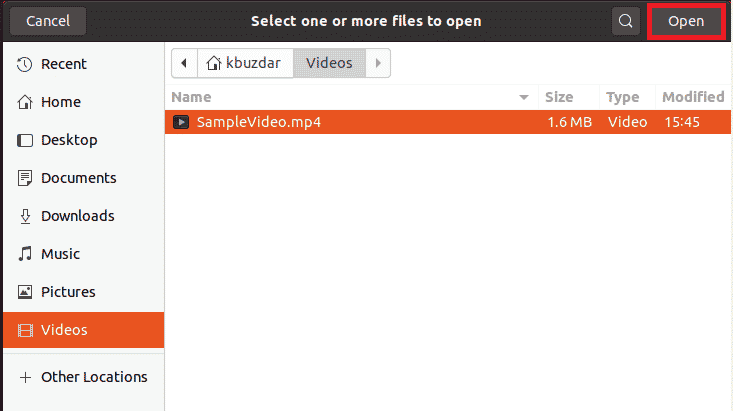
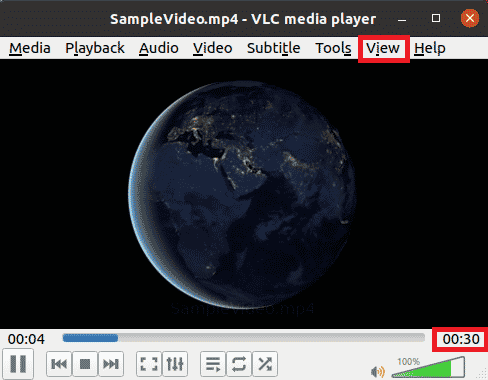
When you will click on this button, the selected video will immediately open with the VLC media player. You can also verify the total duration of this video that we have highlighted in the following image:
Step # 5: Enable the Advanced Controls of VLC:
Once our video is opened with the VLC media player, we need to enable the advanced controls in VLC with which we will be able to trim our video. For that, we will click on the View tab on our VLC window as highlighted in the image shown above in step # 4.
Clicking on the View tab will launch a menu from which we are supposed to check the Advanced Controls option as highlighted in the image shown below:
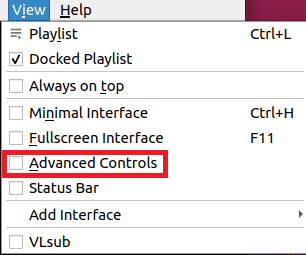
Doing this will cause the advanced VLC controls to appear right above the Play button as highlighted in the following image:

Step # 6: Trim your Video using VLC Advanced Controls:
Now we are going to use the enabled advanced controls for trimming our video. For that, we will first pause our already running video at the point where we want to start trimming. The video can be paused by clicking on the Play button as highlighted in the image shown below:
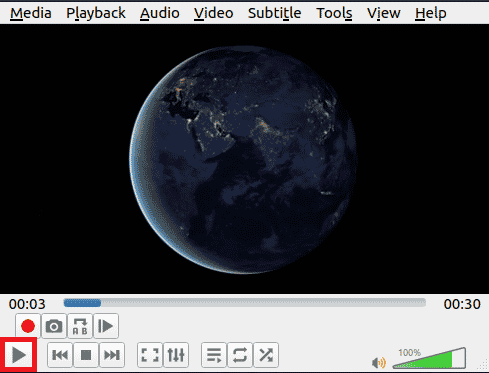
Once our starting point (of trimming) has been selected, we need to click on the red Record button on the Advanced Controls panel and then click on the Play button again to start playing the video. Both the Record and Play buttons are highlighted in the following image:
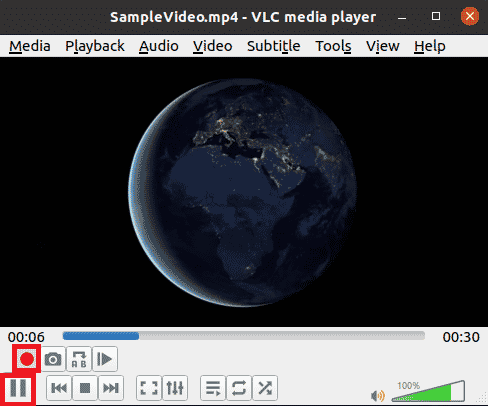
Now as soon as that point in your video is reached from where you want to stop trimming, you need to click on the red Record button again to stop recording and then click on the Play button again to stop playing the video as highlighted in the image shown below:
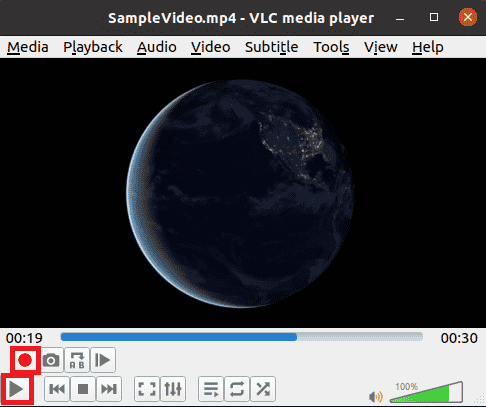
You might not have realized it yet, but you have successfully trimmed your desired video with VLC.
Step # 7: Verify if your Sample Video has been trimmed or not:
Now you need to check whether your trimmed video has been successfully saved or not. A point to be noted over here is that all the videos that are trimmed with VLC are stored in the /home/videos directory. Therefore, you need to go to that directory to find your recently trimmed video. Our trimmed video is highlighted in the following image:
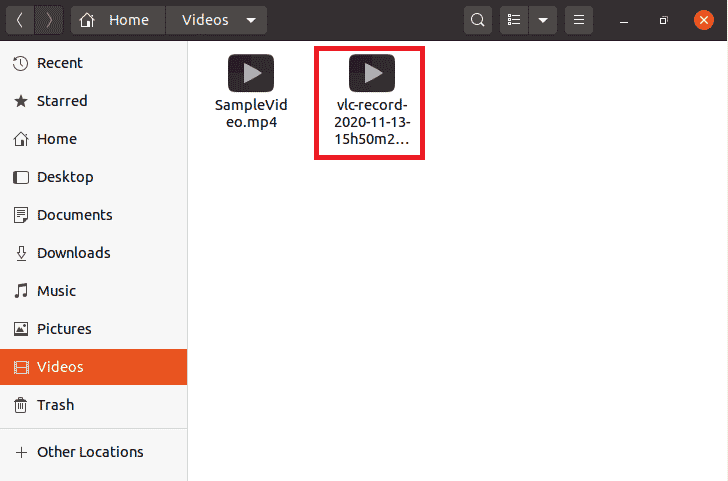
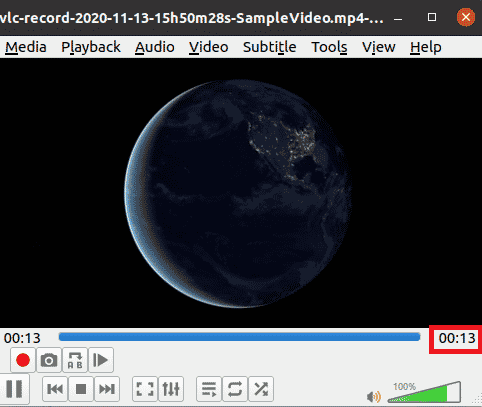
To verify if it has actually been trimmed or not, we will open this video with the VLC media player and you will be able to figure out from its duration that it has been successfully trimmed. (The duration of the original video was 30 seconds whereas the trimmed video is of 13 seconds).
Conclusion:
By following the super quick method described in this article, one can easily get as many videos trimmed as he wants while using the VLC media player. Again, we would like to mention that although these steps have been performed on Ubuntu 20.04, you can still use any other Linux distribution too.


