NFS, also known as Network File System, can be defined as a file machine protocol that enables users to view and access files and directories on a remote system as if they were locally stored. It’s a client-server architecture, with the server being the system that shares storage and the client being the machine that accesses the server’s storage. Users and system administrators can mount the complete or a portion of a server’s file system on a client’s system using NFS. The mounted files can then be accessed by clients based on the permissions (read, write) that have been assigned to them.
In this article, we will show you how to set up and configure an NFS server and client on a Debian system by running the commands and procedures described below:
NFS (Network File System) Server
We’ll need to install the NFS kernel server on a host machine to share folders. To do so, follow the instructions below:
Step-1: Installation of the NFS Kernel Server
Before you start installing the NFS server, make sure your system repository index is up to date by performing the following command in Terminal:
$ sudo apt update |

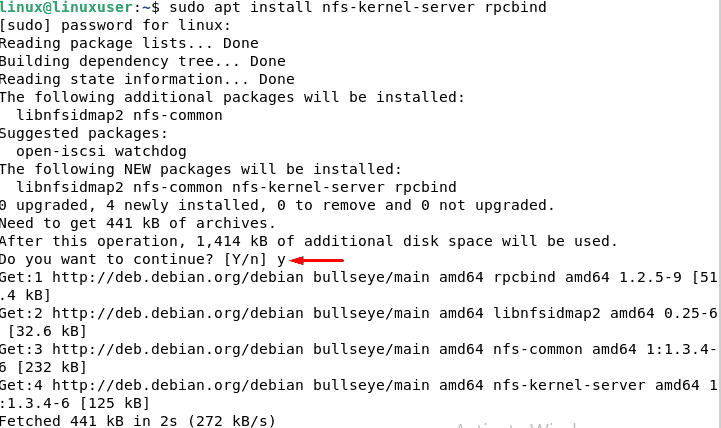
Install the NFS Kernel server by using the following command in Terminal once the update is completed.
$ sudo apt install nfs-kernel-server rpcbind |

To confirm the installation with a Y/n option, press y, and the installation will begin on your computer.
Step 2: Make a Directory for Exports
Now we need to make an export directory that can be shared with the client’s computers. You are free to title it how you see fit. In the /mnt directory, we’re creating an export directory called “sharedfolder.”
Run the following command, making sure to provide the export directory path:
$ sudo mkdir –p /mnt/sharedfolder |

To give all clients access to the export directory, you’ll need to remove limited permissions. To do so, use the following command:
$ sudo chown nobody:nogroup /mnt/sharedfolder |

Then grant everyone access to read, write, and execute new permissions.
$ sudo chmod 755 /mnt/sharedfolder |
Hence, all clients will be able to access the shared folder available in the mnt directory.

Step-3: Configure the Export Directory
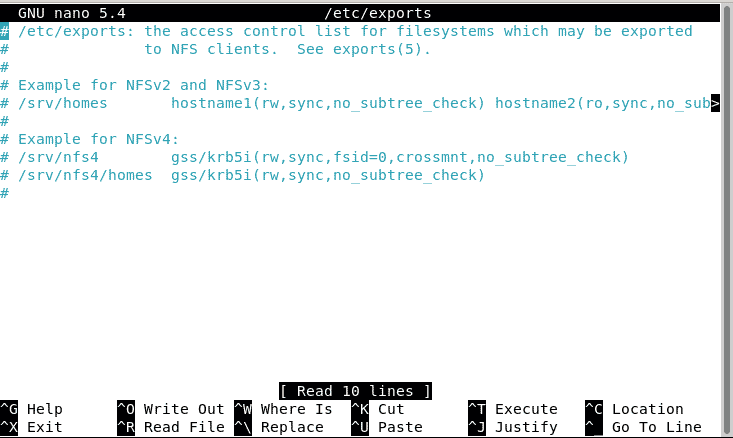
You can indicate the directories you want to share with your clients, as well as their hostnames, in this section. Run the following command as sudo in Terminal to accomplish the change in the /etc/exports file with the nano editor:
$ sudo nano /etc/exports |

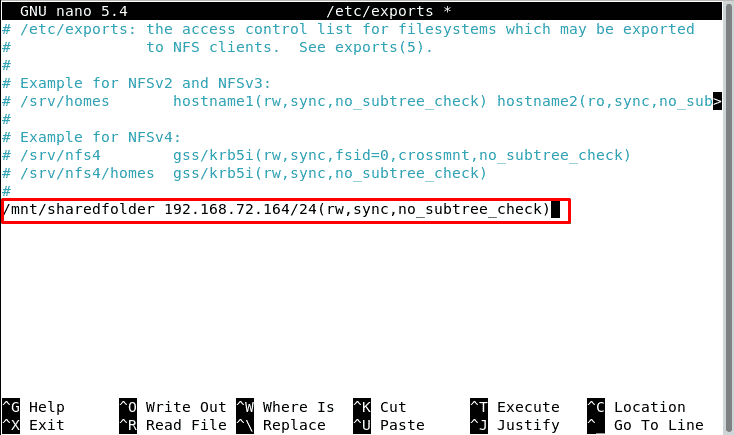
To grant access to several clients by defining a whole subnet, add the following instruction to the code.
/mnt/sharedfolder subnetIP/24(rw,sync,no_subtree_check) |
Customers will have access to our shared directory if they specify the whole subnet.

Press CTRL+O to save and CTRL+X to leave the /etc/exports file once you’ve finished editing it.
The following permissions are granted to the client via the parameters (rw, sync, no subtree check) in the preceding file:
- read and write(rw)
- Before implementing any changes, write them to the disk (sync)
- no subtree checking
Step 4: Set up the Firewall
It’s now crucial to ensure that the server is available for clients to view the shared information. You must add a rule that enables traffic to the NFS port from the specified clients.
If nfw is not installed then you can install it by using the “sudo apt install ufw” command. Also if it is not being enabled and is inactive then use the “sudo ufw enable” command. But in our case, these things are already being done.
In our case, we’ll allow the entire 192.168.72.0 network to access the NF port:
$ sudo ufw allow from 192.168.72.0/24 to any port nfs |
![]()
To check if the rule was correctly added, run the following command in the terminal:
$ sudo ufw status |

Our host NFS server is now set up and ready for use by the specified clients.
Setting Up the Client Machine
We’ll now set up the client machine to allow access to the server’s export directory. To do so, simply follow the steps below:
Step-1: Install the NFS Client
To begin, run the following command in Terminal to update your client machine repository index:
$ sudo apt update |

To accomplish the installation of the NFS client, we used the command:
$ sudo apt-get install nfs-common |

Step-2: Make a Mount Point
Make a mount point to access the server’s shared content. To accomplish this, we used the command:
$ sudo mkdir -p /mnt/sharedfolder_client |

Step 3: On the Client, Mount the Directory
The mount point was established in the previous phase. Now we’ll mount the shared directory of the NFS server to the previously constructed mount point. To accomplish this, we used the command:
$ sudo mount 192.168.72.164:/mnt/sharedfolder /mnt/sharedfolder_client |
The IP address of our NFS server is 192.168.72.164. On the client’s PC, the shared NFS directory has been successfully mounted. 
Conclusion
In this article, we have successfully learned about the basic description of NFS and how to install and configure NFS on a Debian Linux system. On a Debian Linux system, this article also discusses how to establish a connection between servers and clients.


