When you install a new OS, by default it is configured to obtain a dynamic IP address from the DHCP server. However, sometimes you have to configure the static IP address on your machine. It can be for various reasons like when a service needs to connect through an IP address instead of a domain name or when you are hosting a web server or to give someone remote access to your system. Whatever the reason is, you must know how to configure a static IP in your system. This post will explain to you how to do this.
You can configure static IP in Debian 10 system using any of the following methods:
- Configure Static IP through Command Line
- Configure Static IP through GUI
Let’s get started.
Configure Static IP through Command Line
You can configure the static IP through /etc/network/interfaces file from your command line. However, for this, you first need to know the network interface name.
You can find the currently available network interface by running the below command in Terminal:
$ ip a
After running the above command, we received the following output.
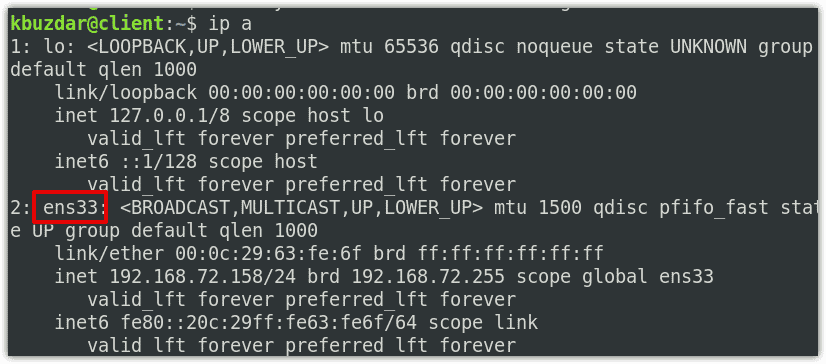 The above output of “ip a” command shows that there are two interfaces currently available. We want to configure the static IP for the interface ens33. The current IP address of ens33 is 192.168.72.158 which is dynamically assigned by the DHCP.
Now we will open the interface configuration file and configure static IP for ens33.
To open network interface configuration file, execute the following command:
$ sudo nano /etc/network/interfaces
Then add lines in the following syntax replacing the interface with your network interface name and xxx.xxx.xxx.xxx with the relevant IP address.
auto interface
iface interface inet static
address xxx.xxx.xxx.xxx #enter your IP address

netmask xxx.xxx.xxx.xxx

gateway xxx.xxx.xxx.xxx #enter gateway ip address

dns-nameservers xxx.xxx.xxx.xxx
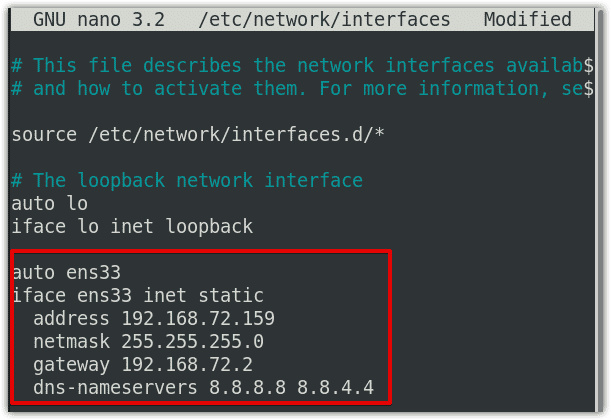
For our network interface ens33, we have modified the configuration lines as follows:
auto ens33

iface ens33 inet static

address 192.168.72.159

netmask 255.255.255.0

gateway 192.168.72.2

dns-nameservers 8.8.8.8 8.8.4.4
Once you have completed the configurations, save and close the file.
Then restart the networking services. Use the below command to do so:
$ sudo systemctl restart networking.service
You can also use the ifdown and ifup command to apply the configuration changes. First, run the ifdown command to bring down the interface:
$ ifdown ens33
Then bring up the interface using ifup:
$ ifup ens33
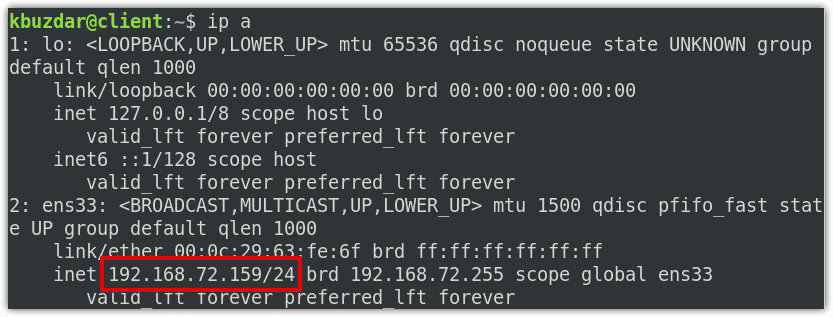
Now to verify if the IP address has been changed successfully, issue the below command in Terminal:
$ ip a
Configure Static IP through GUI
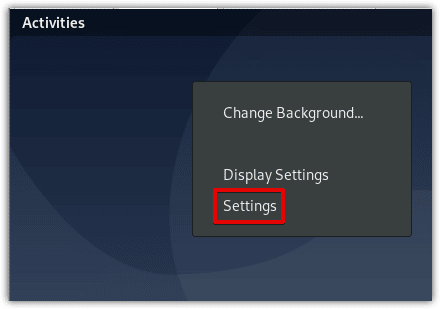
You can also change the static IP through the Settings utility in your Debian system. To launch the Settings utility in your system, right-click the desktop and then click Settings.
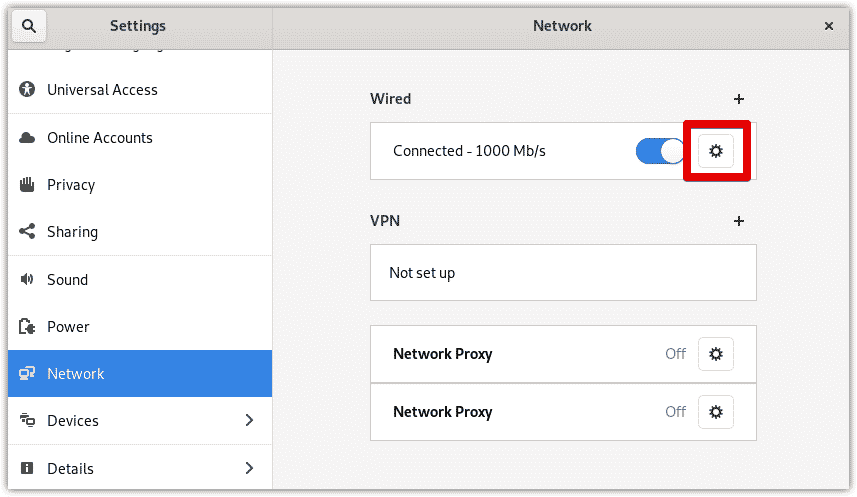
Then from the left pane in the Settings window, select the Network tab.

On the right pane, click the cog icon in front of the network interface you want to configure.
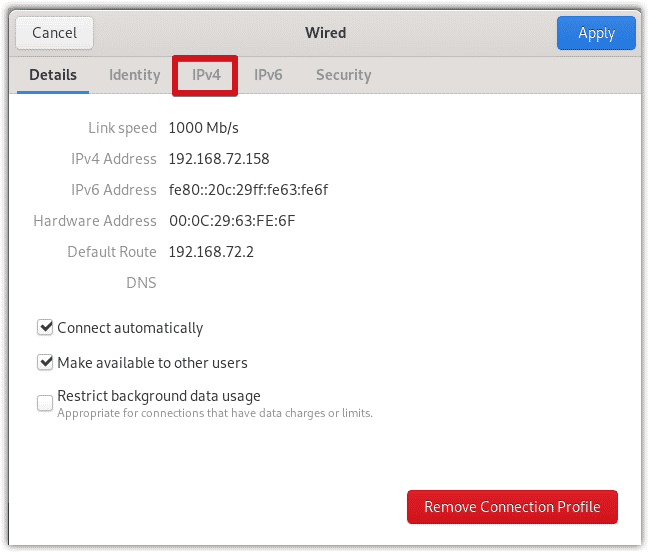
This will open the following configuration window where you will see the current IP 192.168.72.158 which is the IP address obtained from DHCP server. Go to IPv4 tab.
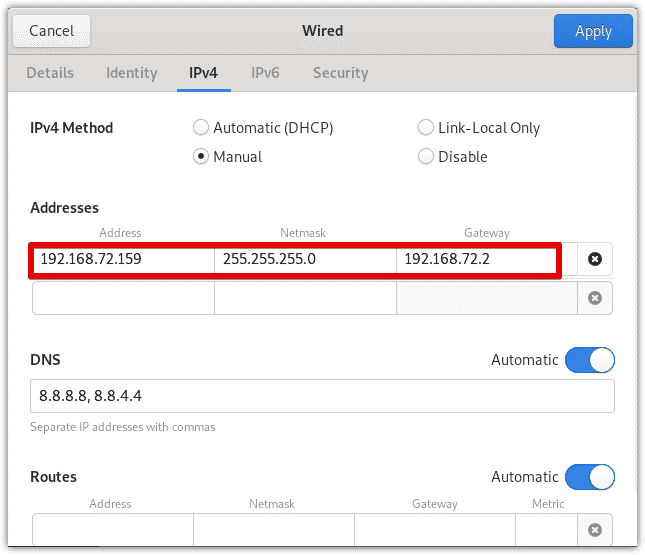
Then in the IPv4 Method, choose Manual.
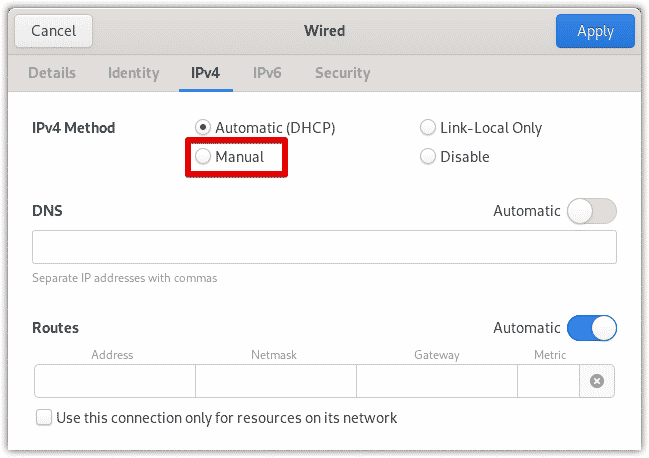
Now the Addresses field will appear. Enter the IP address, Netmask, and Gateway for your interface. If you also want to set the DNS address manually, switch off the Automatic button and enter the DNS server address.
Here, we have specified 192.168.72.159 as our interface IP address, 255.255.255.0 as netmask, and the 192.168.72.2 ad the default gateway. Then we have specified 8.8.8.8 and 8.8.4.4 as our DNS servers.
Now click the Apply button to apply all the configuration changes.
Now to confirm if the new IP address has been successfully configured, go to the Details tab. Alternatively, you can also use the “ip a” command in Terminal to verify the IP address.
There you have the static IP configuration in Debian 10. Using either the command line or GUI method, you can easily configure the static IP address on your system.

Ummara Mushtaq is a Telecommunication engineer with two years of experience in server support and networking. She writes technical articles based on Linux system administration for LinuxWays.


