Nessus is a popular vulnerability scanner tool used to identify and fix the security issues in your network. It allows you to scan for various types of vulnerabilities, such as outdated software, misconfigured networks, potentially weak passwords, and more. Nessus also provides detailed information and recommendation in the form of a report that helps you remediate the detected problems in your system. It is one of the tools you should install and use every day if you are a Kali Linux user. It will help you improve the performance of your system and ensure better security.
Read this guide to find:
How to Install Nessus on Kali Linux
To install and setup Nessus on Kali Linux, follow the below-given steps:
Step 1: Download Nessus Deb Package on Kali Linux
To install Nessus on Kali Linux, you first need to download the deb package for your system, this can be done either through GUI or terminal.
For GUI, open a browser on Kali Linux and navigate to the official Nessus website. Then, choose the version of Nessus you want to download and select the Platform as Linux-Debian-amd64 if you are using Kali Linux 64-Bit operating system. For the 32-Bit Kali Linux operating system, you can go with the i386 platform. Once you selected the desired options, simply click on the Download button to download the Nessus deb package on Kali Linux.

You can also select Download by curl option from the GUI, copy the curl command and execute it in your Kali Linux terminal to download the Nessus deb package on Kali Linux:

The following curl command can be executed in the terminal to download the Nessus version 10.7.0 on Kali Linux:
--url 'https://www.tenable.com/downloads/api/v2/pages/nessus/files/Nessus-10.7.0-debian10_amd64.deb' \
--output 'Nessus-10.7.0-debian10_amd64.deb'

Besides that, you can also use the following wget command to directly download the deb package of Nessus version 10.7.0 on your Kali Linux system:

Step 2: Install Nessus on Kali Linux
After you download the Nessus deb package from any of the above-given methods, run the apt install command followed by the Nessus deb file name to install the package on Kali Linux:

Note: You must have at least 30GB of free disk space available on your Kali Linux for Nessus installation. This requirement is for the setup process, if you fail to do it, you will encounter the disk space error during the process.
Step 3: Start Nessus Service on Kali Linux
Once you installed Nessus on Kali Linux, run the below-given command to start the Nessus daemon on the system:

Step 4: Enable Nessus Daemon on Kali Linux
You should also require enabling the Nessus daemon on Kali Linux, you can do it from the below-given command:

Step 5: Check Nessus Daemon Status
To check Nessus daemon is running on Kali Linux, simply use the following command and ensure it is active on the system:
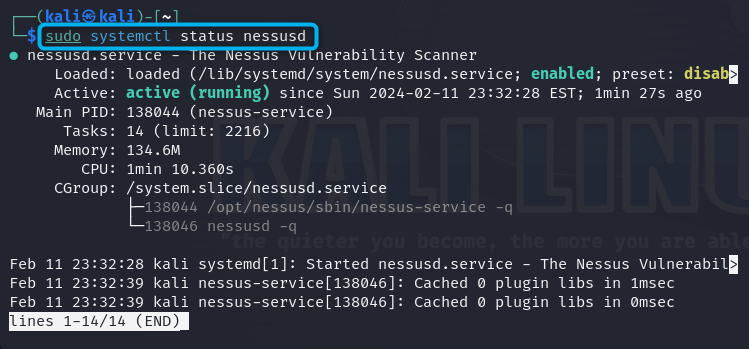
Step 6: Check Kali Linux IP Address
You should also require the IP address of your Kali Linux system because it will be used later on to access Nessus dashboard on the browser. You can find your Kali Linux IP address by running the following command:

Step 7: Access Nessus on a Browser
After you have performed the above steps carefully, you can access Nessus on your browser by using the following URL format:
Note: Ensure replacing the kali_linux_ip with the IP address of your Kali Linux system.
At the initial Welcome screen, simply use the Continue button to move forward:

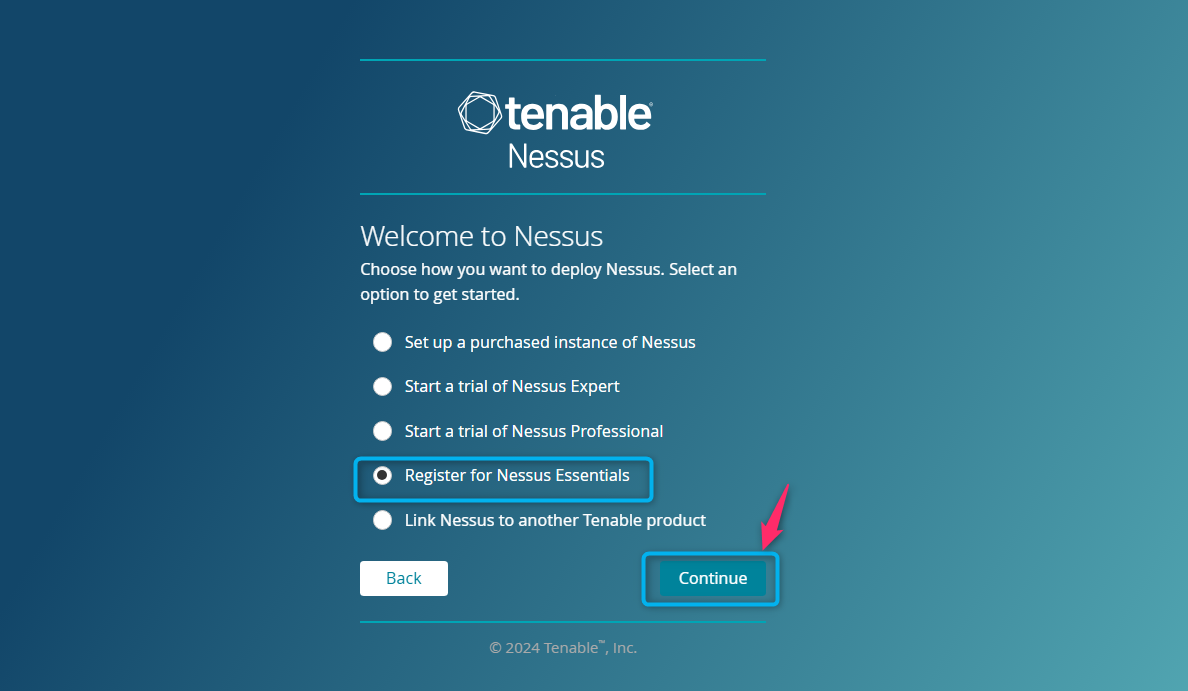
Choose the Nessus package that you want to use. It is better to purchase Nessus to use the full suite of packages. If you want to use free version, you can simply go with the Register to Nessus Essentials option:
Enter your First Name, Last Name and company or organization email address and then use the Register button:

Note: Normal email address won’t work here.
You will get the Activation code as soon as your register your account on Nessus, use the Continue button to move forward:

Now, enter the user account information that you have previously setup and click on the Submit button to login to the account:

Wait until Nessus is initialized, and it will take time downloading the required plugins:

If the downloading is failed due to network error, you will get the following error:
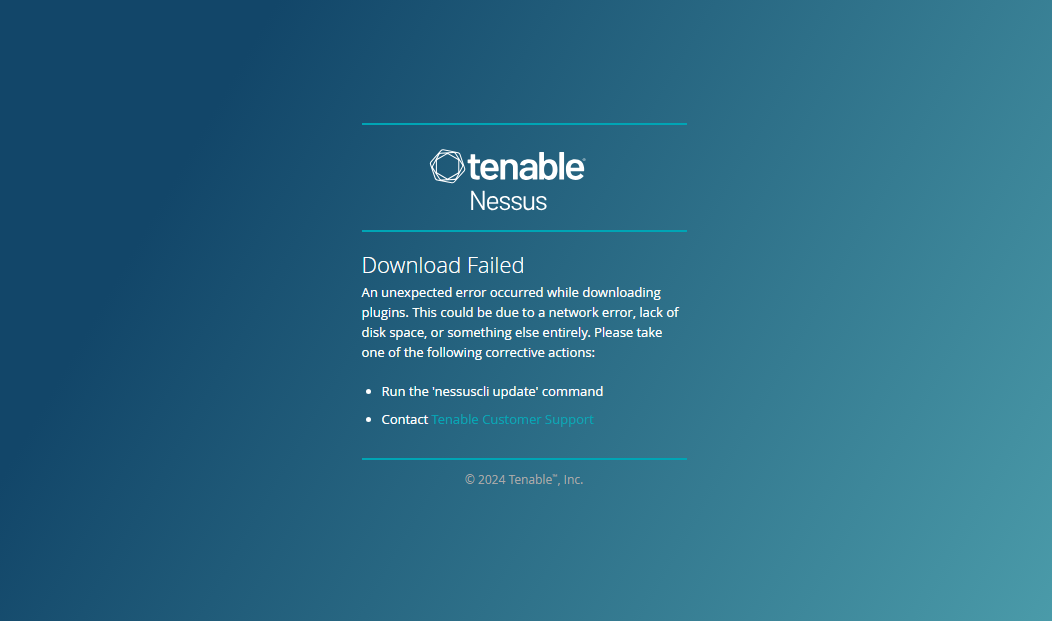
You can fix this error by going back to your Kali Linux terminal and login as a root user using the su command. Then use the following command to update the nessuscli:

The update process will begin downloading the Nessus plugins automatically on Kali Linux, once it is finished, restart Nessus daemon again using the below-given command:
Now, go back to your browser and reload the web page, then enter the user credentials that you set up previously to Sign In to the Nessus dashboard.
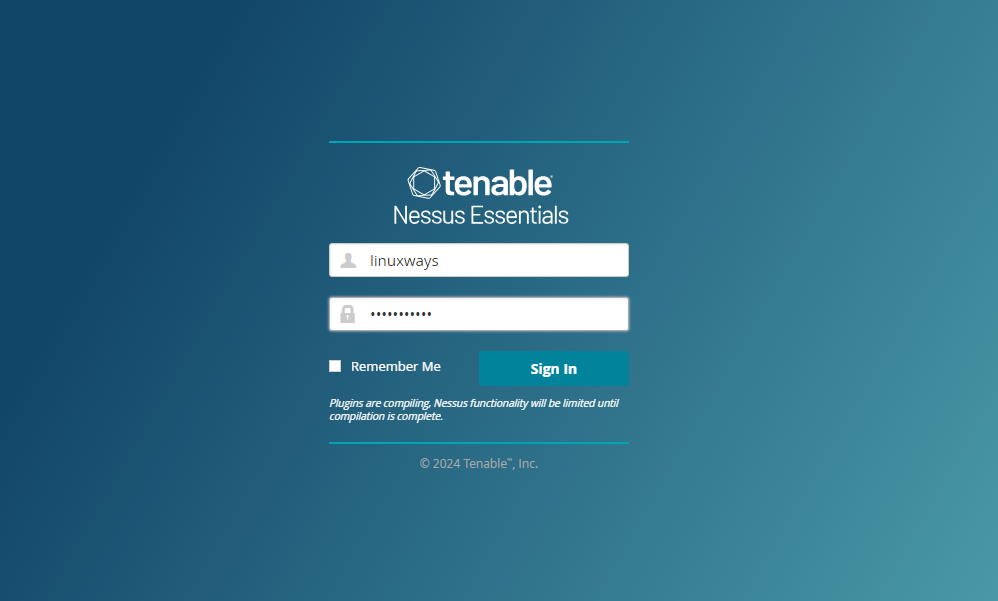
Once completed, the Nessus dashboard will appear on your browser. However, you have to wait for some time until the plugin compilation is completed:

Once the Nessus complies the required plugins, you will then be able to use the dashboard:

How to Fix Create a New Scan Button Not Working on Nessus
If you are unable to click on the Create a New Scan button after completing the plugin compilation, you can try out the following steps to fix it:
Step 1: First, login to root user on Kali Linux terminal using the below-given command:
Step 2: Then stop the Nessus daemon on Kali Linux using the following command:
Step 3: Now run the NessusCLI with -R argument to reload all the plugins on Kali Linux system:

Step 4: After successfully loading the plugin, restart the Nessus daemon on Kali Linux using the below-given command:
Step 5: Now, navigate to the browser and reload the Nessus dashboard URL again. This time you will be able to use the New Scan button:

Step 6: When you select the New Scan button, you will be provided with a different Scanner option to choose from. Here, I’m going with the Basic Network Scan option:

Step 7: Write down the Name for your Scan, select the Targets by adding the IP addresses of the hosts you want to scan separated by comma. Once done, use the Save button to confirm the settings:

Step 8: Click the Launch button to begin the scan:

Wait, until the scan is completed, which might take time.

Once the scan is completed, you can generate a report of the scan using the Report button:

It will download the scan report in a PDF file, which you can open it on your system to see the result:

Conclusion
Nessus is a powerful tool for scanning vulnerabilities in your network. You can install Nessus on Kali Linux by downloading the deb package from the official website. Then, use the apt install command to install the Nessus on Kali Linux from the deb package. You should also enable and start Nessus daemon on your system so that you will be able to run its dashboard on the browser using the system IP address with port 8834. Once the dashboard is accessed, you can run the scan according to your choice. If the scan button is not working, use the step-by-step fixes in the above-section of this guide to efficiently run the scan and test the efficacy of your network.
By day, I am an engineer and researcher, building bridges and figuring out how the universe works. But when the clock strikes five, I turn into a wordsmith!
I write about my adventures on my blog, sharing tips and tricks to help others join the tech fun. I have worked on Raspberry Pi, Ubuntu, Debian, and Laptops. Right now, I have accepted the challenge of working on the Kali Linux system, and with my vast expertise in Linux systems, I will help users overcome the challenges through my blogs.
