Introduction
Normal users on Linux Mint can not execute commands that require root/administrator privilege. With Sudo commands, unauthorized users can run commands that can only be run by root/administrators. Sudo refers to “superuser do”. Sudo users or sudoers group is managed and defined through the sudoer file.
In this article, you will learn various ways of adding and removing sudoers on Linux Mint 20.
Prerequisites
You will need a root/sudo account to apply the following methods.
Assign Sudo Privileges by Adding Users to sudo Group
Method 1:Add Users to sudo Group Using adduser command
Open the terminal and add the user to the sudo group with the following command.
Note: Remember to change the username in command to the name of your user.
sudo adduser <username> sudo

Method 2: Add Users to sudo Group Using usermod command
Usermod command is used to manage, change, and modify existing users. You can add a user to sudo by executing the following usermod command on the terminal. Remember to change the username in command to the name of your user.
sudo usermod -a -G sudo <user>

Method 3: Add Users to sudo Group Using gpasswd command
The gpasswd command administers the /etc/group and /etc/gshadow directories. Enter the following gpasswd command to add users to the sudo group.
sudo gpasswd -a <user> sudo

Assign Sudo Privileges to User by Modifying the sudoers file
You can also give sudo privileges to users by directly editing the sudoers file located at /etc/sudoers.
Note: This method authorizes a user to run sudo commands but does not add the user to the sudo group. Make note that managing privileges through a group is safe and standard practice.
To make changes in the /etc/sudoers file, run the following command to open the sudoer file with the visudo tool.
sudo visudo
Add a new line/rule at the end of the displayed file with the username you want to add.
<username> ALL=(ALL:ALL) ALL
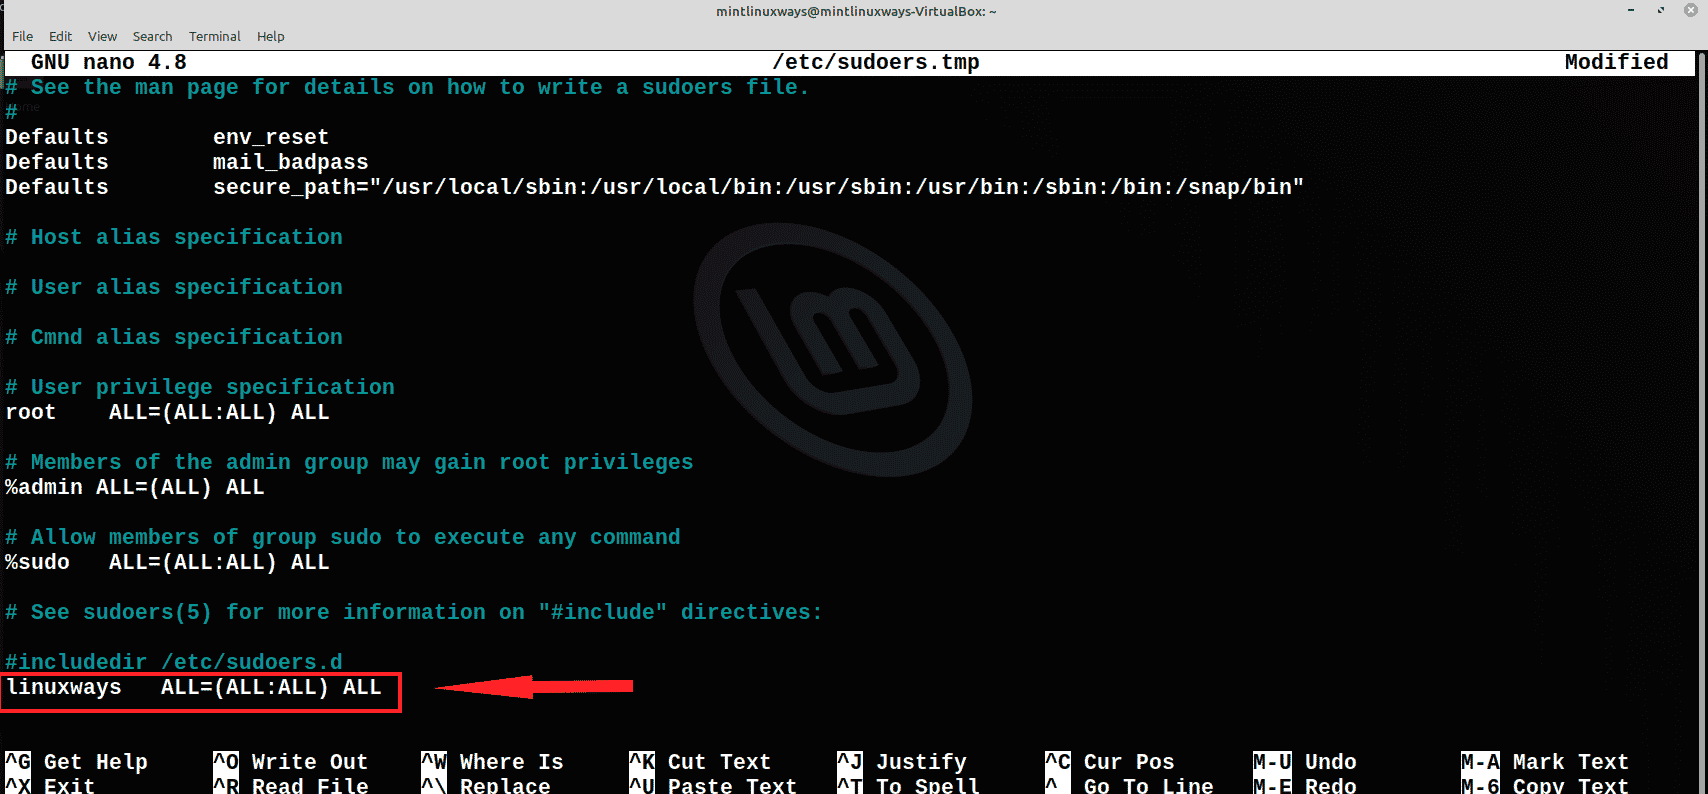
Click Ctrl+X to exit. Press y to update the file.

You will be again prompted to make changes in the file name. Do not edit and press ‘Enter’ to save the file.

You can check if you have used the correct syntax while modifying the sudoer file by parsing it through the following command.
sudo visudo -c

Assign Sudo Privileges by Changing the User’s Account Type to Administrator
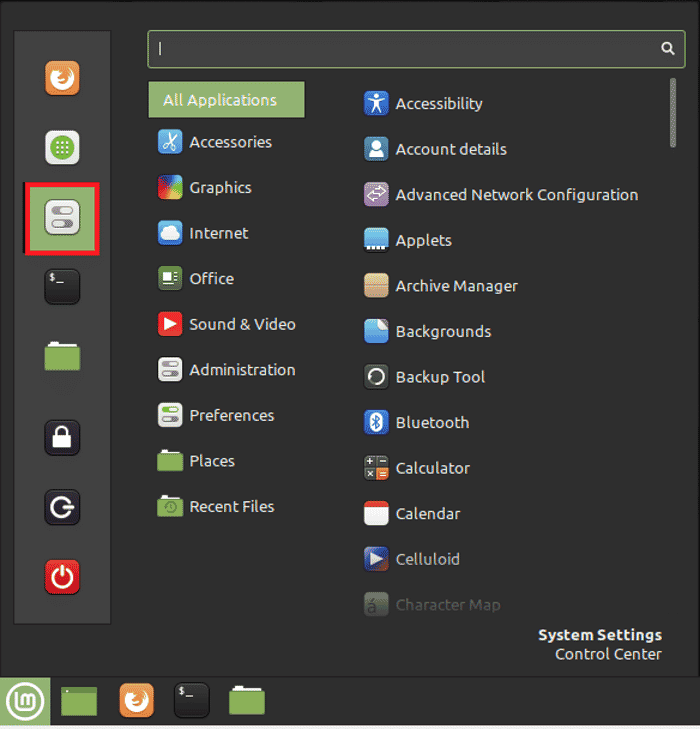
To use this method head over to System Settings from the Applications.
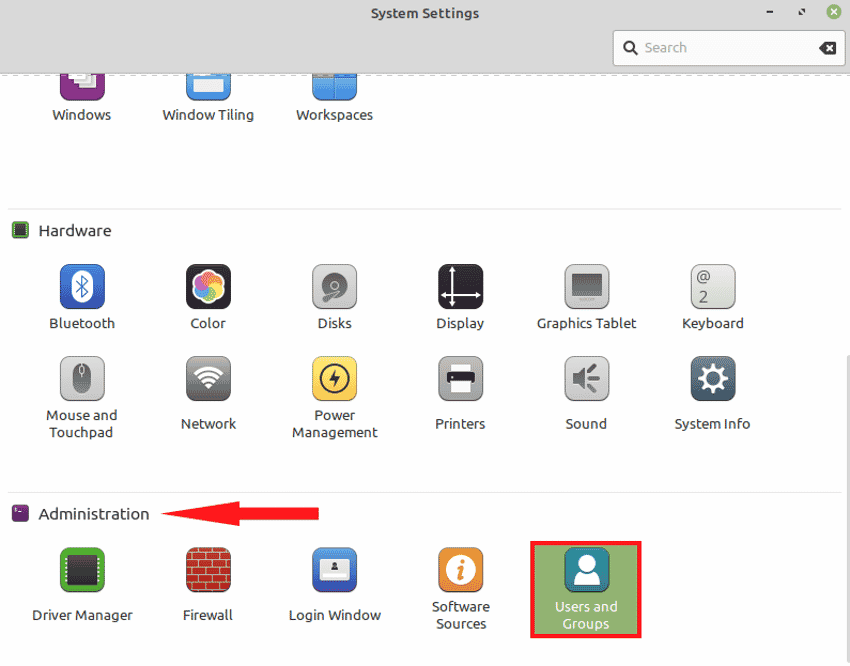
Now Go to the Administration>User and Groups. Enter password when prompted for authentication.
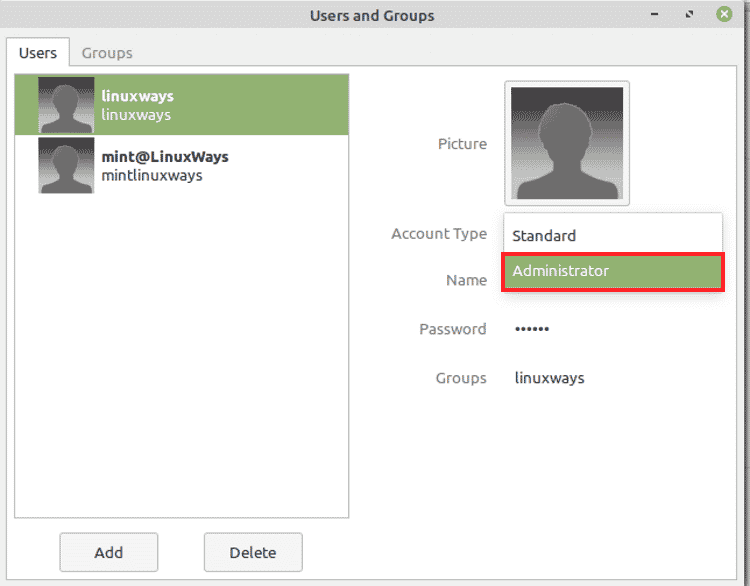
After successful authentication, you will see all users in the system. Select the user you want to assign sudo privilege and change its Account Type from Standard to Administrator.
Check if the User has sudo Privileges
Verify if the user is added to the sudo group or not with the following command. This command will display all the groups that the user is a part of.
groups <username>

Remove Users from sudo Group
Method 1: Remove User from sudo Group Using deluser Command
You can remove the user from the sudo group by entering the following command with the username of the user that you want to remove.
sudo deluser <username> sudo

Method 2: Remove User from sudo Group Using passwd Command
Enter the passwd command with ‘-d’ option to remove the user from sudo.
sudo gpasswd -d <username> sudo

Remove Sudo Privileges by Changing the User’s Account Type to Standard
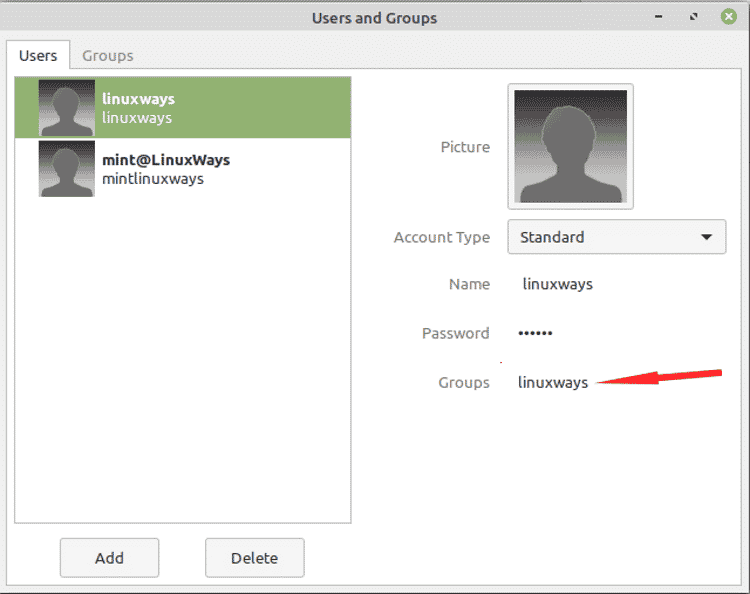
Go to the System Settings>Administration>User and Groups. Now change the user’s Account Type from Administrator to Standard.
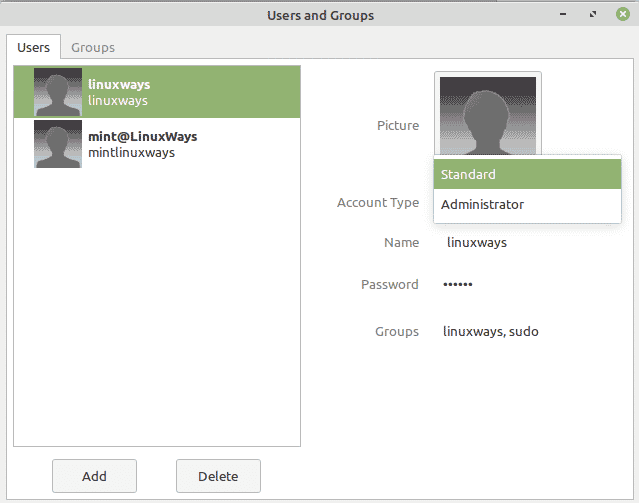
You will see changes that sudo will be removed from the Groups.
Conclusion:
In this article, we have learned how to add and remove users in the sudo group to manage the sudo privileges of the users.


