Introduction:
A Firewall is also labeled as the First Line of Defense against all sorts of external threats and attacks on a system. This single statement is enough to realize the importance of a Firewall, especially in networking. However, at times, the strictness of your Firewall rules leads to such situations in which you are unable to perform some important tasks because of having your Firewall enabled. In these situations, you might want to disable your Firewall temporarily. Therefore, in this guide, we will learn the two methods of disabling the Firewall on a Linux Mint 20 system.
Methods of Disabling the Firewall on Linux Mint 20:
There are two most commonly used methods for disabling the Firewall on a Linux Mint 20 system which are discussed below:
Method # 1: By using the Built-in “ufw” Utility:
Your Linux Mint 20 system’s Firewall can easily be disabled by using the built-in “ufw” utility on your system in the following manner:
Step # 1: Check the Current Status of your System’s Firewall:
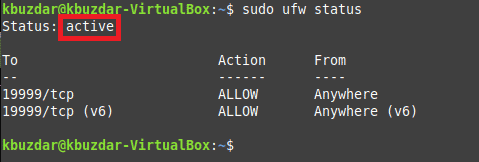
Before disabling the Firewall on your system, it must be enabled currently. For ensuring that, you need to check its current status with the command shown below:
$ sudo ufw status
![]()
Currently, the Firewall is active on our Linux Mint 20 system as you can see from the following image:
Step # 2: Disable the Firewall on your System:
To disable the Firewall using this method, you have to execute the command shown below:
$ sudo ufw disable
![]()
The following message will indicate that the Firewall has been disabled on your Linux Mint 20 system:

Step # 3: Check the Status of your Firewall again for Confirmation:
However, you can still check the status of your Firewall to confirm if it has been disabled or not. The current status of our Firewall confirms that it is inactive as shown in the image below:

Moreover, whenever you feel like re-enabling your Firewall, all you need to do is to execute the following command:
$ sudo ufw enable
![]()
The following message shows that the Firewall has been enabled again:

Method # 2: By using the Externally Installed “gufw” Utility:
For disabling your Linux Mint 20 system’s Firewall through this method, you need to perform the steps discussed below:
Step # 1: Install the “gufw” Utility on your System:
First, you need to install the “gufw” utility on your system with the following command since unlike “ufw”, this utility is not installed on Linux Mint 20 by default:
$ sudo apt-get install gufw
![]()
Step # 2: Launch the “gufw” Utility on your System:
After installing this utility on your system, you can easily launch it by running the command shown below:
$ gufw
![]()
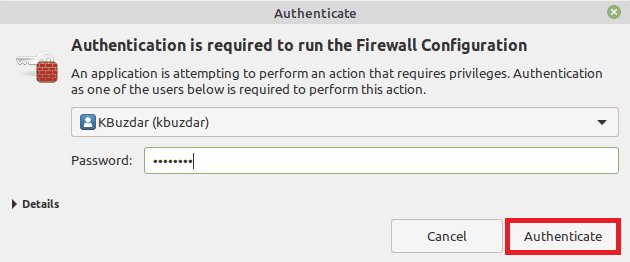
Once you will attempt to launch the “gufw” utility on your system, you will be asked to authenticate yourself by providing your system’s password as shown in the following image:
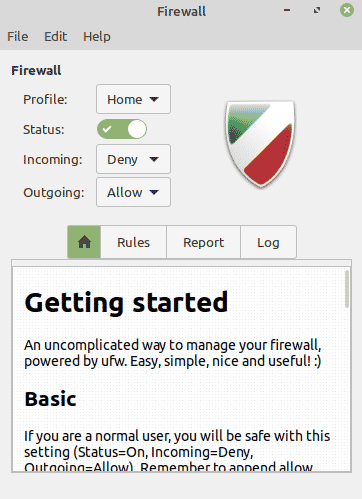
After successful authentication, you will see the interface of the “gufw” utility on your system as shown in the image below. Moreover, you will also be able to check the current status of your Firewall from here.
Step # 3: Disable the Firewall on your System:
For disabling the Firewall on your system, all you need to do is to turn off the “Status” toggle button as shown in the following image:
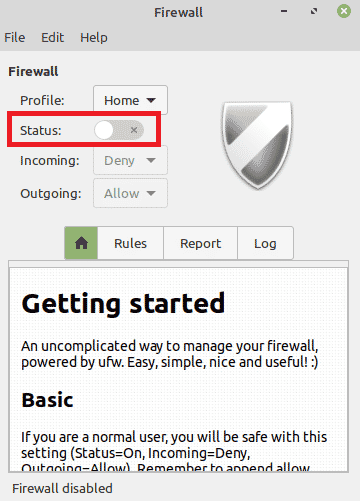
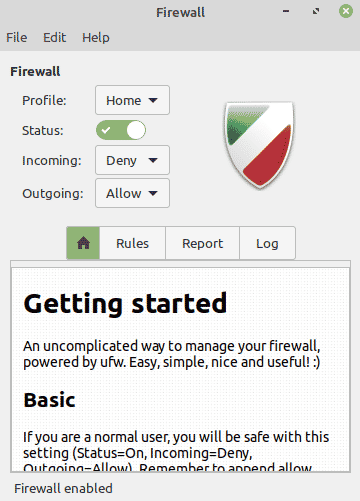
However, if at any moment, you want to re-enable your Firewall, then you simply need to turn on the very same toggle button as shown in the image below:
Conclusion:
This tutorial explained the two methods of disabling the Firewall on a Linux Mint 20 system. However, the importance of an active Firewall must not be overlooked in any case. This is exactly why we have also shared with you the corresponding methods of re-enabling it once you have performed all of your desired tasks for which you had disabled your Firewall earlier.

