
Linux Mint is among the most liked distributions of Linux because it is easy to use and multi-functional. An important factor described above is the desktop environment and how user-friendly it is. GNOME, which is an abbreviation for GNU Network Object Model Environment, is one of the most widely used desktop environments for Linux Mint users. With the launch of Linux Mint 22, users might be looking to download or switch to the GNOME environment.
In this guide, we will show you step-by-step how to download GNOME for Linux Mint 22.
Table of Content
- How to Install Gnome on Linux Mint 22
- Method 1: Installing the Full GNOME Desktop
- Method 2: Installing GNOME Desktop Minimal
- Bonus Tip: Switching from Another Desktop Environment
- Conclusion
How to Install Gnome Desktop on Linux Mint 22
With the new features and enhancements released in Linux Mint 22 alongside GNOME, the latest desktop environment comes with Linux Mint. As it is known, GNOME is one of the most customizable and simplest environments we can find.
Method 1: Installing the Full GNOME Desktop
The complete installation of the GNOME desktop environment includes numerous applications like LibreOffice, Firefox, and Rhythmbox, among others, while its full features edition comes with additional entertainment and social applications. For users willing to install the entire version, execute the command below:
Step 1: Updating the System
Make sure that you have the latest relevant updates for your system using these steps before downloading any new software:
sudo apt update |
|---|
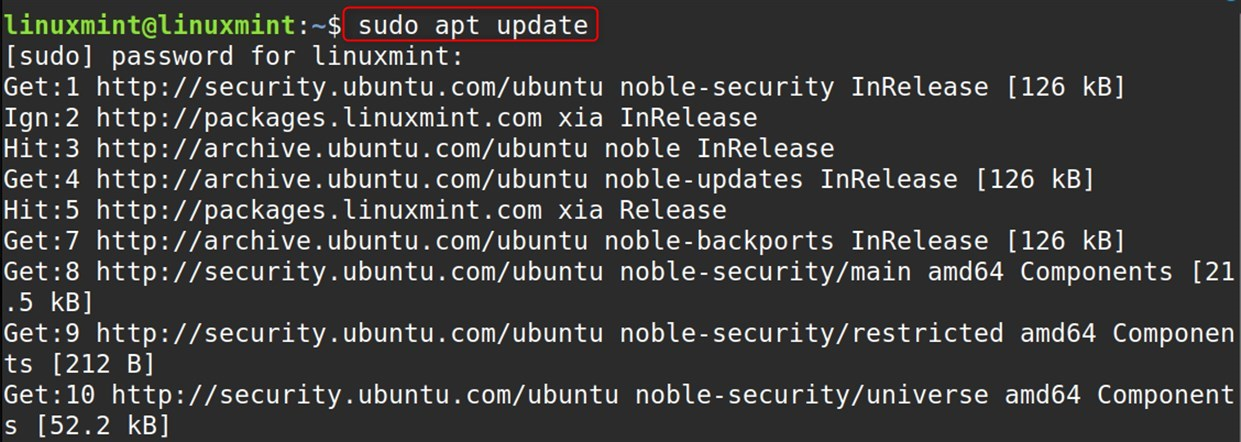
In this command, there is a refresh action for the package list of your system and prepares it for downloading other additional steps.
Step 2: Upgrade Installed Packages
For the added steps to work smoothly, the system needs to have the most advanced information for the installed packages, as well as working ones in Linux Mint:
sudo apt upgrade |
|---|
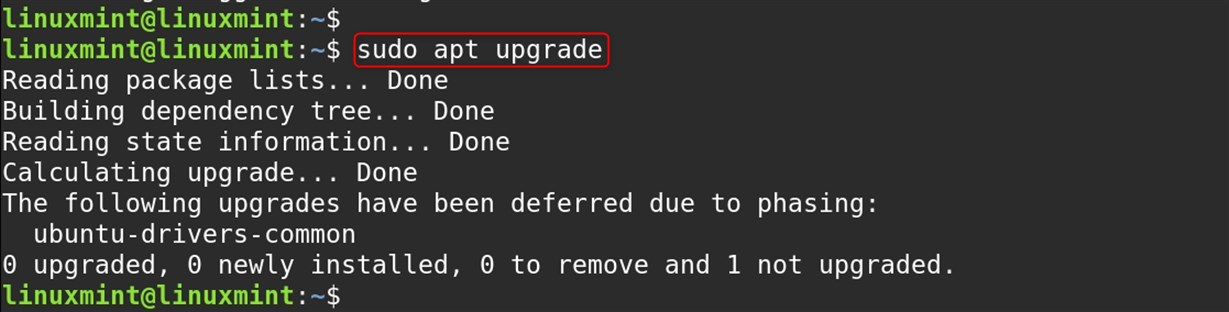
In the above command, apt is an agreement upgrade command, which upgrades all of the previously set packages for your machine.
Step 3: Install GNOME Desktop
Now, you may install the GNOME desktop environment. Let do this:
sudo apt install ubuntu-gnome-desktop |
|---|
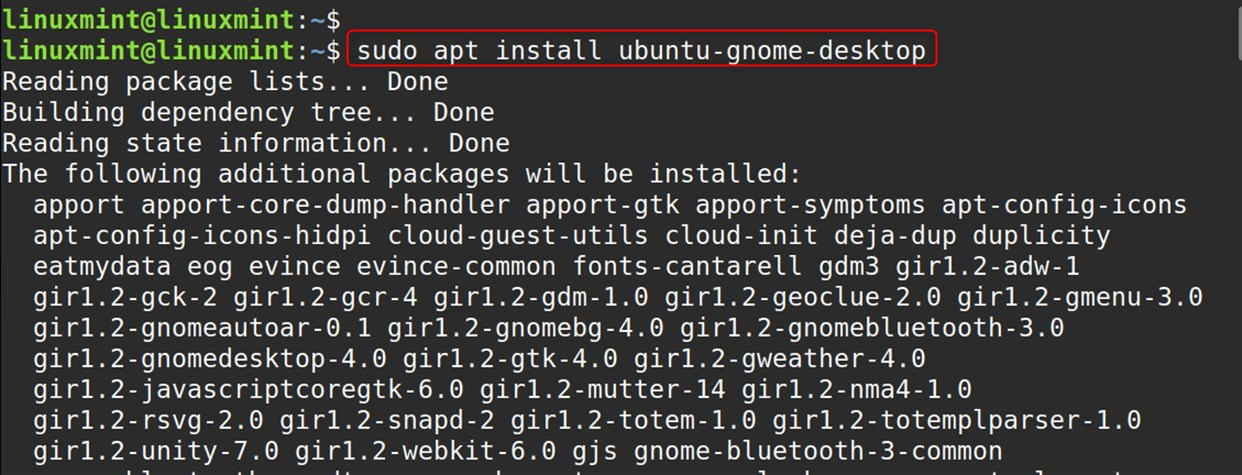
With the command above, there is roaming around of unattended captures for the Desktop Environment; the system needs other packages and their dependencies.
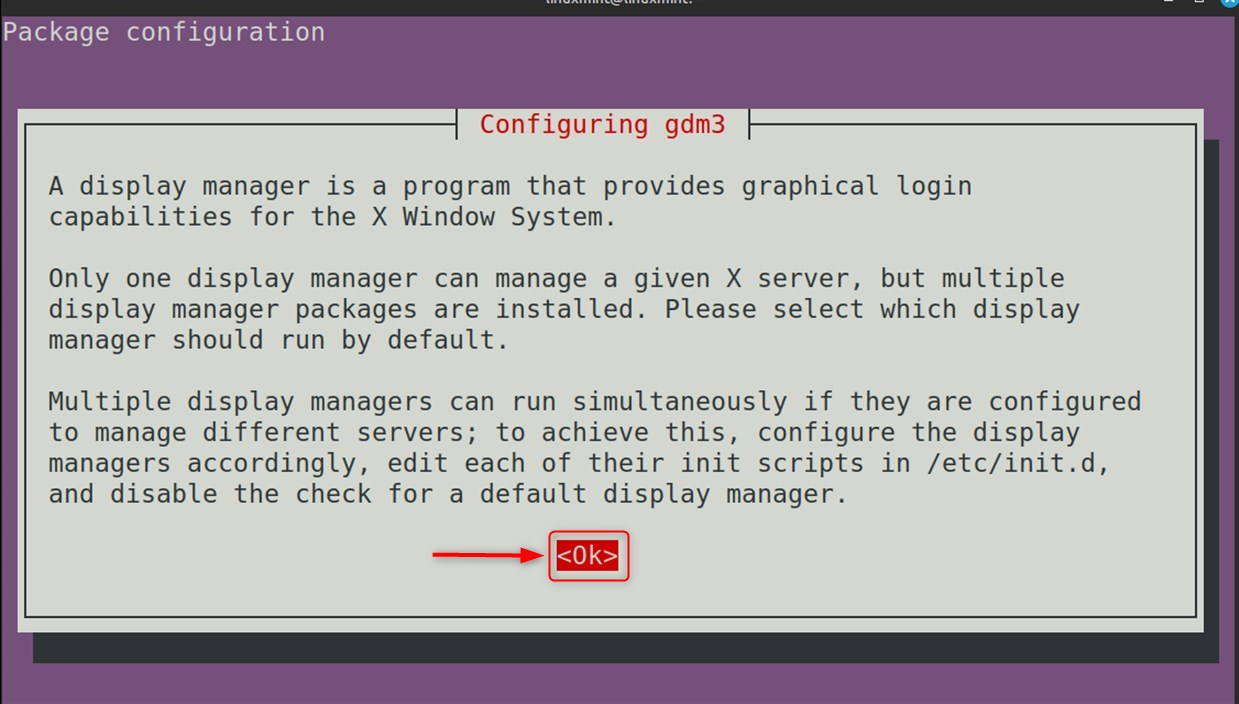
Configure GDM (Display Manager):
To capture the unattended tag for the GUI console of your system that wants to use gnome as the default, then go to the command window your terminal uses this order:
sudo dpkg-reconfigure gdm3 |
|---|
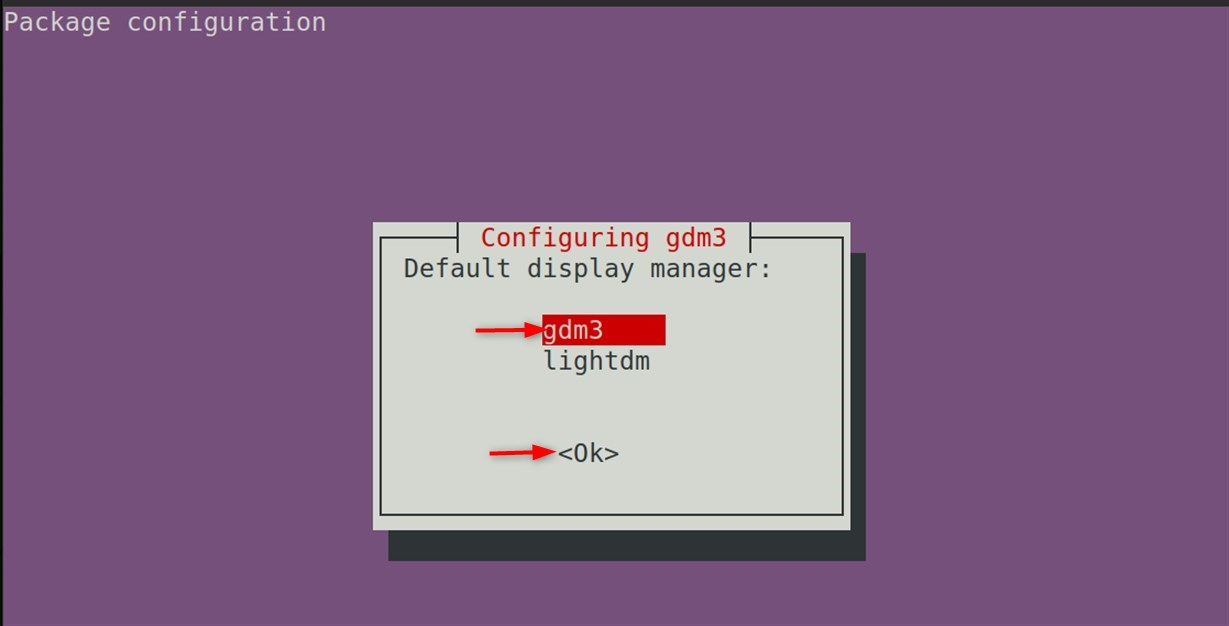
While the configuration window is still open place the mark on “X” and change the option to default session to GNOME.
Note: As a result, this is the most resource-heavy and costly option, taking around 2GB of disk space.
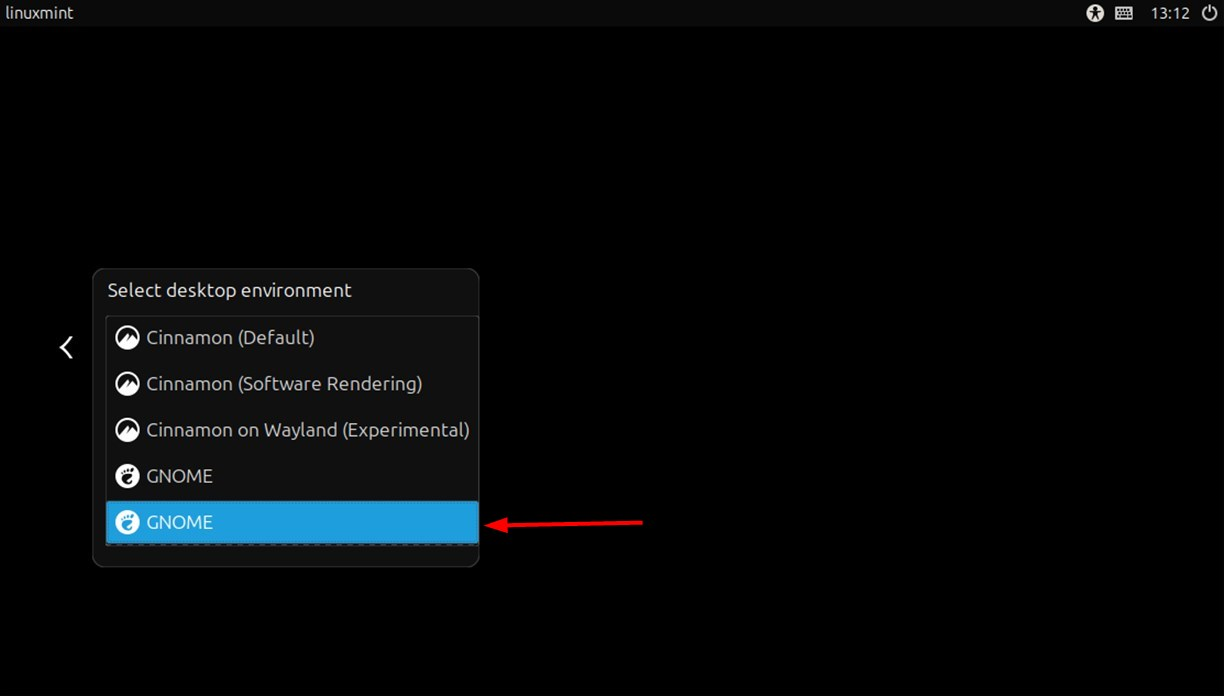
Step 4: Log Out and Select GNOME
After finishing the setup, log out of your current session. Next, on the login menu screen, click on the gear icon beside the username. Then, select Linux Mint or GNOME from the dropdown to start a new session with GNOME.
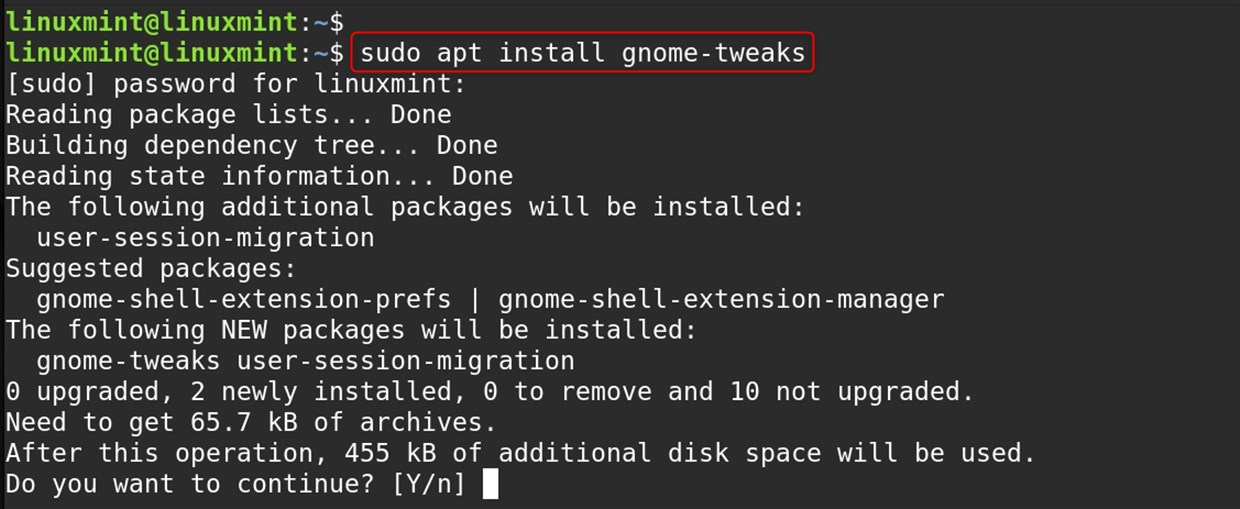
Step 5: Customize Your GNOME Experience
Following your log-in, there are various changes you may wish to make to your GNOME to have a pleasant windowing experience. You’re able to make use of GNOME Tweaks to modify a number of configurations, download sub-themes, or add other extensions.
This can be done through the application offers that are used to manage menu items and it is called Tweaks. Let’s install the GNOME Tweaks app:
sudo apt install gnome-tweaks |
|---|
Step 6: Explore and Enjoy
Familiarize yourself with the overview of Activities by selecting the Activities button or hitting the Super (Windows) key on your keyboard. This allows you to easily cycle through applications, view workspaces, and look for files and settings:
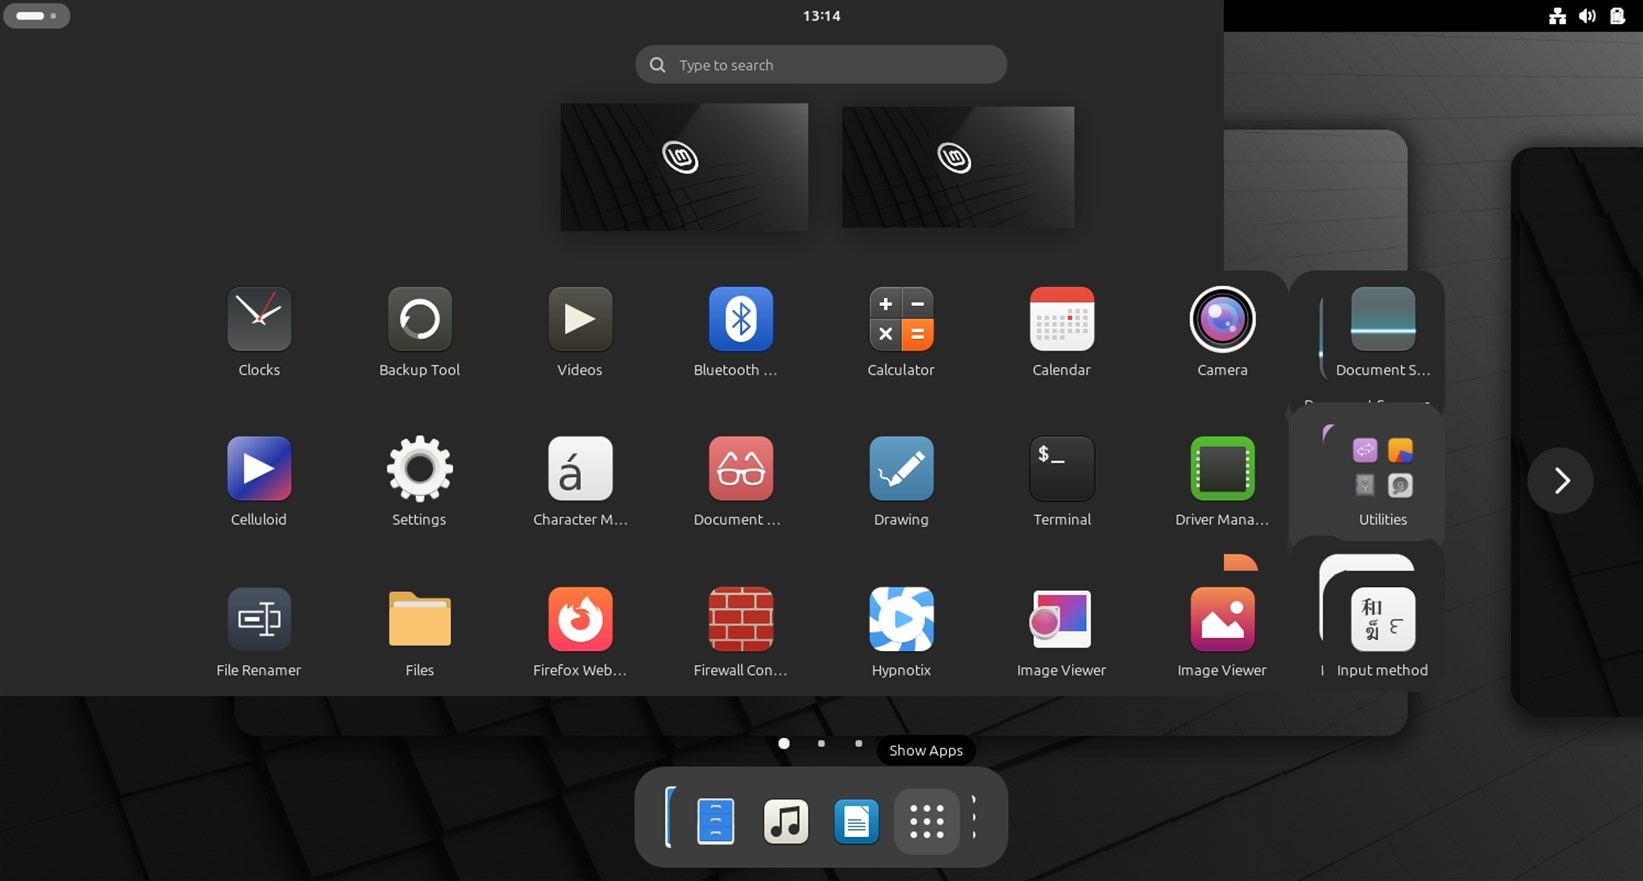
You should now have a complete GNOME environment on your Linux Mint 22 OS, and it should work perfectly. Take advantage of the advanced, user friendly interface along with the many customization features offered by GNOME.
Method 2: Installing GNOME Desktop Minimal
The minimal version is best suited for users who want to use GNOME but still prefer a lighter version. As it only provides the user interface, fonts, icons, and views without any other applications pre installed. Let’s install GNOME Desktop Minimal:
sudo apt install ubuntu-desktop-minimal |
|---|

Bonus Tip: Switching from Another Desktop Environment
For switching or changing the other desktop environment, users can install the GNOME desktop:
sudo apt install ubuntu-desktop |
|---|
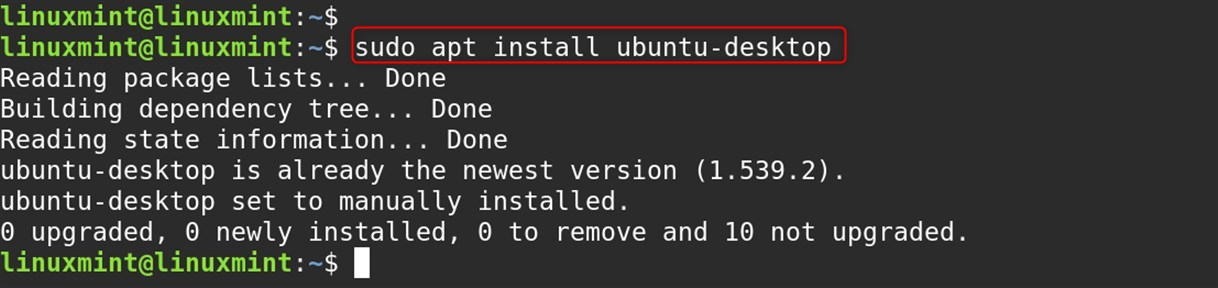
After completing the installation, sign out of your session. At the login window, click on the gear icon next to your username, select “Linux Mint” (this is GNOME), and log in.
Updating GNOME
For updating the GNOME, utilize the below command:
sudo apt update && sudo apt upgrade |
|---|
Like with any installation, ensuring that every single step is conducted in the proper order, including running the updates for your computer, is crucial for optimizing new software features. Now that GNOME is installed, you may begin enjoying Linux Mint’s modern, efficient, and highly customizable desktop experience.
Conclusion
The decision regarding which version or variant of GNOME installation to use with Linux Mint is purely subjective as it depends on individual requirements. Regardless of choosing the full, minimal, or vanilla version, GNOME has simplicity and flexibility at hand and therefore, optimally improves the overall user experience in Linux Mint. Do not forget to perform system updates regularly to counter vulnerabilities and improve performance.

Karim Buzdar holds a degree in telecommunication engineering and holds several sysadmin certifications including CCNA RS, SCP, and ACE. As an IT engineer and technical author, he writes for various websites.