
To enable full synchronization of files to Microsoft’s OneDrive account from local storage, the application needs to be installed on the Linux Mint 22 distribution. This helps users to maintain a backup of crucial files, access them from several devices. Furthermore, keep data uniform when working through different operating systems like Mobile, Windows, and Linux.
Microsoft OneDrive doesn’t have an official client for Linux, but that doesn’t mean Linux Mint users are left out in the cold. However, utilizing open-source options enables full functionality. It includes true sync, offline access, real-time updates, and support for personal and business accounts, thus integrating cloud storage into one’s Linux workflow.
This complete guide provides every possible solution, including simple GUI-based programs to command line tools, so that you are offered the choice that best fits to custom needs.
Table of Contents
- How to Install OneDrive on Linux Mint 22
- Method 1: Using the Official Insync Website
- Method 2: Using Third-Party OneDrive Client
- Troubleshooting Common Issues
- How to Remove OneDrive on Linux Mint 22
- Conclusion
How to Install OneDrive on Linux Mint 22
There are several reliable methods to sync your OneDrive files on Linux Mint 22. Linux Mint 22 users have some really good options for integrating OneDrive into their systems. You can select either a simple GUI application or a powerful command-line utility, both easy to operate and complex depending on your skill set.
Method 1: Using the Official Insync Website
This is a paid Windows application that has a nice interface and also offers great integration with OneDrive.
Step 1: Download Insync
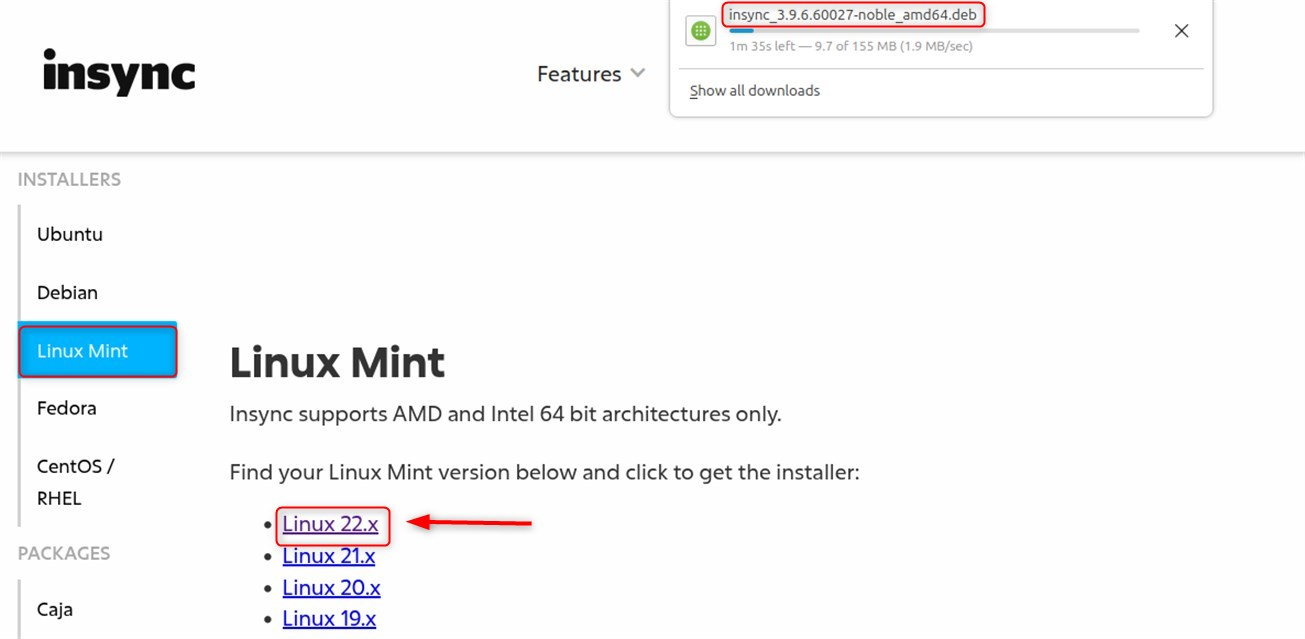
Open a web browser and go to the official Insync website, insynchq.com. Click on the hyperlink ‘Download’ and select the Linux version:
For Ubuntu/Debian (which works well with Linux Mint), opt for the .deb package:
Step 2: Install Insync
Open a terminal. Then, go to your Downloads folder:
cd ~/Downloads |
|---|

Install the package you downloaded.
sudo dpkg -i insync_*.deb |
|---|

If you run into problems with dependencies, you can use the following command:
sudo apt --fix-broken install |
|---|
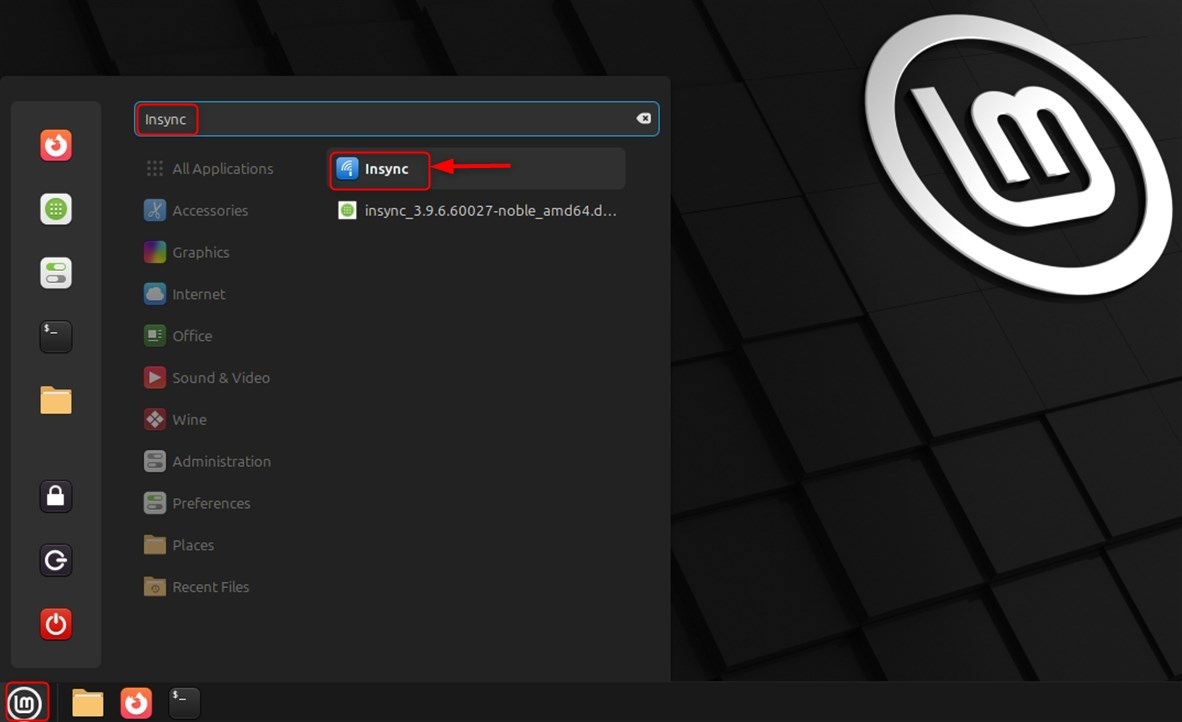
Step 3: Configure Insync
Run Insync from the application menu:
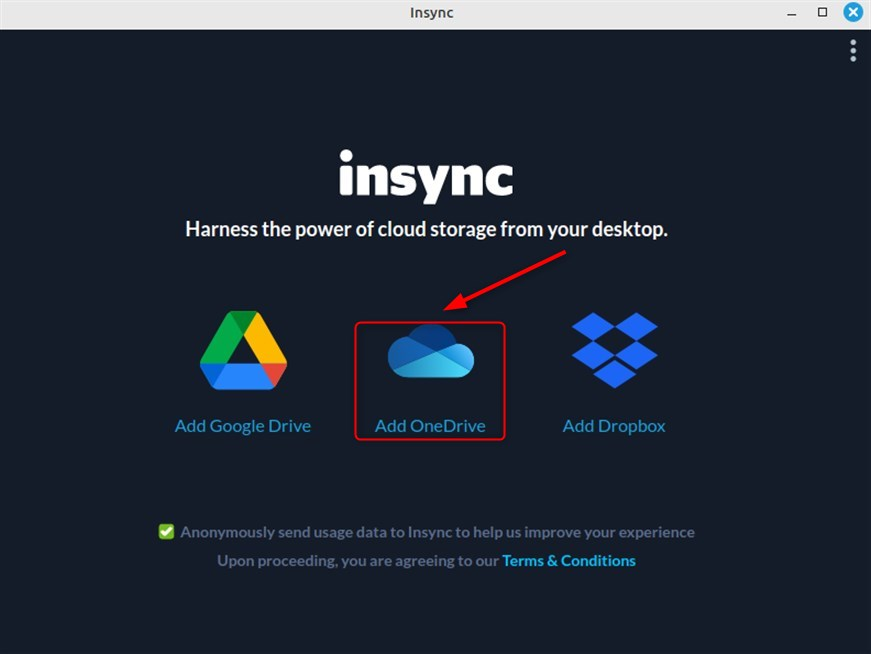
Choose to use ‘OneDrive’ as your cloud service:
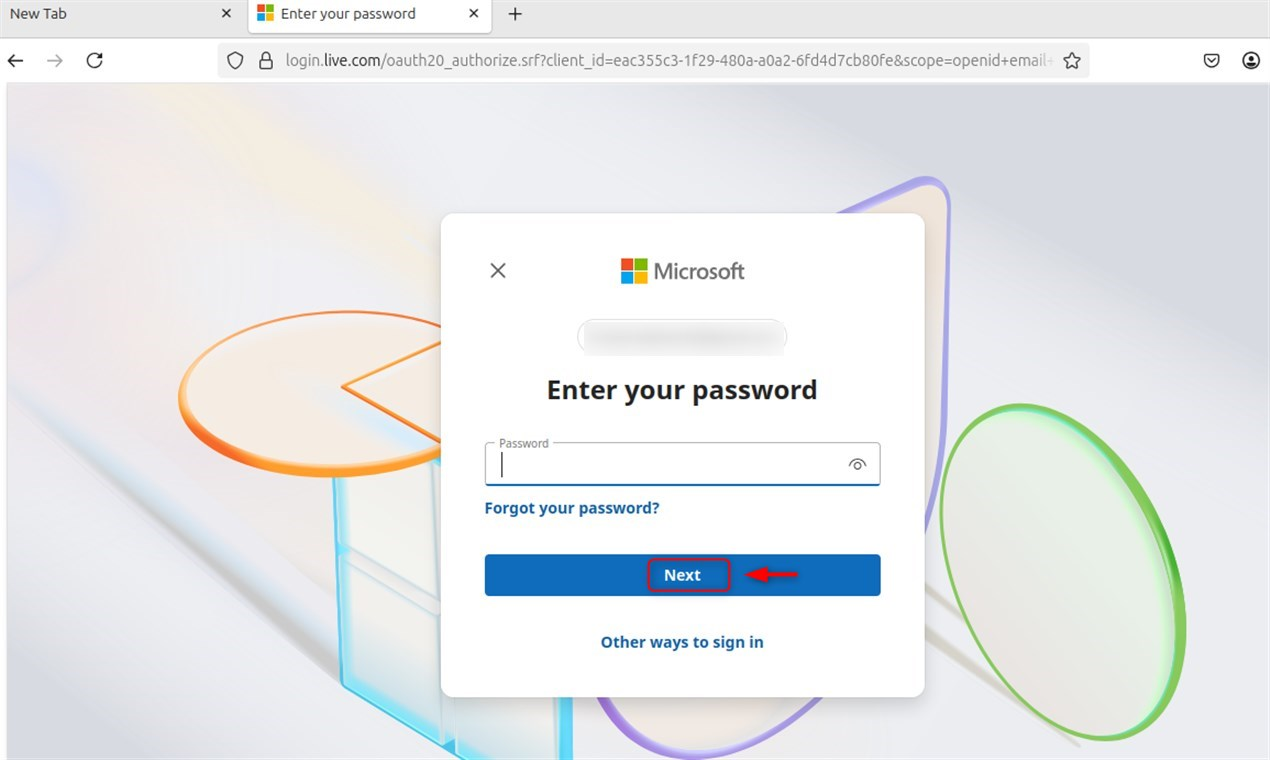
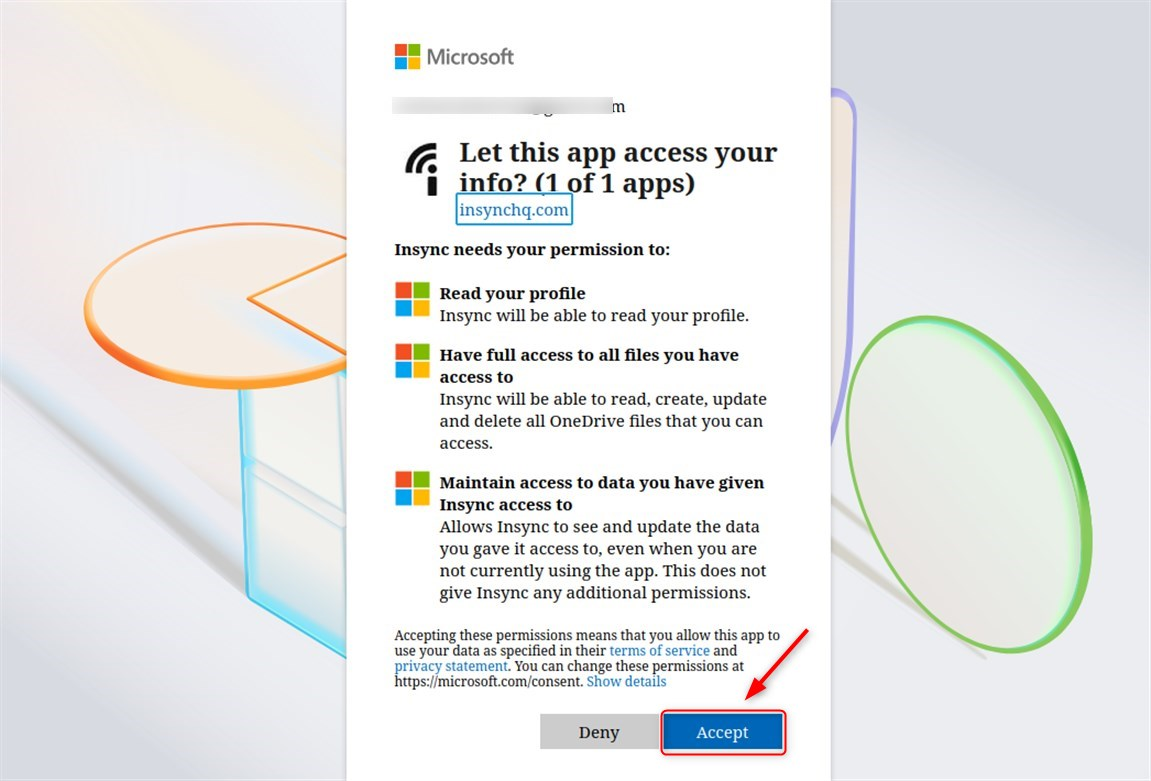
Moving forward to log in through the Microsoft credentials:
Pick out the folders you wish to sync and designate the folder that will act as the local sync folder root:
Pros: Very intuitive and easy to navigate, dependable syncing, facilitates numerous accounts. Cons: Paid software after a 15-day trial period.
Method 2: Using Third-Party OneDrive Client
This method uses a client’s open-source software developed by Abraunegg. They have a complete suite of features, support for personal and business OneDrive, smoothly operate on Linux Mint, and are a free command-line client boasting comprehensive OneDrive synchronization tools. Let’s install it:
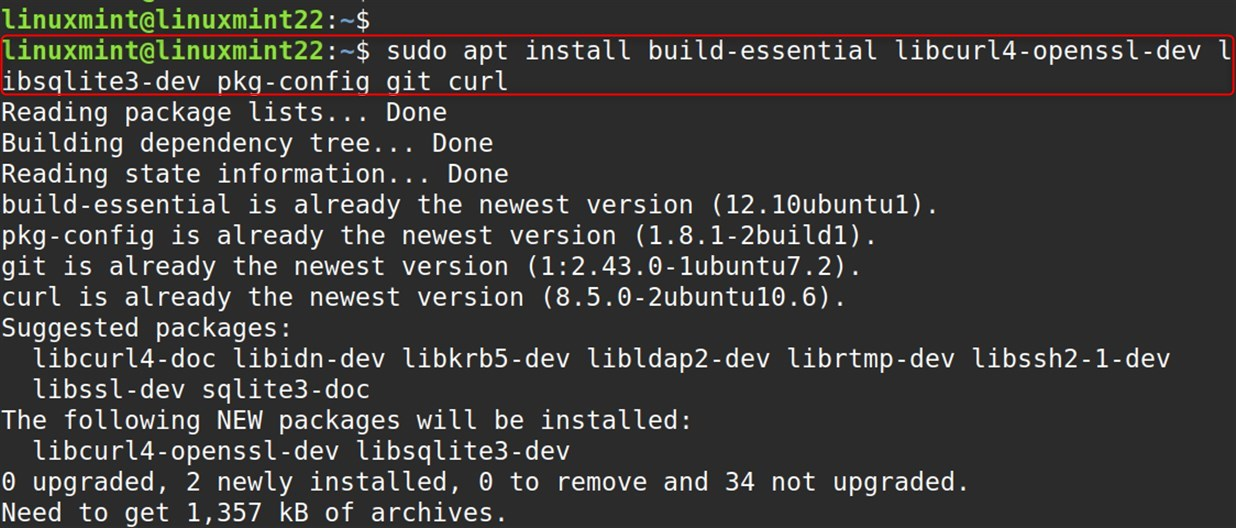
Step 1: Install Dependencies
Require these to build the client from the source:
sudo apt install build-essential libcurl4-openssl-dev libsqlite3-dev pkg-config git curl |
|---|
Here,
- libcurl4-openssl-dev: Enables support for HTTP communications through libcurl, which is relevant for interacting with OneDrive servers.
- libsqlite3-dev: This is applicable for a local state database of the client.
- git: Used for cloning a repository hosted on GitHub.
Step 2: Install DMD Compiler
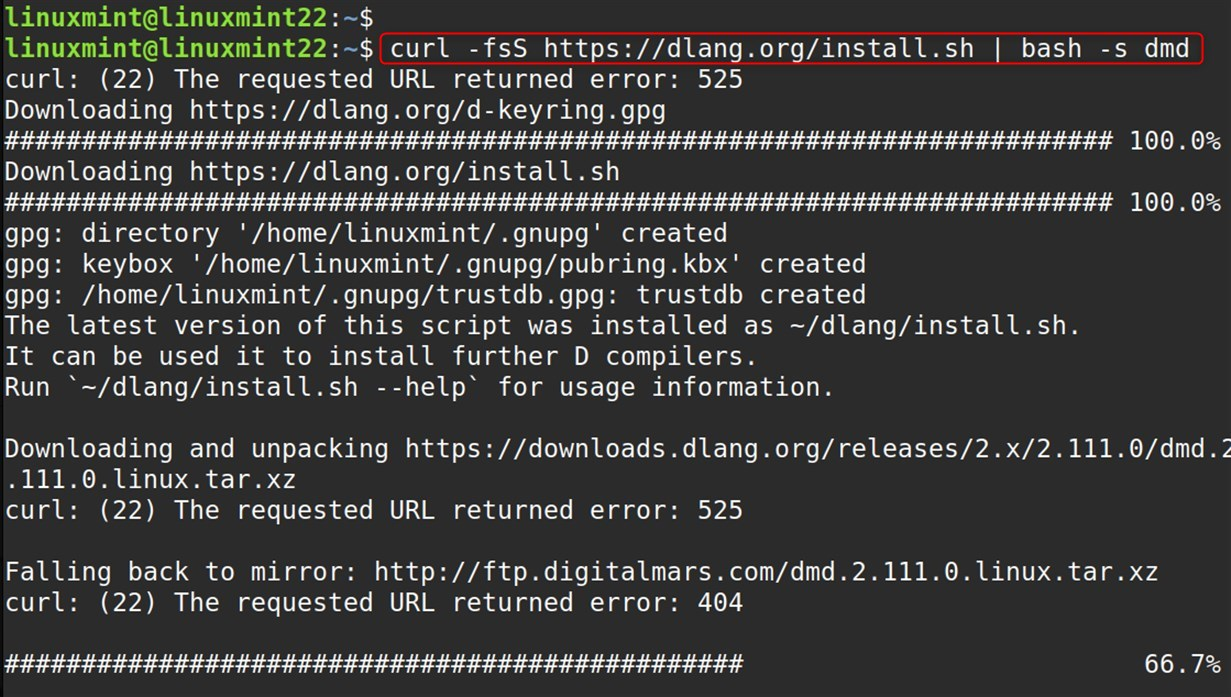
Now, install DMD Compiler from the official source:
curl -fsS https://dlang.org/install.sh | bash -s dmd |
|---|
Now, activate it via the command below:
source ~/dlang/dmd-*/activate |
|---|

Step 3: Clone and Build OneDrive Client
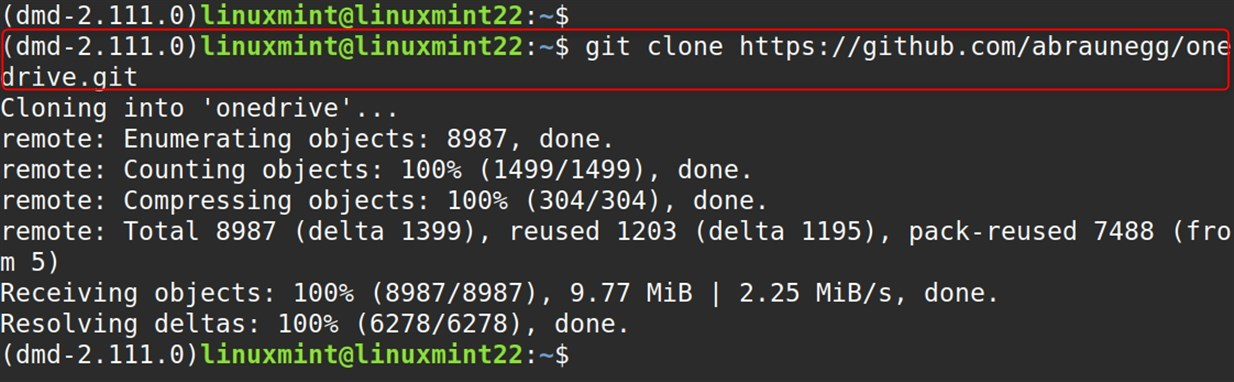
This command fetches the code hosted on GitHub and stores it in a directory named ‘onedrive’:
git clone https://github.com/abraunegg/onedrive.git |
|---|
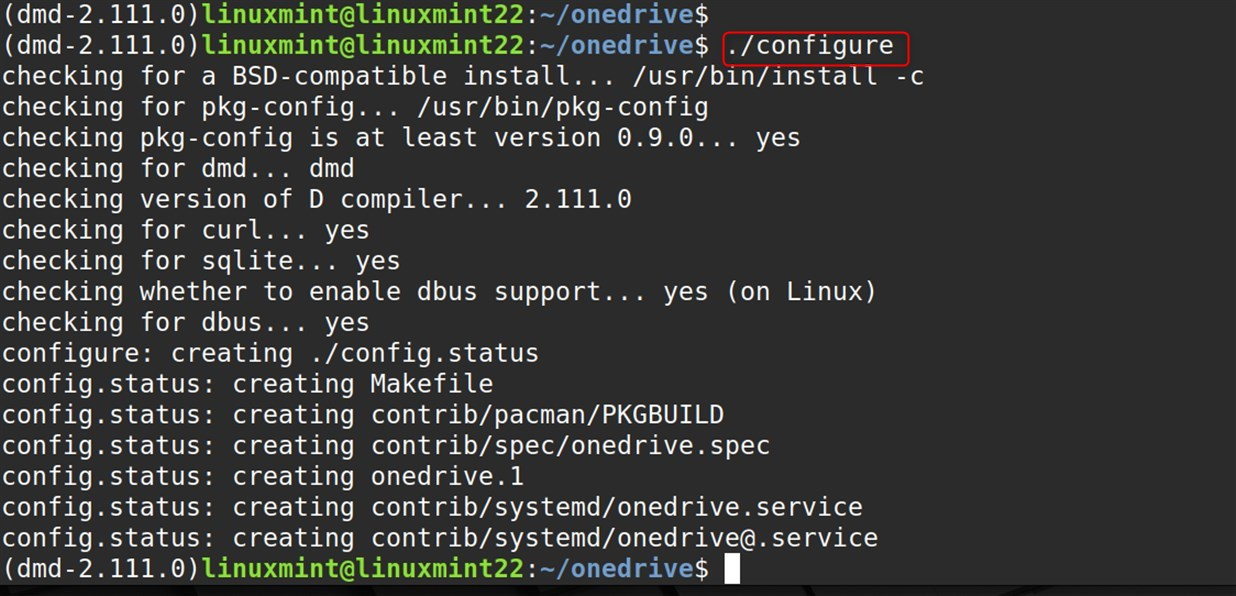
Compile the Client. Here, ./configure sets up the build environment with the necessary dependencies for building the package:
cd onedrive ./configure |
|---|
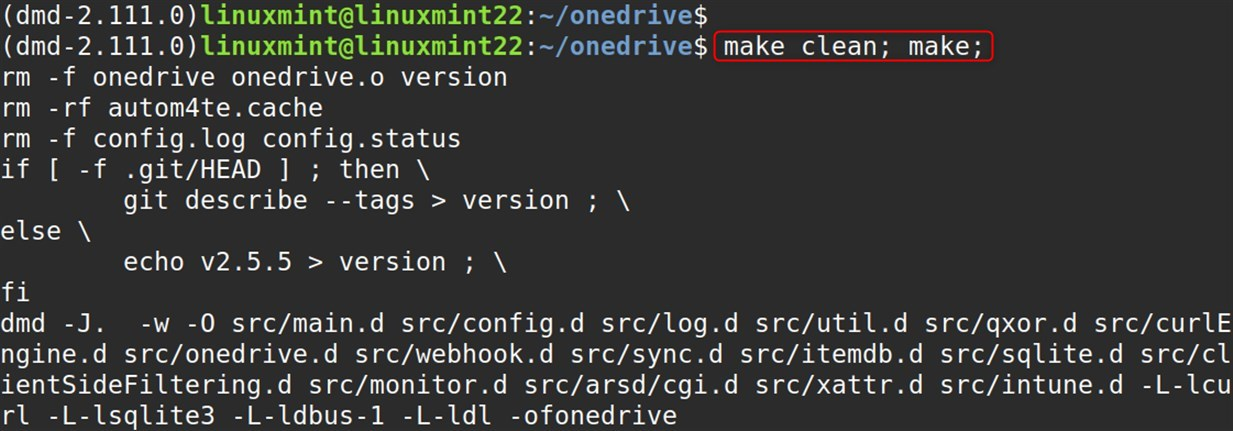
This command builds the application by converting the source code into an executable format. This command first compiles the code and then installs the compiled code:
make clean; make; |
|---|
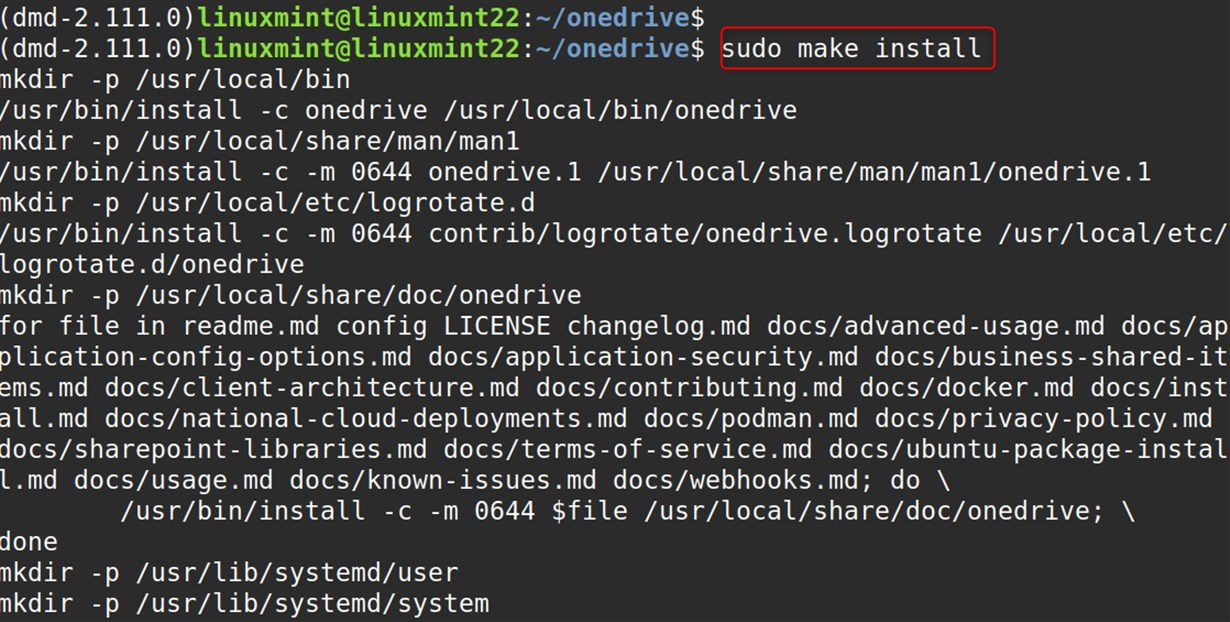
This command makes the compiled application available for use on the system:
sudo make install |
|---|
Step 4: Verify OneDrive
Add the following command to get OneDrive reviews with:
onedrive --version |
|---|

Step 5: Configure Synchronization
Create a config directory:
mkdir -p ~/.config/onedrive |
|---|

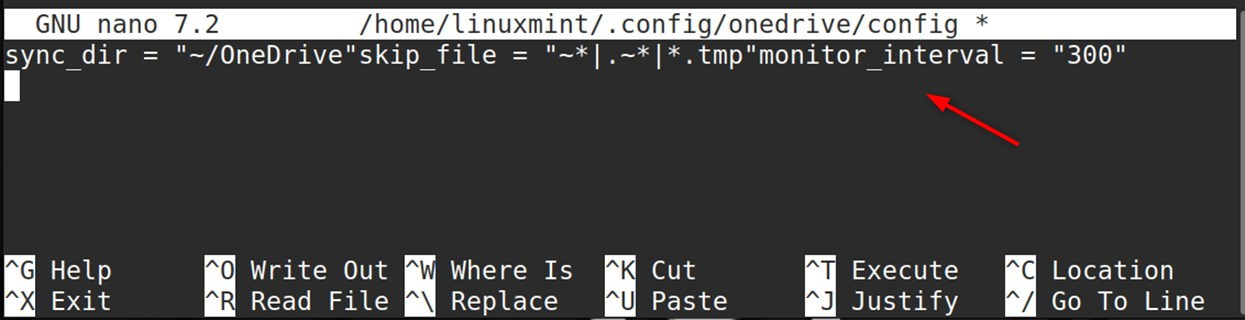
Create a configuration file:
nano ~/.config/onedrive/config |
|---|
In addition to these settings:
sync_dir = "~/OneDrive"skip_file = "~*|.~*|*.tmp"monitor_interval = "300" |
|---|
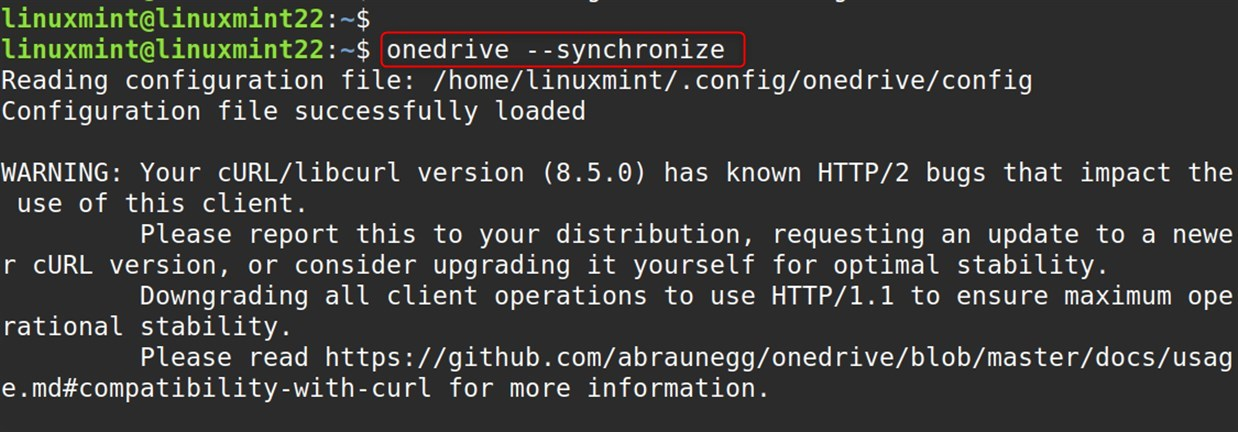
Step 6: Initial Sync
First synchronization occurred via the following command:
onedrive --synchronize |
|---|
Take the URL and load it in your browser. Now, sign in to the Microsoft account. Paste the response URL back into the command line interface:
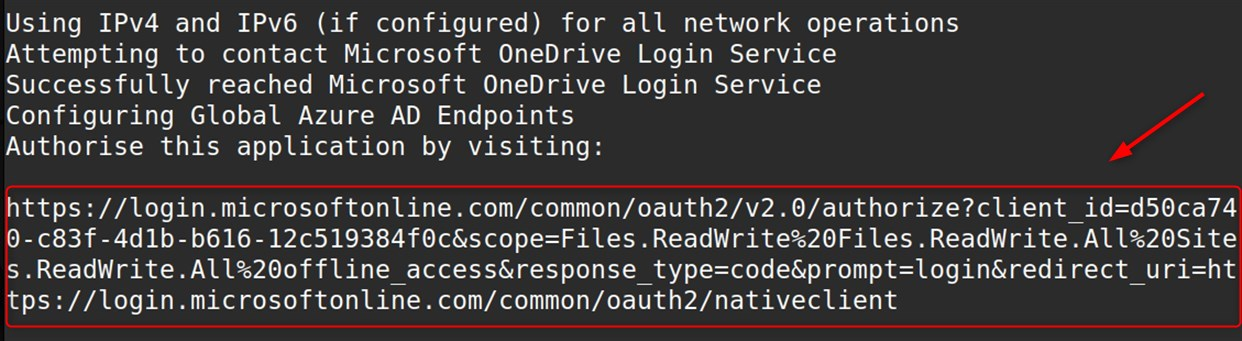
A URL will be shared with you, and you should paste it back into the terminal to complete the authentication. Let’s log in with your Microsoft account: 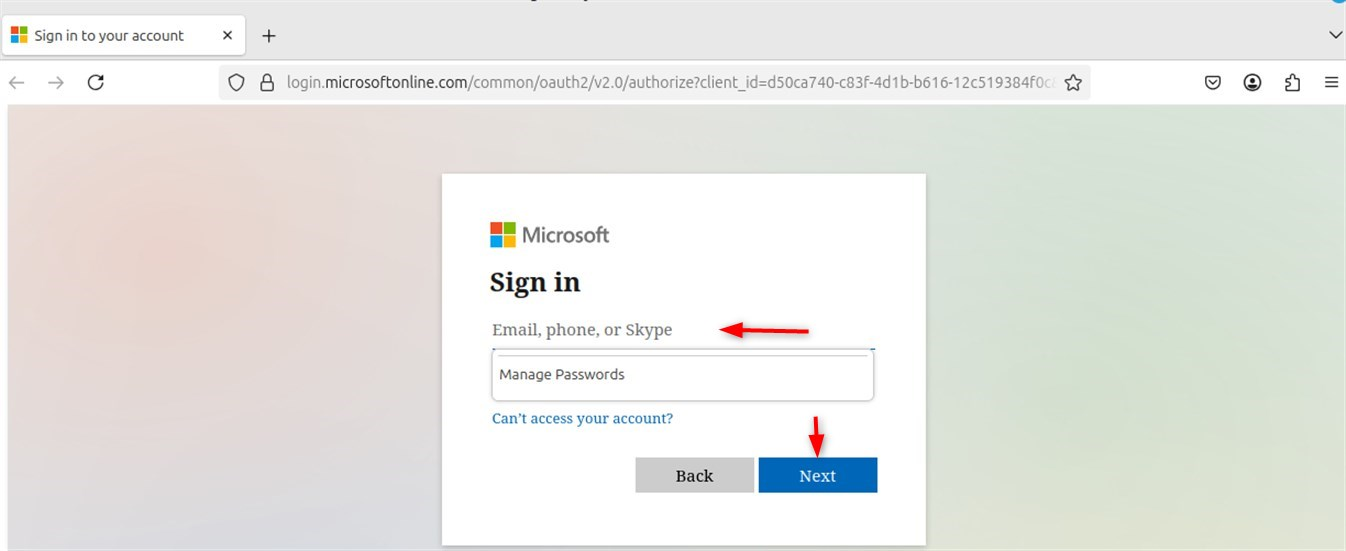
Step 7: Enable Automatic Sync (Optional)
Creating a systemd service. Here,
- –user indicates that it operates at the level of your user account (as opposed to system-wide).
- enable gives access to the service to automatically launch when a user logs in.
- start promptly begins the sync service
systemctl --user enable onedrive systemctl --user start onedrive |
|---|

Pros: Free, open-source, highly customizable. Cons: Command-line based, requires technical knowledge.
Troubleshooting Common Issues
Authentication Problems
- Correct your system’s time.
- Check for firewall configurations.
- Try clearing your browser’s cache.
Sync Issues
- Check your internet connection
- Check your disk space.
- Check the permissions of the files in the designated sync folders.
Performance Optimization
- Change the parameters of the defined unused files.
- Change the defined intervals of sync activities.
- Implement selective sync in redundantly large accounts.
Security Considerations
- Enable two-factor authentication in the Microsoft portal.
- And Consider Encrypting The Sync Folder Locally
- Regularly Update Chosen Client
- Backup Strategy: Do not solely rely on cloud sync.
How to Remove OneDrive on Linux Mint 22
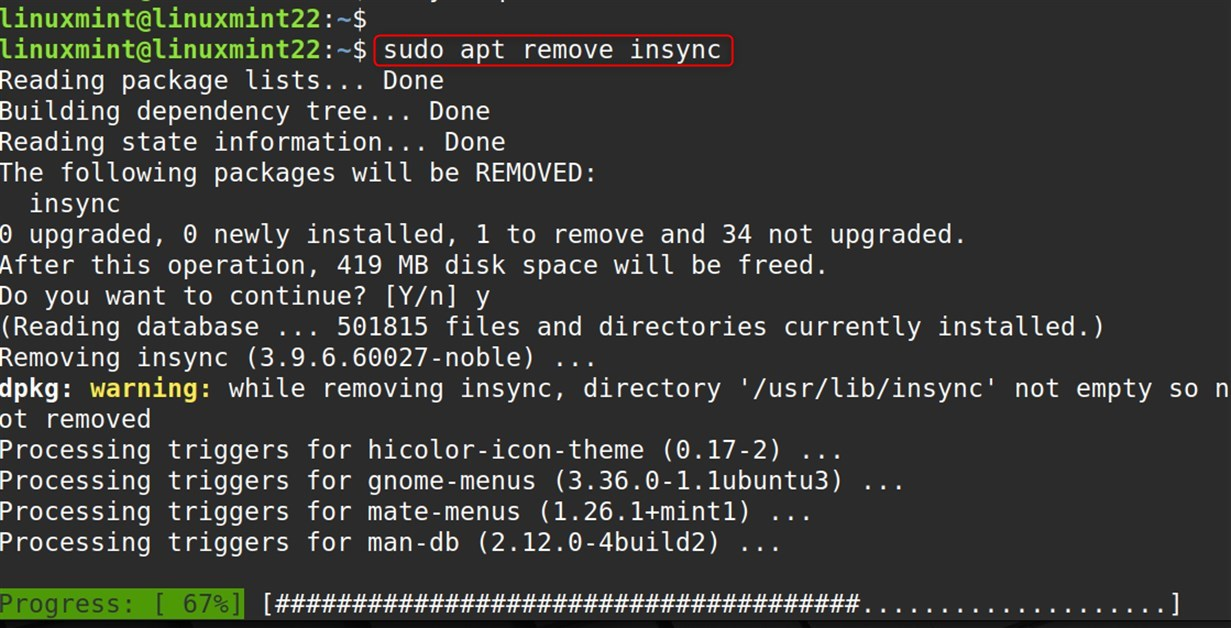
If you need to uninstall any of the OneDrive solutions, follow these detailed removal instructions:
Uninstall the Package
sudo apt remove insync |
|---|
Remove Configuration Files
rm -rf ~/.config/Insync rm -rf ~/.local/share/Insync |
|---|

Remove Desktop Files (if any):
rm -f ~/.local/share/applications/insync*.desktop |
|---|

Stop the Service
systemctl --user stop onedrive systemctl --user disable onedrive |
|---|

Remove the Binary
You don’t have the source directory:
sudo rm /usr/local/bin/onedrive sudo rm -rf /usr/local/share/man/man1/onedrive.1 |
|---|

Remove Configuration Files
rm -rf ~/.config/onedrive |
|---|

Remove Systemd Service Files
rm -f ~/.config/systemd/user/onedrive.service systemctl --user daemon-reload |
|---|

Clean Build Dependencies (Optional)
sudo apt remove build-essential libcurl4-openssl-dev libsqlite3-dev pkg-config rm -rf ~/dlang |
|---|

Conclusion
To install OneDrive on Linux Mint 22, you can use the official open-source OneDrive client developed by abraunegg, which offers reliable syncing for both personal and business accounts. Start by opening a terminal and installing the required dependencies. Next, clone the repository by running and navigating into the folder. After that, to set up your Microsoft account, execute onedrive, which will provide you a URL to log in and copy back to the terminal.
I recommend starting with the method that is easiest for you, and try several approaches to see which satisfies your requirements the best. The OneDrive integration on Linux Mint 22 is very much possible and reliable using open-source and commercial tools. Whether you use a terminal, a GUI, or a mixture of both, there’s a solution that fits your workflow.

Karim Buzdar holds a degree in telecommunication engineering and holds several sysadmin certifications including CCNA RS, SCP, and ACE. As an IT engineer and technical author, he writes for various websites.