Introduction:
The Kernel of any operating system is such an important component that it always resides in your system’s memory. It acts as a bridge between your software and hardware which facilitates their communication. In Linux Mint, you are generally not encouraged to update your Linux Kernel since it affects the normal working of your system. However, you might want to do so if you are more concerned about the security of your system. Therefore, in this article, we will share with you the method of updating the Kernel in Linux Mint 20.3.
Procedure of Updating the Kernel in Linux Mint 20.3:
For updating the Kernel in Linux Mint 20.3, you will have to go through the procedure explained in the following steps:
Step # 1: Access the Update Manager:
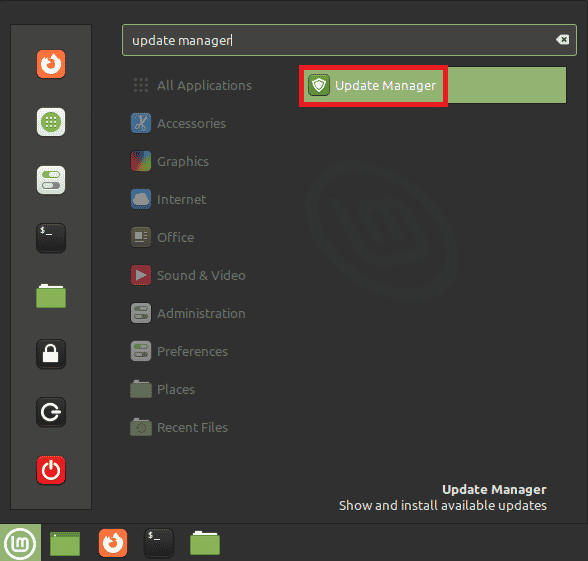
First of all, you need to search for the Update Manager through Mint Menu’s search bar and click on the Update Manager result to launch it.
Step # 2: Navigate to the View Tab:
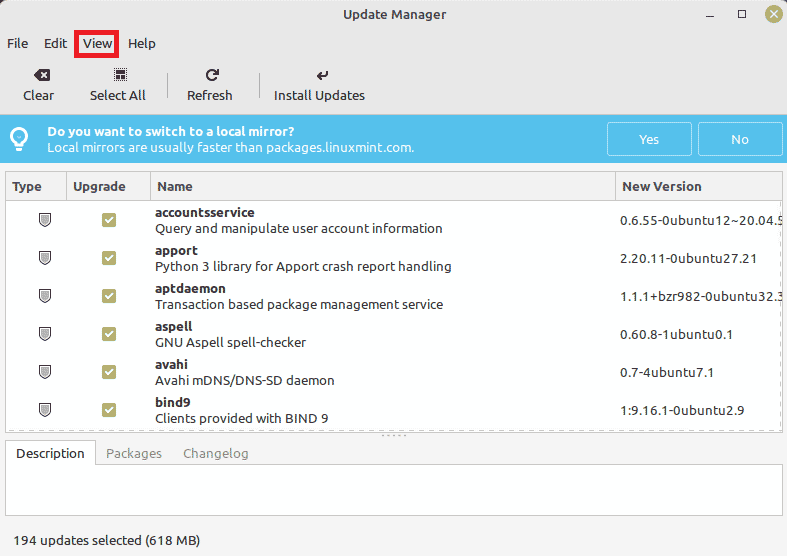
In the Update Manager window, you need to click on the View tab for launching the associated menu.
Step # 3: Select the Linux Kernels Option:
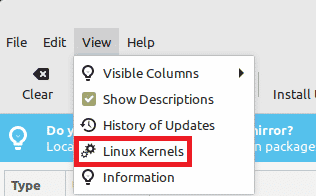
From the View menu, you need to click on the Linux Kernels option as highlighted below:
Step # 4: Proceed by Pressing the Continue Button:
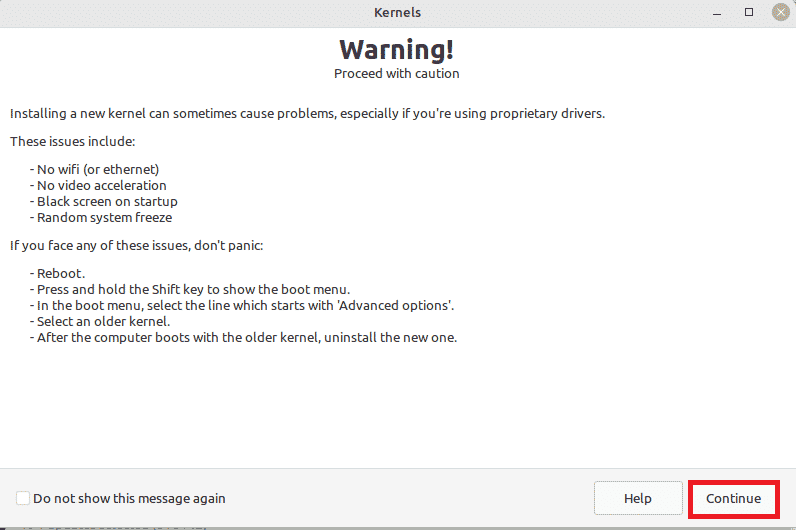
Once you will do this, you will be presented with a warning message. According to this message, it is generally not recommended to change the default Kernel version since it might introduce some bugs into your system. However, if you are ready to take this risk and still want to update the version of your Kernel, then you will need to click on the “Continue” button.
Step # 5: Choose the Relevant Linux Kernel and Update the Current One:
You will be displayed with all the available Kernel versions along with the one that you are currently running as shown in the following image:
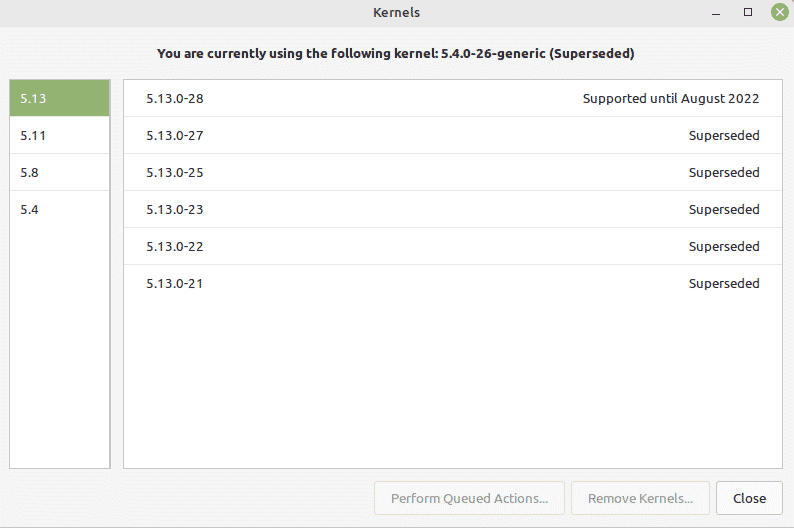
From this list, you can choose any required upgraded Kernel version and then click on the associated “Install” button for updating your Linux Kernel.

The newly installed Kernel will be automatically loaded into your system’s memory once you will reboot it after the installation process gets completed.
Conclusion:
By following the steps shared above, you can instantly update your Linux Kernel without any hassle. However, we would like to advise you again to do this at your own risk since you might face some issues after messing up with your default Kernel.


