
Introduction:
OpenVPN is a tool using which you can create virtual private networks for securing your network communications. This tool also provides the facility of remotely accessing a system. Moreover, it can be used very easily with both the Linux and Windows operating systems. However, in this article, we will just talk about the installation method of OpenVPN on a Linux Mint 20 machine.
Method of Installing OpenVPN on Linux Mint 20:
To install the OpenVPN client on Linux Mint 20, you need to perform the following steps:
Step # 1: Install OpenVPN on Linux Mint 20:
First, you need to install the OpenVPN client on an updated system with the command shown below:
$ sudo apt-get install network-manager-openvpn
![]()
Step # 2: Start the OpenVPN Service:
After installing the OpenVPN client on your system, you need to start this service with the following command:
$ sudo systemctl start openvpn
![]()
Step # 3: Enable the OpenVPN Service:
Now, you can enable the OpenVPN client on your system with the execution of the command stated below:
$ sudo systemctl enable openvpn
![]()
Step # 4: Check the Status of the OpenVPN Service:
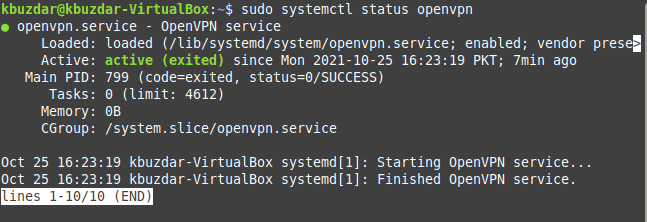
Finally, the active status of the OpenVPN client can be checked by running the following command:
$ sudo systemctl status openvpn
![]()
The active status of the OpenVPN client installed on our Linux Mint 20 system is shown in the image below:
Method of Removing OpenVPN from Linux Mint 20:
You can easily remove the OpenVPN client from your system whenever you want by running the following command:
$ sudo apt-get purge --autoremove network-manager-openvpn
![]()
Conclusion:
This article elaborated the method of installing the OpenVPN client on a Linux Mint 20 system. After installing this tool on your system, it can be used effectively for enabling secure communications via the creation of virtual private networks.

Karim Buzdar holds a degree in telecommunication engineering and holds several sysadmin certifications including CCNA RS, SCP, and ACE. As an IT engineer and technical author, he writes for various websites.


