Introduction
Whether you are an individual looking to make a separate workspace so that your photos don’t accidentally show up during presentation or a system administrator facing new employee inductions in your company, creating a new user is a way to go.
In this article, you will learn how you can create new users using different methods in a Linux Mint 20 system.
Note: You will need a root or sudo privileged account to perform the following methods.
Add a New User in Linux Mint 20
Method 1: Using Useradd Command
Open the terminal from utilities or by pressing Ctrl+Alt+T. Use the following command to add the new user. Switch ‘-m’ will make sure that the home directory is created for the user.
sudo useradd -m <username>
Note: Remember to replace <username> with the user’s name.

useradd command will create the user but no password is assigned to the user so the user cannot log in. Thus you have to set the password for the user. Run the following command and provide a password when prompted.
sudo passwd <username>

Now that you have created the user, assign the user to a group that has desired permissions with the following command.
sudo usermod -a -G <groupname> <username>

Verify the assigned groups with the following command.
sudo groups <username>

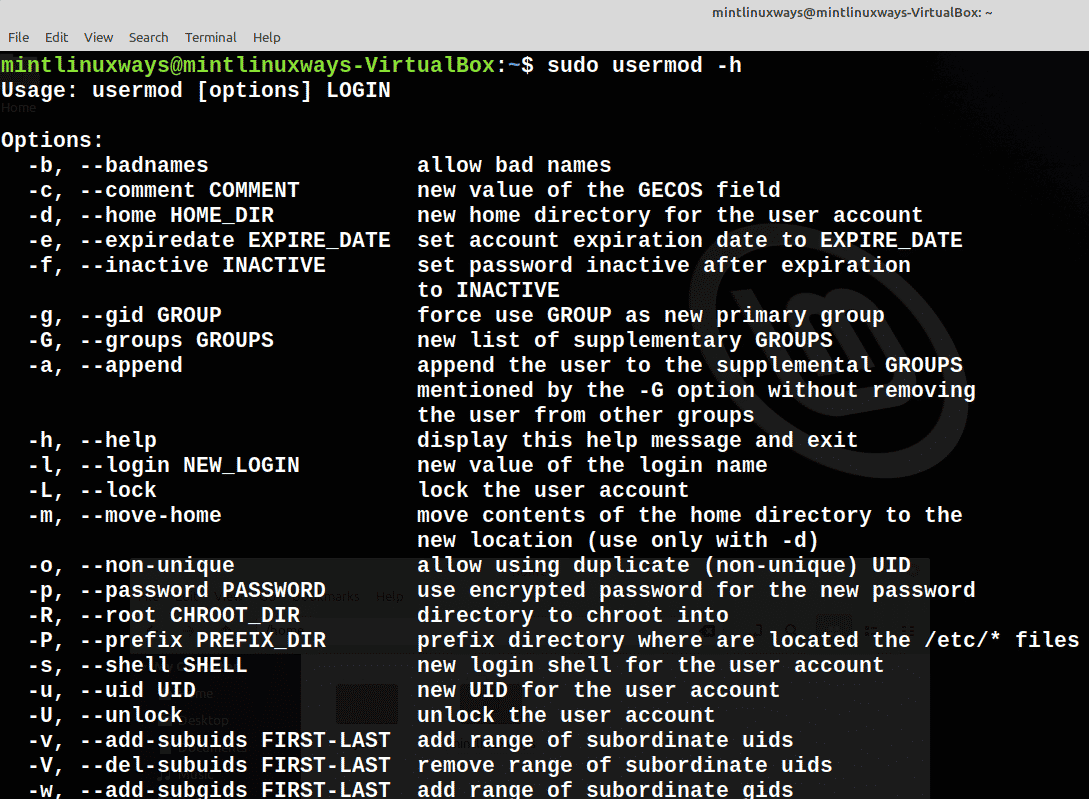
You can further explore the usermod command option through running ‘sudo usermod -h’ or ‘man usermod’.
Method 2: Using Adduser Command
Add the user by running the following command.
sudo adduser <username>
You will be prompted to set a password and then again to fill in user information.
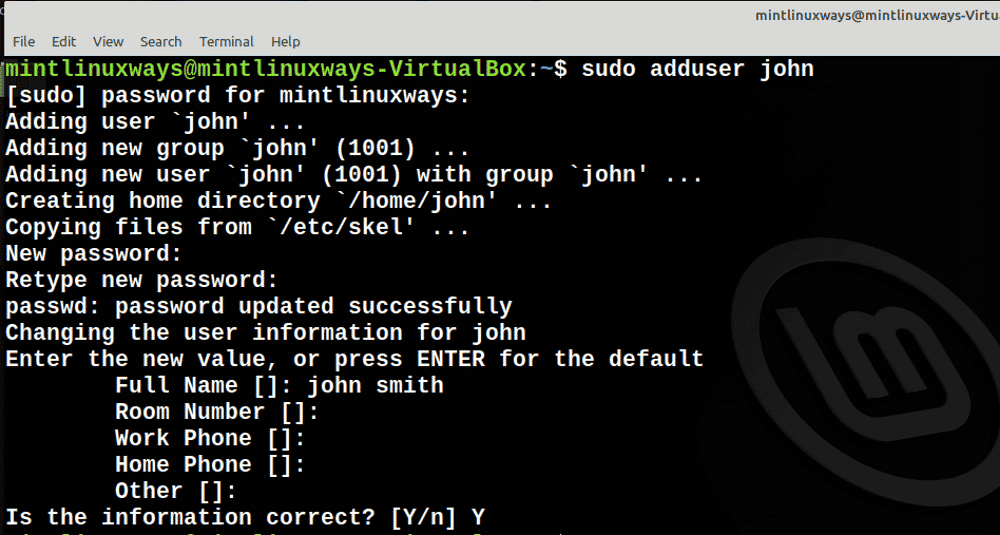
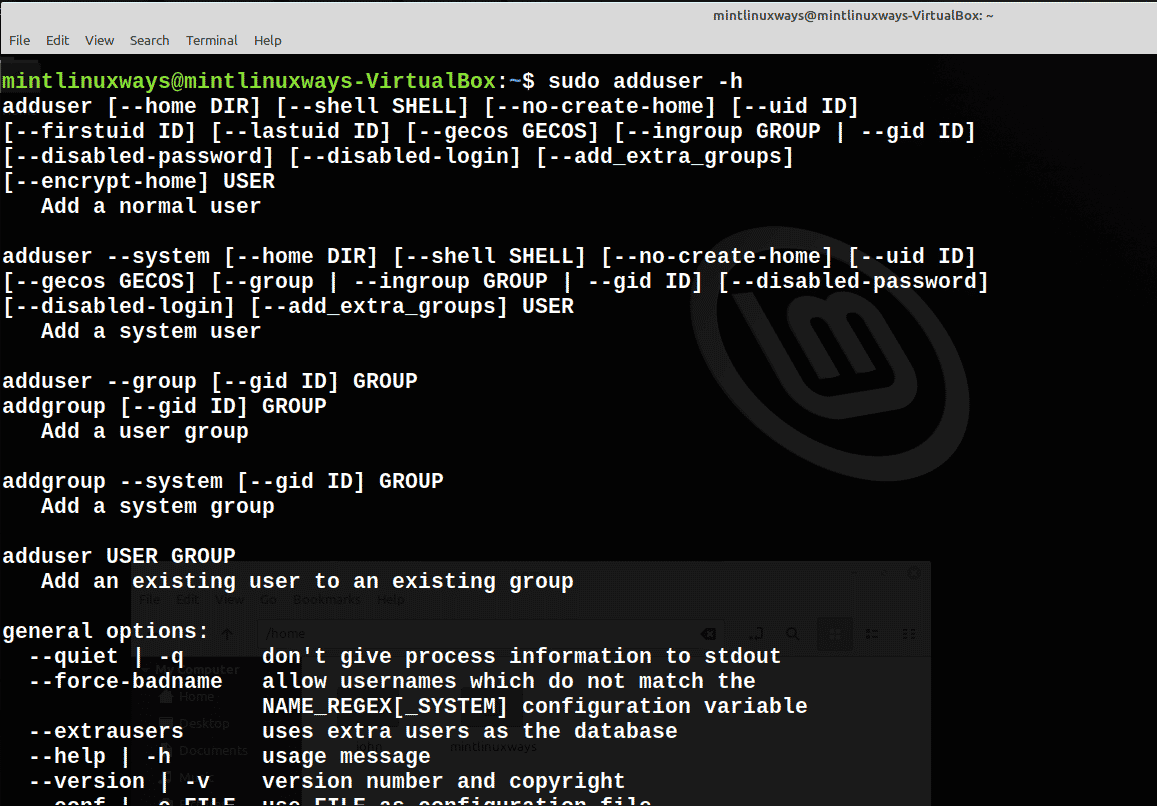
The user will be added and its home directory will be built by default. You can see the full options of the adduser command through ‘sudo adduser -h’ or ‘man adduser’.
Method 3: Using Settings Utility
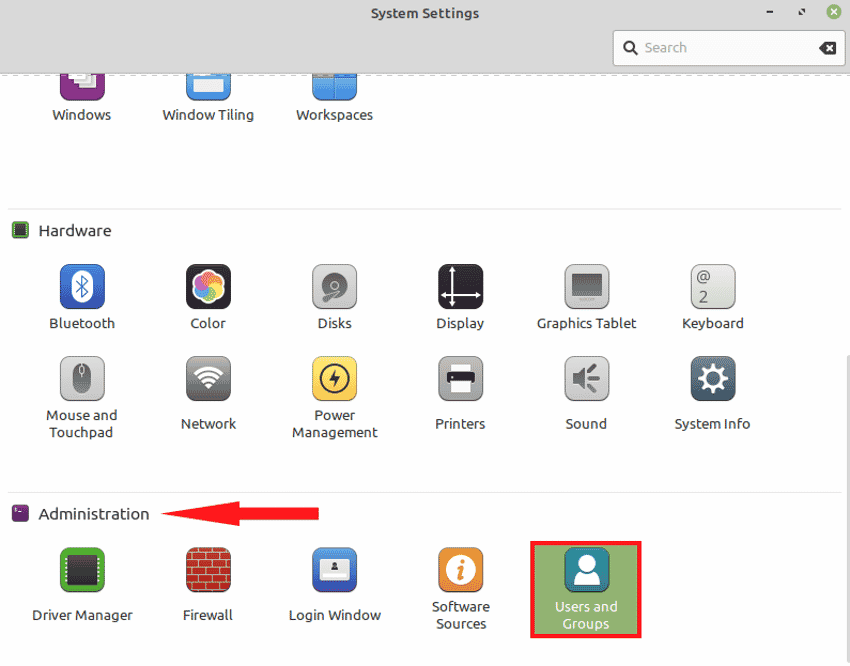
Go and open the System Settings utility. Now navigate to the Administration>Users and Groups.
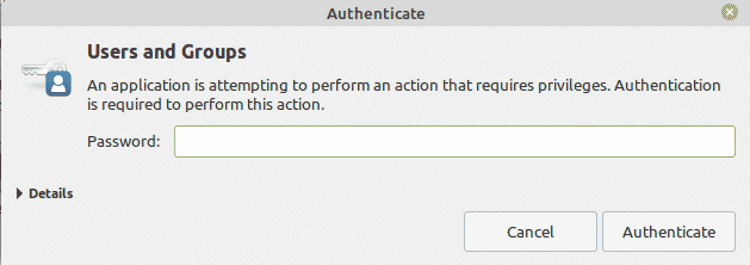
You will be prompted for authentication.
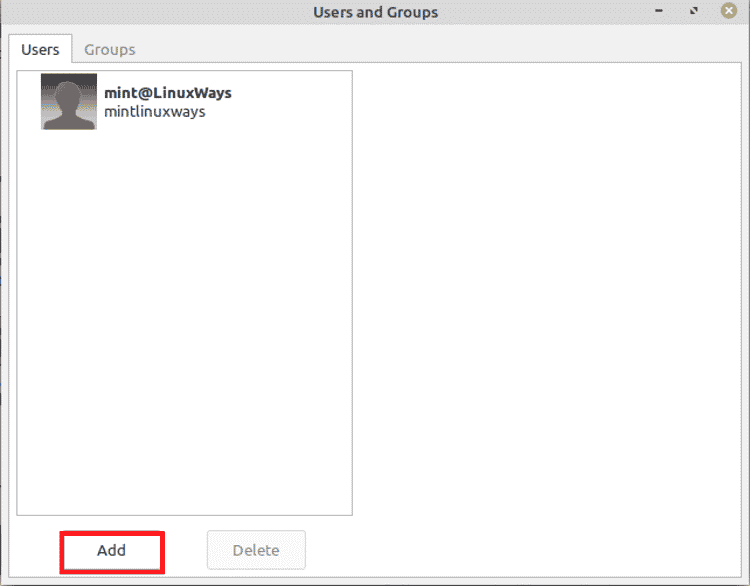
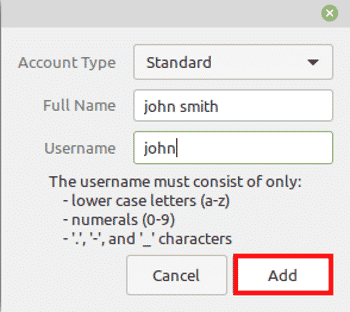
After authentication, you can see all the existing users in the system. Click on Add and provide account information such as account type, name, and username.
Fill the data accordingly and press Ok to create a user.
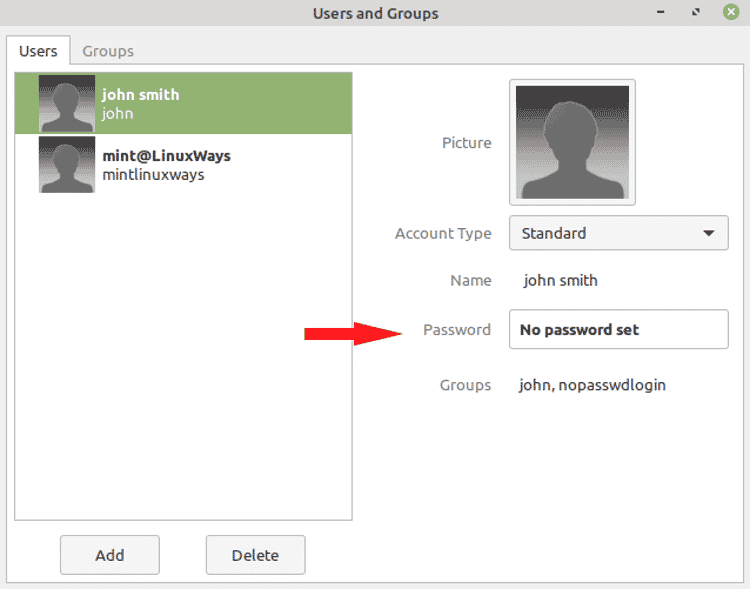
The user will be added to the system yet the Password field is not empty. Click on the Password field.
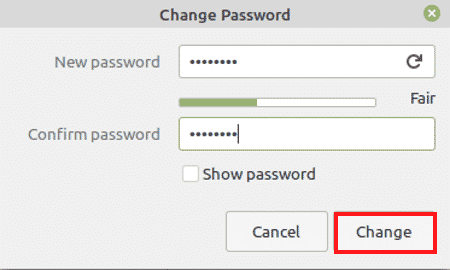
Next, you will be prompted to change the password. Enter the password and press Change.
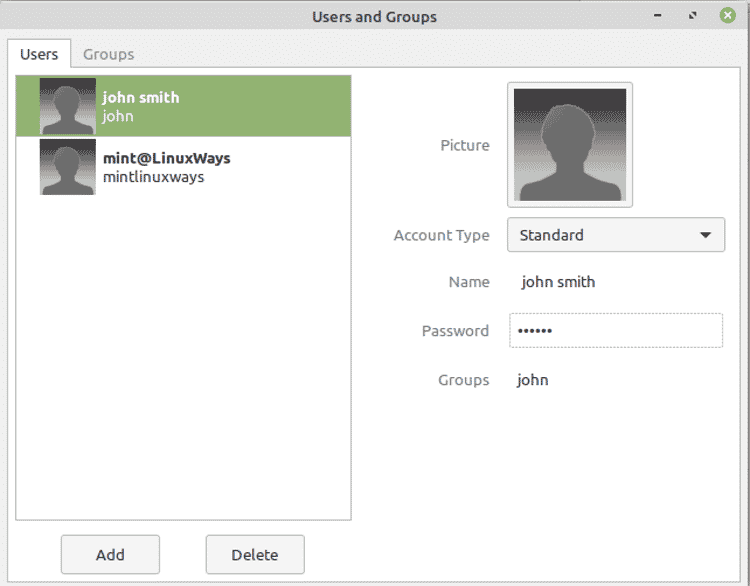
Removing a User in Linux Mint 20
Method 1: Using Userdel Command
To remove the user from the system, run the following command.
sudo userdel <username>
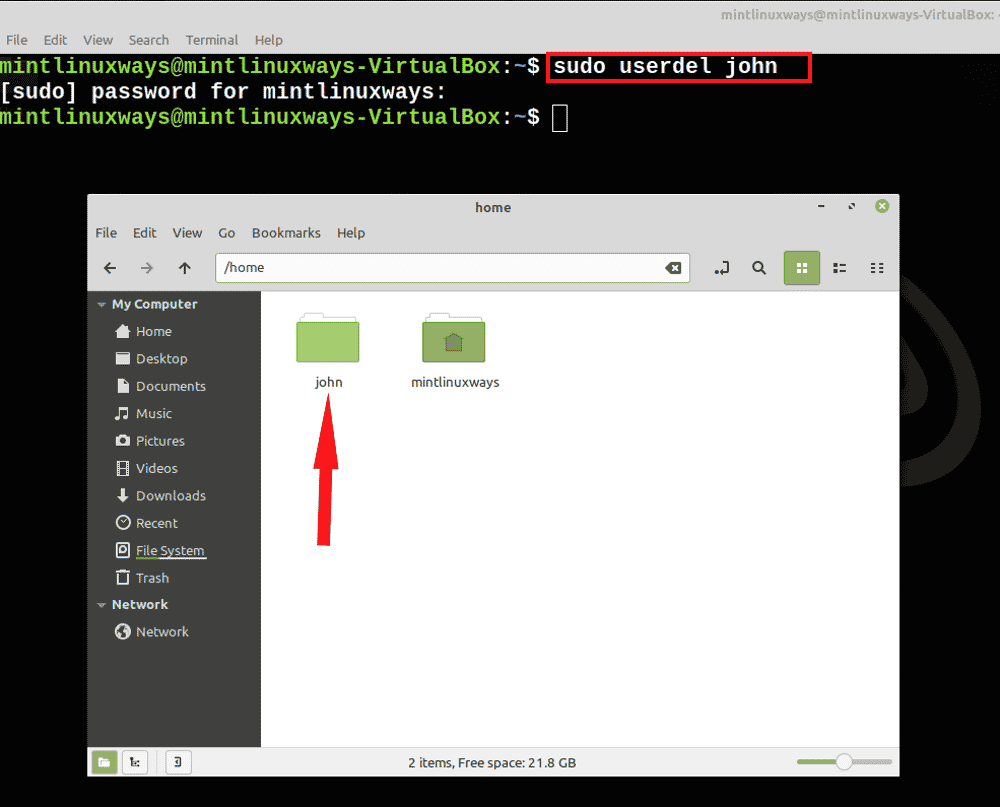
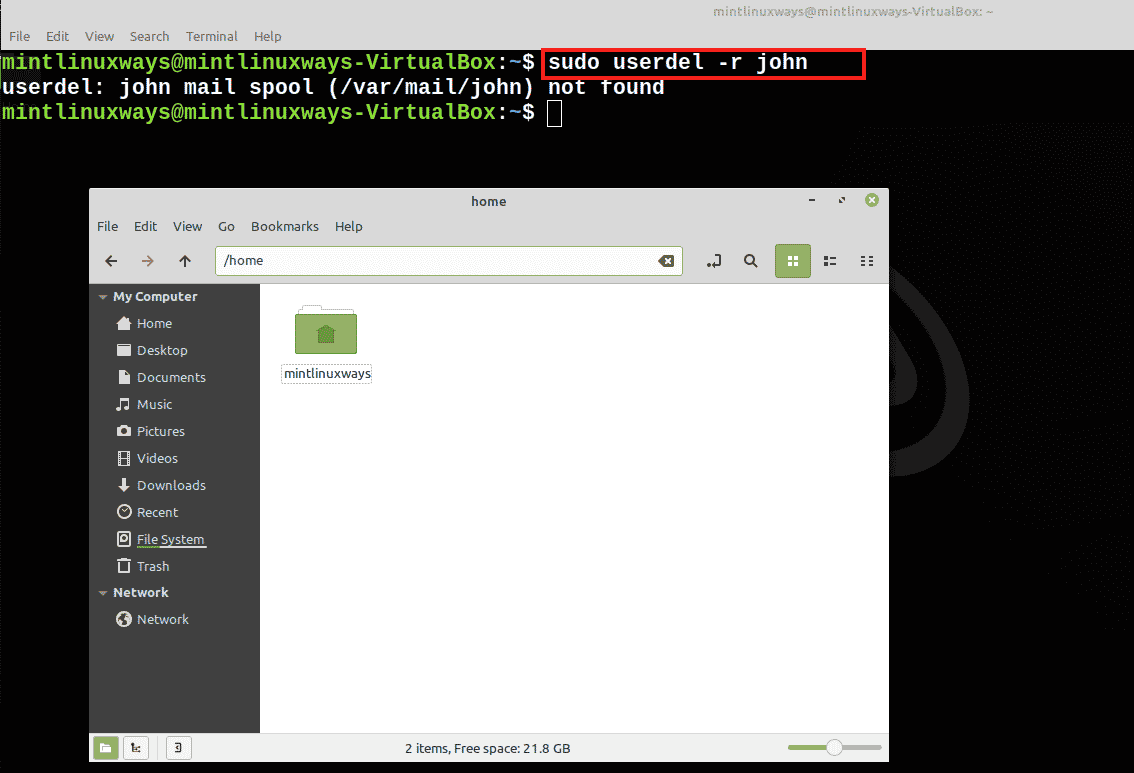
You can see the user is deleted but its associated home directory is still in the system. Use the ‘-r’ switch in the command to make the home directory be deleted too.
sudo userdel -r <username>
Method 2: Using Deluser Command
You can use the following deluser command to delete the user.
sudo deluser <username>


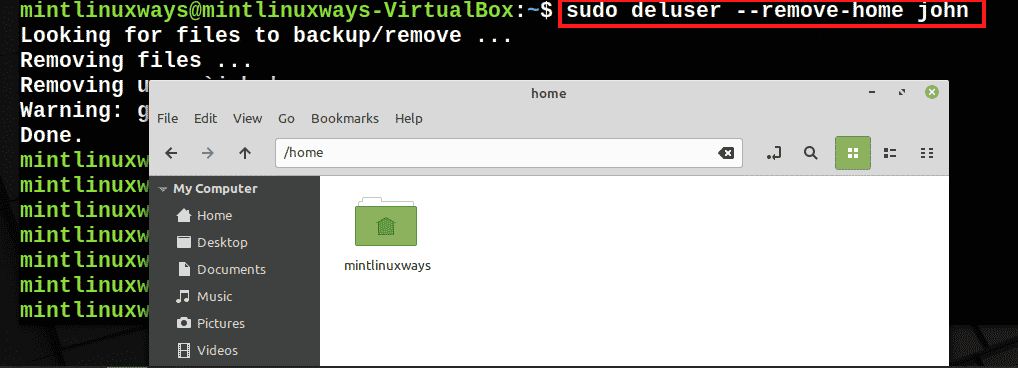
Add ‘–remove-home’ option with your command to make sure the home directory reflects the changes.
sudo deluser --remove-home <username>
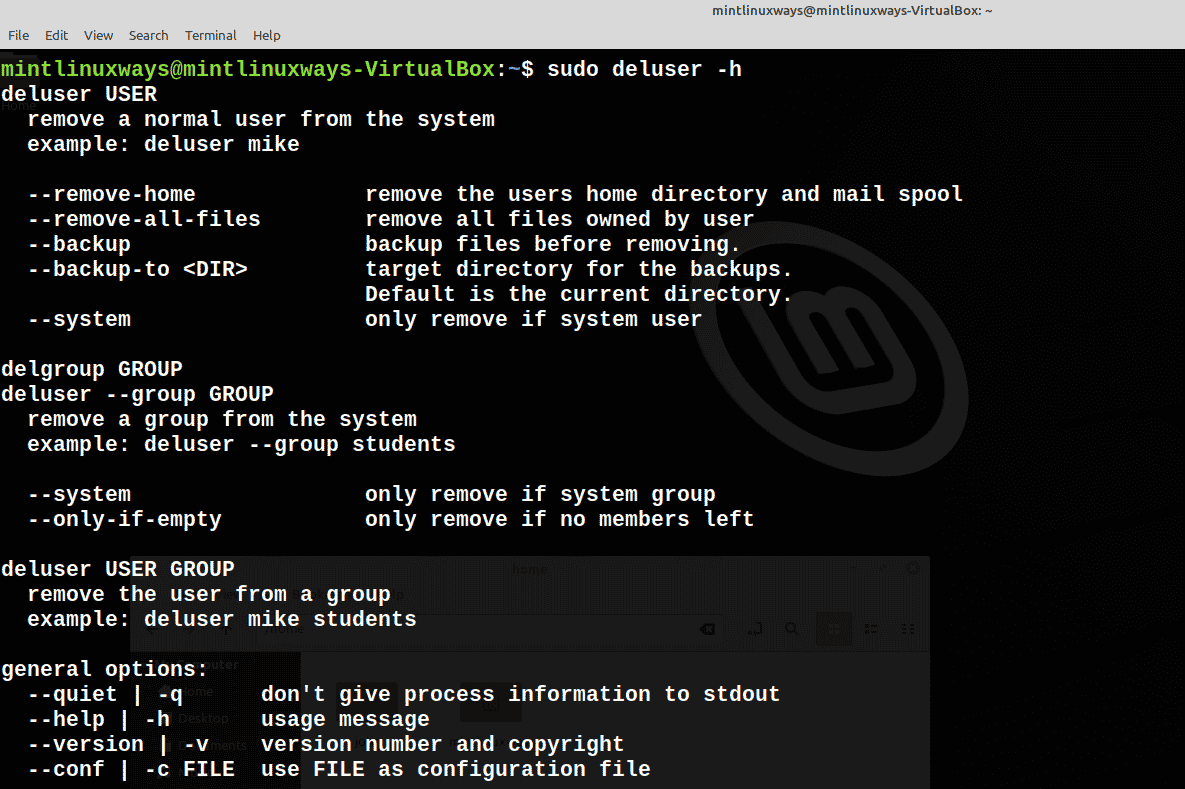
You can also see other options that are available in the deluser command by running the following command.
sudo deluser -h
Method 2: Using Settings Utility
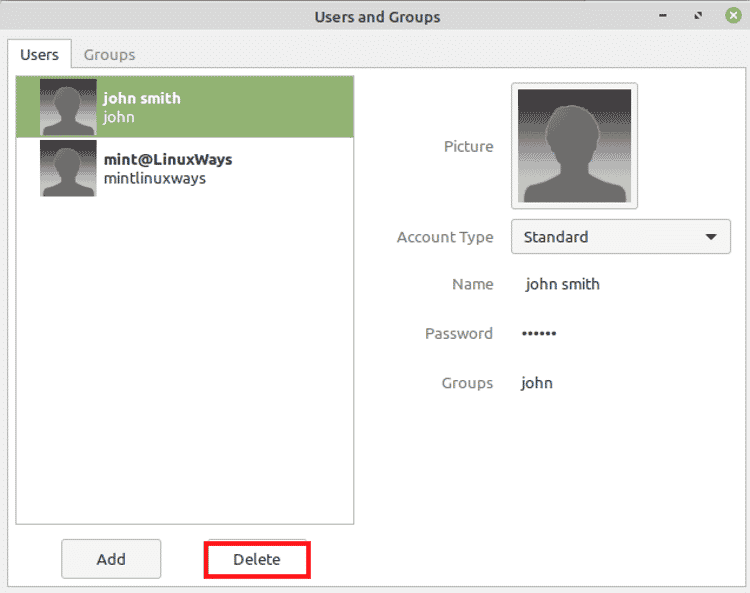
Go to the Administration>Users and Groups in the System Settings Utility. You will see all the available users here. Select the user you want to remove and click on the Delete.
You will be prompted to confirm your action. Press Yes to delete the user.

Conclusion
This article lists down all the ways you can add or delete the user in your Linux Mint system. You can pick and choose your favorite method according to your preference.

