VirtualBox is a free-to-use hypervisor tool that enables users to run and use all major operating systems on PCs simultaneously. It creates a virtual environment on the system where users can install and run multiple operating systems, such as Linux, Windows, or macOS. If you are working on a Linux Mint system and want to install and use other operating systems, you can install VirtualBox. It will allow you to simultaneously run and operate numerous operating systems at a time.
This guide will explain various methods of installing the VirtualBox on the Linux Mint system.
Quick Outline
How to Install VirtualBox on Linux Mint
You can install Virtual Box on Linux Mint through:
How to Install VirtualBox on Linux Mint Through the Default APT Repository
The easiest and simplest way to install VirtualBox is by utilizing the default APT repository. The APT repository contains a list of various VirtualBox packages that can be installed through the “apt” command. However, you will not get the VirtualBox’s latest version using this method.
You can install VirtualBox on Linux Mint through the default APT repository using the provided steps:
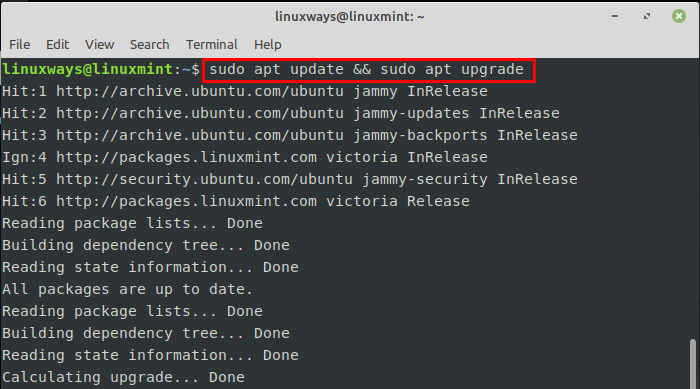
Step 1: Update System Packages
Before installing VirtualBox, it is recommended to update the Linux Mint packages list. To do so, type out the below-listed command:

Step 2: Install VirtualBox and Extension Pack on Linux Mint
Now, utilize the below-given command to install the VirtualBox and its extension pack from the default Linux Mint’s APT repository:
Here, the “virtualbox-ext-pack” is the extension pack for the VirtualBox to extend its functionality:

Then, select the “OK” button from the left arrow and right arrow keys and hit the “Enter” key:

Next, choose the “Yes” option to accept the terms and proceed further:

Upon doing so, the VirtualBox will be installed successfully:

Step 3: Verify VirtualBox Installation on Linux Mint
To verify whether the VirtualBox is installed on Linux Mint, execute the given command:
As you can see, it does not install the latest version of VirtualBox:

Step 4: Launch VirtualBox
Finally, use the provided command to launch the VirtualBox on Linux Mint from the terminal:
The above command will launch VirtualBox on your Linux Mint system, which indicates that it has been installed successfully:

Alternatively, you can also launch the VirtualBox via GUI. To do so, first, click on the “Menu” button and choose the “Administration” option. Then, look for “VirtualBox” and open it as seen below:

How to Install VirtualBox on Linux Mint Through the Official VirtualBox Repository
You can also install VirtualBox from the official VirtualBox repository method. The benefit of using this method is that it will help install the latest version of the VirtualBox on the Linux Mint system. Further, it will also update the VirtualBox if the latest release is introduced.
To install VirtualBox on Linux Mint from the official VirtualBox repository, use the following steps:
Step 1: Update and Upgrade System Repository
First, update and upgrade the system’s packages via the below-given command:

Step 2: Install Essential Dependencies/Packages on Linux Mint
Then install some dependencies needed for VirtualBox’s installation on Linux Mint. This can be done using the command given below:
Here:
- “dkms” builds and installs kernel modules.
- “dirmngr” server is utilized to handle and download encryption keys.
- “software-properties-common” is a tool to manage i.e. add and remove software repositories.
- “ca-certificates” is used for secure/safe connection.
- “apt-transport-https” allows APT repositories to utilize HTTPS protocol for secure package downloads.
- “curl” and “wget” are command-line tools for making HTTP requests and downloading files from the internet.
- “gnupg2” is a tool for encryption and secure communication.
- “-y” option allows direct installation without any confirmation.

Step 3: Import GPG Key for VirtualBox
You should also import the GPG key using the following command to ensure the integrity of VirtualBox packages on Linux Mint:

Step 4: Add VirtualBox Repository in Linux Mint
Then add the VirtualBox repository to the Linux Mint system through the provided command:

Step 5: Update System’s Package List
To successfully add the VirtualBox repository to the system, you should update the system’s repository using the below-given command:

Step 6: Install VirtualBox on Linux Mint
Now, use the provided command to install the latest version of VirtualBox on the Linux Mint system:

Step 7: Verification
For the verification, use the given command to display the VirtualBox’s downloaded version on Linux Mint:
According to the below output, the latest version of VirtualBox has been installed:

Step 8: Launch VirtualBox
Finally, open the VirtualBox on Linux Mint using the following command:
It can be observed that the VirtualBox has been launched successfully:

How to Install VirtualBox on Linux Mint Through Deb File
Another easier way of installing VirtualBox on Linux Mint is using the “deb” package file. This method installs VirtualBox’s latest version on the system, but users cannot get automatically updated to the new version (releases) of VirtualBox.
To install VirtualBox on Linux Mint via the “deb” file, check out the following instructions:
Step 1: Download VirtualBox Deb File on Linux Mint
First, navigate to the Oracle VM VirtualBox official website and tap on the “Ubuntu 22.04” link to download the “deb” file:

Step 2: Install VirtualBox on Linux Mint
Then, open the terminal and navigate to the folder where the “deb” file is downloaded. Here, we are navigating to the “Downloads” folder and listing its content:
ls
It can be seen that the “Downloads” directory contains the VirtualBox’s “deb” package file:

Now, utilize the “sudo apt install” command with the “deb” package file name to install the VirtualBox on Linux Mint:

Step 3: Verification
Finally, launch the VirtualBox on Linux Mint using the following command to ensure that it is installed on the system:
According to the below screenshot, the VirtualBox has been successfully launched and installed:

How to Install VirtualBox on Linux Mint Through Synaptic Package Manager
The Linux Mint system also has a Synaptic package manager, which is a GUI tool for managing various packages. It enables you to install, remove, or update desired packages on the Linux Mint system. You can easily install VirtualBox on Linux Mint using the Synaptic package manager through the following step:
Step 1: Open Synaptic Package Manager on Linux Mint
First, click on the “Menu” button, type “Synaptic Package Manager” in the search bar, and open it:

Then, type the system’s password and tap on the “Authenticate” button:

Step 2: Search VirtualBox in Synaptic Package Manager
Next, type “virtualbox” in the search box and hit the “Search” button:

Step 3: Select VirtualBox Packages
Now, select the below-highlighted “virtualbox” package:

Mark the selected package for installation:

Note: The Synaptic Package Manager also selects some additional packages that are required for VirtualBox. You can check these packages and unmark any package that you don’t want to install.
Step 4: Install VirtualBox and Required Packages
After selecting the desired packages, click on the “Apply” option to start the installation process:

Click on the “Apply” button:

As you can see, the installation has started on Linux Mint, wait for the installation to finish:

Subsequently, the packages have been installed, click on the “Close” button to close the window:

Step 5: Launch VirtualBox on Linux Mint
Lastly, you can launch VirtualBox on Linux Mint from the application menu in the Administration section:

The VirtualBox has been launched successfully as seen below:

How to Uninstall VirtualBox on Linux Mint
Users may want to uninstall VirtualBox on their Linux Mint system when they no longer want to use it. If the VirtualBox is installed from the default Linux repository, use the below-provided command to uninstall it:
Upon doing so, the VirtualBox has been uninstalled successfully:

If you have installed the VirtualBox from the Official VirtualBox repository, you can remove the package from the above-given command and delete the VirtualBox repository through the provided command:

You can also remove/delete the added GPG key from your system using the following command:

For the verification, run the provided command to ensure that the VirtualBox has been uninstalled from the system:
The below output indicates that the VirtualBox has been uninstalled successfully from the Linux Mint system:

Note: The removal method for VirtualBox installed through the Deb file and Synaptic package manager is also similar, which can be done using the apt remove command.
Final Thoughts
VirtualBox is a useful tool for using multiple operating systems on your computer without affecting your original operating system. You can install VirtualBox on Linux Mint through the default Linux repository, official VirtualBox repository, deb file, or Synaptic package manager. Among these methods, the default APT Linux repository method is the easiest way to install VirtualBox. Moreover, if you like to get/install the latest version of the VirtualBox on Linux Mint, utilize the official VirtualBox repository or Deb file methods. This guide has covered all the possible methods of installing VirtualBox on Linux Mint. You can follow any method to install VirtualBox on Linux Mint and seamlessly install and run any operating system with ease.
I am a technical writer with a knack for learning and exploring new technologies. As a Computer Science Graduate, my expertise lies in the fundamentals of Programming languages and Linux OS. I strive to provide users with in-depth and informative articles that can help them understand the core concepts of modern technologies.


