SSH (Secure Shell) is a well-known network protocol that enables secure and encrypted remote access to the systems or computers over a network. It permits users to remotely connect to the remote server system, and access its terminal (CLI) without physically being there.
While working on Linux Mint, if you want to access another system, you can install and enable SSH on your system. It will allow you to remotely control Linux, Unix, macOS, and Windows systems from other computers/systems.
Overview
- How to Install SSH on Linux Mint 21
- How to Enable SSH on Linux Mint 21
- How to Access Remote Server Via SSH on Linux Mint 21
- How to Configure SSH on Linux Mint 21
- How to Transfer/Share Files Using SSH in Linux Mint 21
- How to Disable SSH on Linux Mint 21
- How to Uninstall/Remove SSH on Linux Mint 21
- Conclusion
How to Install SSH on Linux Mint 21
To install SSH on Linux Mint, you have to install the “ssh” package from the default Linux Mint repository. It contains the necessary dependencies for setting up an SSH server on Linux Mint:
This command will successfully install SSH along with the additional packages on the system:

How to Enable SSH on Linux Mint 21
The SSH service is enabled automatically after installing SSH on the system. However, if it is not enabled, you will have to enable it manually using the below-listed command:

Next, enter the given command to start the SSH service:

To verify whether the SSH service is enabled or not, check its status:
The SSH service is enabled and is running successfully as seen below:

Enable SSH Connections Through Firewall
On Linux Mint, the firewall may restrict the incoming SSH connections on the server side. In such circumstances, you will have to configure the firewall to allow incoming client-side SSH traffic using the provided steps:
First, enable SSH connections through the firewall using the below-given command:

Then, write out the provided command to enable the firewall:

Next, restart the firewall to implement changes:

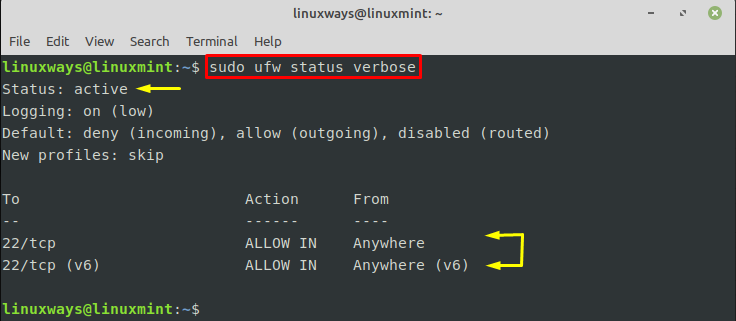
Finally, check the status of the firewall in detail for verification:

How to Access Remote Server Via SSH on Linux Mint 21
To connect to a specific remote server system and access it from another system/computer, use the below-mentioned command:
Make sure to replace the “username” with your username on the remote system and “system-ip-address” with the remote server system’s IP address.
Note: On Linux, Windows, and macOS, you can find the username through the “whoami” command. To find the IP address on Linux and macOS systems, use the “ifconfig” command, and for Windows, use the “ipconfig” command.
Consider the provided examples to understand how we can access remote systems from different devices.
Example 1: Access Your Linux Mint Server System on a Windows Client System
In this example, we will access our Linux Mint server on a Windows (client) computer. For this purpose, open the Windows terminal and execute the below-listed command:
Here, “linuxways” is the username, and “192.168.70.145” is the IP address of our server Linux Mint system.
After executing the above command, you will have to provide the password of the server system you are connecting to i.e. “linuxways@192.168.70.145”. Subsequently, the Linux Mint server system will be accessed on the Windows system successfully as seen below:

If you want to terminate the connection, type out the given command:

Example 2: Access a Debian Server System on Your Linux Mint Client System
In this example, we will access a Debian server system on our Linux Mint client system. We are executing the given command on the Linux Mint terminal and providing the username and IP address of the server Debian system:
Here, “laiba” is the Debian server system’s username, and “192.168.70.146” is its IP address.
We have successfully connected to our Debian server system as seen below:

How to Configure SSH on Linux Mint 21
If you want to enhance the security of the SSH server, you can configure it on your Linux Mint system in the SSH configuration file. You can make changes to the SSH server’s settings, such as changing the port number, limiting root login, controlling user access, and many more. To do so, use the given command to open the configuration file in the editor:
The file has been opened as seen below: 
Now, you can make the desired changes in this configuration file. Go through the provided examples to understand how we can configure SSH on the system.
Change Default SSH Port
The default SSH port is “22” as it listens on it by default. However, you can change this port number to access SSH on any desired port. To change the SSH port in the SSH configuration file, you have to uncomment the “#Port 22” line and change it with the specific port number. For instance, we are assigning “7777” as the new port number.
Note: Before assigning the new port number, ensure that the port is free and not being used by another service. You can check the availability of the new port through “sudo netstat -tulpn | grep ‘:<port-no>’” command.


Save modifications and close the file by pressing “CTRL + S” and “CTRL +X”.
After that, update the firewall rule to enable SSH connection on the new port i.e “7777” using the given command:

Implement new changes by restarting the firewall on the system:

You will also have to restart the SSH service:

Finally, view the SSH listening port to ensure that it is now listening to the new port:
According to the below output the SSH is listening to the new “7777” port:

Limit SSH User Login and Access
If you do not want everyone to access your server system, you can limit the SSH access to specific users. To allow access to certain users, you have to add the “AllowUsers” line along with the specified usernames at the end of the SSH configuration file.
Here, we are allowing access to only three systems with usernames “laiba”, “testsystem”, and “linuxgenie”. So, only these users are allowed to access the server system:

Similarly, you can make other changes in the SSH configuration file according to your needs.
How to Transfer/Share Files Using SSH in Linux Mint 21
SSH also enables users to safely transfer files between remote servers and local client systems using “scp”. The SCP is a secure copy protocol for securely transferring/copying files and directories between systems. Check out the following cases to see how we can transfer files over SSH in Linux Mint.
Note: You will need the file’s path while transferring it. Use the “realpath <file-name>” command to get the file’s path.
Case 1: Transfer Files From the Remote Server to the Local System
To copy or share the desired file from the remote system server to the local system, you can utilize the provided command:
For instance, we are copying a “test1.txt” file from the remote server to our local system in a specific directory:
Here,
- “laiba@192.168.70.147” is the remote server system’s username and IP address respectively.
- “/home/laiba/Downloads/test1.txt” is the remote server’s file path that is being copied.
- “~/Desktop” is the local system’s directory where the file will be copied.
The below output shows the “test1.txt” file has been successfully copied from the remote server to our local system. You can also list the local directory’s content where the file is copied for verification:

Case 2: Transfer Files From the Local System to the Remote Server
To transfer/share a file from the local system to the remote server, utilize the following command:
For example, we are transferring a “demo.txt” file from the local system to the remote server at a particular directory:
Here:
- “/home/linuxways/Documents/demo.txt” is the local directory file’s path that is being transferred.
- “laiba@192.168.70.147” is the remote server’s username and IP address respectively.
- “/home/laiba/” is the remote directory where the file will be transferred.
The file has been successfully transferred from the local system to the remote server:

For verification, you can access the remote server and list the directory content where the file has been transferred:

How to Disable SSH on Linux Mint 21
To disable the SSH on Linux Mint from starting automatically on the system boot, you have to stop the SSH service first using the provided command:

Then, disable the SSH service by utilizing the given command:

How to Uninstall/Remove SSH on Linux Mint 21
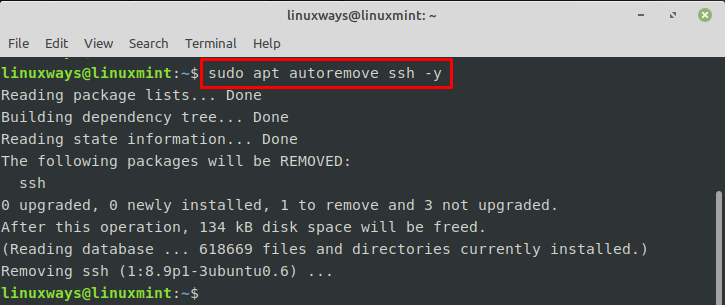
If you no longer need remote access to your remote systems, you can uninstall/remove SSH from your Linux Mint system via the provided command:

That was all about SSH on Linux Mint.
Conclusion
SSH offers an encrypted and secure way to remotely access and control systems, transfer files over the network, and perform administrative tasks. You can install SSH on Linux Mint systems from the default Linux Mint repository and enable it on the system. Additionally, you can make the desired changes in the SSH configuration file to configure the SSH server. This guide has covered the step-by-step instructions to install, enable, and configure SSH on Linux Mint systems.
I am a technical writer with a knack for learning and exploring new technologies. As a Computer Science Graduate, my expertise lies in the fundamentals of Programming languages and Linux OS. I strive to provide users with in-depth and informative articles that can help them understand the core concepts of modern technologies.


