Rufus is useful software for Formatting a USB Drive and it also makes the process of making a Bootable USB Drive easier. Apart from USB drives, other external devices can also be formatted or made bootable with Rufus. A Bootable USB Stick is beneficial in a variety of ways. With a Bootable Ubuntu Operating System on a USB Stick, we can troubleshoot problems in Ubuntu easily. We can easily plug and play the USB Stick and it makes our Ubuntu System Portable as well, i.e. we can use Ubuntu any time.
This article discusses how you can create a Bootable USB Stick with Rufus on Windows.
Create a Bootable USB Stick With Rufus on Windows
Create a Bootable USB Stick with Rufus for either Trying Ubuntu Directly from the USB Drive or installing Ubuntu from USB for its use alongside any other Operating System. The steps below explain the steps required to create a Bootable USB stick.
Step 1: Download Rufus
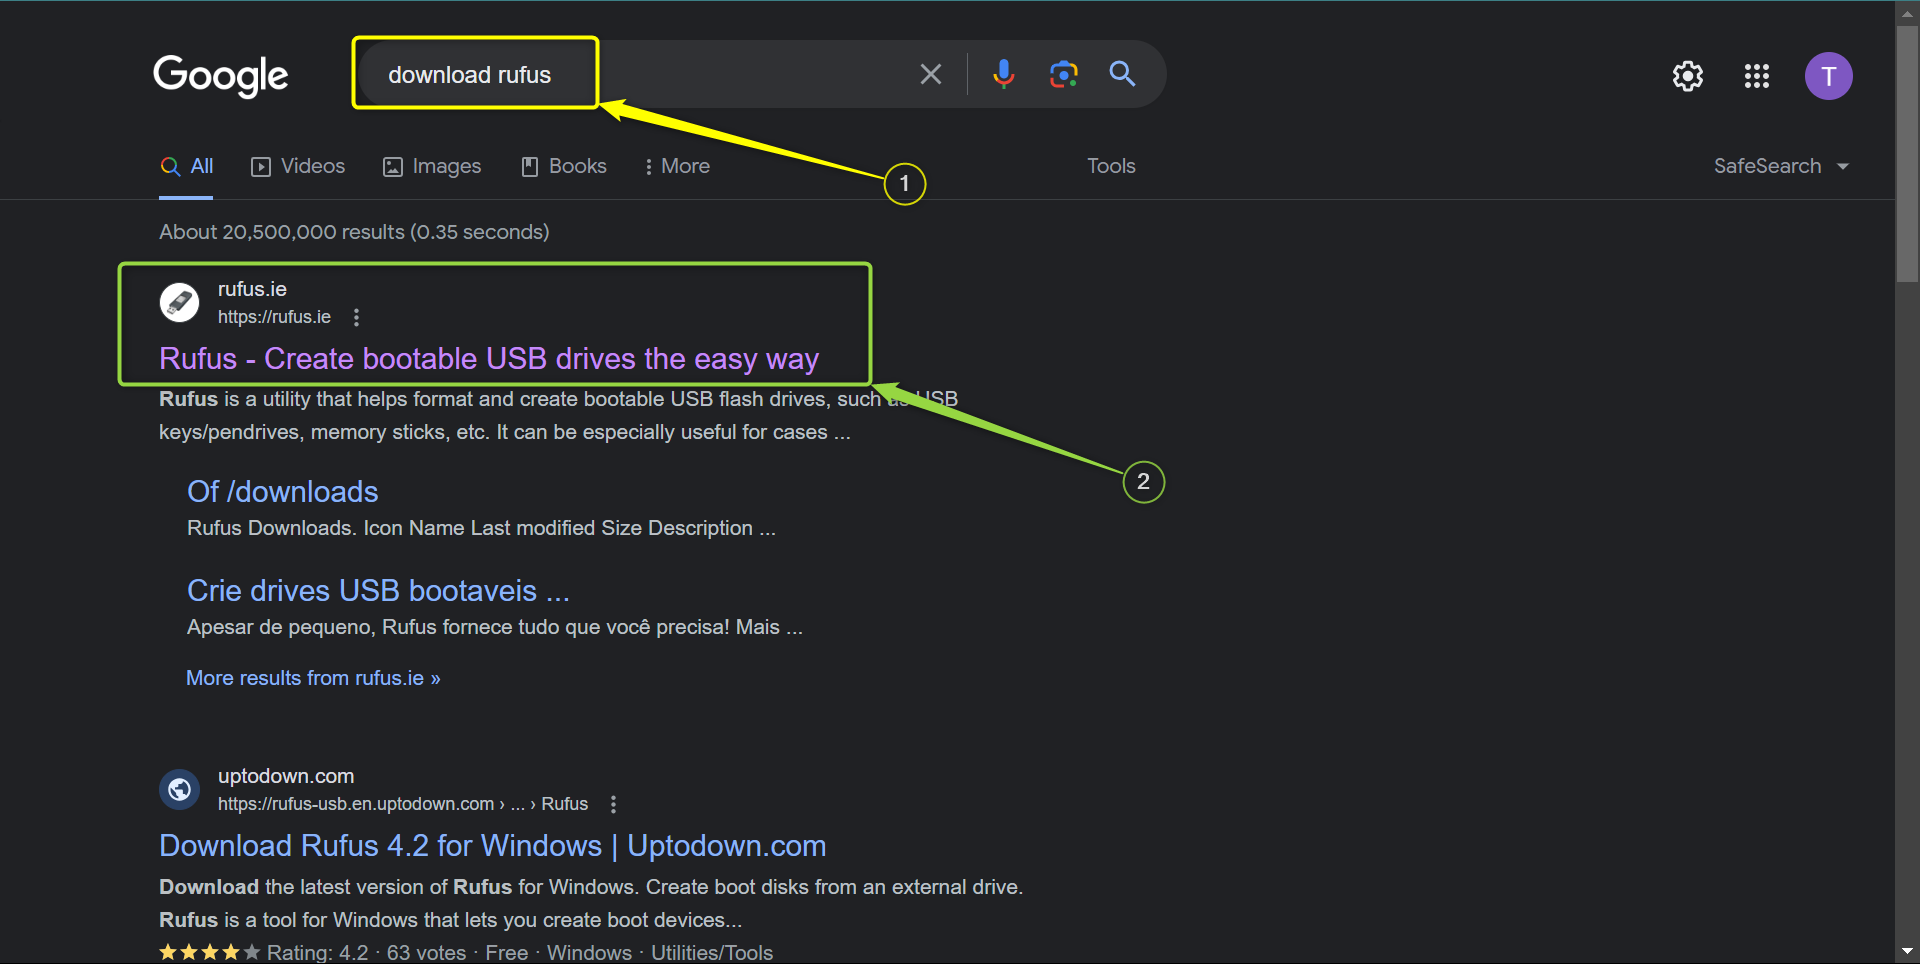
To create a bootable USB Stick using Rufus, you have to install Rufus first on your System. To Download Rufus, either visit the Rufus Website or open your favorite browser and then search for the Official Rufus Download page. In our case, we searched for Rufus and then opened the official Rufus download page:
In the Download Page, scroll down and you will find the “Latest Releases” Rufus Versions. In our case, we downloaded the Standard “rufus-4.2.exe” file:

Once the Rufus Application Downloads, you will see it in the Downloads Directory of your Windows OS:

Click on the Executable Setup File to start the Rufus Application. In the bottom left of the Rufus Application Menu, it will inform if any USB Devices are connected to the System. In our case, the USB Drive is not connected:

Step 2: Rufus Configuration
Insert the USB Stick, click on the drop-down Device menu, and see the USB Drive Device. Click on the Drive to Select it. In our case, the USB Drive is “USB (F:)”:

After selecting the USB Drive, ensure that the Boot Selection Options have the ISO Image Option Selected, and then click on the “Select” Button:

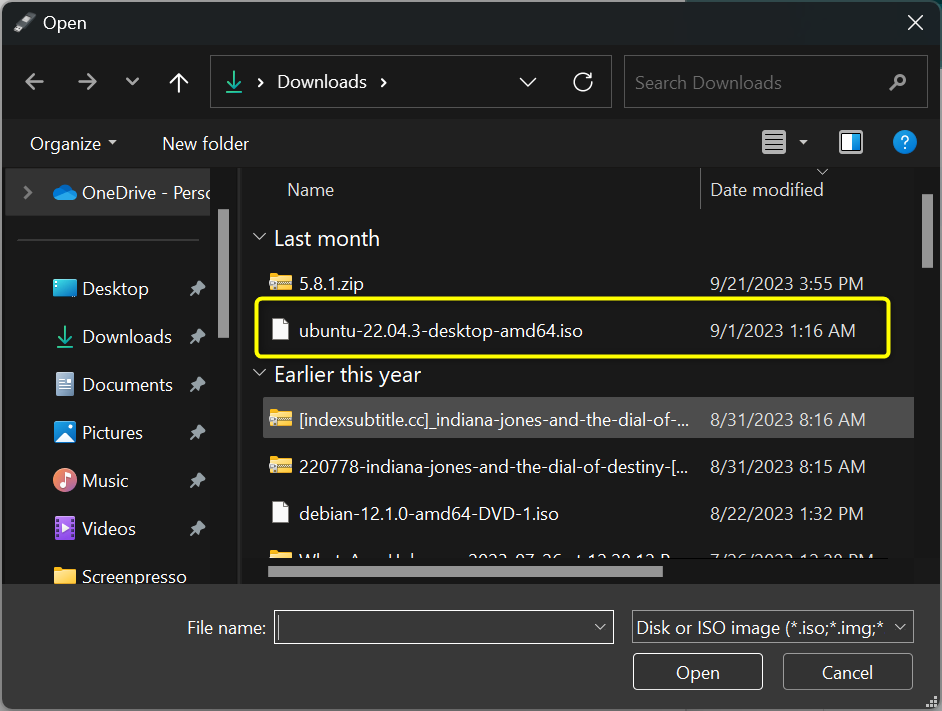
The Select Button will ask you to select the ISO File to add to the USB Stick. In our case, we have the Ubuntu ISO File:
Once the ISO File is selected, leave the default configuration setting for other options in Rufus:

Now click on the “Start” Button to continue with the Bootable USB Stick process:

Step 3: Making the Disk Bootable
After you’ve clicked on “Start”, a Warning Window pops up asking you to select the Image Mode. By default, Rufus recommends and writes to the USB Drive in ISO Image mode. Select the “Write in ISO Image Mode” and then click on “OK”:

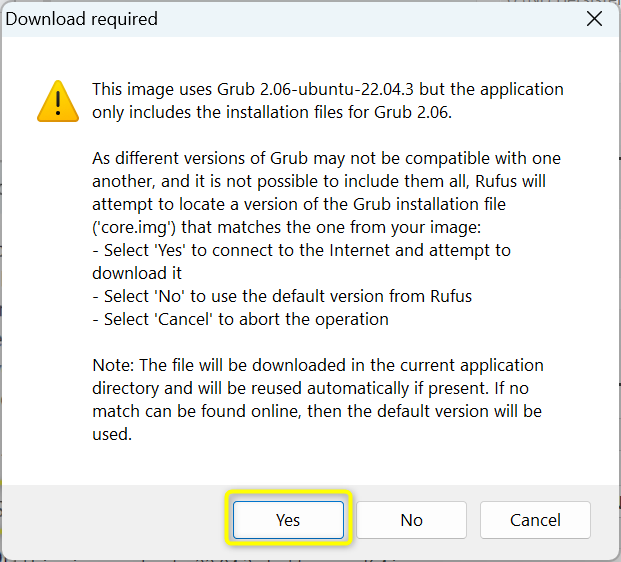
Rufus also checks for any packages or installation files that require an update. In our case, a Download Window Pops Up asking for the “Grub” Latest Installation files to be downloaded before making the USB stick Bootable. Select the “Yes” button if you wish to download additional files:
Before making the USB Stick Bootable, ensure that any useful data is moved out from the USB Drive. Rufus, while making the USB Drive Bootable, deletes all the existing files on the USB drive. Click on “OK” to erase the data from the USB Stick:
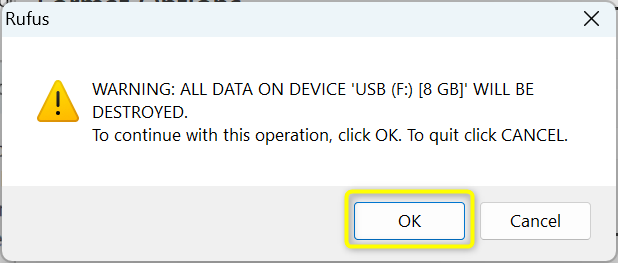
Once the USB Drive is cleaned of any data, the Bootable Drive Creation Process will start and you can see the progress in the Green Bar:

Once the Process completes, you will see the default Rufus Window again with the “Start” button clickable again. This ensures that the USB Stick has been made Bootable:

Step 4: Booting from USB Stick
To Boot from the USB Stick Once it has been made bootable, either restart your Windows Operating System and during the Restart press the “F8” key or restart in Advanced Mode from the System Settings. In our case, we restarted from the Settings. On your Home Screen, either press the Windows Key from your Keyboard or click on the Windows Icon:
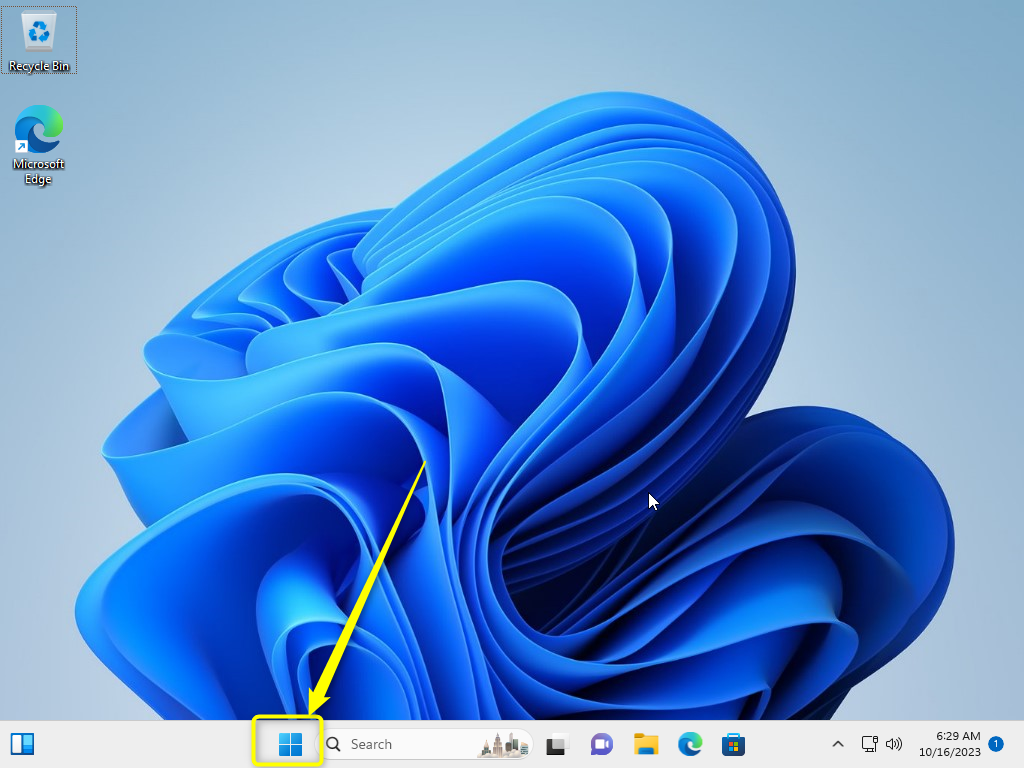
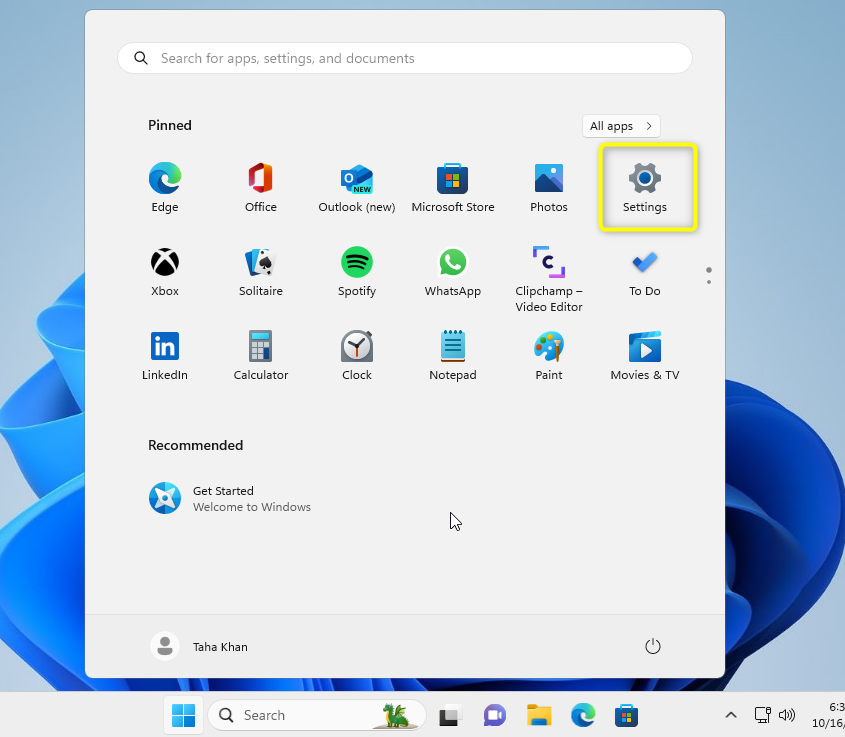
The Application Menu appears where you will see the Settings icon. Click on the “Settings” icon to open Windows Settings:
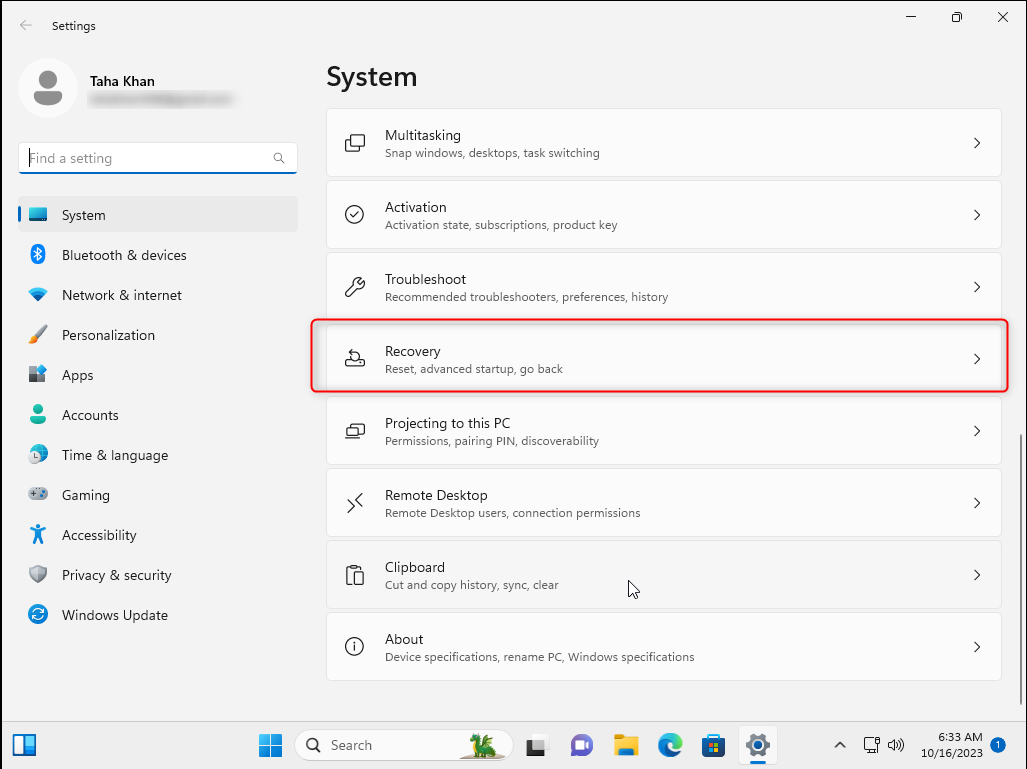
Ensure that you are in the System Settings, and then find the “Recovery” option by scrolling down:

Click on the “Recovery” Option to open the Window Recovery Settings Menu:
In the Recovery Option, you will see the “Advanced Startup” which will Start your Windows Operating System with startup settings where you can choose the Boot Option. Click on the “Restart Now” Button inside the Advanced Startup Option to reboot your system now:
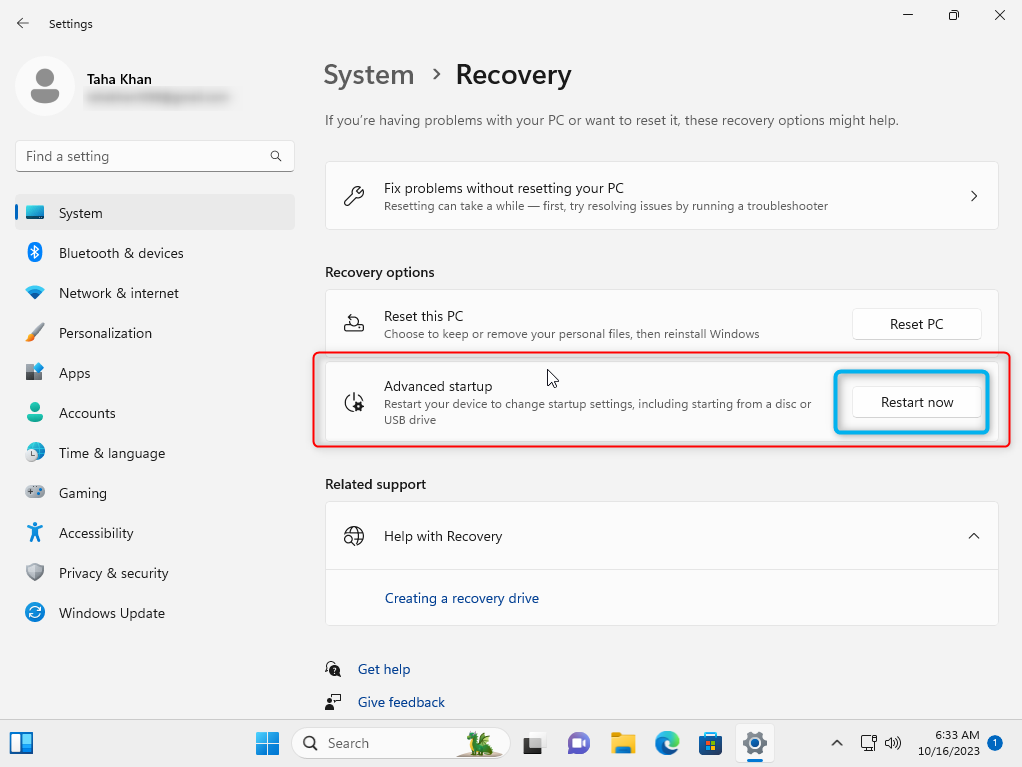
The Windows OS will reboot and once it reboots, it will ask to choose a Boot Option. Click on “Use a Device” to choose a USB device for booting a system:

A list of Devices will appear, click on the “EFI USB Device”:

This will Boot the Ubuntu System from the USB Stick.
Step 5: Trying Ubuntu
Once the Ubuntu System Reboots from the USB Stick, it will ask whether you wish to “Try Ubuntu” or “Install Ubuntu”. The “Try Ubuntu” option will only start Ubuntu from the USB. To Install Ubuntu alongside your Windows Operating System, click on “Install Ubuntu”. In our case, we clicked on the “Try Ubuntu” option:

Clicking on the “Try Ubuntu” will start the Ubuntu Operating System Directly without installing any packages onto your Windows Operating System:
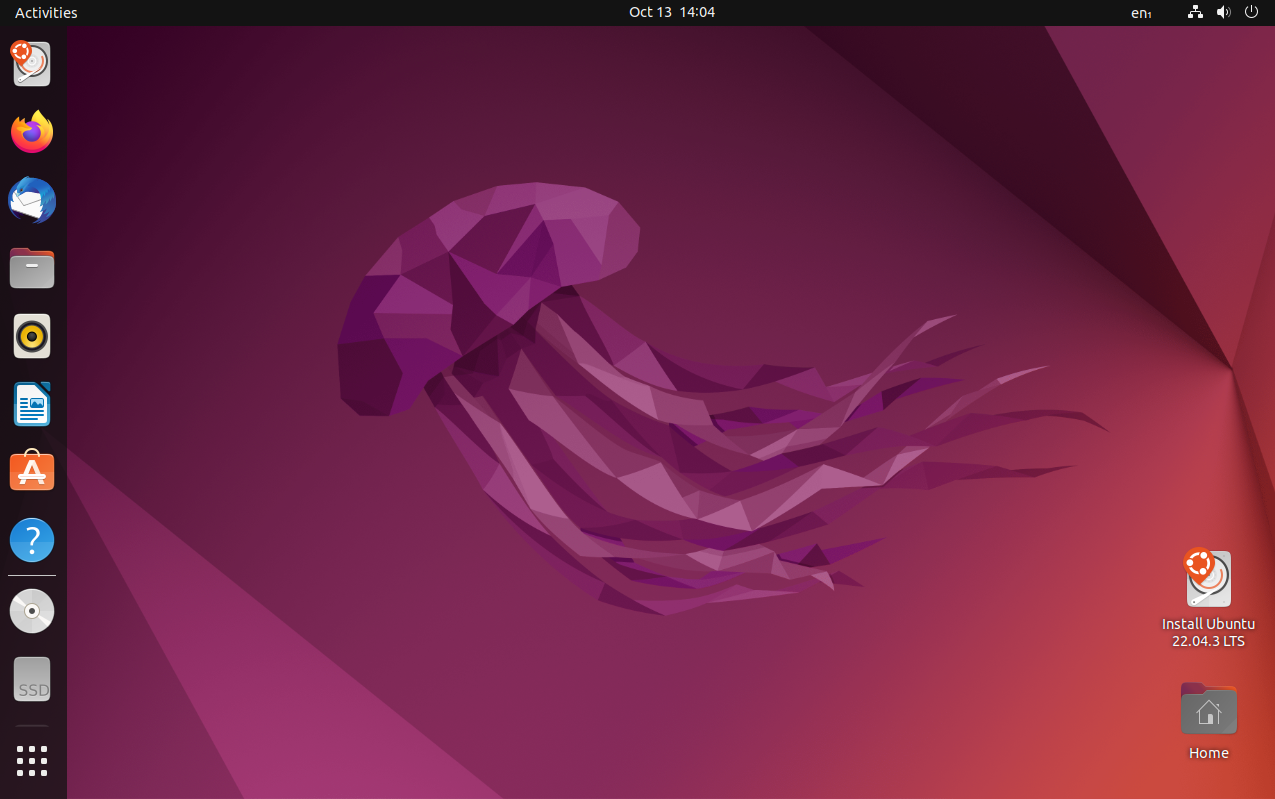
This is how you can create a bootable USB Stick with Rufus.
Conclusion
A Bootable USB Stick can be created by installing Rufus on Windows first, then selecting the USB Stick, then making the USB Bootable through Rufus and finally rebooting the system to boot again from the USB Device. The Bootable USB Drive either asks you to try Ubuntu directly from the USB Drive or install Ubuntu OS alongside Windows. This article explained the detailed process of making a USB Bootable and then trying Ubuntu from the Bootable USB Drive.

