“A computer system is a combination of different hardware and software components. At times, you wish to extract some details about all the hardware components of your system. If you are operating on a Linux-based system, then you can use the DMIDECODE command to get all the relevant hardware information of your system. In this article, we will teach you how you can do so.”
Using the DMIDECODE Command in Linux
To use the DMIDECODE command in Linux, you can consider the following examples:
Example # 1: Displaying all the Hardware-Related Information
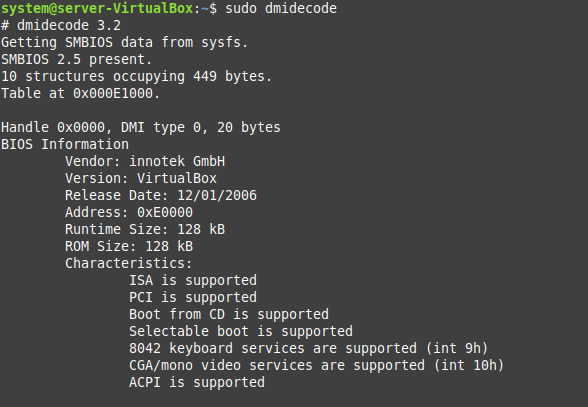
In this example, we will tell you how you can display all the hardware-related information on the Linux terminal regardless of the underlying hardware device. For that, we will simply use the DMIDECODE command without any flags in the manner shown below:
$ sudo dmidecode
![]()
All the hardware-related information about our Linux system is shown in the following image:

Example # 2: Displaying all the Processor-Related Information
Now, we will trim down the output of the DMIDECODE command and print only the processor-related information on the terminal. For that, we have used this command as shown below:
$ sudo dmidecode –t processor
![]()
The processor-related information of our Linux system is shown in the following image:

Example # 3: Displaying all the BIOS-Related Information
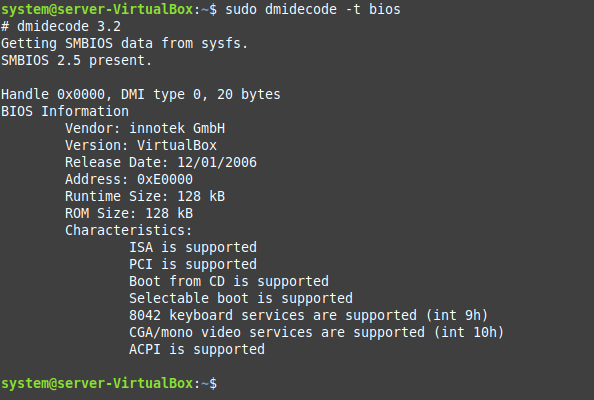
In this example, we will explain to you how you can display all the BIOS-related information by making use of the DMIDECODE command in Linux. For that, you will have to use this command in the manner shown below:
$ sudo dmidecode –t bios
![]()
All the BIOS-related information of our Linux system is shown in the following image:

Example # 4: Displaying all the Chassis-Related Information
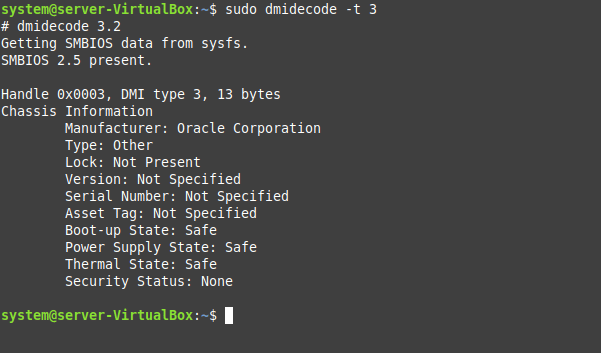
Now, we will show you how you can use the DMIDECODE command in Linux just for printing all the chassis-related information. For that, you simply need to use this command in the manner shown below:
$ sudo dmidecode –t 3
![]()
The chassis-related information of our Linux system can be seen in the following image:

Example # 5: Accessing the Help Manual of the DMIDECODE Command
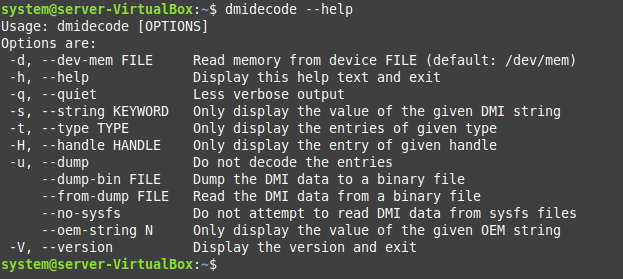
Lastly, we will share with you how you can access the help manual of the DMIDECODE command to learn all the remaining options that you can use with this command. To do so, you will have to run the command shown below:
$ dmidecode --help
![]()
The help manual of the DMIDECODE command is shown in the following image. From here, you will easily be able to find out all the options that can be paired up with this command for serving various purposes.

Conclusion
This article was based on the usage of the DMIDECODE command in Linux. We first talked about the purpose for which this command is used in Linux. After that, we explained a few examples that made use of this command for printing the desired output. You can explore the rest of the options of this command on your own after going through this article.


