Ubuntu is a Linux distro, which includes a variety of utilities for friendly interaction between user and system. One of the utilities is that it also allows you to add a printer to your system for the conversion of data from soft copy to hard form, which means you can also use the printer with your Linux machine. This article is all about the detailed procedure of connecting a printer to the Ubuntu system. Follow the article to successfully install a printer on your Linux operating system.
A printer is an external peripheral device that receives text, graphics, or documents as output from a system and converts them to paper. Printers are now used in offices, schools, colleges, and in homes for individual use. For instance, if you are required to submit a report in school in hardcopy and you made it on the computer using any software, you’ll need a printer to get a printout of that report. Any operating system can operate with it; all you need to learn is to add a printer to your system. Furthermore, advanced level printers are now available that do not need a cable for connection; instead, you must connect them to your PC via WIFI, which is much quicker to set up and use. Printers are classified into different categories according to their features. You can get any of the types according to your requirements.
Adding a Printer to Ubuntu
This article is all about attaching a printer to your Ubuntu system to get a hard copy of your document. Below are the steps for adding a printer to Ubuntu.
Step 1: Go to settings
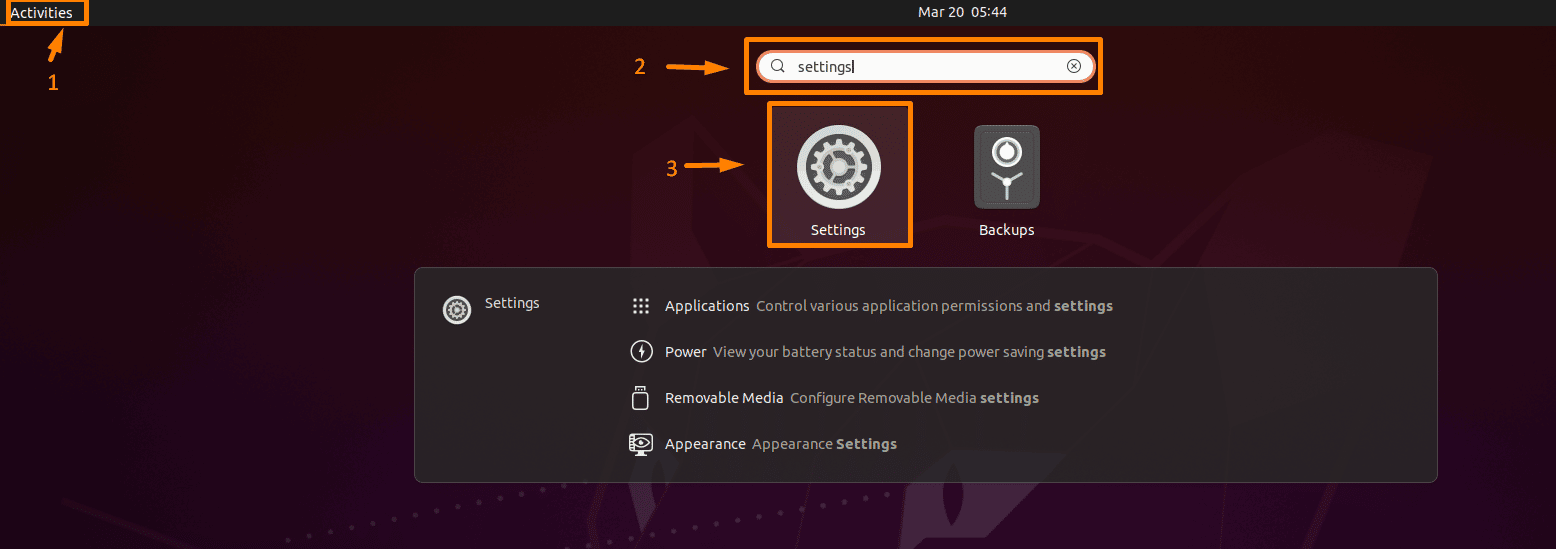
Firstly, open “Activities”, then in the search bar write “settings” and click on the Settings icon to open the options menu.
Step 2: Click printers setting
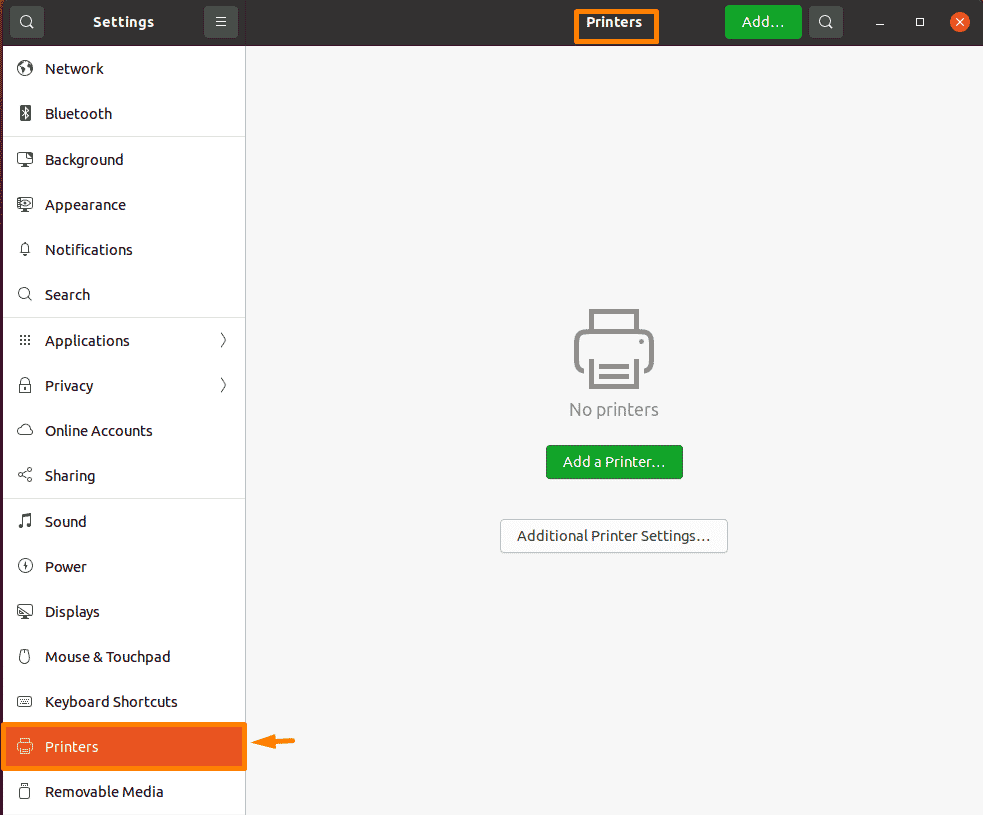
Now from the options on the left side, click on the “Printers” option to open the settings of the printer, and the printer settings will open on the right side.
Step 3: Add Printer to System
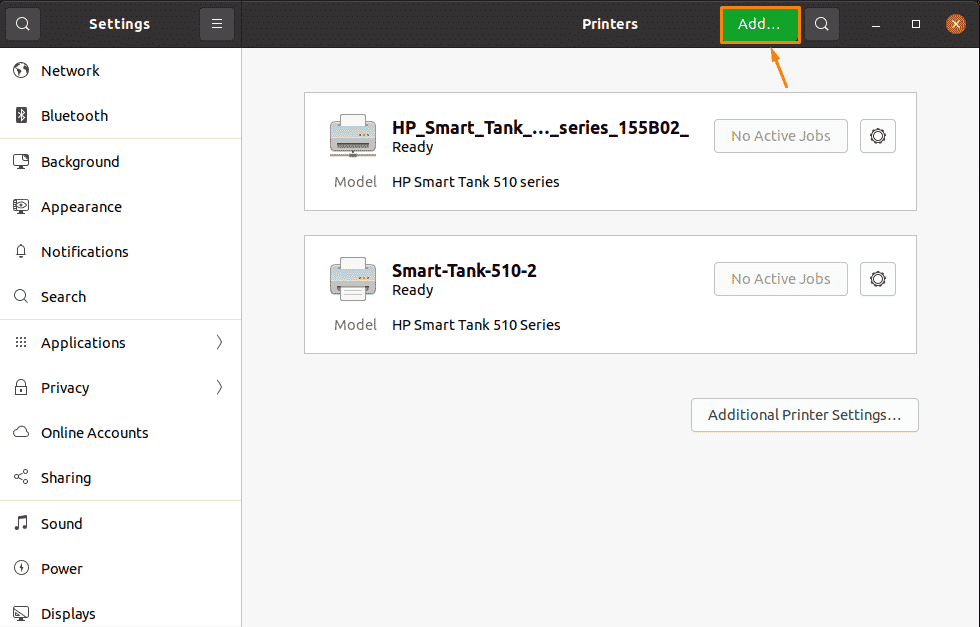
Multiple nearby printers will be displayed on your screen. Now click on the “Add” button on the top left corner of the printer’s settings. It will start searching for nearby printers.
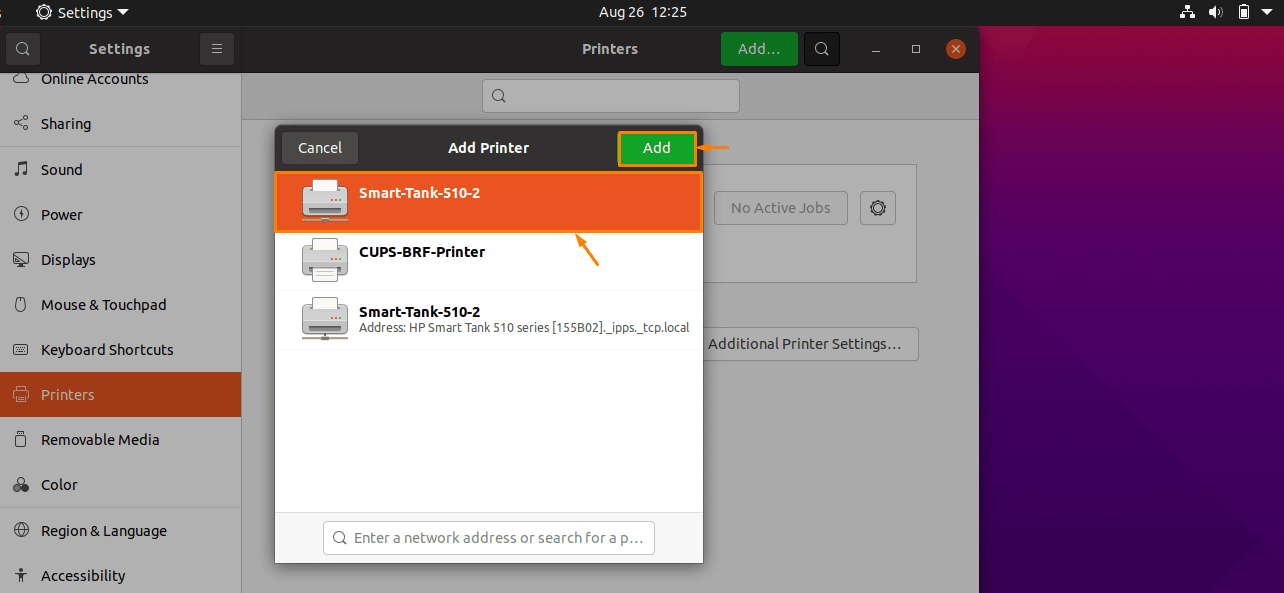
Now this will open a pop-up menu box, which will show all nearby printers. Now click on the printers which you want to add to your system and then click on the “Add” button and that specific printer will be added to your system.
Step 4: Verification of the connection of the printer
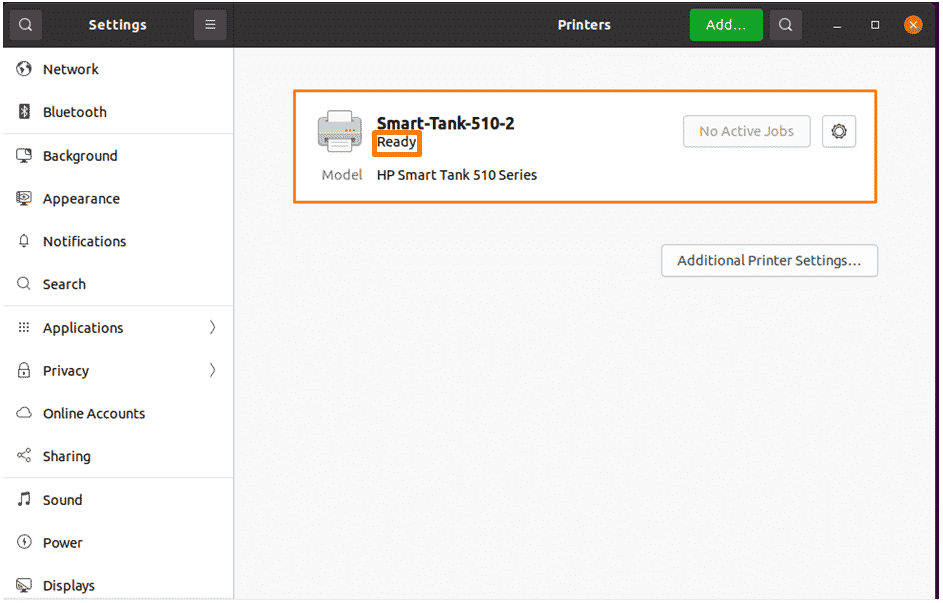
The “Ready” option will appear on the printer once it has been connected to your system. Now you can get a printout of everything you want with linked printing.
Step 5: Configuration of printer setting
To configure the newly setup printer, firstly open up the file/document which you require in hard copy. I want a hard copy of the “file.odt” document, thus opening the required document in LibreOffice Writer. Now click on the file menu and select Print from the drop-down list to access the print options, or you can also use the shortcut “Ctrl + P” from the keyboard to access the print settings as seen below. Now select the newly set up printer from the list and click on the “print button” at the bottom to get a hard copy of the required document.
Conclusion
A printer is a hardware device that is commonly used to convert the softcopy of a particular document to a hardcopy. It is now commonly used in offices, schools, and homes. Printers have made many things easier for the average person. In this article, we discuss a detailed procedure to attach a printer to your Ubuntu (Linux OS) to ease the lives of Linux users. Follow every step to successfully add a printer to your system.


