OPcache is a PHP interpreter module for Apache. It boosts performance by storing precompiled scripts in a shared memory pool. The module is typically used to speed up and enhance the performance of PHP web applications such as WordPress, Drupal, and custom PHP sites. With OPcache, there is no need to load and parse PHP scripts for each request.
With that out of the way, let focus on how to install and enable PHP Opcache module on Ubuntu 20.04.
Step 1: Update Ubuntu 20.04
Firstly, ensure that the package lists are refreshed as follows
$ sudo apt update
This ensures the repositories and package lists are up to date. Once complete, head over to the next step.
Step 2: Install Apache and PHP
First install Apache, PHP, and the required PHP extensions on your system. Execute the commands:
$ sudo apt-get install apache2 libapache2-mod-php php php-opcache php-mysql php-mbstring php-cli php-zip php-gd php-curl php-xml -y
After the installation, verify the PHP version as shown:
$ php -v

Step 3: Configure PHP Opcache
In this step, we will configure Opcache. First, edit the php.ini file to enable the Opcache service. Run:
$ sudo nano /etc/php/7.4/apache2/php.ini
Next, uncomment the following lines:
opcache.enable=1

opcache.memory_consumption=128

opcache.max_accelerated_files=10000

opcache.revalidate_freq=200
Next, save the file and exit. To effect the changes made, reload the webserver.
$ sudo systemctl restart apache2
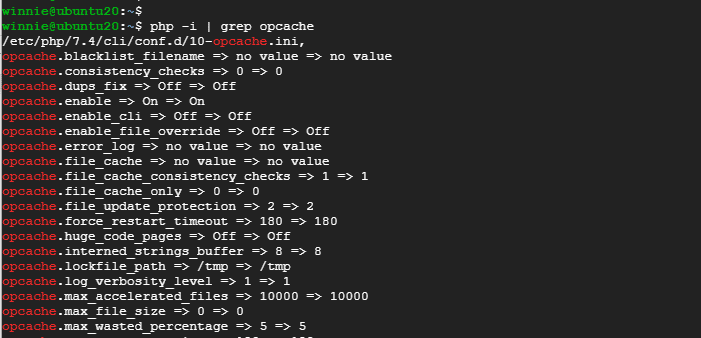
To confirm or check that the OPcache module has been loaded, execute the command:
$ php -i | grep opcache
The output is as shown below:

Install and Configure PHP OPcache with Nginx
You can choose to install PHP OPcache with the Nginx web server instead of Apache. Follow the steps given below:
Step 1: Install PHP and Nginx
Start off by installing Nginx, PHP, and the required PHP extensions as shown:
$ sudo apt-get install nginx php php-fpm php-cli php-opcache php-mysql php-zip php-gd php-mbstring php-curl php-xml -y
To confirm the installation was successful, check the PHP version installed as follows:
$ php -V

Step 2: Configure OPcache
In this step, we will configure Opcache. First, edit the php.ini file to enable the Opcache service. Run:
$ sudo vim /etc/php/7.4/fpm/php.ini
Yet again, uncomment the following lines as we saw earlier with Apache.
opcache.enable=1

opcache.memory_consumption=128

opcache.max_accelerated_files=10000

opcache.revalidate_freq=200
Next, save the file and exit. Finally, reload the web server and PHP-FPM service to apply the changes.
$ sudo systemctl restart nginx php7.4-fpm
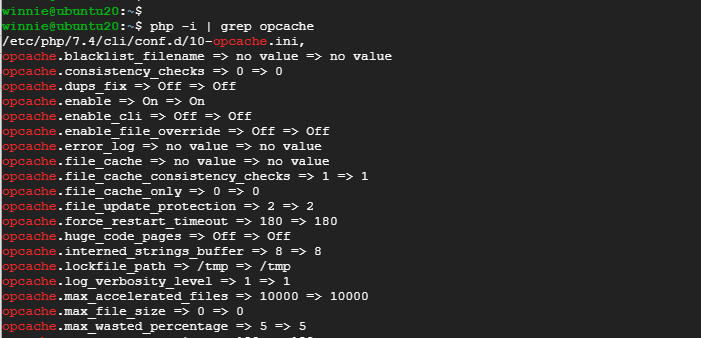
To verify the PHP Opcache installation, execute the command:
$ php -i | grep opcache

PHP Opcache is now successfully installed on Ubuntu 20.04:


