Glances is an open-source Terminal based monitoring tool that displays detailed monitoring information. It is a cross-platform tool that is supported on Linux, Windows, and MacOS. Glances also have a web interface that allows you to monitor remote Glances servers from any system’s web browser. With the Glances monitoring tool, you can monitor Memory, CPU, load, network interfaces, filesystem, Disk I/O, processes, uptime, etc.
In this post, we will explain how to install and get started with the Glances monitoring tool. We will cover:
- Installing Glances via apt
- Installing Glances via snap
Note: The procedure explained here has been tested on Ubuntu 20.04 LTS.
Installing Glances via apt
Ubuntu OS has Glances in its repositories, so you can install it easily using the apt command. Follow the below steps to install Glances on Linux Ubuntu via apt:
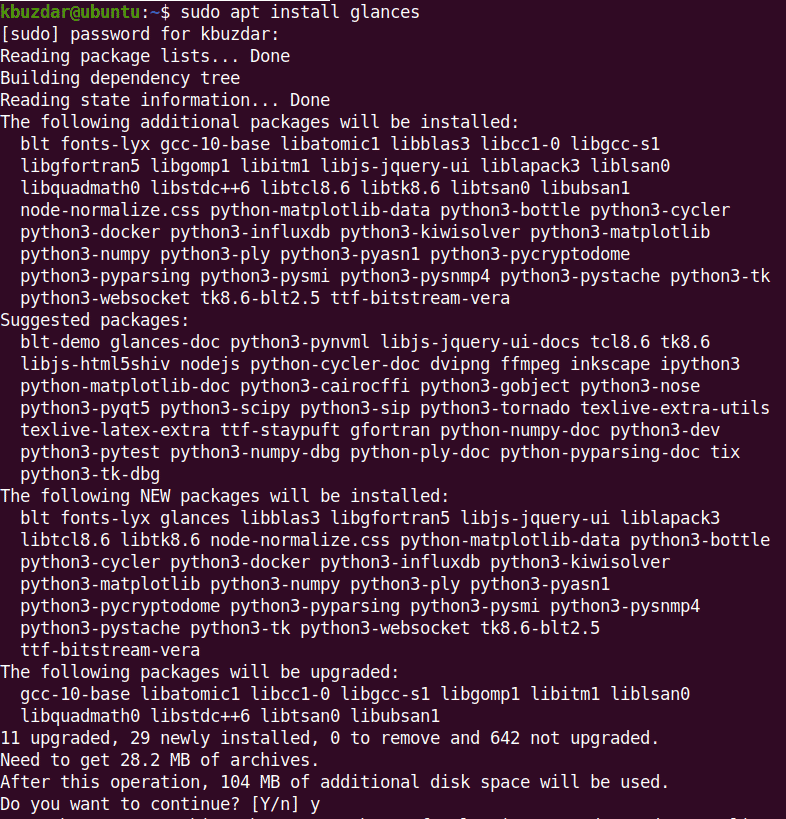
1. To install Glances, use the command below in the Terminal:
$ sudo apt install glances
Enter your sudo password, and if you are asked for confirmation during installation, type y and press Enter.

After the installation of Glances is completed, you can use the command below for the verification:
$ glances --version
The output below verifies that Glances version 3.1.3 has been installed on our system.

Installing Glances via Snap
Glances is also available as a snap package. Follow the below steps to install Glances on Linux Ubuntu via snap:
1. First install snapd using this command:
$ sudo apt install snapd
Enter your sudo password, and if you are asked for confirmation during installation, type y and press Enter.
2. Now install Glances using this command:
$ sudo snap install glances
3. After the installation of Glances is completed, you can use this command for the verification:
$ glances --version
The output below verifies that Glances version 3.1.5 has been installed on our system.

Using Glances
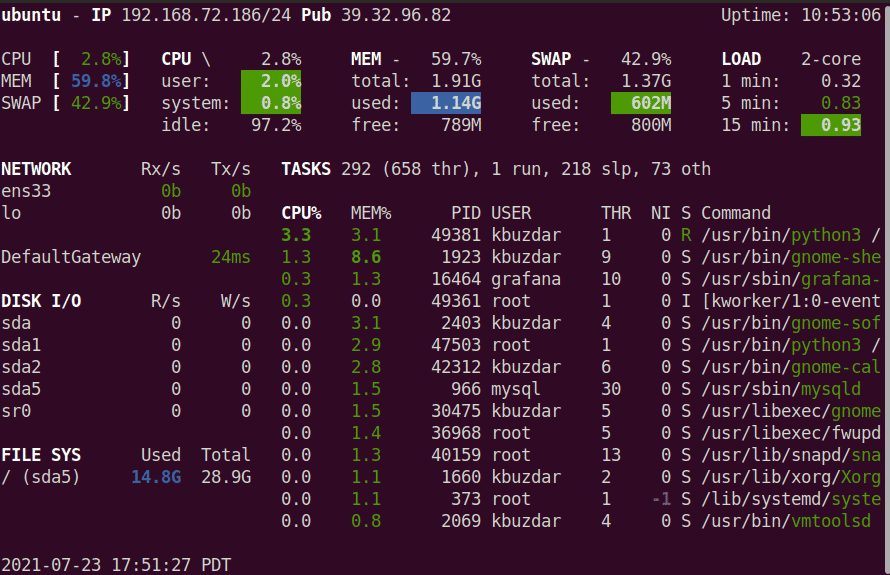
In order to use Glances to monitor system resources, use the command below:
$ glances
Here is how the Glances interface looks like:

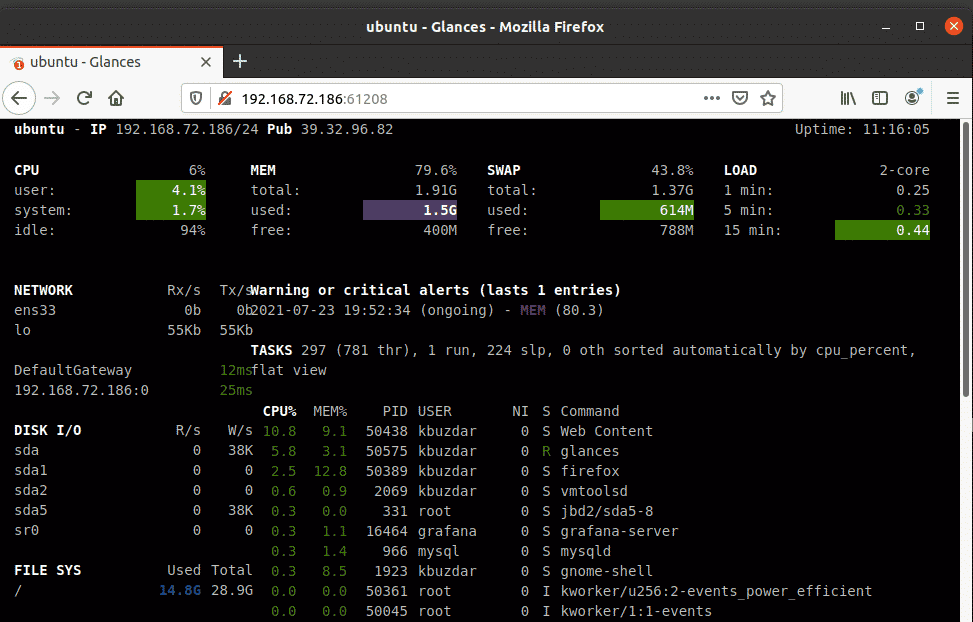
Glances web interface
To access Glances interface from the web browser, use the glances command with -w option:
$ glances -w
The output of the above command will tell you that the web UI has started. Now open the web browser and navigate to the below address:
http://<glances-IP-address>:61208

Access Glances Web UI from outside
If you need to access the Glances web UI from another system on the network, then you will have to allow port 61208 on the firewall of the Glances server. To allow port 61208 on the firewall, use the command below:
$ sudo ufw allow 61208
Then run this command in the Terminal of Glances server:
$ glances -w
Now from the other system, open the web browser and navigate to the below address to access Glances web UI:
http ://<glances-IP-address>:61208
Uninstall Glances
In order to uninstall Glances from Ubuntu machine, use the command below:
$ sudo apt remove glances
Enter your sudo password, and if you are asked for confirmation during uninstallation, type y and press Enter.
That is all there is to it! In this post, we covered how to install and get started with the Glances monitoring tool on Ubuntu. We also covered how to uninstall Glances in case you longer need it. To view more help, you can use the glances –help command.


