Passwords are becoming vulnerable with the ever-evolving cybersecurity environment. No more than ever, systems are becoming prone to brute-force attacks. Users are also making it easy for hackers to infiltrate their systems by securing systems with weak and often guessable passwords. 2 Factor authentication is now commonplace and it provides an extra layer of protection using OTP codes to ensure that it’s actually the user logging into the system.
Another way you can secure your server is by setting up passwordless SSH authentication on your server. This uses public-key SSH authentication where an SSH key pair is generated on the local system. The key pair is made up of a private and a public SSH key. The private key remains on the local system whilst the public key is uploaded to the remote system. During authentication, a key exchange occurs between the public key saved on the remote system and the private key on the local system. Subsequent connections are thus secured and no password will be required.
In this guide, we take you through how to configure password SSH authentication in 3 simple steps.
Passwordless SSH setup Lab
For demonstration purposes, we will use the following lab setup:
Local Linux system - 192.168.2.104
Remote Linux system - 192.168.2.108
It would be prudent to also ensure that you can access the remote system from your local system using SSH password authentication.
Let’s get started!
Step 1. Generate SSH key pair
Right off the bat, we will generate an SSH key-pair which will be stored in the home directory. So, invoke the ssh-keygen command as shown. Here, we are creating a 4096-bit key pair.
$ ssh-keygen -b 4096
Accept the defaults by simply pressing ENTER. You can find the SSH key pair in the ~/.ssh directory which is a hidden directory in your home folder.

Just to be cocksure use the ls command to check the presence of the SSH keys.
$ ls .ssh
The private key is denoted by id_rsa while id_rsa.pub is the public key. These are cryptographic keys that are encrypted. We will, later on, copy the public key to the remote system.

Step 2. Copy the SSH key pair to the remote system
Next, you need to copy and save the public key to the remote Linux system. Why are we doing this? In public-key authentication, an authentication handshake takes place between the public key on the remote system and the private key residing on the local system. This ensures that all subsequent traffic between the local host system and the remote system is encrypted.
To copy the SSH public key, run the ssh-copy-id command as follows.
$ ssh-copy-id user@remote-ip
In our case, this will be:
$ ssh-copy-id james@192.168.2.102
To continue connecting, type ‘Yes’ and press ENTER. Thereafter, provide the password to the remote system to log in and copy the SSH public key.
The public SSH key is added to a unique file called authorized_keys in the home directory of the user account you are logging into. The full path to this file is ~/.ssh/authorized_keys

After successfully copying the SSH key, you can now log in to the remote system using the public key authentication as follows.
$ ssh james@192.168.2.102
From the snippet below, you can see that we have logged in to the remote system without even being prompted for a password. Awesome!

As mentioned earlier, the public key is saved in the ~/.ssh/authorized_keys path.

Step 3. Disable password authentication (Optional)
If you want to boost the security of your remote system, you might want to consider disabling password authentication. In doing so, you ensure that you are the only one who can access the system using the private key sitting on your local system. The key should always be a top secret. Never share it with anyone lest your system becomes compromised.
On the remote host, open access the /etc/sshd_config file a shown.
$ sudo vim /etc/sshd_config
Locate the PasswordAuthentication parameter and set it to no as shown.

Next, ensure that Public Key authentication is enabled as shown.

For the changes to persist, perform a restart of the SSH service as follows.
$ sudo systemctl restart ssh
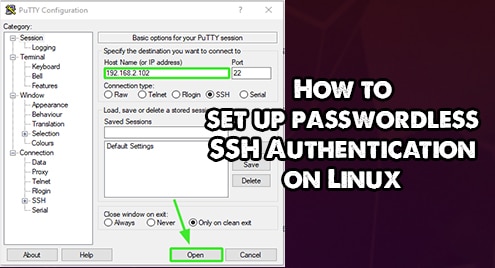
To demonstrate that password authentication is disabled, we will try and access the server using the Putty SSH client. Provide the remote system’s address and hit ‘Open’

Provide the remote username and hit ENTER. This time around, you get an authentication since we disabled password authentication.

Conclusion
Public key authentication is a tamperproof way of connecting and hardening your server. It eliminates attack vectors such as brute force password attacks which are ominous when your system has password authentication.

Karim Buzdar holds a degree in telecommunication engineering and holds several sysadmin certifications including CCNA RS, SCP, and ACE. As an IT engineer and technical author, he writes for various websites.


