XAMPP is short for cross-platform(X), Apache(A) server, MariaDB(M), PHP(P) and Perl(P). It enables a user to turn his system into a fully-featured web server. XAMPP is available for the major OS including Linux, Windows, and MacOS. It allows building a website offline to test it on the local machine before uploading it to a remote server.
In our previous post, we described the installation of XAMPP on Mint. This guide will cover how to install XAMPP on CentOS system. We will be explaining the whole procedure on CentOS 8 OS.
Note: For installing any program on a Linux system, you must be a root user or have sudo privileges.
Installing XAMPP on CentOS
Step 1: Install Net-tools
XAMPP server requires netstat to be installed on your system. Netstat is a part of the net-tools package. Therefore, you will have to install the net-tools package on your CentOS system. Execute this command in Terminal to do so:
$ sudo yum install net-tools
Enter the password for sudo, after which the net-tools will be installed on your system.
Step 2: Download the Installer Package
Now you will have to download the XAMPP installer package for Linux OS. Visit the following website and download the latest version of XAMPP for Linux.
https://www.apachefriends.org/download.html
Alternatively, you can use execute the below command in Terminal to download XAMPP for Linux.
$ wget https://www.apachefriends.org/xampp-files/8.0.0/xampp-linux-x64-8.0.0-2-installer.run
Once the XAMPP installer is downloaded, move on to the next step.
Step 3: Make the Installer Package Executable
Now using the cd command, move inside the directory which contains the XAMPP installer file you have downloaded in the previous step. Then execute the below command to make the installer file executable.
$ sudo chmod 755 xampp-linux-x64-8.0.0-2-installer.run
Step 4: Run the Installer
Then in order to install XAMPP, run the installer as follows:
$ sudo ./xampp-linux-x64-8.0.0-2-installer.run
After running the above command, the following setup wizard will launch. Click Next to continue.
Next in the following screen, you will be asked to select the components to install. Leave the default selection as it is and hit Next.
Now for the subsequent windows, keep on clicking Next until you see the following window. Wait until the installation of selected components is done. Then hit Next.

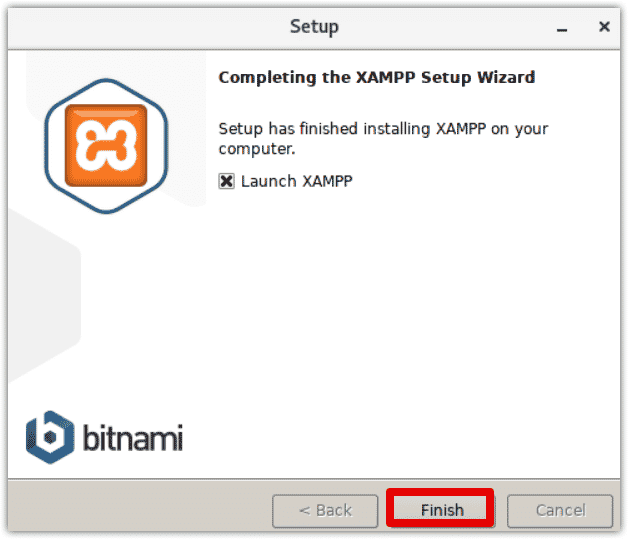
Now the following window will inform you about the completion of the XAMPP installation on your system. Click Finish to close the wizard. If you do not want to start XAMPP now, you can also uncheck the Launch XAMPP checkbox.
Step 5: Start and Verify XAMPP Installation
To start XAMPP from the Terminal, execute the below command:
$ sudo /opt/lampp/lampp start
The following output indicates that XAMPP is started and already running. Note that each time you restart your machine; you will need to manually start XAMPP.

After running the above command, you may receive the following error like I had:
“httpd: Syntax error on line 522 of /opt/lampp/etc/httpd.conf: Syntax error on line 10 of /opt/lampp/etc/extra/httpd-xampp.conf: Cannot load modules/libphp7.so into server: libnsl.so.1: cannot open shared object file: No such file or directory”

To resolve this error, install libnsl library using the below command in Terminal:
$ sudo dnf install libnsl
Now again start XAMPP as described above.
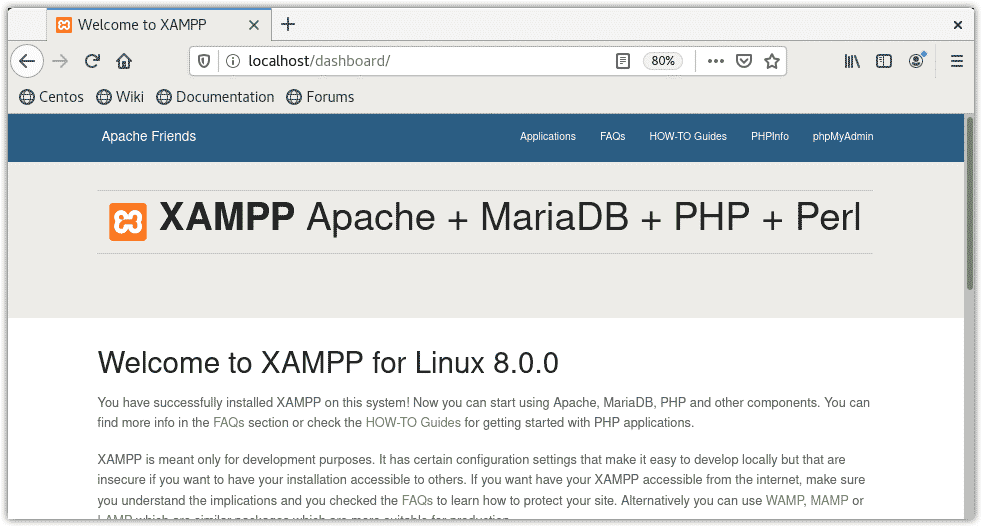
To verify the installation of XAMPP, access the following address in your web browser:
http://localhost
If you see the following page on your browser, it indicates the XAMPP has been successfully installed and running on your system.
Then access the following address to verify if phpmyadmin has been installed.
http://localhost/phpmyadmin
If you see the following page on your browser, it indicates the phpmyadmin has also been successfully installed and running on the system.
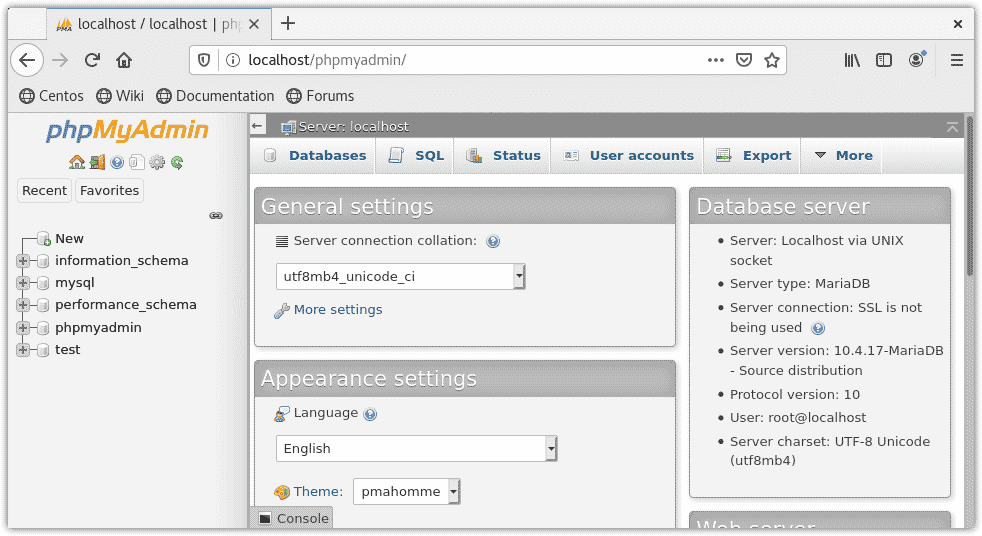
If you need to stop XAMPP, execute the below command in Terminal:
$ sudo /opt/lampp/lampp stop
Uninstalling XAMPP
In case you no longer need XAMPP, you can easily remove it from your system.
First, move inside the /opt/lampp directory where the XAMPP is installed.
$ cd /opt/lampp
Then run the uninstaller file as follows:
$ sudo ./uninstall
Then you will be asked if you want to uninstall XAMPP and its modules. Click Yes, after which it will start uninstalling XAMPP from the system. Once it is uninstalled, you will see a dialog notifying you with the uninstallation completed message. Click OK to close the dialog.
If you also want to remove the XAMPP directory along with its files, execute the below command in Terminal:
$ sudo rm -r /opt/lamp
In this guide, we have explained how to install XAMPP on your CentOS system. We have also explained how to verify the XAMPP installation and start it. In the end, we have also explained the procedure to uninstall XAMPP in case you need to do that.

