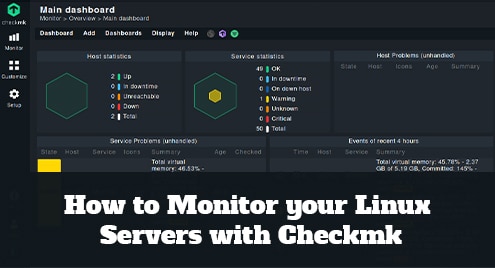
Checkmk is an application and infrastructure monitoring solution that supports the monitoring of servers, applications, networks, containers, and clouds. Checkmk server can be installed on Ubuntu, Debian, CentOS, RHEL, and SUSE Linux Enterprise Server. It can monitor Linux, Windows, macOS, Solaris, and AIX hosts via Checkmk agents. Checkmk gives a quick overview of IT infrastructure which allows administrators to detect and troubleshoot issues that may affect server security or stability.
In today’s post, we will be showing how to install the Checkmk server on Ubuntu OS. We will also be showing how to install the Checkmk agent on Ubuntu OS.
Note: The method described here has been tested on Ubuntu 20.04 LTS. However, the same method can be followed on Debian OS.
Installing Checkmk
Checkmk is available as:
- Raw edition
It is a complete open-source edition but does not contain all functionalities
- Enterprise edition
It is a licensed edition that includes all functionalities. You can also test its free version (along with all functionalities) for 30 days.
We will be using Checkmk raw edition.
Step 1: Download Checkmk
To download Checkmk, visit the Checkmk website downloads page. Select the Checkmk Raw Edition, choose the latest stable version, and then choose your OS platform and OS version. Then click the Download button.
You can also use the below command to download the Checkmk latest stable version (as of this writing) 2.0.0p12:
$ wget https://download.checkmk.com/checkmk/2.0.0p12/check-mk-raw-2.0.0p12_0.focal_amd64.deb
Step 2: Install Checkmk
Now in order to install Checkmk, use the below command:
$ sudo apt install ./check-mk-raw-2.0.0p12_0.focal_amd64.deb
Enter sudo password. If it prompts for confirmation, hit y and then Enter to confirm. Checkmk along with Apache and other dependencies will be installed on your machine.
To verify if the Checkmk has been successfully installed and to see the installed version, use the command below:
$ omd version
Step 3: Adjust Firewall
To access the Checkmk web interface from another system on the network, you will need to add a rule in the firewall.
To allow outside access to the Checkmk web interface, use the below command:
$ sudo ufw allow Apache
To verify if the rule has been added, use the below command:
$ sudo ufw status
If the rule has been added, you will see Apache listed in the output.
Step 4: Create a Checkmk monitoring site
The next you will need to do is to create the Checkmk site. Let’s create our site named monitoring.
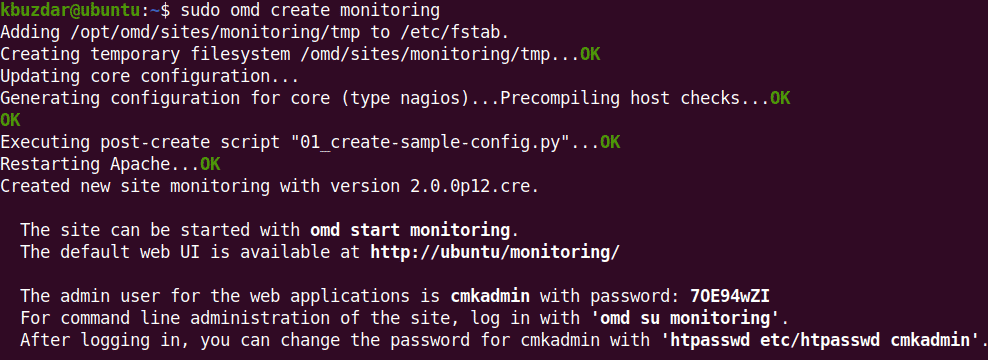
$ sudo omd create monitoring
In the output, you will find the URL, admin user, and password to access the monitoring site.
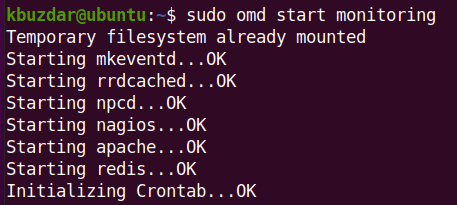
Now start the monitoring site by using the command below:
$ sudo omd start monitoring
Step 5: Access Checkmk Web Interface
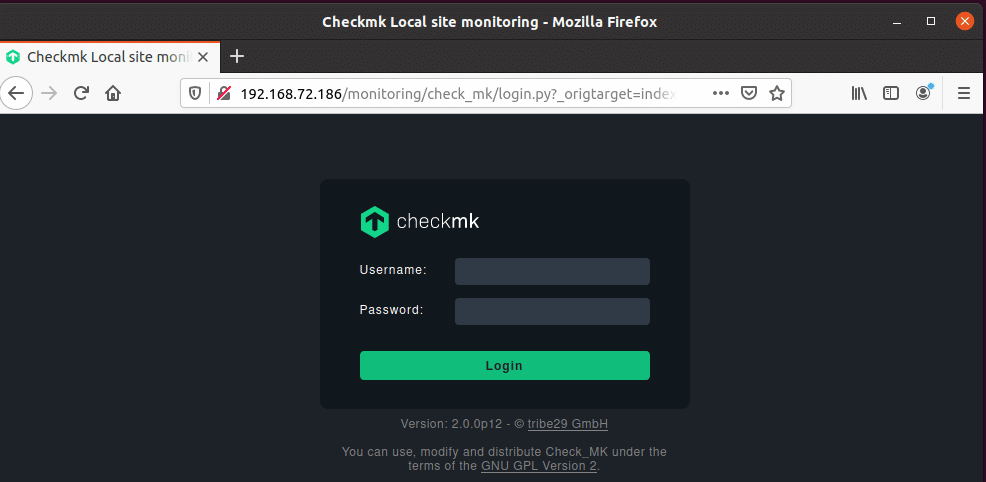
You can access the Checkmk web interface by pointing your web browser to http://server-ip/site-name. Where server-ip is the IP address of the server where Checkmk is installed and site-name is the name of the Checkmk site (monitoring in our example).
http://192.168.72.186/monitoring
Login using the default credentials you got at Step 4. You can change the default credentials later on.
After login, you will see the Checkmk Dashboard.
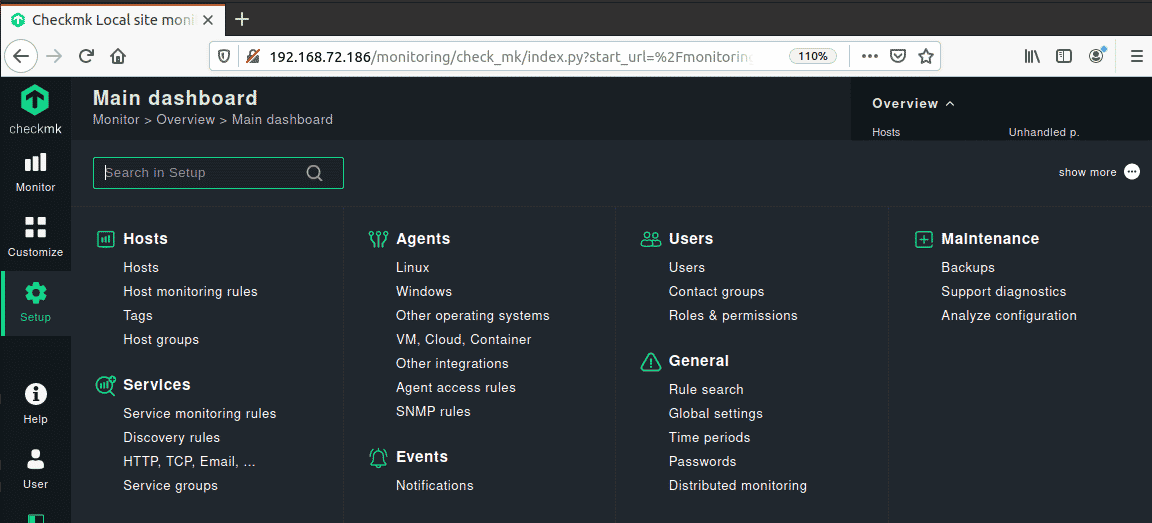
Step 6: Install Agent on Hosts
To add a host in Checkmk for monitoring, you will need to install the Checkmk agent.
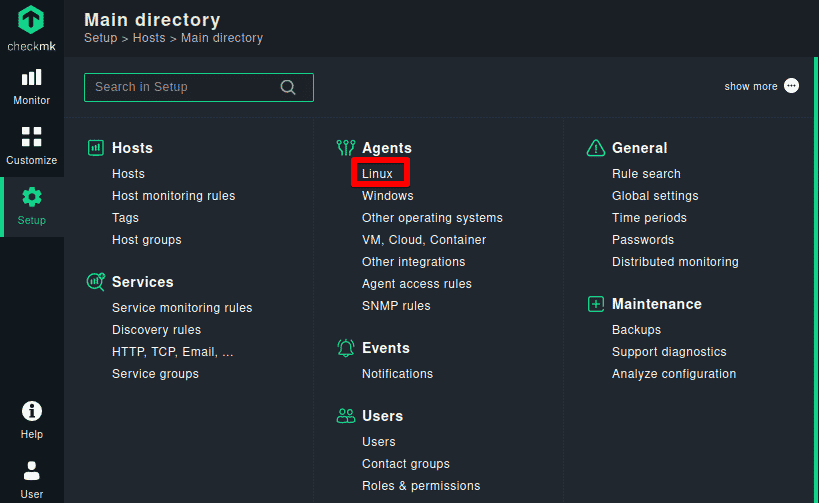
First, we will install the Checkmk agent on the Checkmk server to monitor itself. To install the Checkmk agent on our Checkmk Ubuntu server, go to Setup > Agents > Linux.
Then right click the check-mk-agent_2.0.0p12-1_all.deb and copy this link.
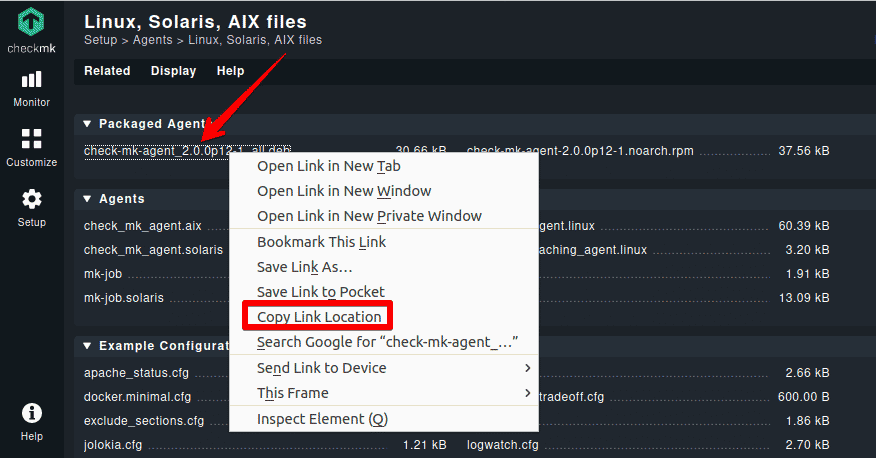
Now download the copied link using the wget command:
$ wget http://192.168.72.202/monitoring/check_mk/agents/check-mk-agent_2.0.0p12-1_all.deb
Once the package is downloaded, install it as follows:
$ sudo apt install -y ./check-mk-agent_1.6.0p20-1_all.deb
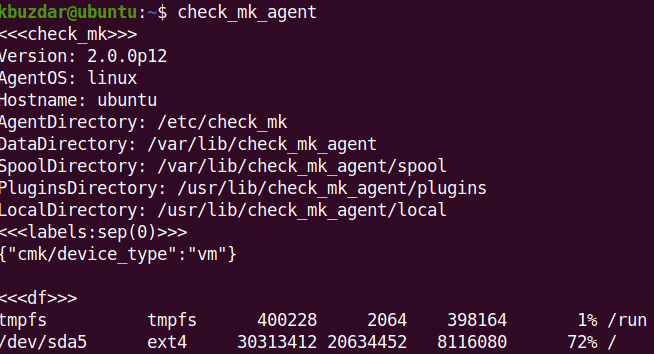
Then to verify if the agent is installed, use the command below:
$ check_mk_agent
You should see the below similar output:
Step 7: Add Host for Monitoring
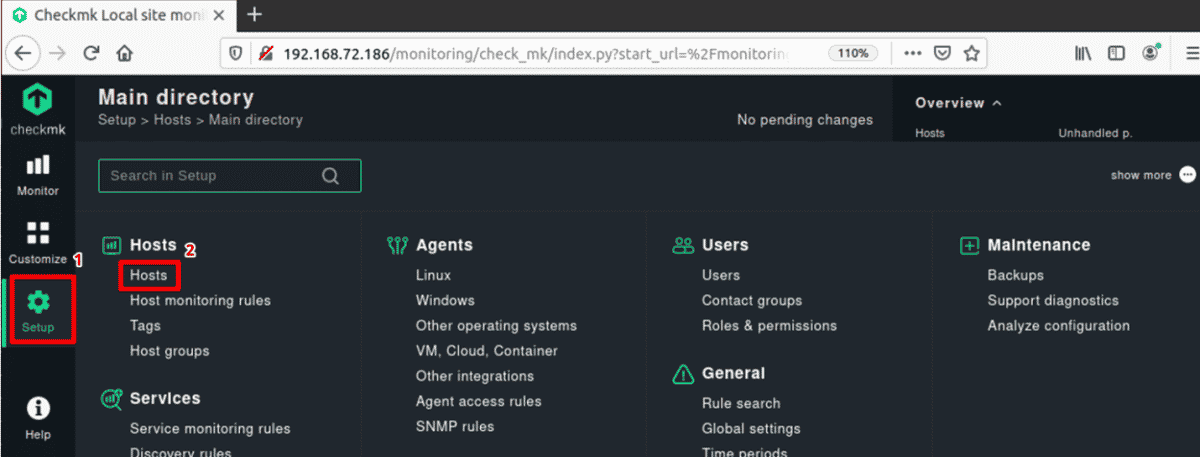
Now you can add host in Checkmk for monitoring. We will add the Checkmk server to monitor itself. To add your Ubuntu server for monitoring, go to Setup from the left panel of the Checkmk web interface. Then go to Hosts > Hosts as highlighted below.
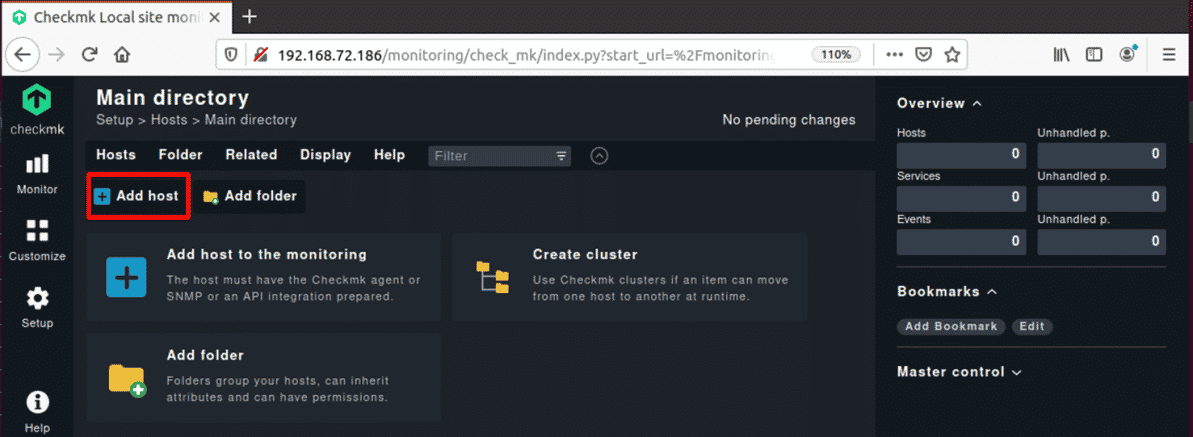
Then in the following window, click Add host.
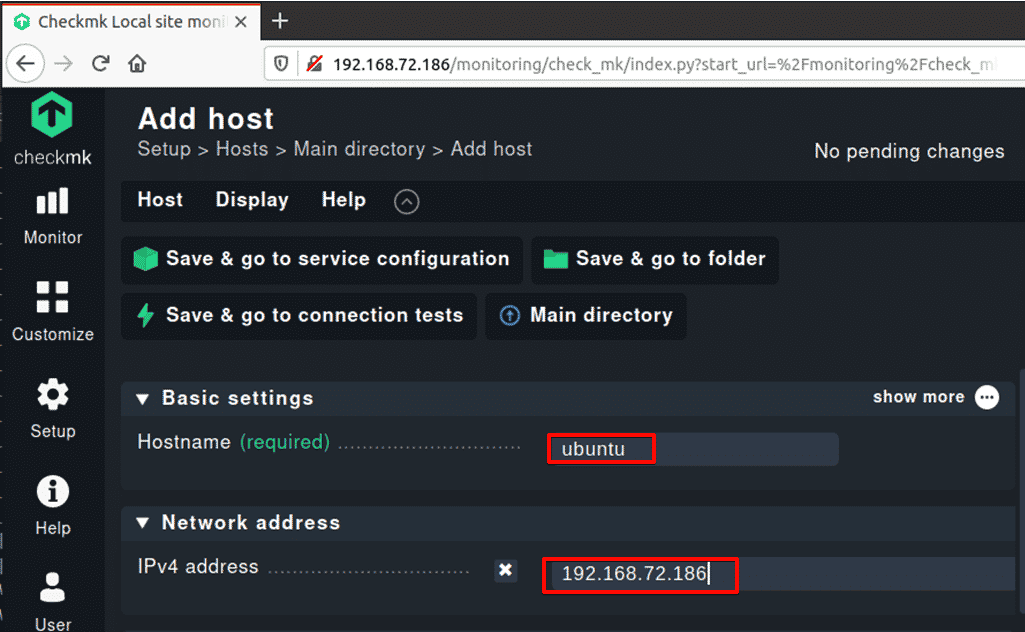
Then enter the hostname (can also enter localhost) and IP address and then click Save & go to service configuration.
On the services page, you will see a list of all found services. If you see any Undecided services, click Fix all.
Then click the orange-colored sign (like 10+ changes) at the top right corner of the window.
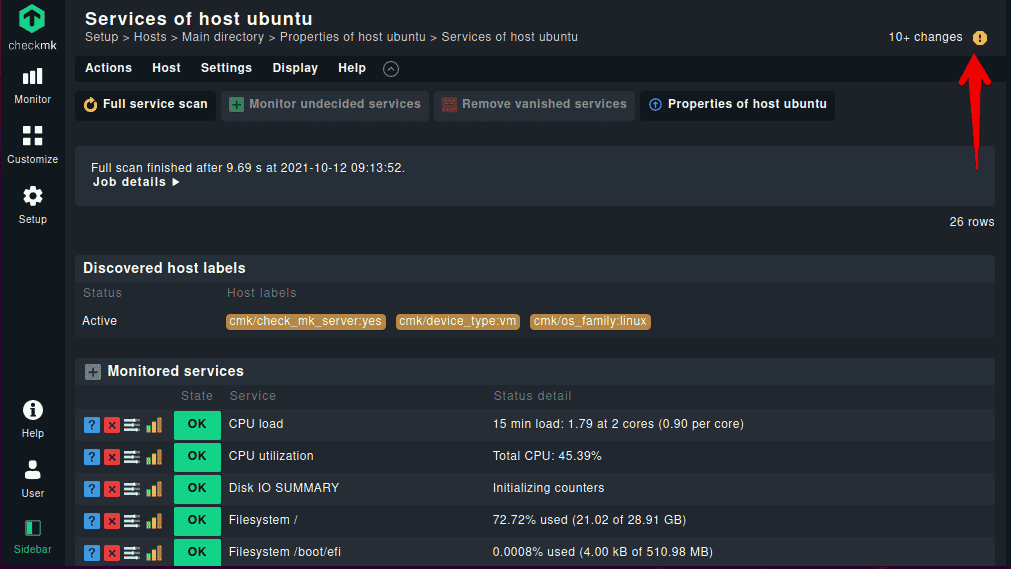
Then click Activate on selected sites.

Now you can find your site at Monitor > Overview > All hosts. Here, you can click your host and view a list of services with their statuses and other details.

Similarly, you can add other hosts for Monitoring in Checkmk.

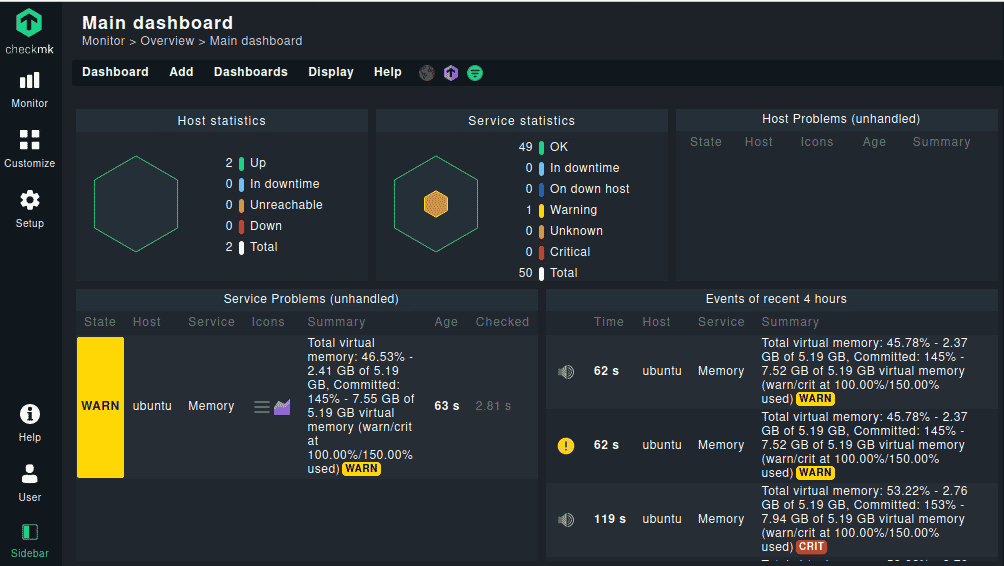
You can also look at the dashboard to get a quick overview by going to Monitor > Overview > Main dashboard.
Uninstall Checkmk Server and Agent from Ubuntu
In case you want to uninstall the Checkmk agent as well as server, you can do so as follows:
To uninstall the Checkmk agent from the Ubuntu machine, use the command below:
$ sudo apt remove check-mk-agent
Now to also remove that Ubuntu host from Checkmk server, go to Setup > Hosts >Hosts, select the host and click the delete icon.
To uninstall the Checkmk server from the Ubuntu server, use the command below:
$ sudo apt remove check-mk-raw-2.0.0p12
In this post, we described how to install Checkmk and monitor hosts in Ubuntu OS. Checkmk has agents available for different OS. Therefore, you can monitor more systems as required. In the end, we also described how to uninstall Checkmk agents as well as servers from Ubuntu in case you need to do so.
