LAMP stack is one of the most popular and leading development stacks among developers. It stands for Linux Apache MySQL/MariaDB and PHP. Apache is a free and open-source and extremely popular webserver. MySQL/MariaDB is an opensource relational database management system and PHP is a server-side scripting language.
In this guide, we walk you through the process of installing LAMP on Debian 11. Check how to install LAMP on Rocky Linux 8 and CentOS 8.
What you need
Before getting started out, first establish you have the following prerequisites:
- An instance of Debian 11 server installed.
- A sudo user configured on the server
Let us now install the popular LAMP stack on Debian Bulleye.
Step 1: Update Debian 11 package lists
It’s essential to always start with updating the package index to start off on a clean slate. On your terminal, run the command:
$ sudo apt update -y
This should take just a few seconds, and once done, head over to the next step.
Step 2: Install Apache webserver
The next step is to install the popular Apache webserver. And to do this, execute:
$ sudo apt install apache2 -y

This installs Apache alongside other additional packages, libraries, and dependencies. By default, Apache autostarts and you can confirm this by checking its status.
$ sudo systemctl status apache2

If, for whatever reason, Apache is not running, start the service by running the command:
$ sudo systemctl start apache2
Additionally, consider enabling Apache to start upon a reboot or every time the system is powered on as follows:
$ sudo systemctl enable apache2
On a web browser, visit your server’s IP address or domain name to verify that, indeed, the webserver is accessible.
http://server-ip
You should get the Apache webserver welcome page.
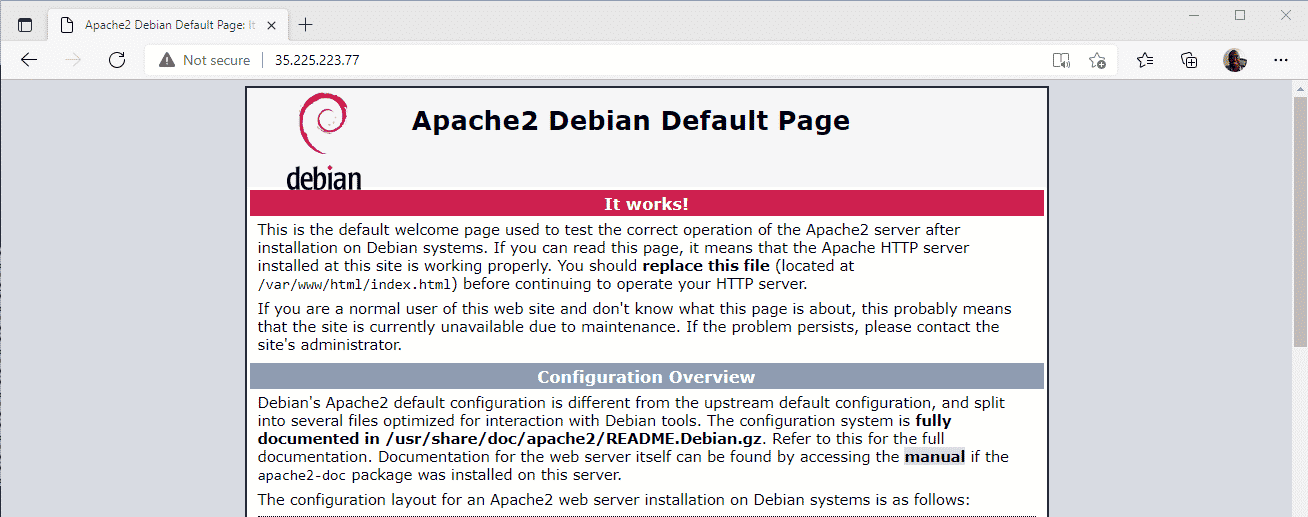
That is a confirmation that Apache was successfully installed.
Step 3: Install MariaDB database server
MariaDB is an opensource relational database management system ( RDBMS) that is forked from MySQL. It’s more robust, more secure and provides additional features such as Galera cluster, and cool storage engines such as InnoDB
To install the MariaDB server, simply run the command:
$ sudo apt install mariadb-server -y
Like Apache, MariaDB starts automatically. You can verify the running status as shown.
$ sudo systemctl status mariadb

If MariaDB is not running considering starting it.
$ sudo systemctl start mariadb
Then enable the service to start on boot time.
$ sudo systemctl enable mariadb
Equally important is the security of the database server. The default settings that MariaDB ships with are weak and can hackers can exploit them to breach the database.
So, to harden MariaDB, run the command:
$ sudo mysql_secure_installation
This will pop up a few prompts which will guide you in hardening your server. Begin with setting a root password
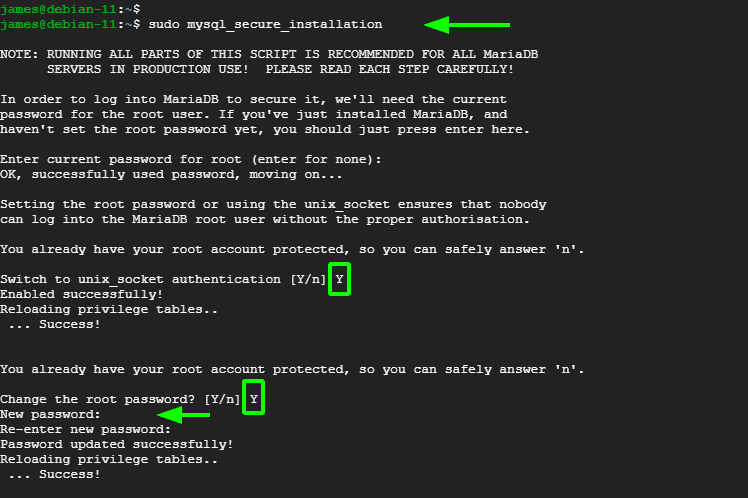
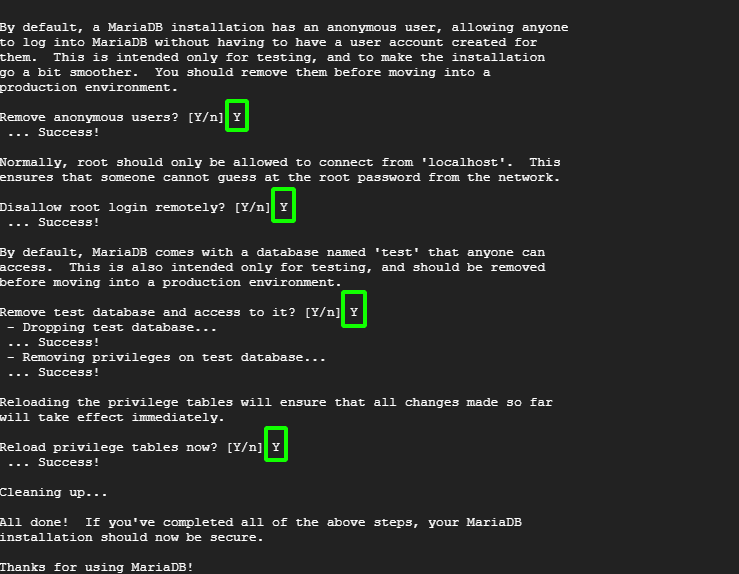
Then type ‘Y’ for the remaining prompts to configure the database server to the most recommended security settings.
To log in run the command
$ sudo mysql -u root -p
Type the root password and hit ENTER. To existing databases run the command:
SHOW DATABASES;
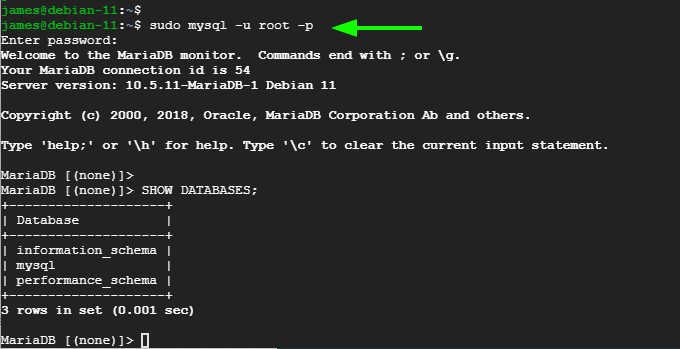
To confirm the version of MariaDB, run:
SELECT VERSION();

To exit the database server, run the command:
EXIT;
Step 3: Install PHP scripting language
Lastly, we will install PHP, which is a server-side scripting language used for supporting the development of dynamic web pages. By default, PHP 7.4 is hosted on Debian 11 repository. Therefore, we will install PHP and some additional PHP modules using the APT package manager as follows:
$ sudo apt install php libapache2-mod-php php-zip php-mbstring php-cli php-common php-curl

You can confirm if PHP is installed using the command:
$ php -v

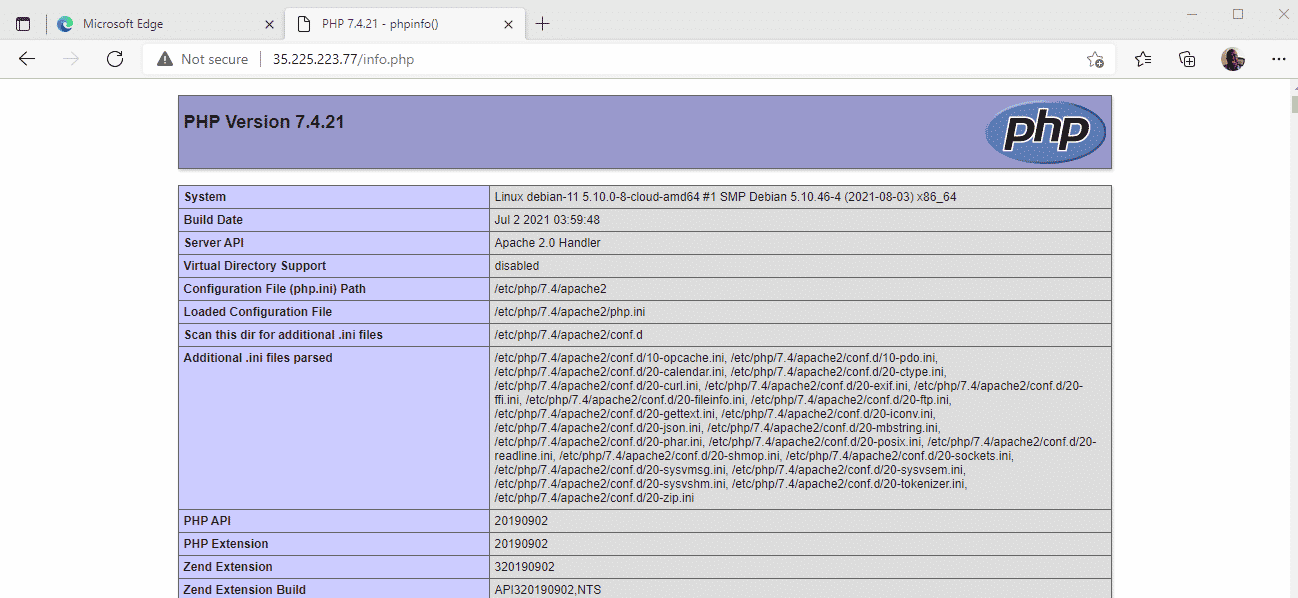
In addition, you can verify this from a web browser by creating a sample PHP file in the document root folder
$ sudo nano /var/www/html/info.php
Paste the following lines
<?php

phpinfo();

?>
Save the file and browse the URL shown
http://server-ip/info.php
You should get the PHP page displayed as demonstrated.
Conclusion
Congratulations on coming this far. In this walkthrough, we demonstrated a step-by-step procedure of how you can install LAMP stack on the Debian 11 Bullseye server. From here, you can start developing and testing your web applications using the LAMP stack.
