MongoDB is the most popular, scalable, and fast document-oriented NoSQL database. It is available in both open-source (Community) and subscription-based (Commercial) editions. In our previous posts, we discussed how to install MongoDB on Ubuntu, Mint, and CentOS. Today’s post will be about installing MongoDB on the Debian system.
Note: All the commands and procedures shown here have been tested on Debian 10 (Buster).
Installing MongoDB on Debian
MongoDB’s latest release is not available in the official repositories of Debian. Therefore, we will first need to add the MongoDB repository to our system and then install it. We are going to install the latest release of MongoDB that is 4.4.
Here are the steps for the installation of MongoDB on the Debian system:
Step 1: Import MongoDB GPG key
Import the MongoDB GPG key to your system’s list of trusted keys. Here is the command to do so:
$ wget -qO - https://www.mongodb.org/static/pgp/server-4.4.asc | sudo apt-key add –
If you receive a “gnupg is not installed” error when adding the GPG key to your system, then install “gnupg” as follows:
$ sudo apt-get install gnupg
After the gnupg is installed, again run the above command to add the GPG key.
Step 2: Add MongoDB Repository
Add MongoDB repository to your system. Here is the command to do so:
$ echo "deb [ arch=amd64,arm64 ]http://repo.mongodb.org/apt/debian buster/mongodb-org/4.4 main" | sudo tee /etc/apt/sources.list.d/mongodb-org-4.4.list
Step 3: Update local package database
After adding the MongoDB repository to your system, update the local package database as follows:
$ sudo apt-get update
Step 4: Install MongoDB
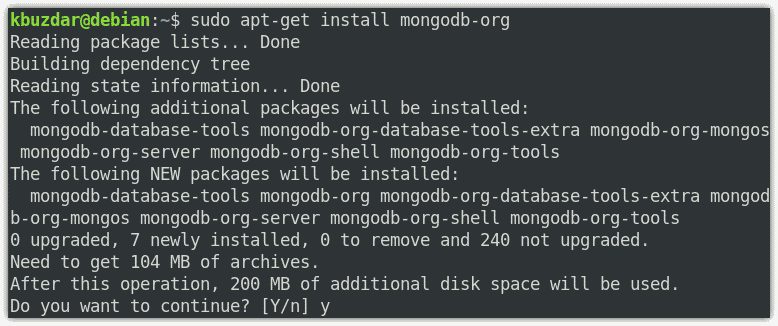
As the MongoDB repository and its GPG key have been added, now you can install MongoDB using the apt-get command as follows:
$ sudo apt-get install mongodb-org
You will be prompted with y/N, hit y. After this, the installation of MongoDB will be started.

Once the installation of MongoDB is completed, you will see the following lines at the output which also shows the version of MongoDB that is 4.4.2 installed on your system.

Step 5: Start MongoDB
After installation, MongoDB does not start automatically. Therefore, you will have to manually start its service. Here is the command to start the MongoDB service:
$ sudo systemctl start mongod
After starting the MongoDB service, if you receive the service not found error, then first run the below command and after that try to start the service:
$ sudo systemctl daemon-reload
Now to check if the MongoDB service is started and running without any issues, run the below command:
$ sudo systemctl status mongod
You should see the active (running) status in the output.
If you want MongoDB to start automatically after a system reboot, run the below command:
$ sudo systemctl enable mongod
In some cases, you may need to stop the MongoDB service. Here is the command to do so:
$ sudo systemctl stop mongod
After making any configuration changes, you must restart the MongoDB service. Here is the command to do so:
$ sudo systemctl restart mongod
Step 6: Connecting to MongoDB
Now to test if you can connect to the MongoDB server, run the below command:
$ mongo
This is the output of the above command which shows the MongoDB version installed on your system(4.4.2), the server address (127.0.0.1), and port (27017).
Uninstalling MongoDB
There may come a time when you want to remove MongoDB from your system. To do so, first stop the MongoDB service as follows:
$ sudo systemctl stop mongod
Then uninstall MongoDB as follows:
$ sudo apt-get purge mongodb-org*
You can also remove MongoDB databases and libraries. Here are the commands to do so:
$ sudo rm -r /var/log/mongodb
$ sudo rm -r /var/lib/mongodb
In this post, you have learned how to install/uninstall MongoDB on your Debian system. You have also learned how to manage MongoDB services. For more information, visit MongoDB’s official documentation.


