Google Chrome is a well known, secure, and efficient web browser. It is also considered the fastest and most stable web browser. Google Chrome does not come preloaded in most Linux distributions including Mint OS. However, you can easily install it in your Linux systems. In our previous posts, we have covered how to install it in Ubuntu, Debian, and CentOS. This post will be about how to install/uninstall Google Chrome in the Linux Mint 20 OS and also how to set it as the default web browser.
There are following two methods to install Google Chrome:
- Through Command Line
- Through GUI
Installing Google Chrome through Command Line
Step 1: Download Google Chrome .deb file
First, you will need to download .deb file for Google Chrome. Press Ctrl+Alt+T to open the Terminal and then and run the following command in it to download Google Chrome deb file:
$ wget https://dl.google.com/linux/direct/google-chrome-stable_current_amd64.deb
Step 2: Install Google Chrome
Once the .deb file for Google Chrome is downloaded, you can install it using either gdebi or apt.
Installation via gdebi
In order to install Google Chrome via gdebi, run the following command in Terminal:
$ sudo gdebi google-chrome-stable_current_amd64.deb
You will be prompted with y/N, hit y. After this, the installation of Google Chrome will be started.

Installation via apt
In order to install Google Chrome via apt, run the following command in Terminal:
$ sudo apt install ./google-chrome-stable_current_amd64.deb

You will be prompted with y/N, hit y. After this, the installation of Google Chrome will be started.
Step 3: Check Version of Google Chrome
Once the installation of Google Chrome is completed, you can also verify and check the version of Google Chrome installed as follows:
$ google-chrome --version
The following output shows the installed version of Google Chrome on our system is 87.0.4280.88.

Step 4: Launch Google Chrome
Now, in order to launch Google Chrome, just run the below command:
$ google-chrome
It will instantly launch the Google Chrome application on your system.
Uninstalling Google Chrome
In case you no longer need Google Chrome on your system, you can easily remove it by running the below command:
$ sudo apt remove google-chrome-stable
The system will prompt with y/N, hit y. After this, Google Chrome will be removed from the system.
Installing Google Chrome through GUI
Here is the Google Chrome installation procedure for those users who prefer to work graphically.
1. Download Google Chrome .deb file
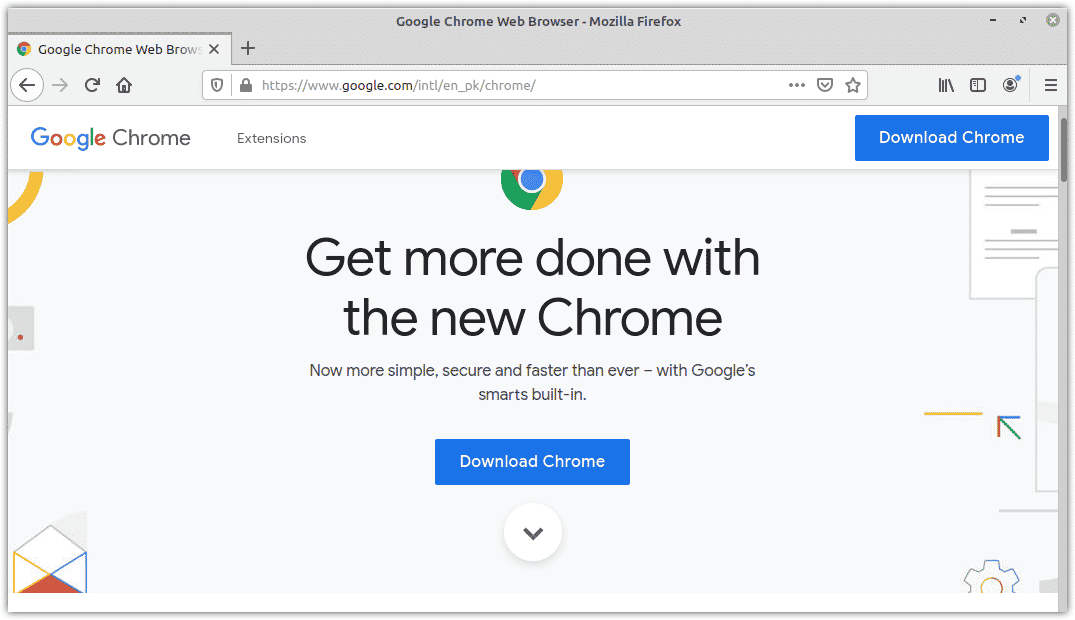
First, you will need to download the .deb file for Google Chrome on your system. To do so, open the following link in your default web browser.
https://www.google.com/intl/en_pk/chrome/
You will see the following page. Click the Download Chrome button.
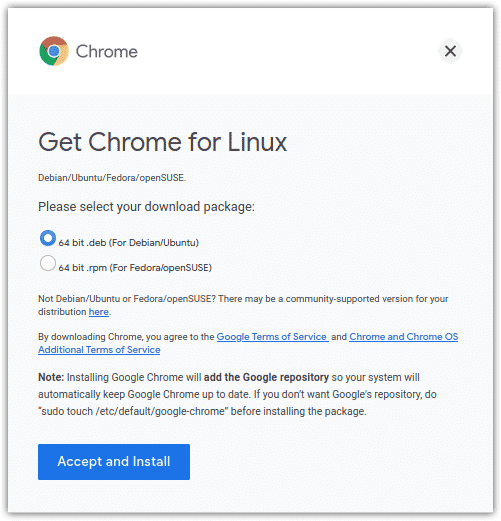
The following dialog will show up for you to choose the download package for your distribution. Choose 64 bit .deb (For Debian/Ubuntu) and then click Accept and Install.
Now it will ask if you wish to open the .deb file or save it. Select Save File and click OK.
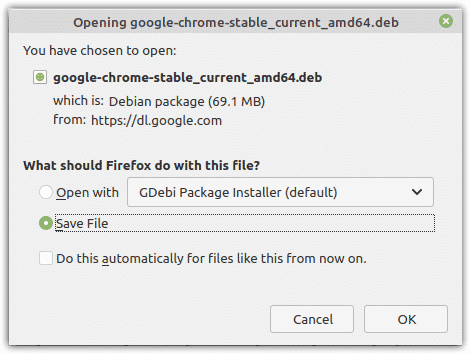
Now it will start downloading the .deb file and save it by default in the Downloads folder.
Step 2: Install Google Chrome
Once the Google Chrome is downloaded, open the Downloads folder in the File Manager. Here, you will see your downloaded .deb file. Right-click the.deb file for Google chrome and select Open with Gdebi Package Installer.
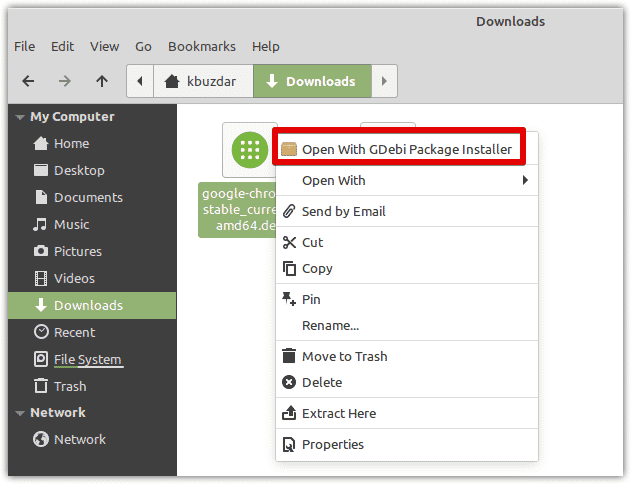
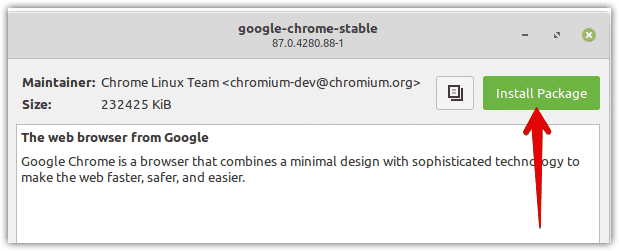
By doing the above step, the following dialog will appear. Click Install Package.
The following authentication box will appear for you to enter the password for authentication. After entering the password, click Authenticate.

After the authentication is completed, it will start installing the package, and once done, you will see the following view.
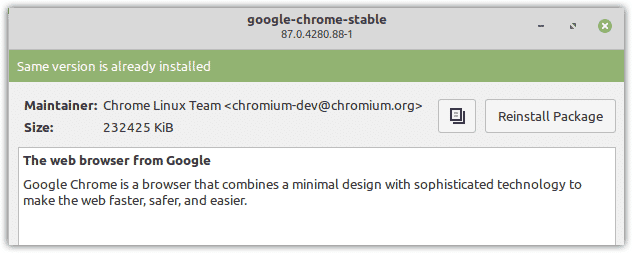
Now the Google Chrome browser has been installed and ready to use.
Step 3: Launch Google Chrome
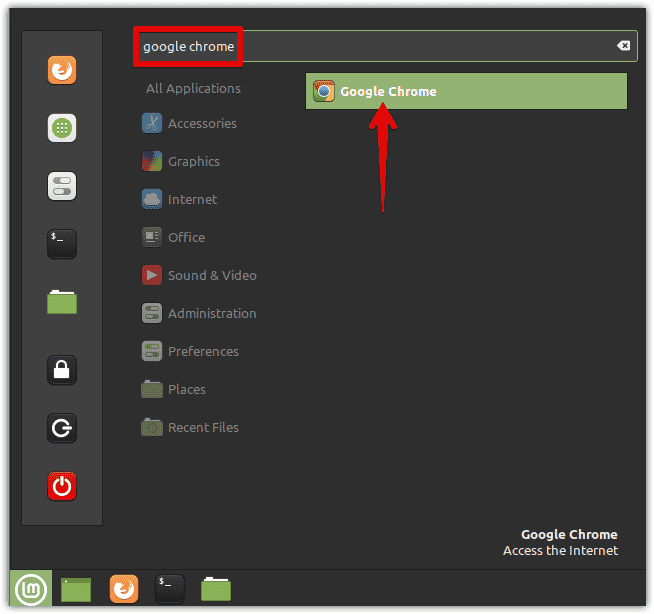
In order to launch Google Chrome from GUI, hit the super key on the keyboard and type google chrome. Once the search result appears, click the Google Chrome icon to open it.
Step 4: Check Version of Google Chrome
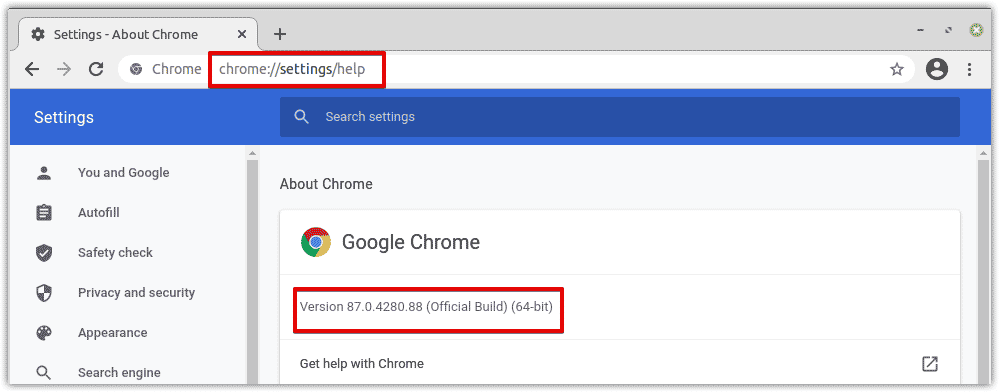
In order to check the version of Google Chrome installed on your system, open the following address in your Google Chrome browser.
chrome://settings/help
By doing so, a page will appear where you can see the installed version of Google Chrome.
Uninstalling Google Chrome
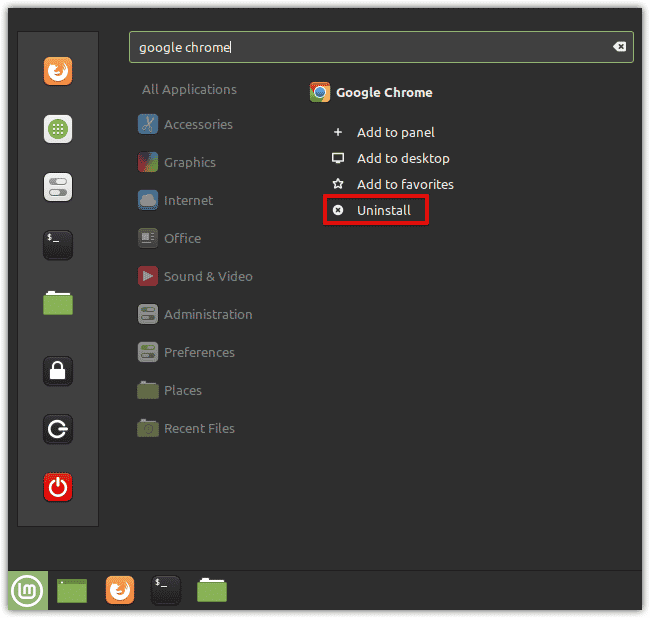
In case you no longer need Google Chrome on your system, you can easily remove it from your system. Press the super key on the keyboard and type google chrome. When the icon for Google Chrome appears, right-click it and select Uninstall.
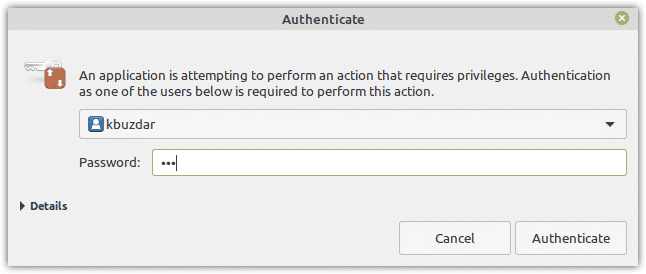
The following authentication box will appear for you to enter the password for authentication. After entering the password, click Authenticate.
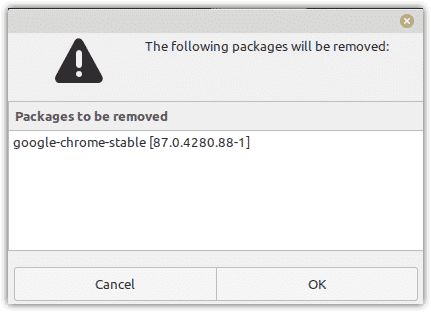
Now the following box will appear informing you, that the google-chrome-stable package will be removed from your system. Click Ok to remove it.
Setting Google Chrome as Default Web Browser
If we click any URL, it by default opens in the Firefox browser. We can set Google Chrome as the default web browser so that all URLs open in Google Chrome. Here are the steps to do so:
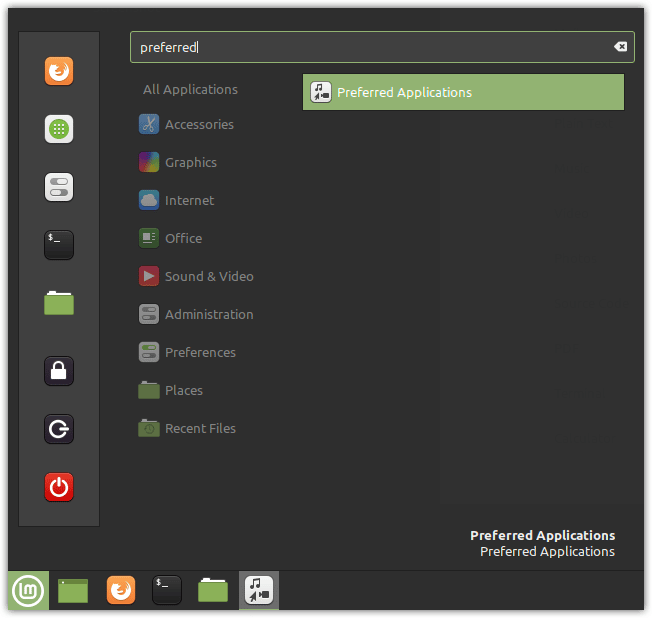
Hit the super key on the keyboard and type preferred in the search bar at the top. Then from the results, click Preferred Applications.
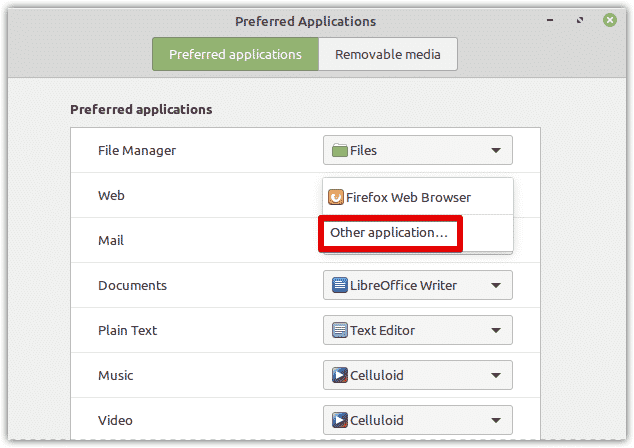
The following Preferred Applications window will open. Click the drop-down arrow against Web and choose Other application…
Then select the Google Chrome application and click the Select button.
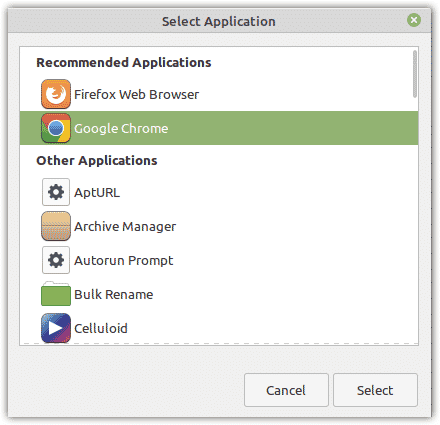
Now the Google Chrome will be set as your default Web browser.
That is all there is to it! Using either the command line or GUI ways discussed above, you can easily install/uninstall Google Chrome on Linux mint 20 OS. We have also explained how to set Google Chrome as the default web browser so that all your links or URLs open by default in Google Chrome.


