Debian 12 is the latest release of Debian and is compatible with numerous desktop applications such as GNOME 43, LXDE 11, etc. netstat is a commonly used CLI tool that is available for a variety of operating systems such as Linux, Windows, MacOS, etc. It can be installed and used on Debian 12 to perform certain operations.
In this article, the step-by-step process of installing netstat on Debian 12 will be discussed.
What is netstat?
netstat is an acronym for network statistics. It is a CLI (Command Line Interface) tool used for displaying the current network connections and port activity on our computer.
How to Install netstat on Debian 12?
The installation of netstat is an easy and smooth process. In order to install netstat on Debian 12 we have to install net-tools using the “sudo apt install net-tools” command:
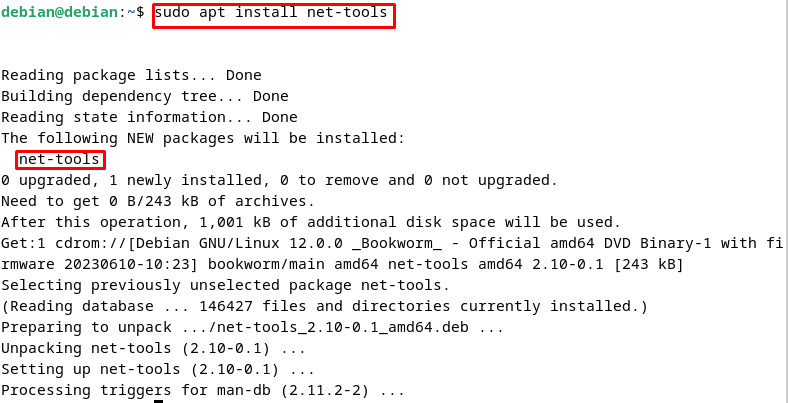
Once the above command is executed successfully, we can confirm its installation by using the following command:
netstat is working completely fine as we can see below:
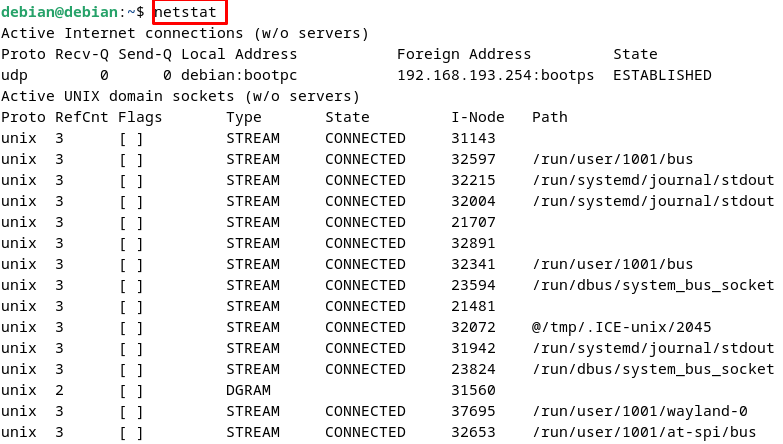
From the above snippet, it can be seen that netstat command retrieved six columns, whose details are illustrated below:
- Proto describes the connection protocol.
- Recv-Q displays the data possessed in the receiving sequence.
- Send-Q displays the data possessed in the outbound sequence.
- Local Address retrieves the IP Internet Protocol Address.
- Foreign Address demonstrates the IP (Internet Protocol) address to whom we are connected.
- State prints the connection state.
How to Use the netstat Command?
netstat is used to display the status of the connected network. It can be executed with different options to achieve a specific functionality. Following are the list of netstat commands that we can use:
- netstat -n
- netstat -ie
- netstat -u
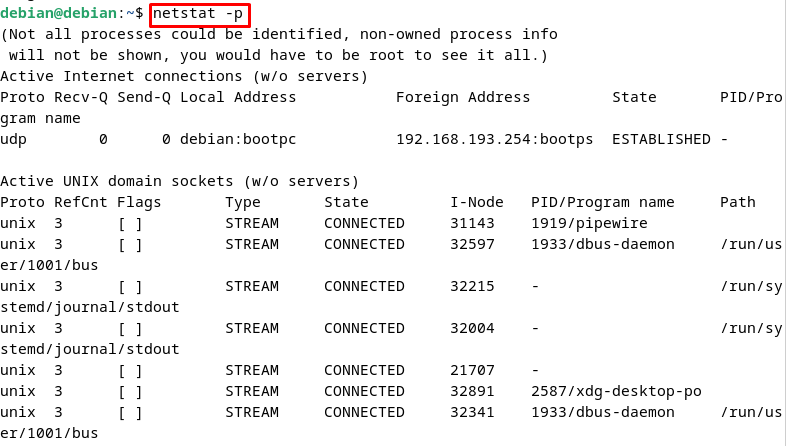
- netstat -p
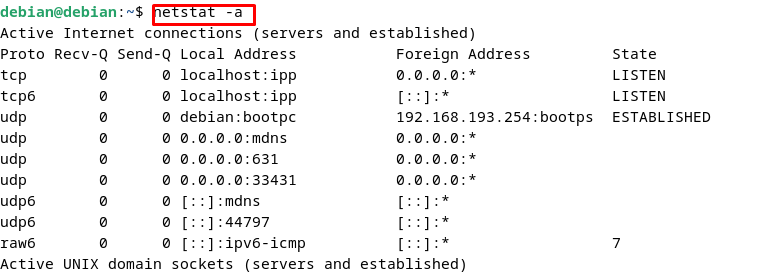
- netstat -a
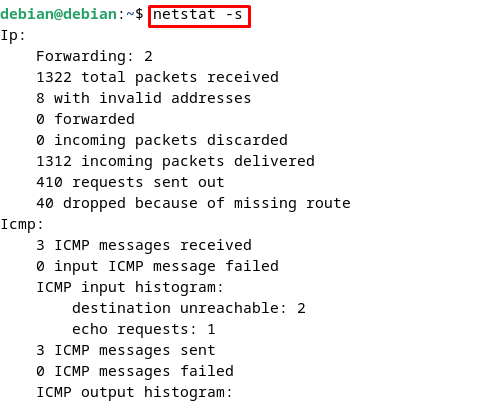
- netstat -s
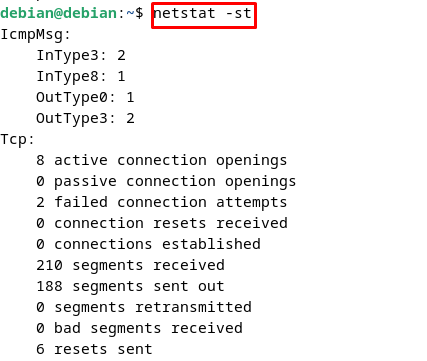
- netstat -st
- netstat -su
- netstat -r
- netstat -g
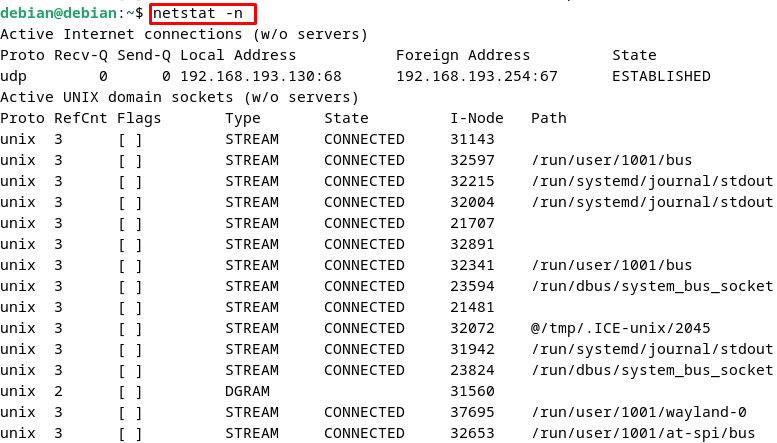
Example 1: How to Exhibit Active Internet Connections?
“netstat -n” is used to exhibit the active Internet connections as shown below:
Example 2: How to Display the Kernel Interface Table?
To display the kernel interface table we use “netstat -ie” as shown in the snippet below:

Example 3: How to Get the Status of TCP/IP Connections?
To print the status of TCP/IP connections “netstat -u” is used:

Example 4: How to Get all IPv4 Connections?
“netstat -p” retrieves all the active IPv4 (Internet Protocol Version 4) connections:
Example 5: How to Get the State of All Sockets?
”netstat -a” is used to demonstrate the state of all sockets including both TCP and UDP:
Example 6: How to Display the Statistical Summary of All Protocols?
“netstat -s” illustrates the statistical summary for each of the available protocols:
Example 7: How to Print TCP Statistics?
“netstat -st” prints the statistics of TCP (Transmission Control Protocol):
‘ 
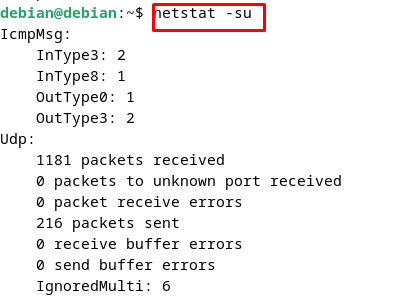
Example 8: How to Illustrate UDP Statistics?
Similar to the above command, “netstat -su” returns the statistics of UDP (User Datagram Protocol):
Example 9: How to Print the Route Table?
“netstat -r”retrieves the route table:

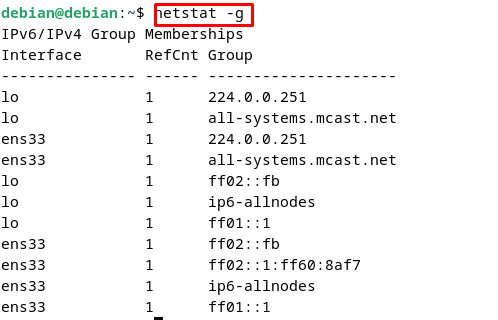
Example 10: How to Display All IPv6 Connections?
“netstat -g” displays the IPv6 (Internet Protocol Version 6) information:
That’s all about installing and using netstat command on Debian 12.
Conclusion
To install netstat on Debian 12, first, open the terminal, and execute the “sudo apt install net-tools” command. Then to verify its installation, execute the “netstat” command. Afterward, we can use commands like “netstat -u”, “netstat -s”, etc. to demonstrate the functionality of these commands. In this write-up, we have given a demonstration of how to install netstat on Debian 12.
