MySQL is a renowned RDBMS (Relational Database Management System) that is freely available for handling and storing structured data. It is designed to handle massive amounts of data, high traffic, and large-scale applications efficiently and securely. It is extensively used by millions of users including organizations, businesses, and companies because of its reliability and compatibility.
MySQL is available on multiple platforms, such as Windows, and macOS as well as various Linux distributions including Debian. This guide will explain the step-by-step procedure for installing and using MySQL on Debian 12.
Overview
- How to Install MySQL on Debian 12
- How to Enable MySQL Service on Debian 12
- How to Use MySQL on Debian 12
- How to Secure the MySQL Server on Debian 12
- How to Uninstall/Remove MySQL From Debian 12
- Final Thoughts
How to Install MySQL on Debian 12
By default, the MySQL package is not available on the standard Debian repository. Therefore, to install MySQL’s latest version on the Debian 12 system, you can download the Debian file of MySQL APT repository from the MySQL official website.
Follow the given steps to get the latest version of MySQL on your Debian 12 systems.
Step 1: Update Debian System
First, refresh the system’s packages list before installing any new package:
sudo apt upgrade
By doing so, all the packages of the Debian system will be updated.
Step 2: Download and Add MySQL Repository
Then, download the latest deb package file of the MySQL repository on the Debian 12 system through the provided command:
Note: Please visit this link and download the latest version of the MySQL repository deb file.

Alternatively, you can visit the MySQL official website and download the deb file of the MySQL APT repository directly from there by clicking on the “Download” button:

Next, install the MySQL repository deb file to add it to your Debian system:

After executing the above command, a pop-up window will appear where you must select some options. Choose the “MySQL Server & Cluster” option and hit the “enter” key:

Select the “mysql-8.0” option and press the “enter” key:

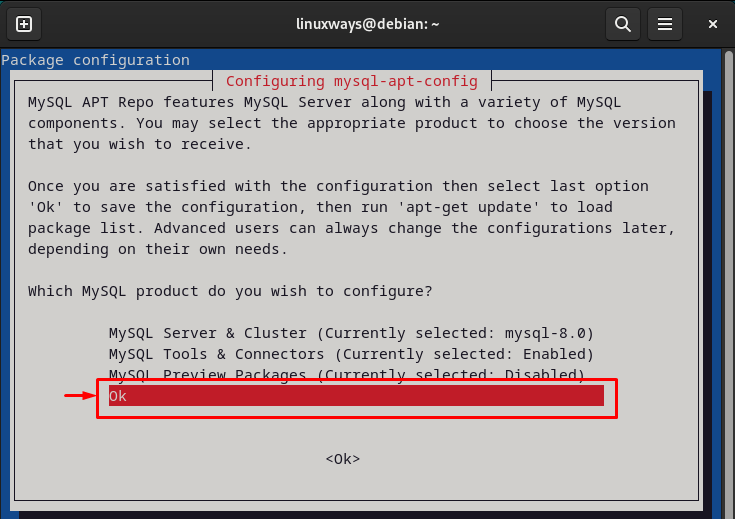
Choose the “OK” option and hit “enter”:

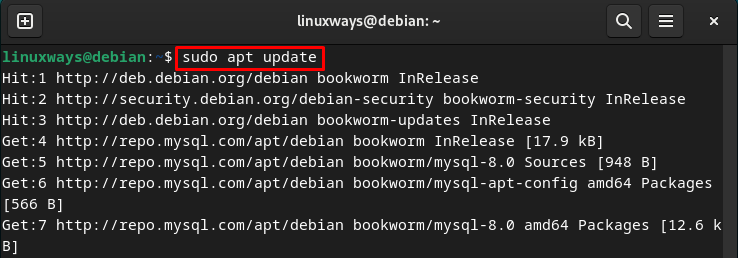
Next, update the packages list to implement new changes:

Step 3: Install MySQL Server
Now, install the MySQL server’s latest package on your Debian system via the given command:

You will be asked to set a new root password for the MySQL server throughout the installation process. Set the password and hit the “enter” key:

Choose “OK” using the arrow keys:

Select the “Use Strong Password Encryption” option:

Subsequently, the installation will be completed:

Step 4: Verify Installation
To ensure that MySQL is successfully installed on the Debian system, check its version:
The below output shows the installed version of MySQL:

How to Enable MySQL Service on Debian 12
By default, the MySQL service starts automatically after the installation is completed. However, if MySQL service is not running on the system, you can enable it to start automatically during system reboot/restart using the following command:

To verify whether the MySQL service is running on the Debian system or not, check its status:

How to Secure the MySQL Server on Debian 12
You may want to enhance the security of the MYSQL database server for several reasons, such as to protect their data from unauthorized access, ensure data integrity, etc. To secure your MySQL database server, you can use the “sudo mysql_secure_installation” command. This command will provide a detailed instruction to secure your MySQL installation:
By doing so, it will ask you for various configurations i.e. to remove unknown users, set a new root password, and many more. You can choose the desired options and make changes:


How to Use MySQL on Debian 12
You can use MySQL on Debian 12 by connecting to the MySQL server and accessing the MySQL shell as a root. After that, you will be able to create, view, and use databases, manage tables, and perform various database operations. Follow the provided steps to use MySQL on Debian 12:
Access MySQL Database Server
To access the MySQL database server, log in to MySQL shell by executing the given command and providing the root password:
In the below screenshot, you can see that MySQL shell has been started:

Create MySQL Database
To create/make a new MySQL database, use the “CREATE DATABASE <database-name>” command and specify the database’s name. Here, we are making a database named “LinuxWaysDB”:

Display All MySQL Databases
If you want to list all the available databases in the MySQL server, type out the following command:

Switch to a Specific Database
If you want to use a specific database, you have to switch to it by utilizing the “USE <database-name>” command:

Create MySQL Table
To create a MySQL table in the database, utilize the “CREATE TABLE” command and specify the desired table name along with the required columns and datatypes. Here, we are creating a “TechWriter” table with the following columns:

Insert Data in MySQL Table
You can insert values into the MySQL table using the “INSERT INTO <table-name> VALUE” command and specify the desired values as seen below:

Select Data From Table
If you want to select and display a specific or all the data from a particular table, the “SELECT” command is used. For example, we are reading all the data of the “TechWriter” table using the given command:

Delete MySQL Table Data
You can also delete a particular record of the specific table using the “DELETE” command and specifying the required condition. For instance, we are deleting the record of the “TechWriter” table where the “T_ID” is “7”:

Delete MySQL Database
To delete a specific MySQL database, you can use the “DROP DATABASE” command along with the database name that needs to be deleted:

Leave MySQL Shell
If you want to leave the MySQL Shell, type out the below-listed command:
How to Uninstall/Remove MySQL From Debian 12
In case you do not want to use MySQL on your Debian 12 system, you can simply remove it through the given command:

That was all about installing, using, and uninstalling MySQL on Debian 12 systems.
Final Thoughts
You can install MySQL’s latest version on Debian 12 by downloading the Debian file of MySQL APT repository from the MySQL official website. This configuration package allows you to choose the MySQL product and server version that you want to install, and it installs packages directly from the official MySQL repository. Moreover, this method also updates MySQL to the new version with the system updates whenever its new release is introduced. This guide has thoroughly explained the ways to install, use, and uninstall MySQL on Debian 12.
I am a technical writer with a knack for learning and exploring new technologies. As a Computer Science Graduate, my expertise lies in the fundamentals of Programming languages and Linux OS. I strive to provide users with in-depth and informative articles that can help them understand the core concepts of modern technologies.


