Grub Customizer is a powerful GUI tool with a simple interface for customizing the GRUB boot menu on Linux distributions. GRUB is the program that appears when users start systems and it lets users choose the desired kernel to boot into.
While working on the Linux Mint system, you may want to change the default boot entry, boot order, kernel parameters, customize the boot menu’s appearance, etc. In this situation, you can install Grub Customizer on your system. It will allow you to modify the order of boot entries or operating systems, set the default entry, and many more.
This article will explain the method of installing and using Grub Customizer on Linux Mint.
Quick Outline
- How to Install Grub Customizer on Linux Mint 21
- How to Utilize Grub Customizer on Linux Mint 21
- How to Uninstall/Remove Grub Customizer on Linux Mint 21
- Final Thoughts
How to Install Grub Customizer on Linux Mint 21
The Grub Customizer can be installed on Linux Mint 21 using the Grub Customizer PPA repository. You can add/import it to your system to efficiently install Grub Customizer’s most recent version.
Here are the steps:
Step 1: Import Grub Customizer PPA on Linux Mint
First, utilize the given command to add/import the Grub Customizer repository on the Linux Mint system:

Then, refresh the APT repository packages to implement changes:

Step 2: Install Grub Customizer on Linux Mint
Now, install the Grub Customizer on your system from the PPA repository through the below-listed command:

Finally, check the Grub Customizer version to ensure that it has been installed on the Linux Mint system:
The output shows the installed version of Grub Customizer:

How to Utilize Grub Customizer on Linux Mint 21
After installing Grub Customizer on your system, you have to launch it so that you can use and customize it.
To launch Grub Customizer on Linux Mint through the terminal, type out the following command:
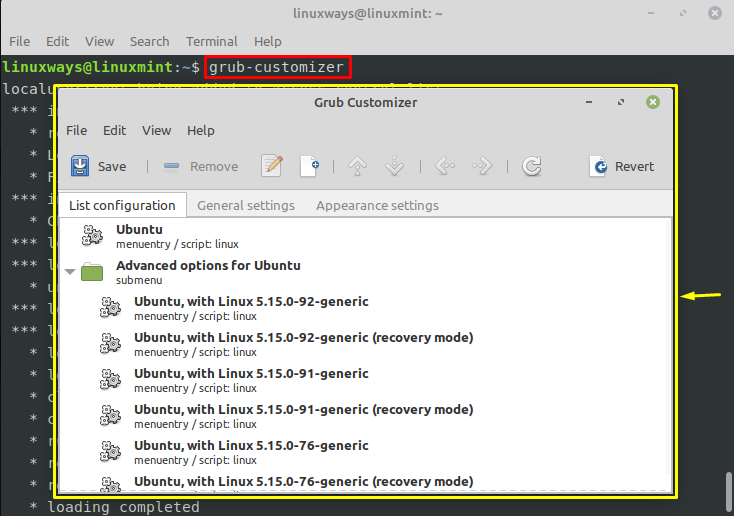
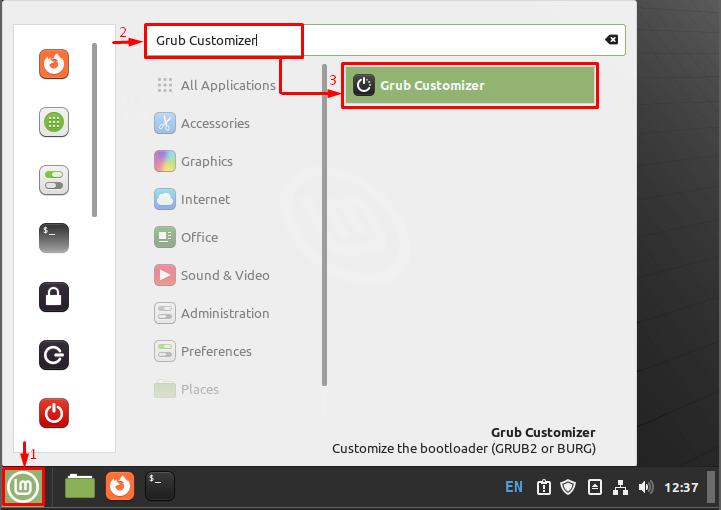
Alternatively, you can launch it from the application menu via the Graphical user interface as seen below:
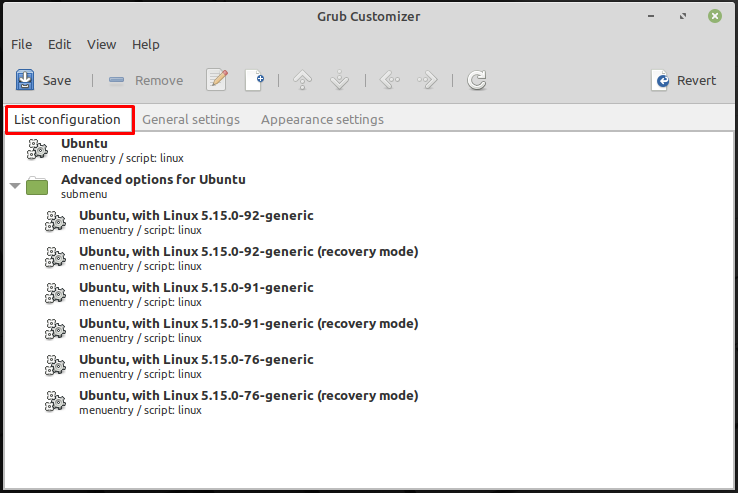
Once the Grub Customizer is opened, you can see that it contains various tabs representing various aspects of the boot menu. You can modify the settings such as the default boot entry, background image, etc through these tabs. The main tabs of Grub Customizer are explained in the below section.
“List configuration” Tab
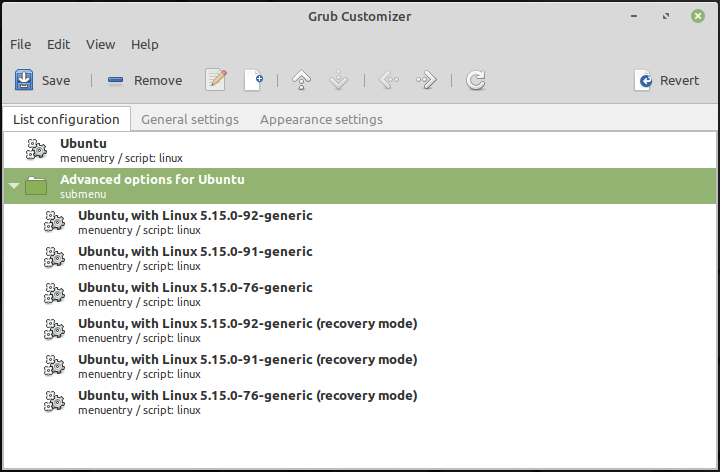
This tab enables users to manage the boot entries’ order in the Grub menu. You can change the default boot entry and rearrange their order according to your needs:
For instance, we have chosen the following entry and right-click on it. The pop-up menu has appeared where we can perform various operations on the selected entry, such as rename, edit, remove, reorder, etc. Here, we are changing the order of these boot entries by using the “Move up” and “Move down” options:

The order of the entries has been changed successfully as seen below:
“General settings” Tab
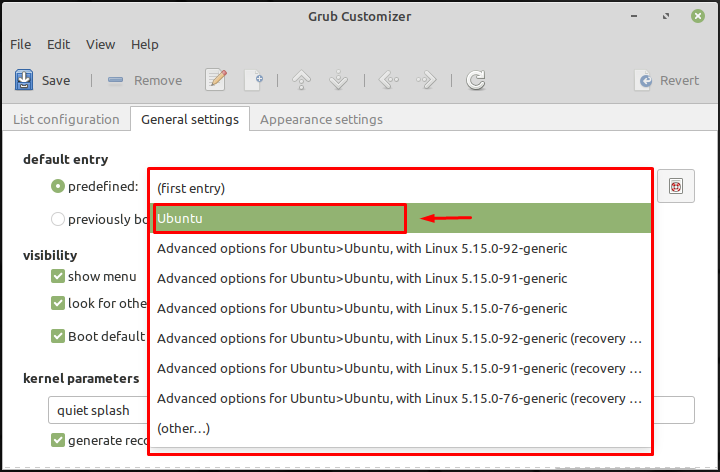
This tab has different options to customize general settings such as default boot entry, timeout duration, add or remove kernel parameter, etc. In this tab, you can set the default operating system that will be selected automatically within the timeout period, set the duration for the boot menu to appear, and modify other advanced options:

For example, if you want to change the default boot entry, simply click on it and select the desired operating system that you want to boot by default:

Here, we have selected the “Ubuntu” option:
You can also adjust the time duration for the Boot default entry as seen below:

“Appearance settings” Tab
This tab allows users to customize the Grub menu’s appearance. You can change the background image, adjust the font, highlight colors, add themes, and many more:
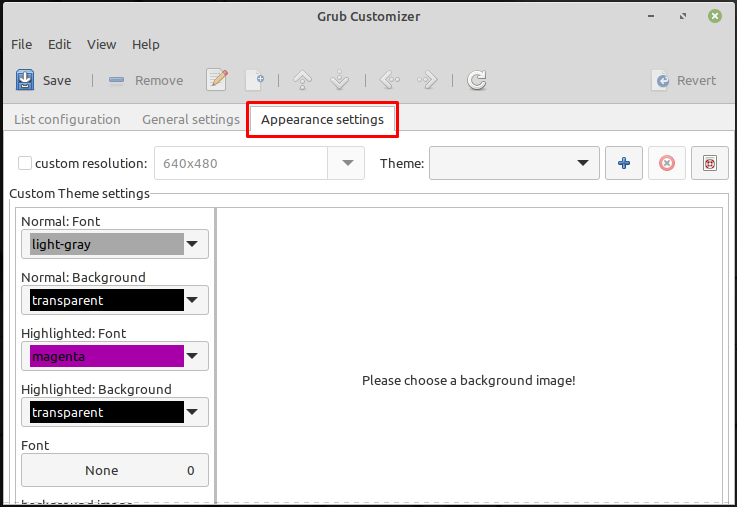
For instance, if you want to change the resolution, just tap on it and choose the desired custom resolution:

Here, we have selected the following resolution:

To change the background image, click on the below-highlighted icon:

Choose a particular image for the background:

The background image has been set successfully:

Similarly, you can make other changes as required, and for verification, you can access the “GNU GRUB” boot loader menu and view the changes there.
How to Uninstall/Remove Grub Customizer on Linux Mint 21
If you no longer need and use the Grub Customizer feature on Linux Mint, you can simply remove/uninstall it from your system through the below-mentioned command:
By doing so, the Grub Customizer package and related configuration will be removed from the Linux Mint system:

You also have to remove the added Grub Customizer PPA repository from your Linux Mint system by utilizing the following command:

That was all about installing and using Grub Customizer on Linux Mint 21.
Final Thoughts
Grub Customizer is a convenient GUI-based tool to customize and manage the Grub boot loader on Linux systems. You can install Grub Customizer on Linux Mint 21 through Grub Customizer PPA repository. It will enable you to modify the boot menu and customize its appearance. This article has explained the method to install, use, and uninstall Grub Customizer on Linux Mint 21.
I am a technical writer with a knack for learning and exploring new technologies. As a Computer Science Graduate, my expertise lies in the fundamentals of Programming languages and Linux OS. I strive to provide users with in-depth and informative articles that can help them understand the core concepts of modern technologies.


