For Linux distributions like Debian 12, there are a number of image editing software available, and one of them is ImageMagick, which is preferred by many as it is free to use and comes with several editing options. Editing the images using ImageMagick on Debian can be done either using its GUI or using the command line interface, which is another plus. To install ImageMagick on Debian 12 there are different ways that will be discussed in the guide along with some commands for editing images.
Outline:
- Installing ImageMagick
- Through Apt
- Through AppImage
- Through Tar file
- Through Git
- Using ImageMagick
- Removing ImageMagick
- Conclusion
How to Install ImageMagick on Debian 12
Most editing software requires a huge space and a large amount of resources to work smoothly, but the ImageMagick is lightweight and does not require a lot of resources to function properly. This makes it quite suitable for Linux distributions, although this tool can only perform basic editing functions like image, resizing, changing colors, or cropping any image. To install ImageMagick on Debian 12 here are some ways for it:
Method 1: Through Default Package Manager
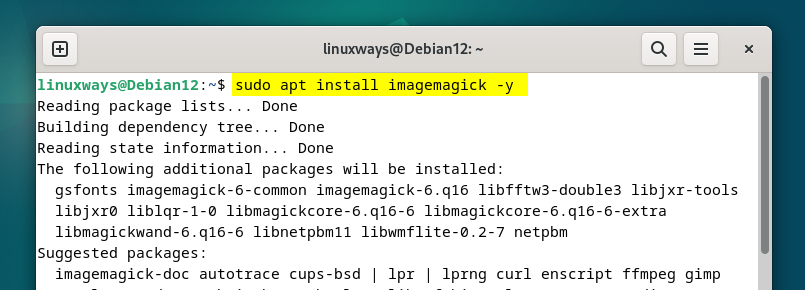
Every Linux distribution has its default package manager which has almost all the application packages listed in it. So, in the case of Debian 12 apt is its default package manager so to install ImageMagick on it execute the:

Once the application is installed it is better to update the packages list and afterward verify the version installed, so in the case of installing ImageMagick check its version by executing:

Note: ImageMagick might be pre-installed on Debian 12 so it is better to check whether it is installed or not either through version check or by listing all the applications installed through the default package manager.
Method 2: Through AppImage
If you are looking of plug and play version of ImageMagick then the best way for it is to get its app image file which can be either downloaded manually from their official website or by executing:

Once the file is downloaded, make it executable and for that allow it to run as a program for that use the chmod command, and don’t forget to switch to the directory when the file is saved:

Now to check if the file is executing correctly run it using the help flag which will display the syntax for the commands to use ImageMagick:

Here I am running the command in the same directory where the file is placed but if you are in another directory then you have to specify the path for the file.
Method 3: Through Tar File
If you are looking for the latest version of ImageMagick then it is best to look for the source file which is available on its official page. The benefit of having the lattes version is that it has fewer bugs and access to new features, here are some steps for installing ImageMagick on Debian 12 through is tar file:
Step 1: Download and Extract the Tar File
There are two ways to download the tar file, one is by visiting the official ImageMagick archives page where you will find packages for different Linux distributions:

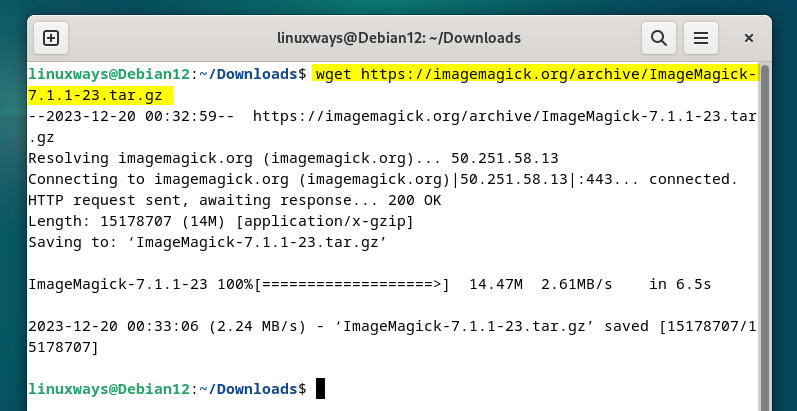
The other way is that you can use the terminal to download the compressed file in tar.gz format using the wget command like this:

Once the file is downloaded extract it using the tar command along with the xvzf flags which unzip the file, list its contents, decompress the unzipped file, and specify the file name same as the compressed file name:

Step 2: Configure and Build the Application
Once the file is extracted, execute the configure file in it which will look for the dependencies required to install and run ImageMagick on Debian 12. In short, it is a script file responsible for bullying the file necessary for installation:

Don’t forget to switch to the folder of the extracted file.
Now as a result of configuration a Makefile temperate is created based on Debian 12 and to create a make file of ImageMagick execute the make command:

Step 3: Install ImageMagick
Once the make file for ImageMagick is created just install ImageMagick on Debian 12 using the install command:

Step 4: Run the Dynamic Linker and Verify the Installation
The ImageMagick may need to access some libraries during execution so to avoid any occurrence of error during this it is better to execute the dynamic linker so that it can access libraries:

Now to verify the installation by checking the version of ImageMagick installed on Debian12:

Method 4: Through Git Repository
Another way to install ImageMagick is by using the git repository, and for that git should be installed on Debian 12 and for that execute:
To that, just clone the repository of ImageMagick using:

After cloning the repository in Debian 12 install some necessary dependencies and libraries for ImageMagick by executing:

The next steps are the same for both the installation and removal of the ImageMagick
sudo ./configure --with-modules
sudo make
sudo make install
sudo ldconfig /usr/local/lib
magick --version
Note: The only difference between this method and the previous one is that in the previous method, we use the tar file from the official website and in this method, the source code from the git repository is used.
How To Use ImageMagick on Debian 12
ImageMagick can be used either through the command line interface or by its graphical user interface(GUI) but mostly the CLI is preferred as it is quite easy to use this way. So here are some basic editing you can do through ImageMagick
Converting an Image Format from PNG to JPG Using ImageMagick on Debian 12
To convert an image format from one to another, just use the convert command, and here is its syntax:
Now just for illustration, I have converted an image having a PNG format into a JPG format using the above given syntax:

If you are using the app image file then just go to its respective directory or give a path for it, and execute it along with using the convert command:

Editing an Image in Debian 12 Using ImageMagick
There are various basic editing options that one gets on ImageMagick like cropping, resizing, rotating, and blurring the image. To simply open up the image in Debian 12 using ImageMagick use the display command along with the image name and format and don’t forget to give the path for the image if you are in any other directory:

Rotating an Image
To rotate an image on Debian 12 using ImageMagick, just use the rotate flag along with the angle of rotation like this:

Blurring an Image
If you want to blur an image to a certain extent, then use the blur flag along with the radius and standard deviation of the Gaussian blur filter:
Now for illustration, I have blurred an image and zero here means that the radius of the blur filter is zero, so ImageMagick will adjust to a suitable radius automatically in correspondence to the standard deviation(8):

Cropping an Image
To cut an image using ImageMagick on Debian 12 just specify the size of length and width to cut along with the full size of the image using the crop flag:
Now for illustration, I have an image for size 2880 by 1800, and I have cropped 400 from its length and width:

Resizing an Image
To make the large image smaller without cutting out the image, the resizing option can be used, simply use the resize flag with the percentage of resize required as in the syntax below:
For example, I have resized the image to 50 percent using the above syntax:

Another way to resize the image is by specifying the size the size of image you want and below is the syntax if the required size is less than the original size:
If you want to enlarge the image then it means that the size required will be more than the original size so for that use the below syntax:
Now here, for instance I have resized the image to a lower value:

Note: To use ImageMagick through its GUI on Debian 12 just open up the image and click on it anywhere to access its GUI, from there you can access all of its options.

How to Remove ImageMagick From Debian 12
Since every installation method is different from the other the method to remove ImageMagick from Debian primarily depends on the installation method and I have explained the removal method for each of them:
Removing ImageMagick Installed Through Apt
For removing the ImageMagick if installed through the default package manager it is preferred to use the autoremove flag as it removes the unused dependencies by itself so execute:

Once you have uninstalled it, you can verify it by listing all the applications installed using the apt package manager and for that execute:

Remove ImageMagick Installed Through Tar File
Since installing ImageMagick through the tar file a Makefile is created, so in a similar way to remove or uninstall ImageMagick just use the uninstall command in the same directory where the make file is present:

Now to completely remove ImageMagick, remove its directory using the remove command along with the r flag which is used when there is any data in the respective directory:

Remove ImageMagick AppImage
Once you no longer require the use of ImageMagick, simply remove the file by using the rm command:

Conclusion
ImageMagick is a free-to-use tool for editing images and can be installed on Debian 12 in four ways. These methods include using its default package manager, its AppImage file, and its source file either through GitHub or through its official website. Moreover, this tool can be used from both the command line interface and its GUI.


