Java is a software development platform and a programming language as well. With more than three decades of existence, Java is still more popular and preferred over other programming languages. Some people confuse Java with JavaScript (JS), but there is a clear difference i.e., Java code needs compilation, while JS code does not need compilation. Java is an essential component to be installed on Ubuntu to run the Java programs smoothly.
Outline:
- How to Install Java on Ubuntu 22.04
- Bonus Tip 1: How to Install the Specific Java Version on Ubuntu 22.04 Using apt Package Manager
- Bonus Tip 2: How to Install Open JRE 11 on Ubuntu 22.04 Using apt Package Manager
- Conclusion
How to Install Java on Ubuntu 22.04
The Java can be installed on Ubuntu using:
Method 1: Install Java on Ubuntu 22.04 Using apt Package Manager
Ubuntu users can install Java through the official apt package manager, which is a straightforward, safe, and secure option for quickly installing Java on the system.
To install Java on Ubuntu 22.04 using the apt command-line utility, check the guided steps given below.
Step 1: Check the Existence of Java on Ubuntu
Before installing Java on Ubuntu, let’s check if it is already installed on the system or not by using the given command:
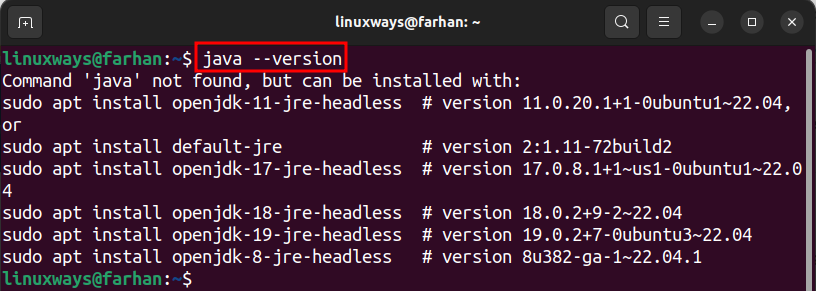
The output confirms that Java is not installed on Ubuntu.
Step 2: Install Java on Ubuntu (JDK & JRE)
Execute the mentioned command to install Java on Ubuntu 22.04:
The above command will install the default Java version stored in the official apt repository. It will install both JDK and JRE, so you do not need to install the JRE separately:

Step 3: Verify the Java Installation
Once Java is installed, execute the below command to check whether it is installed or not:

How to Remove Java from Ubuntu 22.04 Using apt Package Manager
If you want to uninstall Java from Ubuntu 22.04, then execute the mentioned command in Terminal:

Note: Sometimes removing Java using the above command does not remove it. In that case, execute the given command to remove all the Java versions installed on the system:

Method 2: Install Java on Ubuntu 22.04 Using the Deb Package
Another method you can use to install Java on Ubuntu is through the deb package. You can find Java’s deb package from Oracle’s official website. Installing Java through the deb package is simple and easy. Check the instructional guide below in the form of steps.
Step 1: Download the Java Deb File Using wget Command
To download the deb file of Java, first, visit the official Oracle website, find the Linux x64 Debian Package, right-click on its download link, and copy it:
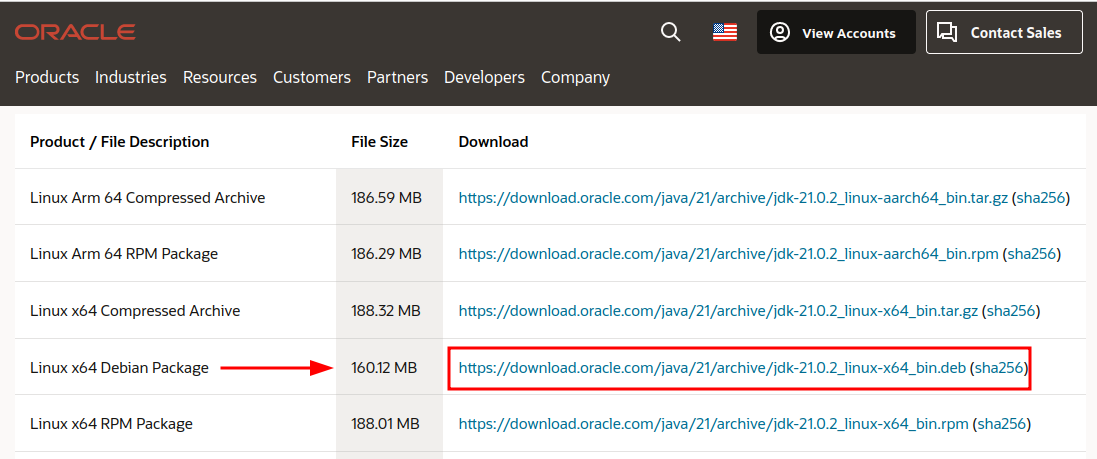
Once the link is copied, provide it to the wget command to download the Java deb file:
This will save the deb file in the Home directory:

Step 2: Install Java on Ubuntu
After downloading the file, execute the given command to install Java on Ubuntu 22.04:
Replace the file name with the file name you downloaded:

Step 3: Verify Java Installation
Once the Java is installed on Ubuntu, use the given command to check whether the Java is installed or not:

How to Remove the Specific Version of Java from Ubuntu 22.04 Through apt Package Manager
Execute the mentioned command below to remove the specific version of Java from Ubuntu 22.04:
Replace the java version 21 with your desired version to remove it from Ubuntu:

Method 3: Install Java on Ubuntu 22.04 Using GUI (Graphical User Interface)
Ubuntu users can install Java on Ubuntu 22.04 through the Ubuntu Software application. To install Java on Ubuntu using GUI, check the stepwise guide mentioned below.
Step 1: Download the Java Deb File
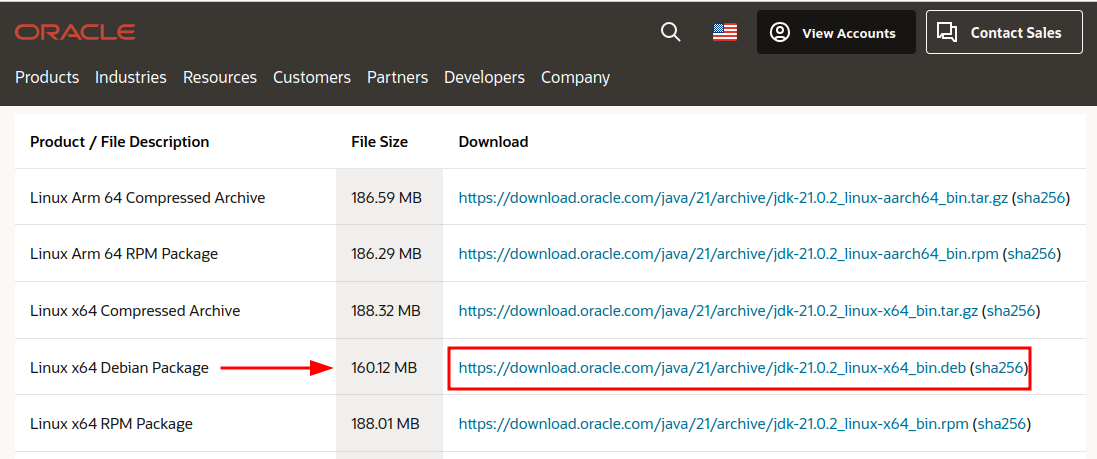
First, download the deb file of Java on Ubuntu. To do so, visit the official Oracle website, locate the Linux x64 Debian Package, and click on the highlighted link to start downloading the Java deb package:
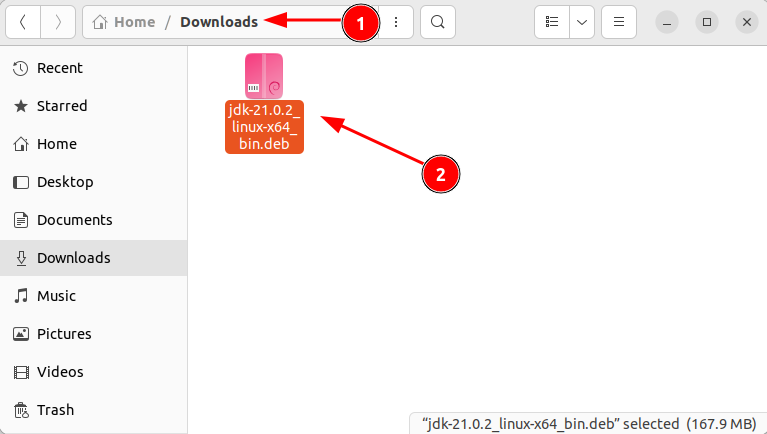
Once the download is complete, check the Downloads folder to verify whether the file is downloaded or not:
Step 2: Install Java Deb Package
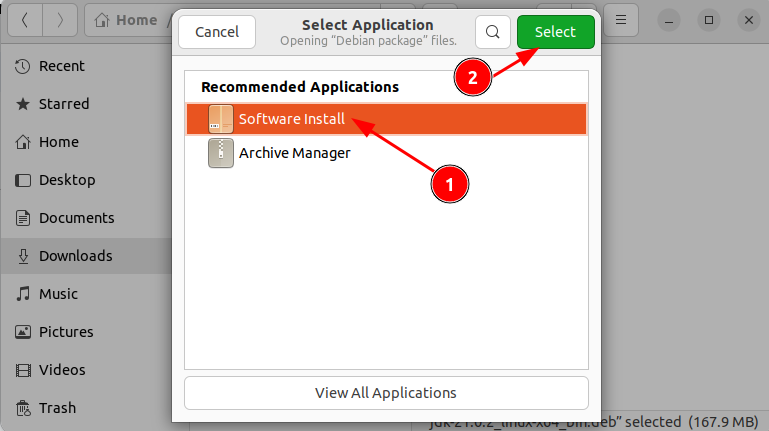
In the Downloads folder, right-click on the Java Deb package, and choose Open with Other Application option. Then, select Software Install, and click on the Select button to install Java via the Ubuntu Software store:
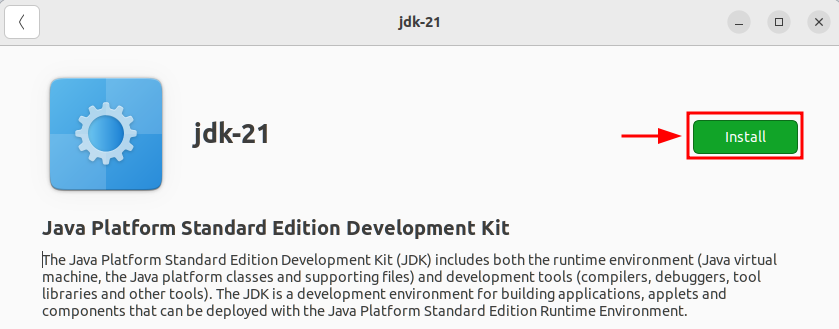
Click on the Install button to begin the Java installation on Ubuntu 22.04:
How to Remove Java from Ubuntu 22.04 Using GUI (Graphical User Interface)
When you have installed Java through GUI, then you can remove it using the Ubuntu Software application. Check the instructional guide provided below to remove Java from Ubuntu 22.04:
- Launch the Ubuntu Software application available on the left-side panel.
- In the Ubuntu Software application, move to the Installed section.
- Locate the installed Java package and click Uninstall to remove it from Ubuntu:
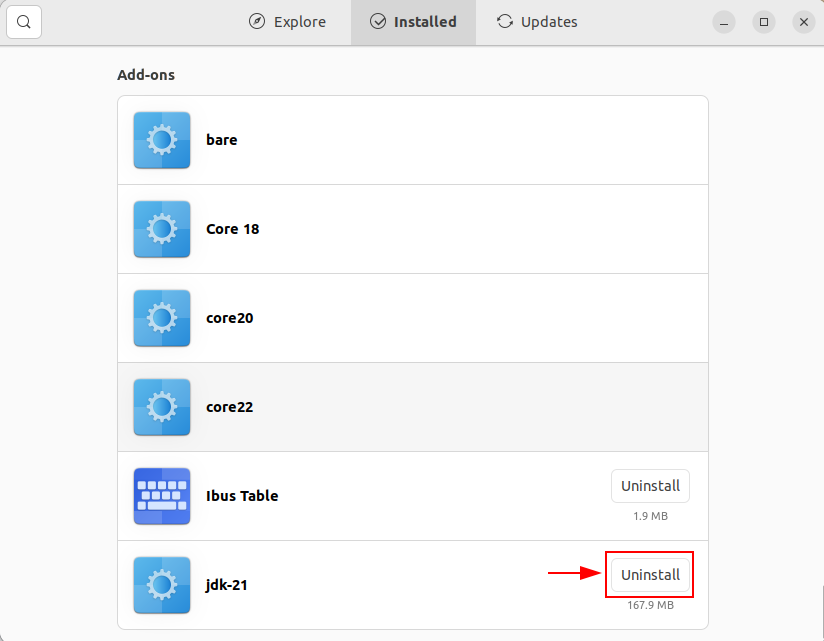
Note: Only Java installed using GUI can be removed through the Ubuntu Software application.
Bonus Tip 1: How to Install the Specific Java Version on Ubuntu 22.04 Using apt Package Manager
Besides installing the default Java version on Ubuntu, you can also install the version of your choice. The latest Java version is 21. So, let’s install the Java 21 version on Ubuntu. To install the specific Java version 21 on Ubuntu, execute the given command:
To install the version of your choice, replace 21 with your version:

Now, let’s verify whether the Java version of your choice was installed or not by executing this command:

Note: You may not find all Java versions in the apt repository.
Bonus Tip 2: How to Install Open JRE 11 on Ubuntu 22.04 Using apt Package Manager
By default, whenever Java gets installed on the system it also installs the JRE (Java Runtime Environment) alongside JDK (Java Development Kit). However, in the case you removed the JRE, or it is not functioning well then you can reinstall it by checking the steps provided below.
Step 1: Update apt Repository Packages
Make sure to update the system repositories by running the mentioned command in Terminal:

Step 2: Install JRE on Ubuntu
Execute the below command to install the default JRE version on Ubuntu 22.04:

Conclusion
Java is a programming language used to develop mobile applications, desktop applications, and web-based applications. Moreover, Java itself is a development application used by developers. Java can be installed on Ubuntu 22.04 using the apt package manager and through a deb file. Additionally, Java can also be installed using GUI (Ubuntu Software application). You can use any of the provided methods to install Java on Ubuntu 22.04 according to your preferences from this guide and start running Java-based applications on your system.
