Introduction:
Updating a system periodically is mandatory for its proper functioning. However, doing this manually might seem tedious because of which most of the people prefer to automate this process. Therefore, in this guide, we will teach you the process of configuring the automatic updates of a Linux Mint 20 machine through GUI.
Procedure of Configuring Linux Mint 20 Automatic Updates through GUI:
For configuring the automatic updates of your Linux Mint 20 system through its GUI, you need to follow the steps explained below:
Step # 1: Access the Update Manager of Linux Mint 20:
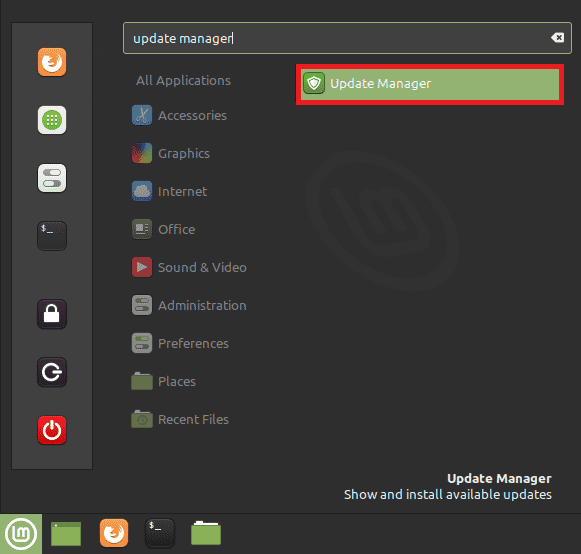
First, you need to access the Update Manager of your system by looking for it in the Mint Menu as shown in the following image:
Step # 2: Expand the Edit Tab of the Update Manager:
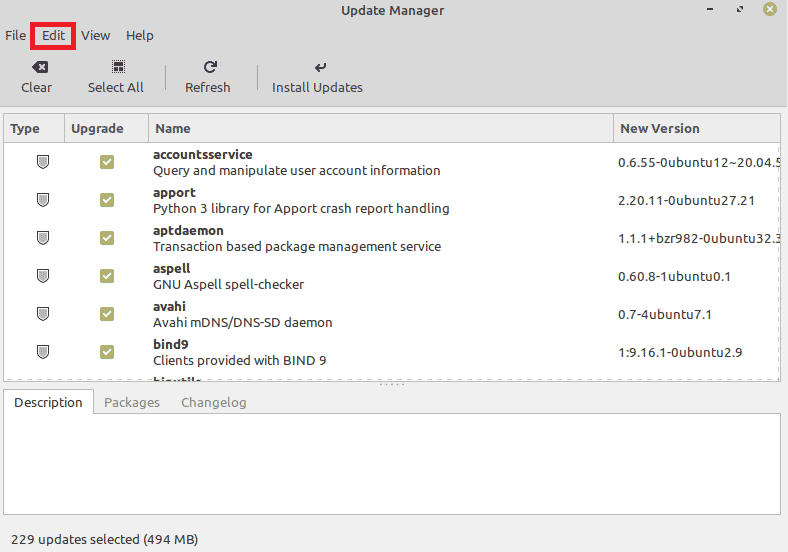
In the Update Manager window, you need to expand the Edit tab by clicking on it as highlighted below:
Step # 3: Select the Preferences Option from the Edit Tab:
From the Edit menu, you need to click on the Preferences tab as shown in the following image:

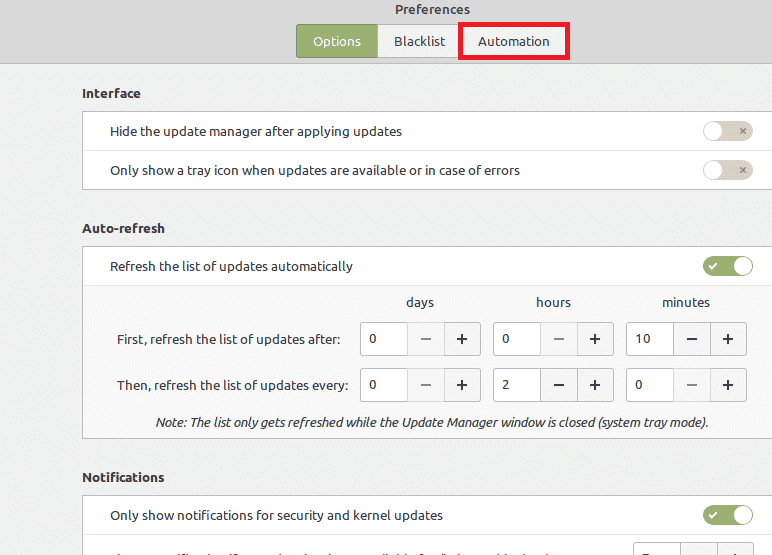
Step # 4: Switch to the Automation Tab from the Preferences Window:
Now, from the Preferences menu, you need to switch to the Automatic tab highlighted below:
Step # 5: Select the Automatic Updates Option from the Automation Tab:
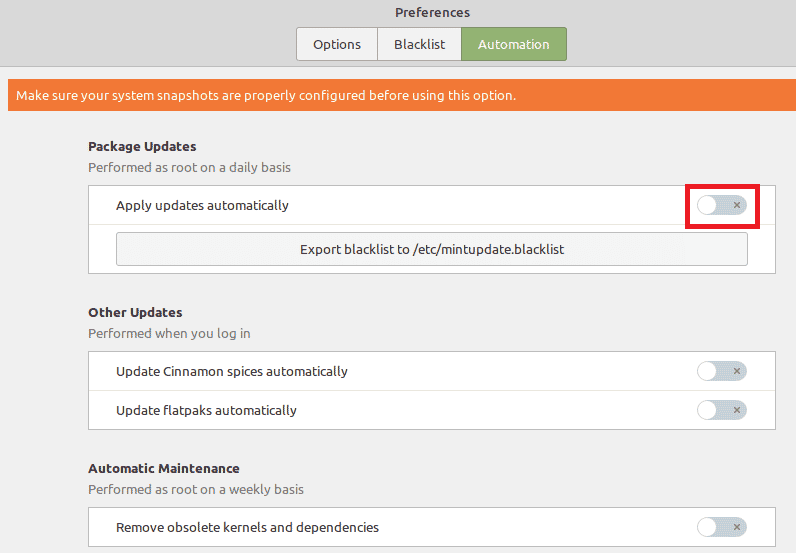
Finally, in the Automation tab, you will see different options for automating the updates of your system. You can switch on the toggle buttons of as many of these as you need depending upon your requirements. For example, for automating the package updates, you need to turn on the toggle button highlighted in the following image:
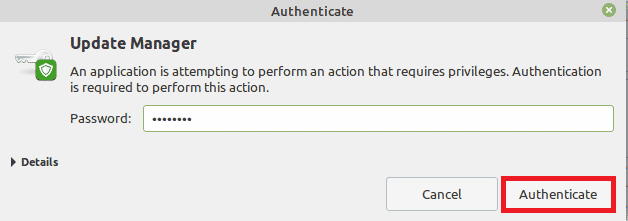
Once you will do this, you will be asked to authenticate yourself.
Finally, you will be able to see that the desired updates have been configured to take place automatically as shown in the image below:

Conclusion:
In this article, we discussed the process of configuring the automatic updates of a Linux Mint 20 system. After performing these steps, you will get rid of the worry of updating your system manually.

