Introduction:
Octave is a special purpose high level programming language. It is used to perform numerical computations very easily and with a very high level of precision. Moreover, it is a very good alternative to MATLAB. In this article, we will talk about the installation procedure of Octave on a Linux Mint 20 system.
Procedure of Installing Octave on Linux Mint 20:
For installing Octave on Linux Mint 20, you just need to perform the following steps:
Step # 1: Begin with a System Update:
First, you need to begin with a system update that can take place with the command stated below:
$ sudo apt update
![]()
Step # 2: Install Octave on your Updated System:
After that, you can install Octave on an updated system by running the following command:
$ sudo apt-get install octave
![]()
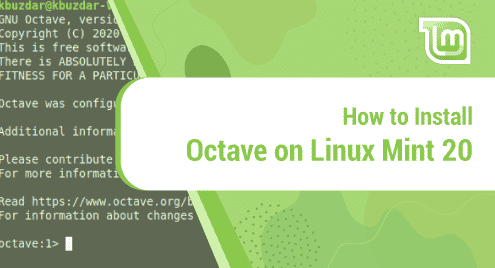
Step # 3: Launch the Octave Terminal for Confirming its Installation:
Once Octave is successfully installed on your system, you can access its terminal by executing the command shown below:
$ octave
![]()
The Octave terminal is shown in the following image:

For exiting from the Octave terminal, you simply need to run the command shown below:
> quit
![]()
How to Remove Octave from Linux Mint 20?
If you want to remove Octave from your Linux Mint 20 machine at any instance, then you can run the following command:
$ sudo apt-get purge --autoremove octave
![]()
Conclusion:
In this tutorial, we learned to install the Octave programming language on a Linux Mint 20 machine. After having this programming language installed on your Linux Mint 20 system, the complex numerical computations can be performed very conveniently.

Karim Buzdar holds a degree in telecommunication engineering and holds several sysadmin certifications including CCNA RS, SCP, and ACE. As an IT engineer and technical author, he writes for various websites.


