Introduction:
Composer is a tool that acts as a package manager for PHP. It is used to gracefully manage all the packages and dependencies for this programming language hence offloading the developers from the responsibility of doing this manually. Today, we will see how we can install Composer on a Linux system.
Note: We have performed the method described in this article on a Linux Mint 20 system.
Pre-Requisites:
Before proceeding with the method shown below, you need to have “PHP” installed on your Linux system with “sudo” privileges.
The procedure of Installing Composer on Linux:
For installing Composer on your Linux system, you will have to follow the steps described below in the specified order:
Step # 1: Download Composer from its Official Website:
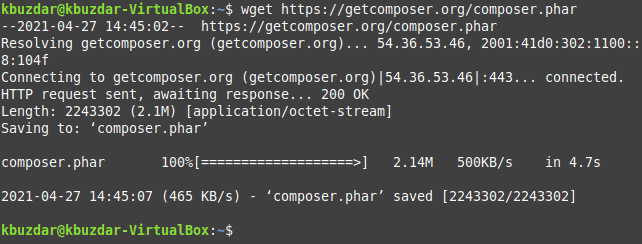
First, you need to download Composer from its official website by executing the following command:
$ wget https://getcomposer.org/composer.phar
You can also mention the exact version of Composer in this command that you want to download. However, running this command as it is will ensure that you download the latest available version of Composer on your system.
![]()
This download will literally complete within the blink of an eye after which your terminal window will look something like this:

Step # 2: Make the Downloaded Composer File Executable:
Now, you need to make the downloaded file executable with the command shown below:
$ chmod +x ./composer.phar
![]()
This command will not render any messages on your terminal if it is executed without any errors.
Step # 3: Change the Path of the Executable Composer File to make it easily accessible:
After performing the above-mentioned step, you need to move your executable Composer file to the /usr/bin/composer directory for making it easily accessible. You can do this by executing the following command:
$ sudo mv ./composer.phar /usr/bin/composer
![]()
You should run the above-mentioned command as it is because omitting the “sudo” keyword from this command will not let you change the path of the executable Composer file. Again, if this command will execute without any errors, then it will not produce any messages on your terminal.
Step # 4: Verify the Installation of Composer on your Linux System:
Finally, you can verify the successful installation of Composer on your Linux system by checking its location with the command shown below:
$ which composer
![]()
The location of Composer on our Linux system is shown in the following image which indicates that Composer has been successfully installed on our Linux system.

Uninstallation Procedure of Composer on Linux:
You can easily uninstall Composer from your Linux machine by first executing the command shown below:
$ sudo apt-get purge composer
![]()
After executing this command, you can run the following command in your terminal to free up more space on your Linux system:
$ sudo apt-get autoremove
![]()
Conclusion:
After following this tutorial, you will be able to install Composer on your Linux system and use it for handling the packages and dependencies of the PHP programming language. The method that you have learned in this article can also be implemented on a Ubuntu 20.04 or a Debian 10 system.


