The ability to restore databases when data failures occur is very important. Data failures can be as a result of an accidental or malicious modification, deletion or corruption of data.
In this guide, you will learn how to backup an existing MySQL database on Red Hat Enterprise Linux (RHEL) 8 by using the mysqldump utility. Also, you will learn how to restore a MySQL database in order to recover from data failures.
Backup a MySQL Database
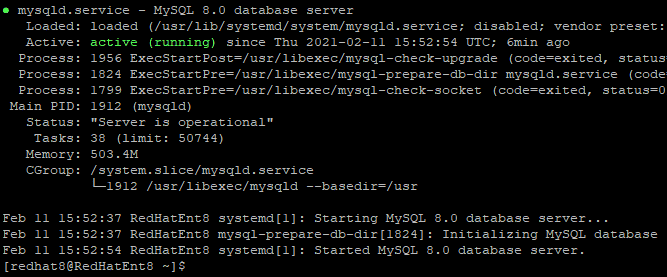
You can use the mysqldump utility to backup your MySQL database. Firstly, run the command below to confirm that the mysql service is active (running.)
$ sudo systemctl status mysqld

Press q to return to the terminal prompt.
If you see a message which indicates that the mysql service is disabled or inactive (dead,) then run the next command to start the mysql service.
$ sudo systemctl start mysqld
Once the mysql service is active (running,) you may login.
$ sudo mysql -u root -p
Note: You may replace root with another mysql user as appropriate.
Create a sample database and table
For the purpose of this tutorial, I have created a sample database and table by running the following queries. You may do the same.
mysql> CREATE DATABASE cars;

mysql> USE cars;

mysql> CREATE TABLE suvs (make varchar(25), model varchar(25), VIN varchar(17));

mysql> INSERT INTO suvs VALUES ('Toyota', 'Rav4', '12345678901234567'), ('Honda', 'Crv', '09876543211234567'), ('Nissan', 'Pathfinder', '25162435453647567');

mysql> SELECT * FROM suvs;

Run the next command to quit mysql.
mysql> quit
Export database with mysqldump
The syntax of the mysqldump command is:
mysqldump -u username -p database_to_backup > backup_file_name.sql
Replace:
- username with an actual username that has appropriate permissions on the database
- database_to_backup with the actual name of the database you intend to backup
- backup_file_name with your desired name for the backup file
Using the sample cars database as an example, the following command will backup the database to the database_backups folder in my home directory.
$ mysqldump -u root -p cars > /home/shola/database_backups/cars_bk.sql

If no errors are displayed, then the operation completed successfully.
Verify database backup
Next, you can quickly examine the content of the database backup file by running the command below. Remember to replace backup_file_name accordingly.
$ head backup_file_name.sql
See the figure below for a sample output.

Restore a MySQL Database
The only thing that is more important than taking backups is ensuring that you can actually restore those backups in the event of any data failure.
Imagine that the sample cars database which we created earlier has just been maliciously corrupted. Luckily, we have a backup of the cars database and we can restore it as follows.
Create a new database
We would need to login to mysql and create a new database for the restore operation.
Login to mysql as follows.
$ mysql -u root -p
Next, run the query below to create a new database.
mysql> CREATE DATABASE cars2;

Once the query executes successfully (OK), we may quit mysql.
mysql> quit
Import database from backup
The basic mysql syntax for restoring a mysql database is:
mysql -u username -p new_database_name < backup_file_name.sql
Replace:
- username with an actual username that has appropriate permissions on the database
- new_database_name with the name of the new database created for the restore operation
- backup_file_name with the name of the database backup file
For example, the following command restores the cars database from backup.
$ mysql -u root -p cars2 < /home/shola/database_backups/cars_bk.sql

If no errors are displayed, then the restore operation completed successfully.
Verify database restore
We could login to mysql and verify the database restore operation as follows.
$ mysql -u root -p
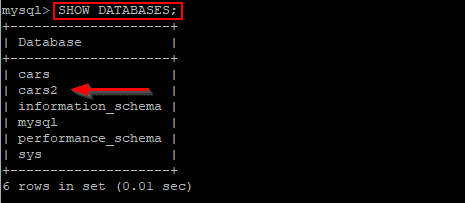
Once you are logged in, run the query below to show available databases.
mysql> SHOW DATABASES;

The next query selects the cars2 database.
mysql> USE cars2;

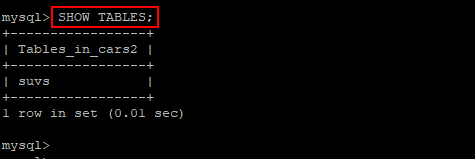
Display tables in the cars2 database with the query below.
mysql> SHOW TABLES;

Finally, select all records from the suvs table as follows.
mysql> SELECT * FROM suvs;

Conclusion
In this guide, we successfully backed up and restored a MySQL database on Red Hat Enterprise Linux 8. Do let us know if you have any questions or comments.


