A key component of the Elastic Stack groups of software components is Elasticsearch. Developed in Java, Elasticsearch is a opensource, fast and scalable , distributed search and analytics engine.. It allows you to store, index, analyze and search massive volumes of data in near real-time speed. You can store and retrieve data in JSON format using REST APIs.
Over the course of time, Elasticsearch has become a popular search engine in fields such as log analytics, business analytics, security intelligence as well as full-text search.
Notable bluechip companies that leverage Elasticsearch in their tech stacks include Uber, Udemy, Shopify, Netflix, Facebook and many more.
In this article, we will go through the installation of ElasticSearch on AlmaLinux 8.
Step 1 : Install Java
ElasticSearch was built on Java. You therefore need to install Java on your system. Run:
$ sudo dnf install java-11-openjdk
Confirm java is installed successfully with the command:
$ java —version

Step 2: Import Elastic search GPG key
Next, we need to import the GPG key for the Elasticsearch rpm packages. Execute the command:
$ sudo rpm --import https://artifacts.elastic.co/GPG-KEY-elasticsearch
Step 3: Install Elasticsearch on AlmaLinux
Next, create a file called elasticsearch.repo in the /etc/yum.repos.d/ .
$ sudo vim /etc/yum.repos.d/elasticsearch.repo
Paste the lines below to the file:
[elasticsearch]

name=Elasticsearch repository for 7.x packages

baseurl=https://artifacts.elastic.co/packages/7.x/yum

gpgcheck=1

gpgkey=https://artifacts.elastic.co/GPG-KEY-elasticsearch

enabled=0

autorefresh=1

type=rpm-md
After that, install elastic search as follows:
$ sudo dnf install --enablerepo=elasticsearch -y elasticsearch
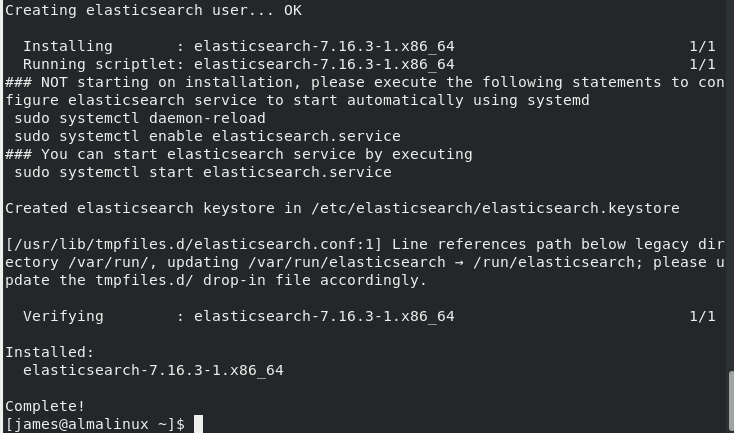
The Elasticsearch service is disabled by default. Run the following systemctl command to start and enable the elastic search service:
$ sudo systemctl enable elasticsearch.service --now

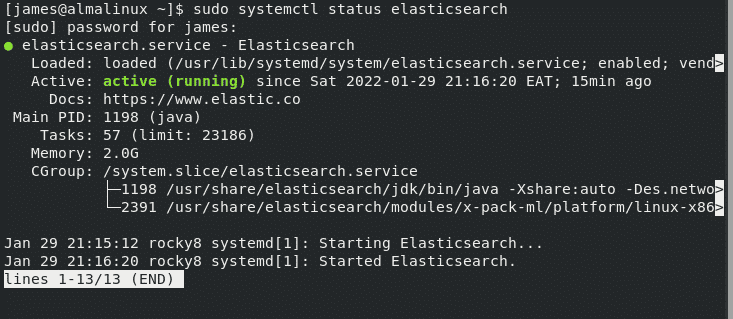
Check the status of the service with the command:
$ sudo systemctl status elasticsearch
Step 4: Configure ElasticSearch
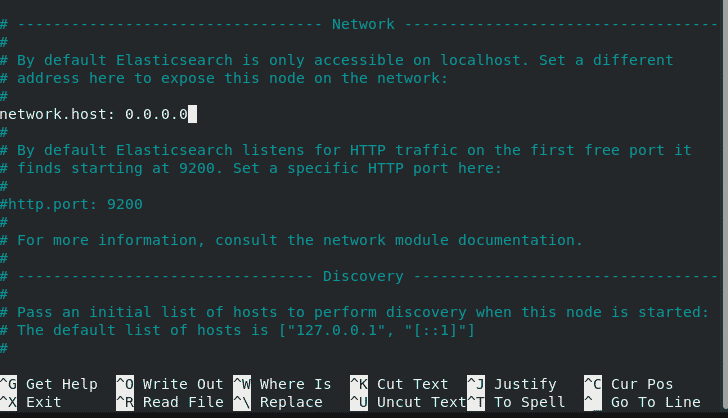
After a successful installation, edit the Elasticsearch configuration file. The default configuration settings are okay for single operating servers as Elasticsearch runs on localhost only. However, If you want to set up a cluster, you’ll have to change the configuration file to allow remote connections.
In the example, we have specified the address 0.0.0. 0. This allows Elasticsearch to listen on all interfaces. If you wish to specify a specific IP address, do so in this section.
$ sudo nano /etc/elasticsearch/elasticsearch.yml
For the changes to take effect, run the command:
$ sudo systemctl restart elasticsearch
Testing ElasticSearch installation
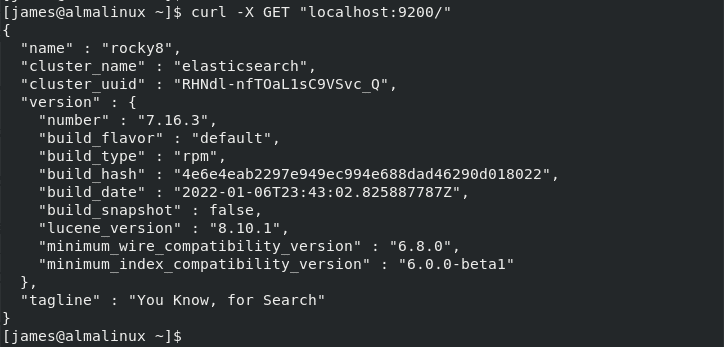
To confirm that Elasticsearch is up and running on our system, run the following curl command. Elasticsearch listens on port 9200 by default.
$ curl -X GET "localhost:9200/"
Simple Operations to perform with elastic search
First, we will add data to ElasticSearch, you can use the curl command together with a POST request as shown below:
$ curl -H 'Content-Type: application/json' -X POST 'http://localhost:9200/employee/task/1' -d '{ "name": "Update Jira" }'
You will get the output below:

Next, let’s retrieve that data using a GET request.
$ curl -X GET 'http://localhost:9200/employee/task/1'

You can retrieve the data in a in human-readable format as follows:
$ curl -X GET 'http://localhost:9200/employee/task/1?pretty'
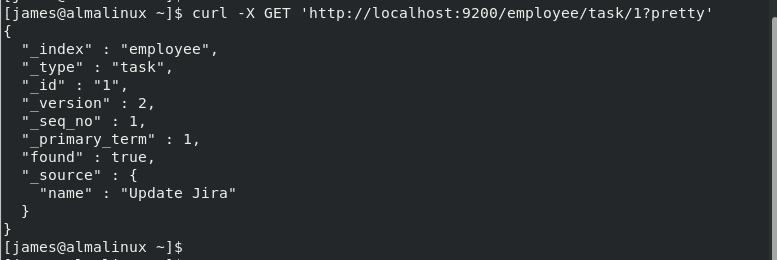
You can now use ElasticSearch to handle large volumes of data.
![How_to_Install_ElasticSearch_on_AlmaLinux_8[1]](https://linuxways.net/wp-content/uploads/2022/01/How_to_Install_ElasticSearch_on_AlmaLinux_81.png)


