By default, Rocky Linux provides a GNOME desktop environment which, despite its appealing user interface, exerts pressure on the available computing resources. If you have a PC with low CPU and RAM specifications, chances are that you might be experiencing slow system performance.
XFCE is a lightweight desktop environment that is resource-friendly and appealing at the same time. It’s ideal for old PCs or PCs with low RAM and CPU resources. Additionally, it’s recommended for users who desire fast performance since XFCE consumes very little system resources.
In this guide, we will walk you through the installation of the XFCE desktop on Rocky Linux.
Step 1: Update the system and install EPEL
To get started, log in and launch your terminal. Then upgrade the system packages to their latest versions as follows.
$ sudo dnf update
When the update of the packages is complete, install the EPEL (Extra Packages for Enterprise Linux) repository. The EPEL repository is provided by the Fedora Project and provides a set of high-quality software packages for RHEL-based distributions such as CentOS, Red Hat, and Rocky Linux.
So, to install EPEL, execute
$ sudo dnf install epel-release
Once the EPEL repository is installed, enable the EPEL group as shown
$ sudo dnf --enablerepo=epel group
Step 2: Install XFCE desktop environment
To install the XFCE desktop environment, run the command:
$ sudo dnf groupinstall "Xfce" "base-x"
As you might have noted, the XFCE desktop environment has a small footprint. In my case, the installation size was 52MB.
When the installation is complete, set the XFCE desktop session to start on boot time.
$ echo "exec /usr/bin/xfce4-session" >> ~/.xinitrc
$ sudo systemctl set-default graphical
Finally, reboot your Rocky Linux system.
$ sudo reboot
Step 3: Access the XFCE desktop environment
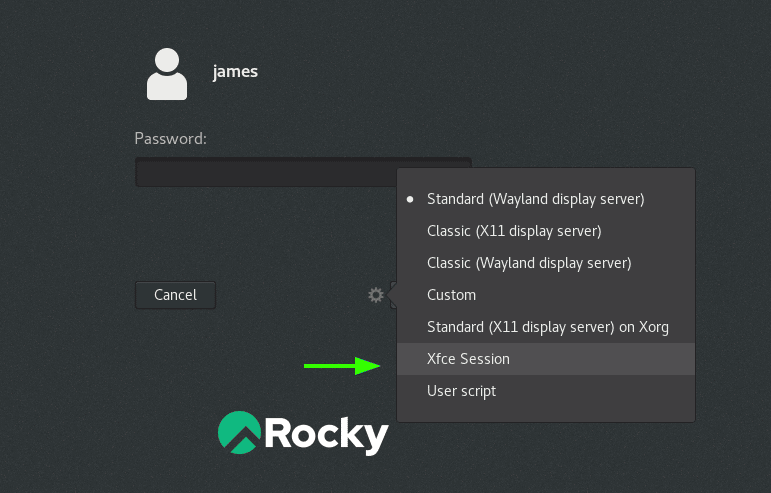
Once the system reboots, click on the small gear wheel icon next to the ‘Sign In’ button and select the ‘Xfce Session’ option.

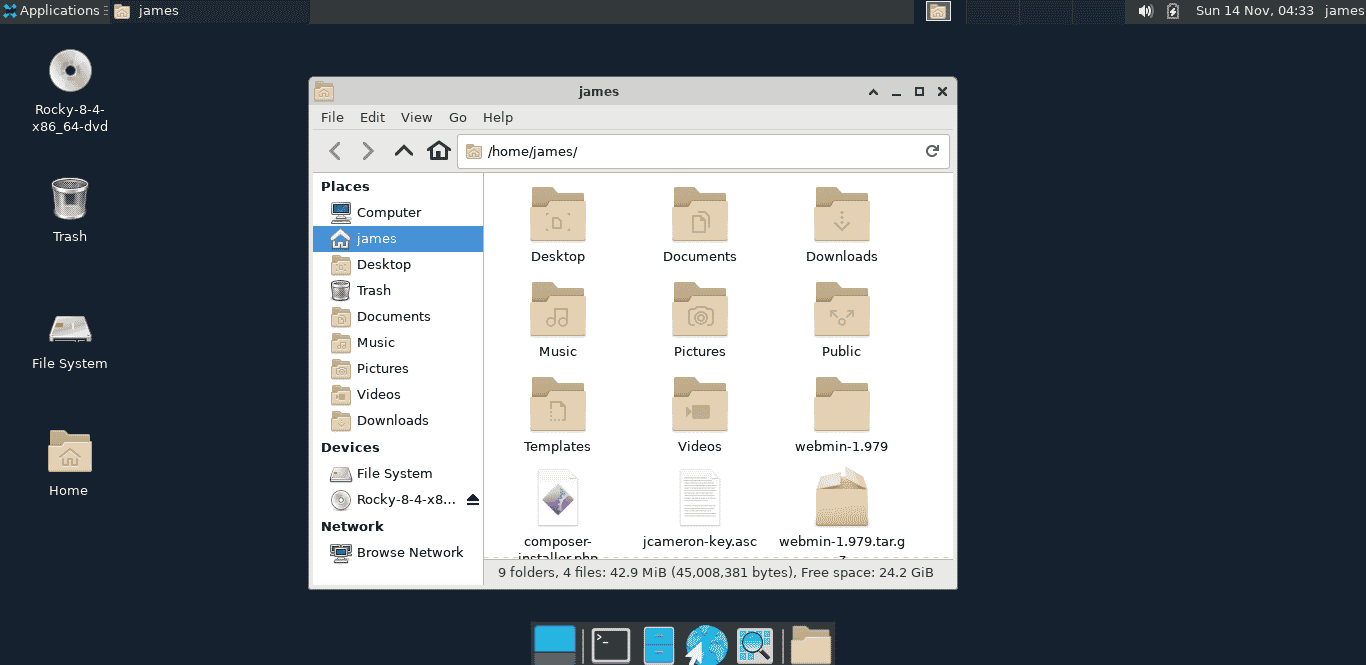
Next type in your password and click the ‘Sign In’ button. This ushers you to the XFCE desktop environment shown below.

And this concludes our topic on how to install the XFCE desktop environment on Rocky Linux.


