Once referred to as iPython Notebook, Jupyter Notebook is an open-source web application that allows users to interactively run code on a web browser alongside some visualizations. Jupyter Notebook is mostly used for data science which includes carrying out operations such as data visualization, statistical modeling, numerical simulation, data cleaning, machine learning and so much more.
Join us as we embark on the installation of Jupyter Notebook on Ubuntu 20.04.
Step 1: Update the package index
The first step in installing Jupyter Notebook is to update or refresh the package index and repositories of the local system. To achieve this, execute the command:
$ sudo apt update

Step 2: Install Pip and other Python dependencies
Pip – which is a Python package manager – will be required to install Jupyter Notebook towards the end. As such we are going to install pip3 alongside the python3-dev package which is used for the compilation of Python extension modules.
$ sudo apt install python3-pip python3-dev

Step 3: Upgrade pip & virtual environment package
Next, we are going to install the virtual environment package. But first, we will upgrade pip.
$ sudo -H pip3 install --upgrade pip

Thereafter, install the virtualenv Python tool. This is a tool that is used for creating isolated Python environments.
$ sudo -H pip3 install virtualenv

Step 4: Create a virtual environment for launching Jupyter
Once the requisite packages have been installed, you need to create a directory that will serve as the code directory. Inside this directory, you will create a virtual environment and later use it to install Jupyter Notebook.
In our case, we will create a directory called jupyter_dir and navigate into it using the following commands.
$ mkdir jupyter_dir
$ cd jupyter_dir

Next, create a virtual environment using the command. Here our virtual environment is called jupyter_env
$ virtualenv jupyter_env

Next, activate the virtual environment using the source command-line tool.
$ source jupyter_env/bin/activate
Once you run the command, notice that the prompt changes to the name of the virtual environment (jupyter_env)

Step 5: Install and launch Jupyter Notebook
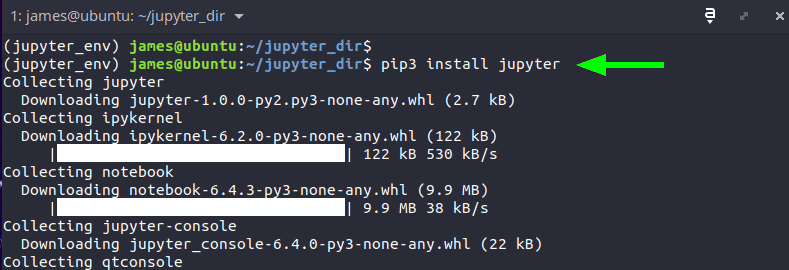
After activating the virtual environment, the last step is to install Jupyter Notebook. To achieve this, use the pip3 package manager as shown.
$ pip3 install jupyter

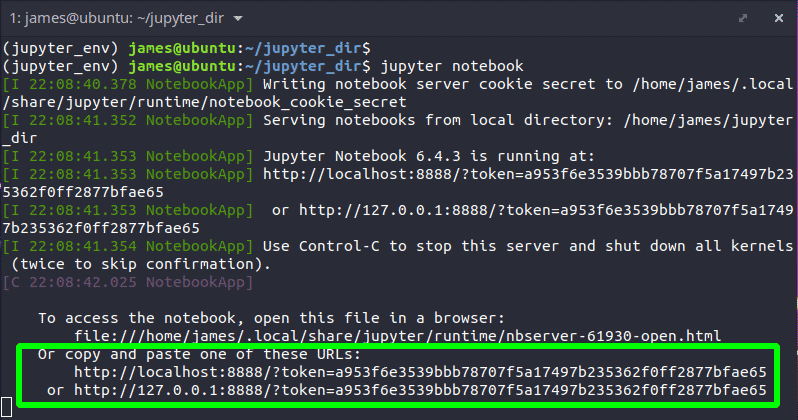
When the installation is complete, launch Jupyter Notebook as shown.
$ jupyter notebook
Some output will be displayed as shown confirming the initialization and the running status of the Jupyter Notebook platform. At the very bottom, click to browse one of the links on a web browser.

This takes you to the home screen of the Jupyter Notebook web application.

To create a project click on the ‘New’ button and select the ‘Python3’ option.

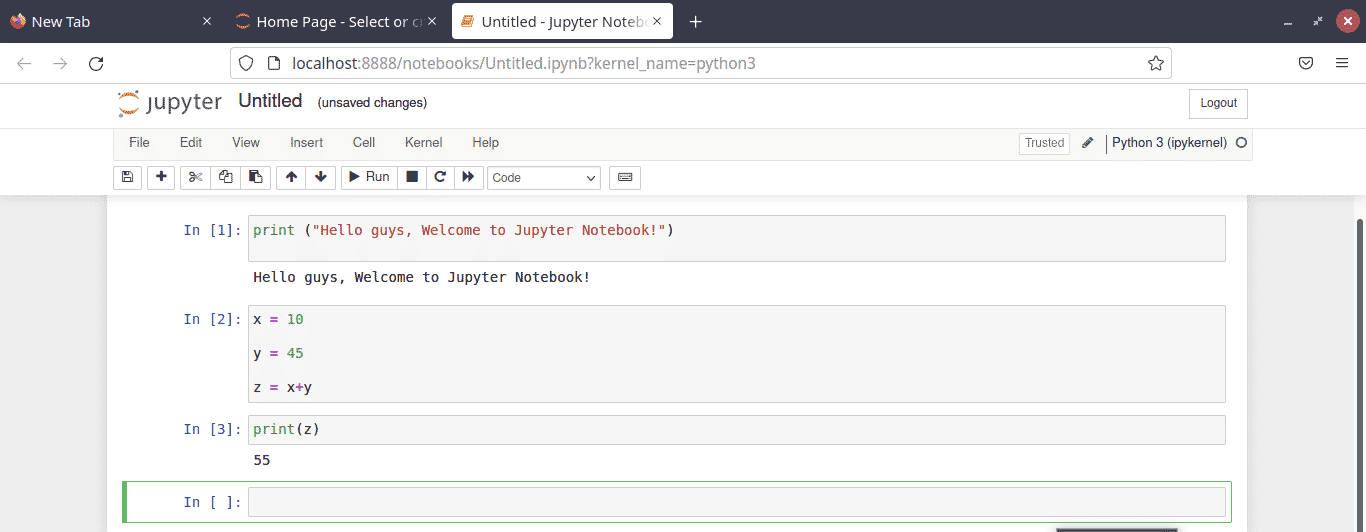
This launches a code editor shown that provides a line-by-line coding environment. Here, I have run 2 simple Python programs.
The first program prints out the message “Hello guys, Welcome to Jupyter Notebook” and the second one sums the values of two variables.

Conclusion
And that’s it, folks. In this brief tutorial, you have learned how to install the Jupyter Notebook web application on Ubuntu 20.04.


